Found on
http://www.heraldsun.news.com.au/ with a link to the website
http://coopers.itgo.com/Restore1.html
I tried my best to contact the elusive Mr Gulson to no avail. Hope he posts here eventually - he can explain what he mean't by recommending "Japanese Clutches" . Very interesting reading Paul.............
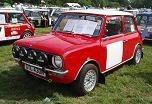
How to Restore Your Mini.
Ideas & Tips with Paul Gulson.
--------------------------------------------------------------------------------
After building all the fast race and road Minis over a period of 35 years (give or take a few), I thought I would share a few of my secrets and experiences before I forget them! My love affair started in 1966 with a short-stroke 998 1964 Mini Cooper. I was hooked straight away! The car didn't go but sure did go around corners. Frustrated by lack of power, I traded-up to a late green Mark I Cooper S which I modified to the blueprint and proceeded to race series production. My first race meeting was Warwick Farm. I was so scared before the flag fell that my left leg was shaking and my tongue had swollen to the point that lack of oxygen was going to kill me. Then the flag fell and I was away! I drove like a man- possessed. It was an 8-lapper -I dared not even look in the mirror until lap 7 when I noticed that I was miles in front.
Excitement and an awful lot of adrenaline had pushed me to heights I'd never dreamed of, as well as a new lap record. After I'd pitted I was offered sponsorship by a company called Marque Motors of Crows Nest who went on to sponsor me for many years. I won the next race at Oran Park and then won the first race at Amaroo Park and in the second race I was 'creamed' by a Phase III Falcon and I rolled ten times end-for-end in the loop. I ended-up hanging upside-down in my seatbelt with no glass or panels on my car, still in my lap-sash belt wondering how I had survived such a horrific accident without a scratch. The car was taken back with my wounded pride to my workshop at Crows Nest and I proceeded to repair what was left of it. Two weeks later we were back at it again. It taught me a valuable lesson which I never forgot - don't stick your nose where it's not wanted or pay the price! Be sure before you commit and then act!
Still wanting more horsepower, the series production car became my road car and I purchased a Group C Mini from Lakis Manticas which I raced and loved the way it went. You could drive on two wheels and feel at home. Still wanting more horsepower, I was at Oran Park testing late one afternoon and I wandered up to the circuit to see with disbelief a Mini wheel-spinning all the way down the straight. This particular car was owned by a famous Mini punter called John Leffler, and the car was a sports sedan light-weight, turbo-charged monster. Boy did this car go! The second lap I looked on in disbelief as it screamed passed me again. This time I noticed the exhaust pipe coming through the top of the bonnet and the engine noise was very quiet. I did not understand how this could be. Then at lap 31 saw the car explode the engine as it went passed. John coasted it to his trailer where he proceeded to use words that nobody should hear whilst screaming obscenities at his car. He said "Paul, do you want to by an f.....'n turbo-charged motor?". I replied straight away "Yes!" with great excitement. John had told me this was his fifth attempt at trying to make the 'f........'n' thing work and told me "good luck". Now, in 1966, you couldn't give a turbo-charger away. Everyone was afraid of what they couldn't understand and it wasn't until Mitsubishi produced a turbo Cordia that the general public really accepted turbo-chargers. Getting back to fixing the 'f......'n' thing, Lakis and I stripped the engine and studied the reason why it had melted three sets of pistons. The pistons would melt the two inside cylinders. This was caused by the shape of the intake manifold being curved and when the fuel speed increased with the boost, the density of the fuel drove it to the outside wall of the manifold, thus feeding the Siamese ports of the cylinder head at an angle which meant that all the fuel went to 1 and 4 cylinders and nothing for 2 and 3 cylinders. A new log type manifold was designed, remembering there was no such thing as a waste gate, so we restricted the air intake of the Webber to reduce the boost. A huge exhaust system to dump the fuel and the boost at times could reach 30 p.s.i. We never maintained good reliability but it would go to 8 laps before it melted all the pistons. Had we have had an intercooler and a waste gate we would still be going.
I preceded to race sports sedans and was sponsored by Leyland Australia. I received all my competition parts for free direct from England. You could purchase over 80 special tuning parts for your Mini, thanks mainly to the big effort that the factory put in to the Monte Carlo rally previously. The success of many a racing Mini was due also to this. I sold my business in Sydney and moved to Surfers Paradise because I loved the track - it was my favourite. They closed the track in 1985 and now houses are built there. Sad isn't it, to lose the best track in Australia, not knowing that Lakeside Raceway was to follow the same fate. The races they had at Lakeside Raceway were huge events - Grand Prix's, Touring Cars, Historic Races - all of our great drivers cut their teeth there.
The money from these events was squandered and not put away by bad management and no foresight into the future of another wonderful racetrack which couldn't be paid for at the end of the day and the Council, who now own the land, will never let it be used for motor sports again. Housing developments will win again and maybe on a still night the sound of screaming engines will still be heard.
Maybe donations to Morgan Park Raceway at Ipswich would be a good investment to a future Lakeside-type race track, because the big paperclip raceway just does not do anything to excite most racing drivers I have spoken to. So, once again, a badly designed circuit exists and is funded by the Government, but you have to eat your caster oil.
I started a Mini business called Mini Mania and I built many Minis and Mokes and exported overseas. I ran this business for 8 years and it was very successful, building many cars, and making customers happy was my aim. While doing this I learned a great deal on how to approach the restoration side of things.
These could be approached haphazardly or in some sort of order. I found the latter to be most beneficial, which I am passing on to you to save you time and money on your restoration. If you follow a few important steps, the most being the purchase or inspection of your body shell before you start your project.
BODY.
The places to look for rust in your Mini body are: behind the lower and upper door hinge panels, the front and rear beaver panel, battery box, the drip rails on either side of the turret and inside the sills. The sills rusted from the inside outwards. This was caused by four captive nuts after the bolts had been removed from the jig that took the car around the assembly plant. If you look under your sill where it angles down to the floor, you will find mastic which was put over these holes to stop water getting in. The mastic being porous allowed rust to form in the captive nuts and then it traveled along the sill and up the door support hinge panel which destroyed most of our Minis.
Holes have to be drilled from the inside about V in diameter under the kick strip and a close inspection with a torch before you proceed. After inspection and rust- proofing of you sills, rubber grommets can be fitted in the holes. Rust- proofing should be done every 2 years. Don't be afraid to replace the whole body shell if it is a basket-case. You can purchase good shells for around $500 and save yourself the heartache later.
RUST is your number one enemy. Rust-proof with bitumen inside your sills, rear wheel arches, battery box, beaver panels, inside doors, rear parcel shelf and inside floor - and spray it on thick! You need mineral-based bitumen, as it never dries, the rust cannot breathe and even if you spray over some rust it will not spread any further. Electronic rust preventatives can also be purchased which work a treat.
PAINT WORK.
Now you have a great body, you can begin. The side-strips have to be removed and rust-treated with red oxide and fitted back making sure you weld top and bottom with bronze. Remove the wiring, hood lining, sub frames all nuts and bolts. Now, if you can afford to have your body professionally painted, take my advice and do it because the end result is what you pay for. Have your car sprayed in 2-pack - a more durable finish that will last and last. Try not to use acrylic as it is porous. All the doors and boot and bonnet have to be fitted prior to painting. Repair around door hinges after you fit the doors, but remember to fit a curved plate that is shaped to the top of your doors on the top door hinge otherwise when you do up the bolts you will bend the door skins. Then your last job is to fit the gaskets behind the hinges - these have to be made out of water-proof gasket material.
NUTS & BOLTS have to be sent to a plating works and re-plated in zinc colour.
SUBFRAMES.
Strip sub frames -I know this sounds like a lot of work, but I have seen a lot of Minis that have been restored and people have painted around the sub frame. Why not do the job properly and powder-coat your sub frames. Strip them down straighten if required and have them sandblasted and coated in semi-gloss black - the end result will be much better.
FRONT SUBFRAME.
Assemble your lower arms and upper arms; replace your rubber cone with a non-collapsed rear one. Use Hi Low adjustable trumpets – these are cheap and you can set-up the height of your car. Fit new ball joints. Make sure when you set the height you are sitting in the vehicle as it makes a lot of difference. If you can afford to buy adjustable front suspension, do so. Then you can set your castor and camber adjustments. If you are lowering your car, you will need to raise the top shock absorber mounting one inch. You will need to use lowered gas shocks as well. Fit new brake lines and fuel lines before replacing the sub frames. Use urethane on the lines to stop them rattling. When fitting the front sub frame in place, use eight large washers on the floor mounts four each side, then four on the front mounts. Overhaul brakes and wheel bearings. Use tapered roller Timken bearings as these will outlast conventional ones. Replace all ball joints and renew your steering rack. Use nolathane bushes in all suspension arms and rear sub frame mounts. Remove steering arm bolts from upright, lock-tight and tighten to 40 Ibs.
REAR SUBFRAME.
Check rear arms for movement, if slack fit new trailing arm kits and grease. Fit rear sub frame up into place making sure you have fitted all your brake lines and fuel lines and hydrolastic lines first. Fit new gas shock absorbers and if you can afford to fit rear toe in and camber kits, do so. Suspension settings have always been a contentious issue. I have found the best settings are:
Front Suspension Settings: toe-out 1/8" overall, castor positive 2.5 degrees, camber 1/4 degree negative.
Rear Suspension Settings: toe-in 1/16" either side, camber 1/8 degree negative.
Thanks to late-model wheel alignment machines, all these settings can be done very accurately. Make sure you have settled-in your suspension prior to having your wheel alignment and set your tyre pressures; don’t forget to sit in your car while it is being aligned as this will make a difference to the height at the end. At no time should you let the suspension contact your bump stops, if you are lowering, make sure you cut-down your front bump stop to suit 20 mm. clearance minimum height front and rear.
BRAKES.
Now there are no short-cuts in this department. Start with both new clutch and brake master cylinders or have them stainless steel sleeved. The latter is cheaper. Use new rubbers as well as a new slave cylinder or stainless steel sleeve.
All brake lines and hoses have to be replaced with no exceptions. Rear wheel cylinders replaced with 3/4". All master cylinders are 0.7" and all clutch master cylinders 0.750". A non-return valve is fitted only to the master cylinder to hold line pressure. A new slave cylinder hose has to be fitted - no exceptions.
You might think your brake hoses look good externally, but they block-up on the inside and hold the brakes on because the fluid cannot return to the master cylinder. This can cause your engine to labour and your brakes to wear out needlessly.
CLUTCH
The clutch always has been a bone of contention with many problems. Clutch shuddering, exhaust breaking, engine mounts destroyed, your teeth rattling, and then the sudden take-off as the clutch takes up. The cause of all these problems is the clutch plate itself and the material it is made from. Borg and Beck clutch plates are not only too thick they are also too hard, which causes disengagement problems and clutch-shudder. There are better clutch plates to be bought from Japan. These consist of a “spooked” wheel-type, slightly thinner and flexible and as smooth as silk.
Now, the next problem is the disengaging problem. This is caused by wear of the clutch arm ball wearing to the point where it no longer has the push to disengage fully. Also, the thrust bearing support wears on the inside where the ball pushes and also causes problems. Replace your clevis pins and make sure your master cylinder push rods are in good condition. Most Mini mechanics try to cheat to fix this problem by bending a clutch arm towards the engine with an oxy - this is a no-no. All they're doing is pushing the piston of the slave cylinder back into the cylinder, allowing more travel before the piston bottoms on the circlip, making you think that the clutch has reached the floor when in actual fact is hasn't.
Now, I have come up with a fix that incorporates a spring fitted to the thrust bearing support to return the bearing away from the engine, allowing you to adjust the free-travel on the clutch adjusting bolt to a smaller tolerance of 15 tho. which makes the clutch disengage a treat. The diagram will explain this in detail, as I feel it's very important. Not only does it make your car drive better but it is kind to the gearbox. To check disengagement the way I do it, with the engine switched off, select reverse gear, depress clutch once only whilst pushing the car backwards, release clutch to see where it's taking-up. The clutch should take-up a minimum of 1" off the floor.
Re-adjustment of your clutch should be done when the clutch plate settles in. Re-adjust to 15 tho. at every service.
MOTOR REBUILDING
The controlling factor of this project is the fuel you use. Now, being unleaded, you can be a tight-arse and use normal unleaded or spend the extra few cents and buy premium unleaded. Forget the pellets the Kiwis try to sell you - they're a load of crap and they don't work. If you follow a few basic theories, you can build your engine to work reliably and well.
VALVES.
First step is the valves. Replace exhaust with stainless steel and fit hardened valve seats into the head. Fit valve stem seals, the Cooper S type, only on intakes. Fit copper head gasket and seal with hylomar which can be purchased from Repco. The cylinder head has to be re-torqued one week after initial running and tappets re-set to suit camshaft profile you have chosen.
PISTONS.
Use only high-quality pistons such as duralite or hepalite, making sure to use chrome top ring or double molly rings. Upper cylinder lubricant should also be used or simple two-stroke oil with a ratio of 25-1 or simple 1 cup per tank will make the whole engine last longer and run more efficiently.
BEARINGS.
Now, there are good bearings and then there's cheap garbage. Use vandervel bearings and replace your thrust bearings with new ones as well, making sure you have 4 tho. end float in your crank.
CRANKS.
Speaking of cranks, make sure you have it crack tested before you do anything. Then re-grind your crank and re-size your conrods to make them round. This will ensure correct clearance between the bearing and crankshaft. Balance your crankshaft and rods.
CAMSHAFT.
The camshaft is the heart and controls the fuel flow of the engine. Many camshafts can be purchased but you have to rob Peter to pay Paul. A rough idle is great, but I have found a smoother idle with good horsepower to 7000 rpm can be achieved using factory grind cams. The camshaft for instance can make an enormous difference to the drivability but has to have the other ingredients in the recipe to make it all work. If you fit a big cam and fit a smaller carbie, it is the same as running down the road with your hand over your mouth - it won't work. So there are five things you have to do to make it all work: Carby, camshaft, compression, fuel, and distributor. Carby choice is very important. I have always found twin-carbies to work much better than a single one. The distributor also plays an important part in the correct running of your engine if the advance curve is incorrect, nothing will work except bad things will begin to happen such as detonation, over-heating (which are two killers of your engine), pre-ignition causes loss of power and increases temperature. Re-curve your distributor to suit your camshaft.
Compression Ratio.
Compression ratio should not exceed 10-1. The best fuel to use I have found is BP Ultimate.
Some useful torque settings;
Flywheel Nut. 140 lbs
Harmonic Balance 120 lbs
Main bearings & Bigends. 998 1100 engines. 60 lbs & 40 lbs.
1275 engines 75lbs & 50 lbs.
Use red “Locktite” and on 1275 engines always use new conrod bolts.
GEARBOX
You have to overhaul your gearbox and, more importantly, your differential. It's like going out without your trousers on. You have to overhaul the whole package because the gearbox and differential lives underneath the engine and feeds on the same oil. So, if you re-build just the engine, the old gearbox will destroy it.
Before the engine is fitted to the gearbox the idle gear end float has to be checked. The correct clearance is 4 to 6 tho. It is also advisable to replace the out rigger and idle gear bearings. When you fit the crankcase throw away the lock tabs and use NEW nylock nuts and torque to 20 lbs.
CORRECT ENGINE CHOICE
If your car is original, keep it that way. Replace the engine and everything else as it was originally manufactured. This will add value to your car because nobody wants to buy someone else's idea of a hot car. The most reliable engine is the 998 cc. This is well-proven and will outlast the body in most cases. The 1100 cc has a bigger stroke than a 1275 cc. This causes the pistons to wear out and break the rings around the 60,000 mile mark and high-quality pistons with a small piston to bore clearance of 2 tho. should be installed. These engines gave good horsepower and were reliable except for that problem.
The 1275 engine suffered badly from harmonics. Originally so bad it used to tear the centre main clean out of the block and BMC had to make a heavier block to fix the problem. This didn't fix the harmonics as the crankshaft tends to whip in the middle because of the weight difference on either end. Balancing the whole motor made it a lot better but using a bigger harmonic balancer is the fix and lightening the flywheel adds to the fix. Vanderval copper lead bearings are a must and a new oil pump must be fitted to all Mini re-builds as that is the heart that controls the oil.
Also, a good-sized magnet glued to your oil pick-up strainer with full strength (not 5 minute) araldite is also advisable. It catches all the loose bits that destroy your engine. New rod bolts must be fitted to your 1275 rods and the rods re-sized. Again, piston choice is critical. Hepalite pistons seem to be the best choice. Again a copper head gasket, a high-volume oil pump and an oil cooler is a big advantage in keeping the engine cool. It keeps your cooling system cool as well. Coolant must be used and a new radiator core, three-row for a road car and four-row for a race car. Modify your radiator tank and fit a short neck recovery type cap 131b then connect your overflow to a clear header tank so that the water level will be topped up automatically, and also you have a visual reference. You will never run low on water again and won’t have to remove your radiator cap again. A large water pump impeller should be used and block off your bi pass hose as these cause more problems than they are worth.
Your radiator header tank should be fitted with a half inch o.d. tube along side the radiator cap. Water is taken from the heater tap outlet on No. 4 cylinder and fed through a small heater core which sits behind your grill then to the radiator. This circulates the water from No. 4 Cylinder through the heater core and into the top header tank of the radiator.
Water rises in the block and the clutch at No. 4. end also adds heats to the water. By pulling the water out of the hottest part of the engine and placing it in the coolest part of the radiator you have fixed most of your over-heating problems. You have to fit a thermostat to slow the water traveling through the radiator. The correct thermostat to fit summer and winter is 160 degree temperature. Also, the fan should be replaced by a large multi-blade plastic fan. Do not use thermo-fans as they don't work well enough.
TIMING CHAINS
Don't fit a single-row timing chain, as they rattle 5 minutes after you've re-built the engine. Fit a double-row Cooper S type chain and gear set.
FUEL PUMPS
For 998 and 1100 engines you can buy fuel pump kits to overhaul your existing fuel pumps. 1275 type engines and bigger, you need to use a high-quality quiet electric fuel pump. An in-line fuel filter should also be used and changed regularly.
OIL FILTERS Your oil filter should be changed very 5,000 km. and use high-quality multi-grade oil such as Penrite 20W50 when running-in a new engine. Do not use a friction-modified oil as the rings will not run-in and it will blow smoke forever. Also, you can buy a product called a “Fran” external oil filter. This has a toilet roll fitted into it and the oil is fed from the oil pressure switch through the filter and back into the engine. These extend your oil life and trap small particles that can damage your engine.
WIRING
If you own a late-model Mini you won't have a problem with your wiring. Clean up your loom with a good detergent, hose it off, blow it off with air and put it in the sun. If you have an old cotton loom, do yourself a favour and replace the whole thing with a new one. While you're at it, overhaul your starter motor and alternator as well.
TRIM
Trim is just as important as your paint work. If your hood lining and seats are a bit tatty, replace your whole interior. All rubbers and bailey channels have to be replaced. Water that leaks into your car and ends up on the floor will destroy your body. All the water gets trapped in the underfelt and stays wet and over time stinks and rots your floor. I have found the best fix is not to use underfelt. I use ground-up rubber tyres. You can get fine, medium or coarse - use the coarse as this allows the water to travel through it to reach the holes you have drilled in the lowest spot on the floor; two holes in the front and two holes in the rear. Spray on your bitumen, mask-up your rear parcel shelf first, then mix-up your rubber and binder in a wheelbarrow, then trowel it onto your floor - it will dry overnight, leaving a flat, pleasant-smelling surface that will not rust your floor.
Re-trim your seats and hood lining and replace your carpets as close to original as possible if you are entering your car in a concourse or show. Go bananas if you are making a one-off special - I have seen some good examples, one was a wetsuit material that looked like an Australian flag glued directly on the inside of the roof- this looked great. It is also cheaper than a genuine hood lining. $2000 is about what you would pay to have the whole interior re-trimmed and $4000 for body and spray painting is about the norm. New wheels will set you back around $200 a wheel and new tyres about $95 each. New glass is on computer at protector glass and you can now buy a full tinted laminated screen as well. The only glass you can't buy brand-new is the rear window.
If you have any problems, I am only too happy to assist you no matter how big or small your problem is. I have since moved to Beaudesert where I enjoy a country lifestyle and I restore Minis, build Mini engines and sell the odd spare part.
Phone me on 07-55410660 or 0412-763229 or e-mail at
[email protected]
Paul Gulson.
_________________
"Show me the Mini!"