Ausmini
It is currently Sat Apr 20, 2024 3:03 am

All times are UTC + 10 hours


Post new topic Reply to topic  [ 8521 posts ]  Go to page Previous  1, 2, 3, 4, 5, 6, 7, 8 ... 569  Next
Author Message
 Post subject:
PostPosted: Fri Apr 24, 2009 2:46 pm 
Offline
The TIG
User avatar

Joined: Thu Oct 27, 2005 4:28 pm
Posts: 860
Location: Victoria, BC, Canada
I did a little playing around with some wiring in my second Traveller. And I tried buffing up the old paint in a few places.

_________________
email - turbomini@gmail.com
http://s28.photobucket.com/albums/c207/TurboOrangie/
Image
67 Traveller - Needs restoration
www.victoria-chiropractors.ca


Top
 Profile  
 
 Post subject:
PostPosted: Fri Apr 24, 2009 2:50 pm 
Offline
848cc
848cc
User avatar

Joined: Fri May 25, 2007 10:58 am
Posts: 422
Location: Melbourne
my brother fitted our first protype manifold today! looking good, second one is getting made out of stainless! weber into 850, no firewall mods :twisted:

_________________
1962 850,Frog


Top
 Profile  
 
 Post subject:
PostPosted: Fri Apr 24, 2009 5:12 pm 
Offline
848cc
848cc
User avatar

Joined: Wed Nov 19, 2008 7:18 pm
Posts: 209
Location: Burpengary,Brisbane Nth(the better side of Bribane)
Pics of my mags as promised :D I wil put more pics on my thread.

Image

_________________
https://t.me/pump_upp


Top
 Profile  
 
 Post subject:
PostPosted: Fri Apr 24, 2009 8:50 pm 
Offline
1098cc
1098cc

Joined: Thu Mar 22, 2007 9:25 pm
Posts: 1322
Location: wooToomba
My Mini Day.
By Tadhg.

Given that the first thing I did with the Mini this morning was drop my son to Pre-Prep, I thought I'd do this like a school story, or show-and-tell. :P

After dropping my son to Pre-Prep, I went out onto the Ipswich Motorway, at the end of the street from school. I entered through a roadwork zone, so I was in first, and the traffic was murder. I straightened it up, wrote the number 11, :shock: :twisted: :lol: and headed for Ipswich. There, I spoke with the Seat Belt Certification bloke, as listed here. Happy with the results, I turned to go home, to do an oil change. :) But I stopped for some Vortex 98 first. 8)

As I reached the last three streets, my indicator stalk went awry, and stopped working. :shock: It's a new stalk, maybe a month old, but the way the cancelling knob on the column was located, I had the switch half off the outer column shaft, and the stalk was vertical to suit the cancelling knob. :oops: So that meant that, before I could look at the oil change, I had to fix the column. :x That meant I had to find my old Gregory's Manual, which took a while. :roll: Amazingly, I was able to remove the column, adjust the outer shaft, re-adjust the column lowering bracket, re-route the indicator loom through the column lowering bracket (so I won't catch my knee in it), and even, eventually, get the pinion spline collar bolt back in. :o And the car steered straight! Amazing! Success! :D

Next, I went to do the oil change. I thought I had a 15/16 spanner, but I didn't. :x So I tried an 8" shifter. But the shifter was flexing. :? So I tried a 10" shifter, which I bought to change the steering wheel (needed for the big nut!). That flexed too. :shock: So I went down the road to buy a 15/16 spanner. :roll: After the first roundabout (3rd street), the engine started to rev on a gearshift - and it felt like the throttle was stuck open. :shock: So I keyed it off and pulled over. Started, did the same thing. :? Got under the bonnet, looking for a broken throttle cable, only to find the rocker cover oil cap stuck in the linkages of the twin HS2's. :shock: :oops: I'd taken it off, ready for the oil change, and left it on the rocker cover - it'd fallen back into the linkages when I accellerated from the roundabout. :lol: No harm done! :) Surprisingly, on the way, an MGB owner waved at me! :o Hagar (on here) would be amazed - and I didn't even have the grill in at the time (so that I could get at the oil filter). :lol: That was 40 minutes (20 minutes each way)... :roll:

After I got home with my new 15/16 shifter, I put on a rubber glove, and burned my fingers through it on the sump plug. :roll: But the glove stayed in tact! :D One quarter turn with the new spanner, and the rest of the way the plug came off by hand. Easy! :D Filter came off nicely too. :o Didn't spill too much oil, and the glove survived a full hour, in heaps of oil, before eventually tearing. But not before I'd reinstalled the plug and installed the new filter. :D My left (gloved) hand was amazingly sweaty and pink and prune-like, and my right hand was greasy... :roll:

I then had to go pick up the boy in the 4WD - Pre-Prep was finished for the day. :) 
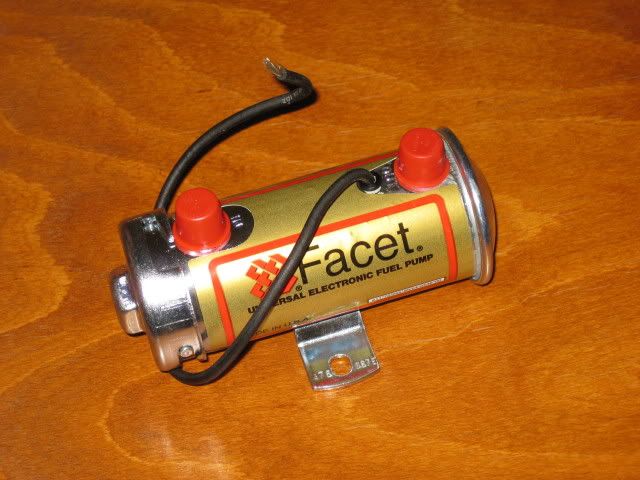
He came home to help me install the electronic ignition kit. :D Well, to watch. :lol: Surprisingly, this made my hands much, much dirtier doing that than the oil change. :roll: I got on here, to find out what Points were, :oops: did it all as per the instructions, :wink: and then... :shock: :x :cry: No one's answered me yet. :cry:

So that was my slightly manic, very long winded, Mini day. :P :oops: :roll: This is a lot less than I plotted writing! Is this the sort of thing you want, willy..? Really?! I think it needs more smilies. :P
And, on the Number 11, I didn't dip the clutch or anything, I just got it straight and flattened it in 1st - no intention to do anything that might be considered illegal. And I have Kumho 145's.


Top
 Profile  
 
 Post subject:
PostPosted: Fri Apr 24, 2009 10:12 pm 
Offline
848cc
848cc
User avatar

Joined: Mon Mar 02, 2009 1:23 pm
Posts: 178
Location: Canberra
we put the new made up dash in Lou today it looks quite posh if i do say so and the noise from the engine has gotten quieter inside aswell. Had her tuned by the dyno guys up the road and shes like a new car now and took out a few bits of wiring that we no longer need in the dash, like the swtich for the gauge lights, why did they do that?????


Such a good mini day

_________________
I'm grew up on the street, not the hood, the sesame st


Top
 Profile  
 
 Post subject:
PostPosted: Sat Apr 25, 2009 2:52 pm 
Offline
1360cc
1360cc
User avatar

Joined: Mon Jul 26, 2004 7:23 am
Posts: 7339
Location: Sunny Shine Coast, Qld Australia
So far today I've given the engine a coat of paint (what I can reach)
Bolted on the head and fitted the Doc's 1.3 modified rockers.
Was about to fit the fan and decided it would be easier to fit the hose to the water pump first so off to Supercrap for some new hose clamps.
starting to look good 8)

Image

_________________
David L
Image

My greatest fear in life is that when I die my wife will sell my Mini and tools for the price I told her I paid for them!


Top
 Profile  
 
 Post subject:
PostPosted: Sat Apr 25, 2009 3:51 pm 
Offline
1098cc
1098cc
User avatar

Joined: Sun Mar 29, 2009 10:46 pm
Posts: 1305
Location: Outback Mini Man
Last and final getting ready for the trip which should have started a month ago.

Took Clutch arm apart and double checked everything.
Topped up all fluids and did oil change.
Jacked up and checked each wheel and brakes and tightened.
Rechecked Timing on my Dodgy Distributor
Checked Dash and replaced a few lamps that stopped working.

Now i have to deal with a speedo, a square peg in a round hole means the speedo floats, ill be doing 50km/hr and the speedo will say 100km/hr.

Took for a test drive and now clutch thrust bearing is whining like a bitch, i should have replaced more stuff after i broke the clutch arm.

_________________
Aussie Leyland, Aussie Factory, Aussie Mini S.


Top
 Profile  
 
 Post subject:
PostPosted: Sat Apr 25, 2009 4:16 pm 
Offline
the King of Bling
User avatar

Joined: Thu Jun 03, 2004 11:11 pm
Posts: 19858
Location: Baulkham Hills
I have no thumb print on my right hand now
At least I have started on Gr Manifold now

_________________
Stop Licking the Dog...I Don't Care Who Started It


Top
 Profile  
 
 Post subject:
PostPosted: Sat Apr 25, 2009 4:20 pm 
Offline
SooperDooperMiniCooper ExpertEngineering
User avatar

Joined: Fri Apr 29, 2005 9:46 am
Posts: 18854
Location: Under the bonnet son!
Helicoiled the radius arm mounting points on the rear subframes....
When doing a rear wheel alignment last week, the bolts started to strip out the thread in the subframe...I should have helicoiled them when it was out but oh well.

Its interesting to note that you can use a 3/8UNF tap to prepare the holes for the 5/16UNF helicoil inserts. It's the only size I know of where you can do this. The helicoil inserts on their own are dirt cheap this way as you don't need to buy the kit :)

_________________
SooperDooperMiniCooperExpertEngineering

All garage work involves equal measures of enthusiasm, ingenuity and a fair degree of irresponsibility.


Top
 Profile  
 
 Post subject:
PostPosted: Sat Apr 25, 2009 4:22 pm 
Offline
1360cc
1360cc

Joined: Mon May 03, 2004 6:46 pm
Posts: 13688
Location: ADL
Tadhg, exactly what i'm after.
Some pics would have helped though :lol:

I'm uploading a few pics now to show what I've been up to.


Top
 Profile  
 
 Post subject:
PostPosted: Sat Apr 25, 2009 4:27 pm 
Offline
1098cc
1098cc

Joined: Thu Mar 22, 2007 9:25 pm
Posts: 1322
Location: wooToomba
One of these days I'm going to have to setup a photobucket/etc account... But that doesn't mean I'd have felt good playing with the wife's dSLR with filthy hands :lol:

Gafmo, I think you need to expand your post to explain exactly how you came to have no thumb print... :? And willy wants photos. :P And I'm sure someone will need assistance with getting into somewhere they shouldn't be. :P :lol:


Top
 Profile  
 
 Post subject:
PostPosted: Sat Apr 25, 2009 4:37 pm 
Offline
1275cc
1275cc
User avatar

Joined: Fri Oct 29, 2004 6:14 pm
Posts: 4963
Location: A pub near Geelong
yesterday, replaced points (very little grease on cam = no heel on points...), cleaned and re-gapped plugs. running like a dream!

today, adjusted brakes, nice and solid, and going to give him a wash for the cruise tomorrow :)

OH and i've got to figure out how to fit the solar panel for the boot light...

_________________
78 Leyland Mini - Prince


Top
 Profile  
 
 Post subject:
PostPosted: Sat Apr 25, 2009 4:40 pm 
Offline
998cc
998cc
User avatar

Joined: Thu Mar 18, 2004 6:34 pm
Posts: 722
Location: melbourne vic
Ive done nothing :cry: :cry:
im on holidays for two weeks...have one week and a bit to go but the mini is
at home ...ill be starting back on her once i get back...
jobs...

fit new power cable
fit new fule line
fit new brake pipe from front to rear of car
fit new loom
im lucky as ive got a lit garage but will be adding more lighting soon so its even better for all the night work ill be doing ..
once the little boy is in bed ill be hitting the project every night for a couple of hours.
im just glad to have her back and rust free..

_________________
started a new project...there goes all my free time....


Top
 Profile  
 
 Post subject:
PostPosted: Sat Apr 25, 2009 4:49 pm 
Offline
1360cc
1360cc

Joined: Mon May 03, 2004 6:46 pm
Posts: 13688
Location: ADL
Right... I've had a pretty drawn out half-absense from ausmini lately.
I just haven't had much motivation with the project. Seeing it sitting there, with so much more to go has put a bit of a dampener on my motivation towards it.
But lately, I have had a lot of motivation. I wanna hear it, feel it... DRIVE IT! I think the motivation has come from driving the Moke (A-series), and possibly driving fun/fast/cool cars for work.

I've had it back from the paint shop for a few months now.
At the moment it looks like this:
Image
Image
Just recently (before the photos) I have taken out the front and rear subframes - and sold them - , removed the fuel line/brake lines/hydro lines.

I had beanie help me weld in a small rust replacement that the body shop 'overlooked'.:
Image
Image
Image
Underneath, its now all sealed and ready for underbody finishing.

I have bought my 3/8" ID bundy tube for the fuel line. Yes, its a huge line. Graham has asked me to run this size due to the extra volume/flow it offers.
Here is the new pump: Facet Competition 4-5.5PSI (30gallons per hr).
Image


Thats about it for the moment. On Tuesday I expect my delivery of Competition rubber cones, front bump stops and under-top arm bump stops, braided brake lines from the UK. Then I can get the front subframe to a stage where it is ready to be installed into the car. THAT IS... after I have bent up the new fuel line.
IT JUST DOESN'T END!!!
But I will keep at it, bit by bit, and it will be finished. Eventually.


Top
 Profile  
 
 Post subject:
PostPosted: Sat Apr 25, 2009 5:03 pm 
Offline
The TIG
User avatar

Joined: Thu Oct 27, 2005 4:28 pm
Posts: 860
Location: Victoria, BC, Canada
Today I welded in some mounting plates for the rear tubes on my cage. Tricky, but I managed. Hope to get more work done on the cage this weekend.

_________________
email - turbomini@gmail.com
http://s28.photobucket.com/albums/c207/TurboOrangie/
Image
67 Traveller - Needs restoration
www.victoria-chiropractors.ca


Top
 Profile  
 
Display posts from previous:  Sort by  
Post new topic Reply to topic  [ 8521 posts ]  Go to page Previous  1, 2, 3, 4, 5, 6, 7, 8 ... 569  Next

All times are UTC + 10 hours


Who is online

Users browsing this forum: No registered users and 17 guests


You cannot post new topics in this forum
You cannot reply to topics in this forum
You cannot edit your posts in this forum
You cannot delete your posts in this forum
You cannot post attachments in this forum

Jump to:  

cron

© 2016 Ausmini. All garage work involves equal measures of enthusiasm, ingenuity and a fair degree of irresponsibility.