Ausmini
It is currently Sun Apr 28, 2024 12:03 pm

All times are UTC + 10 hours


Post new topic Reply to topic  [ 1864 posts ]  Go to page Previous  1 ... 113, 114, 115, 116, 117, 118, 119 ... 125  Next
Author Message
PostPosted: Sun Mar 30, 2014 9:18 pm 
Offline
1275cc
1275cc
User avatar

Joined: Fri Apr 25, 2008 2:34 pm
Posts: 2002
Location: Brisbane
I think El Gato is one of the most patient builds on the net.
I don't think theres any other 115 page builds over 7 and a half years without the car being rebuilt several times.
It shows enormous testament to the sticking power and determination to build this car once, and build it right. I've lost track of how many times it has been redeveloped or redesigned to take into account new technology, better procedures and the hiccups that life kicks up.

But Tricky, it did start to look a bit impatient hidden away in the corner under a tarp. And was probably a bit jealous Leonidas has been getting the lionshare of the attention.

_________________
Simplify and add lightness


Top
 Profile  
 
PostPosted: Sat Apr 05, 2014 8:52 am 
Offline
1275cc
1275cc
User avatar

Joined: Fri Jun 17, 2005 10:31 am
Posts: 3183
Location: Burpengary, Queensland - Home of Tricky Performance Engineering
Thanks for the kind words Joe, much appreciated.

But I do have to start and get a move on with him, or he will get left behind and no one wants to be left behind!! He watches forlornly from under his covers whenever Leo gets worked on thinking 'Why isnt that me'??

Soon buddy, soon!!

Cheers,
Tricky

_________________
"Not Speeding Officer..........Qualifying"


Top
 Profile  
 
PostPosted: Sat Apr 05, 2014 8:17 pm 
Offline
1275cc
1275cc
User avatar

Joined: Fri Jun 17, 2005 10:31 am
Posts: 3183
Location: Burpengary, Queensland - Home of Tricky Performance Engineering
Well, something very weird happened today - I ended up with some free time on my hands!!! :shock:
The wife was at work, the kids at friends houses, and just me and the workshop home alone. With all this Mini stuff happening on Leonidas, I just couldnt turn up the opportunity to do at least something on The Cat, so I did. After all, I had Joe's kind words ringing in my ears and Hallsey's size 9 stll on my butt.....

I pulled the covers off the poor Old dusty thing and got acquainted with where we left off - ahh yes, here we are, electrical!!

I decided that seeing as the car is parked in rear first, and that I had a bit of room to pull him forward to get to the bootspace, I would work from the front to the back and that way I could always do something on the front part if I only had a little room to spare. He looks sooooooooo good even being dusty:
Image

There are quite a few circuits in the boot, and it was evident from the list that a mulit-core run from the front to the back was a logical way to go. The circuits:
>Brake Lights
>Tail Lights
>Left Indicator
>Right Indicator
>Primary Fuel Pump
>Secondary Fuel Pump
>Water Methanol Injection Pump
>Water Methanol Injection Tank Sender
>Fuel Tank Sender
>Windscreen Washer
>Boot Remote Release Solenoid

I decided to remove the boot lid to save it getting scratched or damaged while I was wiring the boot-space. After all, a lot of time an effort went in to doing this awesome paint job. Looks great next to the bonnet - needs a tub though. I will just have to touch up the bolt heads when it is on for the last time!
Image

I still had some of the cable left-over form doing the roof, so I decided to run that up the C-pillars, across the roof and down the A-pillar to the dash area. I also decided that the cable size of the mulitcore - being 0.75mm2 - was too small to run the secondary fuel pump and the WMI pump, so I grabbed some 1.5mm2 cable and made up a seperate loom for those two. Yellow/blue and blue for the fuel pump, and green/white and white for the WMI pump:
Image

I then ran the multicore and popped it out the A-pillar in its own grommet, while the other loom for the pumps I popped out with the aerial lead. I just hope that there wont be any interference through the aerial lead from the other two cables - should be ok being DC and also the aerial cable is screened:
Image

Then I decided to add a little mechanical protection to the bare loom just as some added security:
Image

And then dressed it down into the boot area:
Image

Now that we had all the cables we nned from front to back, it was time to start reinstalling the boot-space equipment. First off was the fuel tank. It needed to be cleaned and the pump/sender/strainer unit from an Aussie Starlet installed:
Image

Then it was time to install the tank - hopefully for the last time. I decided to use all stainless steel fasteners where they penetrate the floor for durability:
Image

After this, time to install the WMI tank on the drivers side, and the window washer reservoir on the passenger side. Once again, resorting to 8mm domed socket head fasteners in stainless steel:
Image

Well that was about 3 hours worth. Still heaps to do in the boot space - like installing the swirl tank and secondary pump, fuel filler hoses, tank vent hoses, fuel filter and associated hoses to and from the pump/swirl/main tank/feed line/return line, and then install the lights, wire all the components, reinstall the boot lid, close-out the boot space and move on to the cabin area. Sounds like a plan for tomorrow!!! :D

Stay tuned.

Cheers,
Tricky

_________________
"Not Speeding Officer..........Qualifying"


Top
 Profile  
 
PostPosted: Sun Apr 06, 2014 6:17 pm 
Offline
1275cc
1275cc
User avatar

Joined: Thu May 24, 2007 7:19 pm
Posts: 5370
Location: Yandina,Sunshine Coast,QLD
That tank setup looks good, do you have anything going on top of that lot, boot boards, spare wheel?

_________________
Respect mine and I'll respect yours.


Top
 Profile  
 
PostPosted: Sun Apr 06, 2014 7:32 pm 
Offline
848cc
848cc
User avatar

Joined: Wed Mar 14, 2007 3:50 pm
Posts: 404
Location: MORNINGTON PENINSULA
Ahhh she looks sweet, good to she the cat out from under the covers

i still have nightmares from doing those stripes lol

I'm sorry mate but you need to lift your game 3 hours is not enough, i want to see the cat on the road before i retire lol :D

Seriously bro she looking brilliant and is gunna be one tuff MOFO when it hits the streets

btw is my foot print still imprinted on your butt cheek,looking forward to more regular updates

Cheers Hallsey


Top
 Profile  
 
PostPosted: Sun Apr 06, 2014 9:03 pm 
Offline
1275cc
1275cc
User avatar

Joined: Fri Jun 17, 2005 10:31 am
Posts: 3183
Location: Burpengary, Queensland - Home of Tricky Performance Engineering
It happened again!!!! :shock:

Some free time today after Mitch played his 2nd grading match at the Caboolture Lions club!

So, we rushed down to the shed and picked up where we left off yesterday. With the fuel tank, windscreen reservoir and WMI tank installed, it was time to switch our attention to the surge tank and the secondary fuel pump. They are combined on the same platform, a profiled piece of 1.5mm aluminium sculptered to fit beside the windscreen washer reservoir tank. It was time to put them back together as one unit and install them.

The surge tank was held on by 6 x self-tapping cadmium-coated screws into the base plate. Simple enough to reinstall that one. The Bosch 910 hi-flo fuel pump is held on by 2 x 8mm bolts. Even though the bracket that holds the 910 is rubber sheathed between the pump body and the bracket itself to reduce noise and vibration, I decided to mount the bracket on its own rubber strip to give it added help in reducing any N&V that may be apparent while in operation.

All back together and ready to go in - needs some alloy hose ends on the hose though:
Image

And installed next to the windscreen washer reservoir (both ended up having to come out again as its been so long since I installed anything in the boot, I forgot that the strut brace had to go in first before any of the other items except the fuel tank. Looks good, and will be sealed next to the bodywork with a bead of clear silicone when the boot is finished. You can also see the Delphi fuel filter with integral water seperator, it had to come out too to get the strut brace in, but looks good in position:
Image

Next, it was time to install the twin fuel filler hoses. They are a six-ply, fuel resistant rubber to the Australian Standard, and they are stiff, like really stiff. Took a bit of force to slip them on the fuel tank inlet and the then the filler neck. But once on, they are staying on. Tightened them down with some aero hose clamps for a good seal. Next was to install the vent hoses that lead from the fuel filler inlets, to the tank vent tube. There are four vent hoses that need to be hooked up together - 2 x fuel filler vents (as there are two fuel fillers, one each side), the fuel tank vent hose and the surge tank vent hose. I decided to run the fuel filler vent hoses down the back of the fuel filler hoses and cable tie them to the back side. Once everything is in situ, I will buy or machine up an aluminium block that will connect all four with hose barbs and mount that to the seatback somewhere:
Passenger side vent line:
Image

Drivers side vent line:
Image

Next job was to install the brackets that hold the strut brace in place. They sit on top of the shock mountings and bolt down with 3 x 8mm bolts onto captive nuts. I had to tap out the thread on a couple of them as the coating of underbody deadener gummed up the thread. Once again as these are exposed to the outside, I used stainless steel domed socket heads on these.
Passenger side:
Image

Drivers side:
Image

Time to install the strut brace - like I mentioned before I had to uninstall the fuel pump/surge tank, Delphi fuel filter and the windscreen washer reservoir to get it in, but in it did go!! I just need to source some new 10mm x 100mm long bolts to finish securing them in place, but at least its in:
Image

Reinstall the Delphi fuel filter, with the 6-ply fuel filler hose in the background:
Image

As you can see from the pics, its starting to get crowded in there (once the spare goes in the centre its jam-packed!). From here its a case of mount the WMI pump, get some more Earls fittings for the surge tank, hook up the fuel feed and fuel return lines, hook up the WMI pressure and feed lines, join all the vent pipes, run the windscreen washer tubing, install the taillights and wire it all up. But, thats a job for next weekend!!!

Cheers,
Tricky

_________________
"Not Speeding Officer..........Qualifying"


Top
 Profile  
 
PostPosted: Mon Apr 07, 2014 8:31 am 
Offline
1275cc
1275cc
User avatar

Joined: Fri Jun 17, 2005 10:31 am
Posts: 3183
Location: Burpengary, Queensland - Home of Tricky Performance Engineering
Kennomini wrote:
That tank setup looks good, do you have anything going on top of that lot, boot boards, spare wheel?


The spare goes in the centre section Kenno....

_________________
"Not Speeding Officer..........Qualifying"


Top
 Profile  
 
PostPosted: Mon Apr 07, 2014 1:58 pm 
Offline
1275cc
1275cc
User avatar

Joined: Thu Jun 03, 2004 2:56 pm
Posts: 3981
Location: Brisbane
I admire your commitment AT. Many would have given up long ago.

_________________
But he's thriving and striving and hugging the turns.


Top
 Profile  
 
PostPosted: Mon Apr 07, 2014 5:39 pm 
Offline
1275cc
1275cc
User avatar

Joined: Fri Jun 17, 2005 10:31 am
Posts: 3183
Location: Burpengary, Queensland - Home of Tricky Performance Engineering
Thanks JC.

I cant give up now, I have invested too much!!

_________________
"Not Speeding Officer..........Qualifying"


Top
 Profile  
 
PostPosted: Mon Apr 07, 2014 6:58 pm 
Offline
1275cc
1275cc
User avatar

Joined: Fri Jun 17, 2005 10:31 am
Posts: 3183
Location: Burpengary, Queensland - Home of Tricky Performance Engineering
Just an aside.....

For those of you that didnt know, SE QLD got hit by a pretty intense storm last night. It lasted for a few hours and where we are, at Burpengary, got 56mm in under two hours - that's a lot of rain!! I went down the workshop this morning and, dodging my way through fallen palm fronds and branches etc, opened the door to be greeted by this:
Image

Image

Image

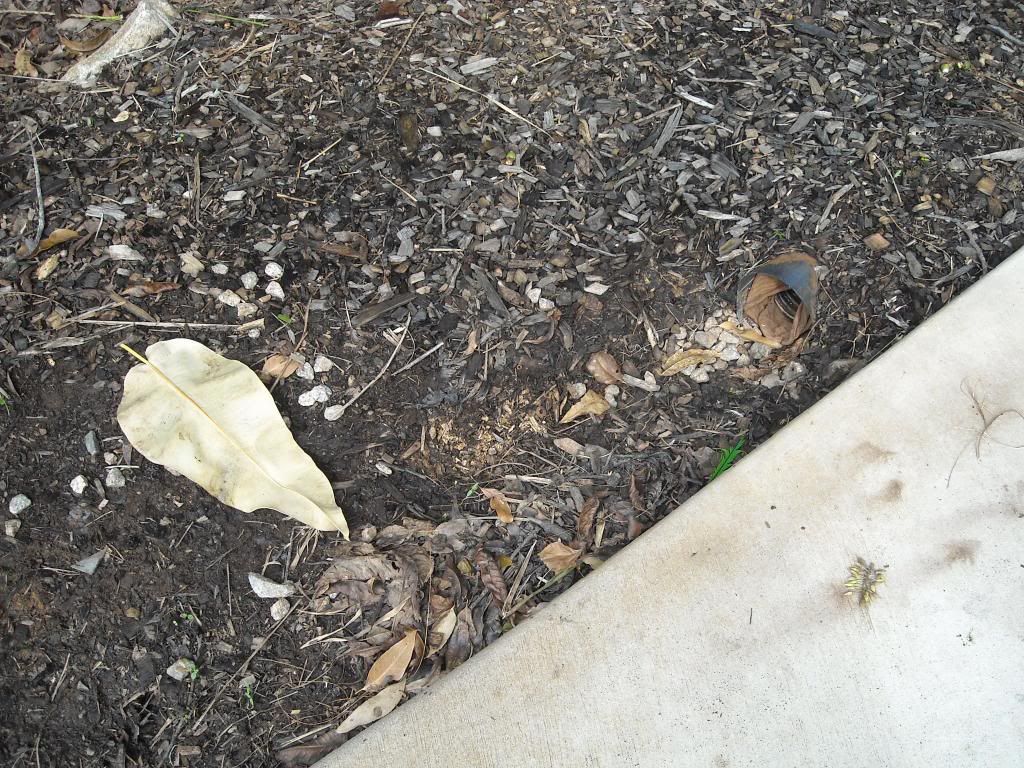
The amount of water coming off the roof inundated the water tank, even with a 90mm overflow. It accumulated around the shed with the other runoff and soon the aggie line and drainage system was overwhelmed as well. From there it could only flow up under the sheet and into the shed - bugger!! The amount of water coming out the aggie line was evident by the scouring at the exit near the driveway:
Image

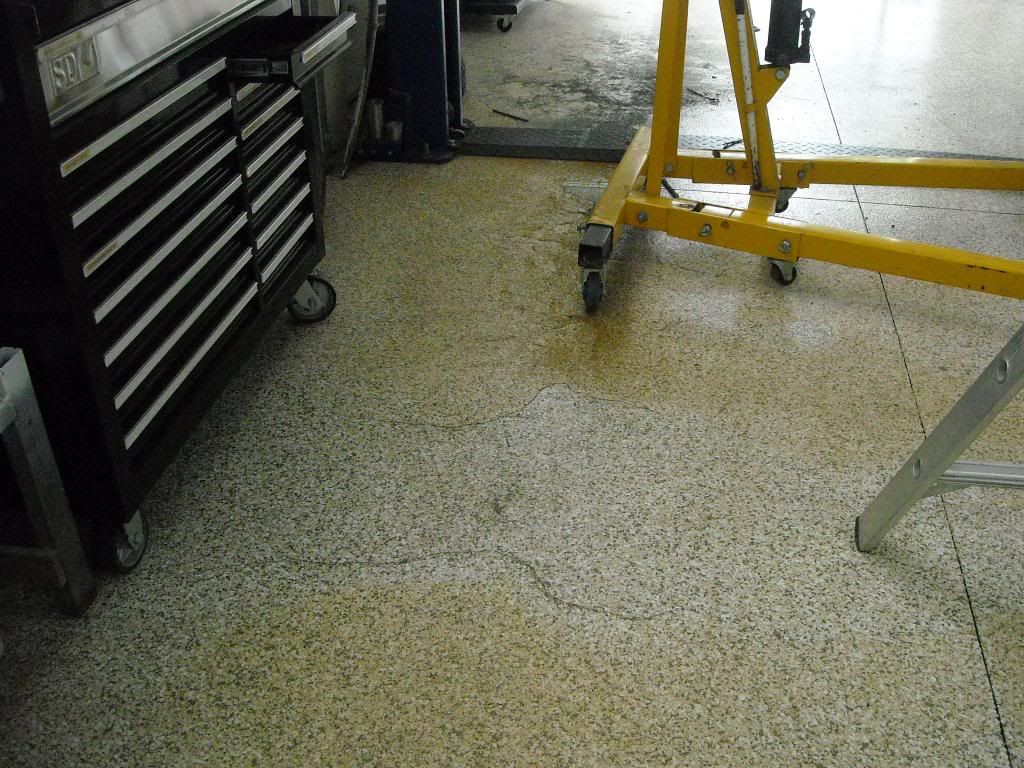
The worst affected area was where I was working on El Gato yesterday, it was a sea of fine silty mud! Worst of all, I had left some of my stuff on the floor when I had finished up, not tools (never leave tools on the floor), but I remember putting my note book and pencil on the floor when I sat down on the stool!! This was not a good thing, as a lot of my notes and calculations for many projects are in the notebook - bugger!
Image

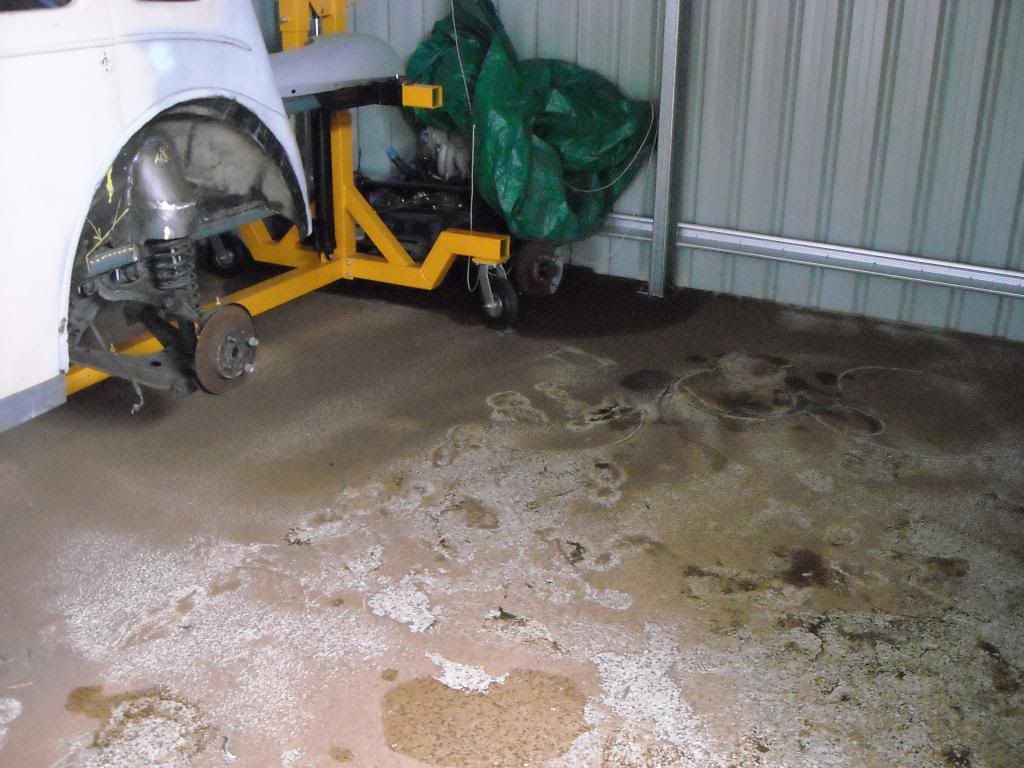
Anyway, it wasnt going to clean itself! I decided a bit of music to sooth the savage beast was in order so I put on the mellow tones of the Eagles. Rockin out to 'Hotel California' I set to work - moving everything out onto the driveway - for those things I could easily manage - or just dragging then forward to the edge of the workshop for those I couldn't. The cleaning would have to be done in sections - remove items, then clean, then replace items, then clean up tire tracks and footprints. Luckily I had a couple of saving graces on my side - the floor coating. Thank heaven I got the floor coated, or it would have been stained, ugly concrete forever. With the urathane coating, the silty mud just mainly washed off, with the hardest bits just took a bit of water blasting with the karcher. The 2nd saving grace was the sheeting - I had left a 100mm gap between the bottom of the sheet and the floor for this very event, should it ever happen - good thinking 99!!! The 3rd saving grace was that most of my stuff - save for the welding table and one or two other things - are all on wheels, so it was an easy task to wheel most things around to get at the problem areas. Meisner was rocking to 'Try and Love Again' and by the time Henley and Frey were pumping out 'The Last Resort', I had the first area done!!!
Image

Sticking with the Eagles, I decided on the later, more rocking tones of 'The Long Run', and let Henley let loose on the title track. It was the last bars of 'Sad Cafe' by the time I got the 2nd and 3rd areas cleaned.
Image

I kept going - Electric Light Orcheatra's 'Very Best of ELO had me pumped. Jeff Lynne was awesome and he had me singing along to 'Horace Wimp' as I hosed, scrubbed, cleaned and mopped.

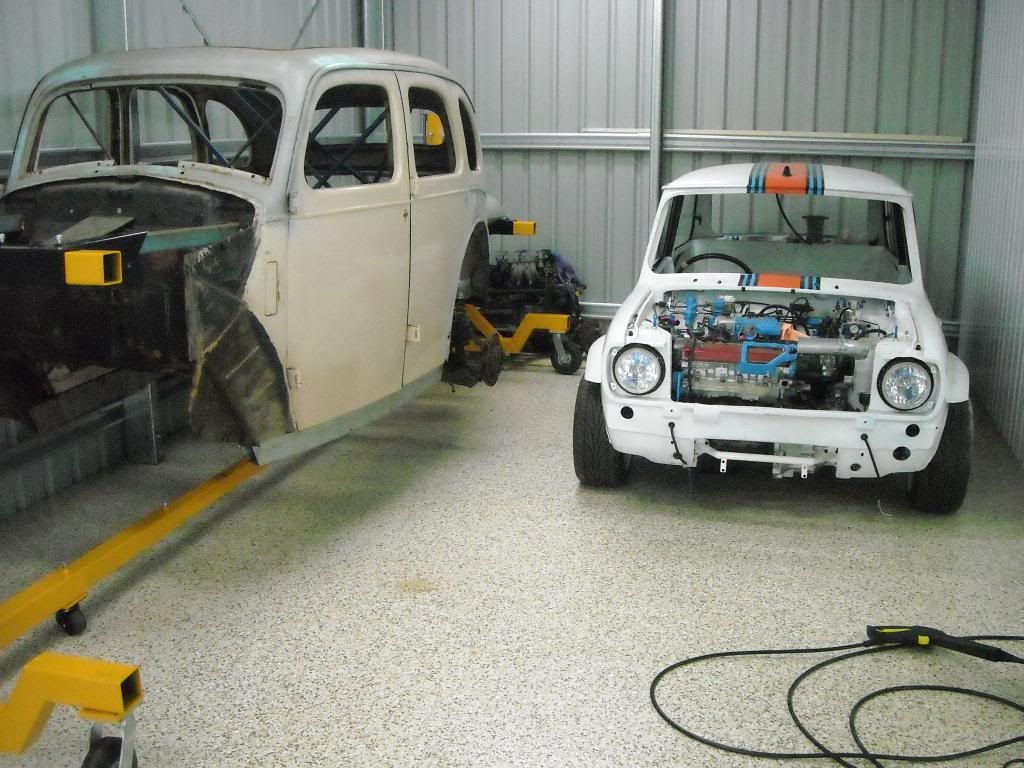
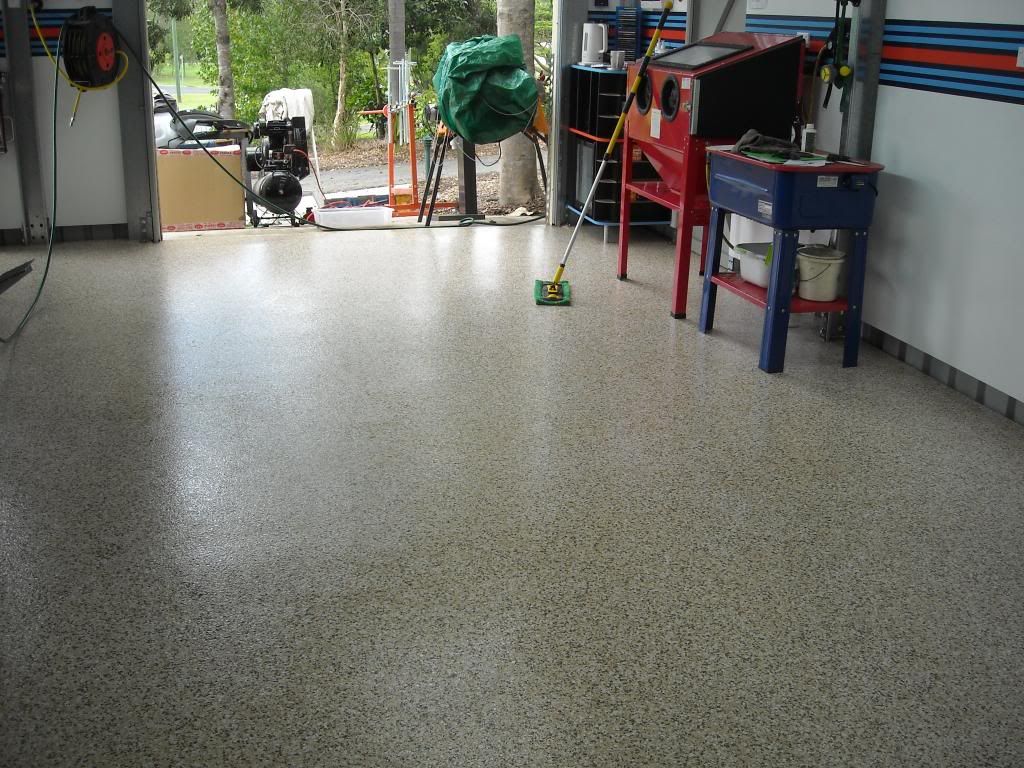
Lunctime came and went as I pressed on - the sky outside was looking decidely grey and threatening and I didnt want to be caught with all this gear sitting on the driveway. I was nearing the end, and I put on Cold Chisels 'East' for one last push. Jimmy and I were doing an awesome duet of 'Four Walls' and I was almost done. By the time 4 o'clock came around I was done, packed up and sorted - and everything was sparkly clean once more:
Image

Image

And for you Hallsey, I even cleaned the welder before putting it back into its place (thanks ya b@stard):
Image

So, six hours and a clean shed - but no work. A sincere apology to Justin for not getting anything done on Leonidas today, mate I just cannot work in anything but a clean and tidy workshop, plus all that silt on the floor was just downright dangerous - but I do apologise for the lack of productivity mate, will try and make it up later in the week if I can!!!

Some lessons learnt:
>The floor coating was a godsend - the result would not be as good without this coating. PM me if you want details of the company that did it - well worth it and it looks and stays oh so clean!!
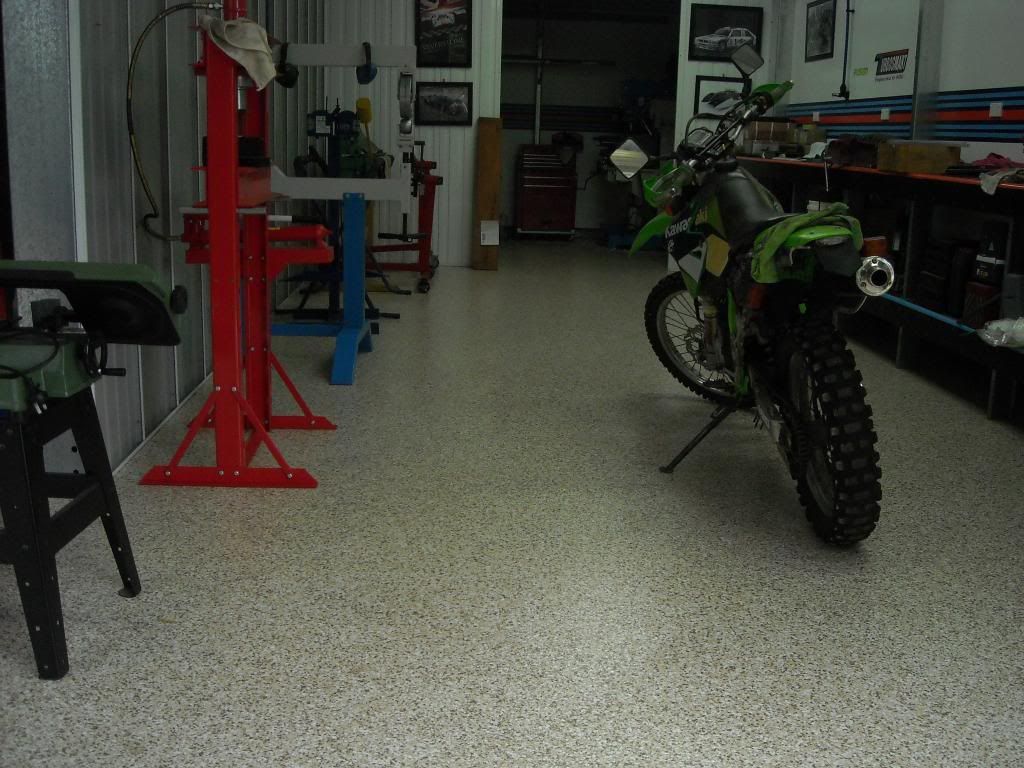
>Put everything on wheels, makes it easier to move and if you have space limitations like me, you are always moving stuff around to optimise space
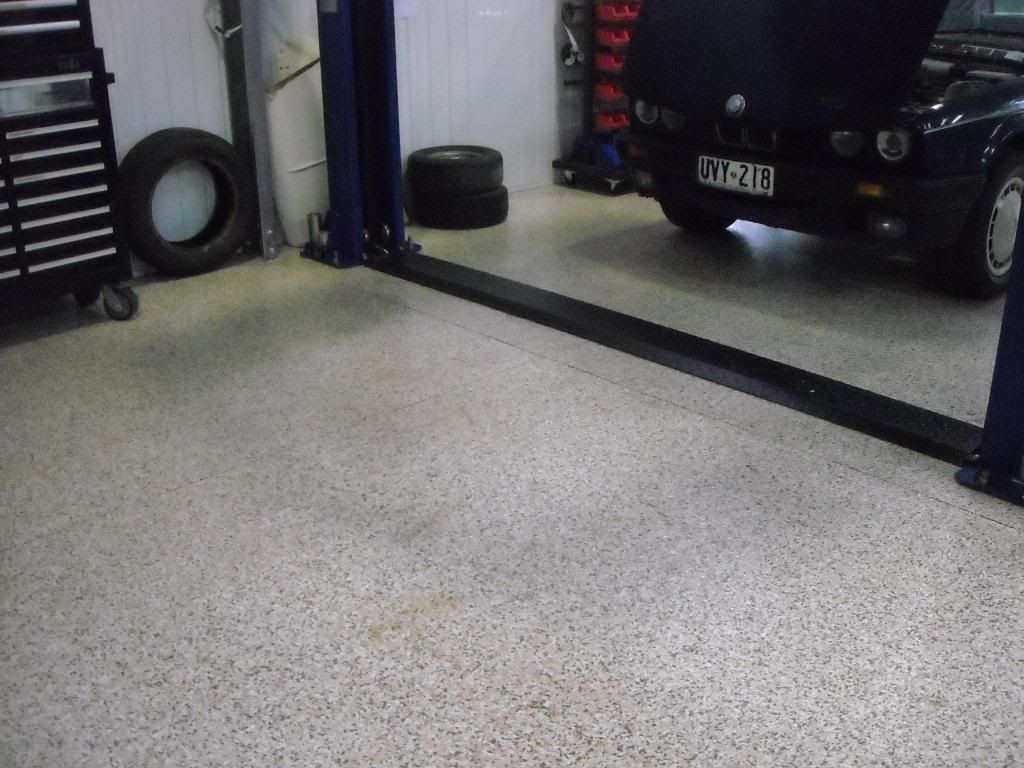
>If you are going to line the walls like I did, leave a gap to the floor for that 'I need to hose this crap out' event!
>Clean up after yourself every afternoon - I didnt on Friday thinking I was going to keep going where I left off and this just made things harder
>Dont leave anything lying on the floor - like valuable notebooks! I dont make it a habit of leaving anything on the floor, but must have forgottent his one. I wont in the future that's for sure.

New Respect:
>Mother Nature - by crikey we had some rain!! May have to do more to the drainage system but I dont think anything I could have done in this instance would have made any difference!
>Enyo - my Enyo mop (thanks Wifey, it was a shed-warming present!!) was awesome - squeedgy, mop, scrubber - it did it all and it made things a lot easier than they could have been - Clean The World, yay!!

Back to work tomorrow in a clean workshop - yay!!

Cheers,
Tricky

_________________
"Not Speeding Officer..........Qualifying"


Top
 Profile  
 
PostPosted: Mon Apr 07, 2014 7:24 pm 
Offline
848cc
848cc
User avatar

Joined: Wed Mar 14, 2007 3:50 pm
Posts: 404
Location: MORNINGTON PENINSULA
Thats better , now it looks like the rest of the shed :lol: :lol:
56mm wow thats a fair bit of presipatation in 2 hours , no wonder the poor old tank didnt keep up

see you genius ,you even had natural disasters covered

never cease to amaze me,good clean up skills , now get back to work lol :lol:
cheers Hallsey


Top
 Profile  
 
PostPosted: Mon Apr 07, 2014 7:40 pm 
Offline
1275cc
1275cc
User avatar

Joined: Fri Jun 17, 2005 10:31 am
Posts: 3183
Location: Burpengary, Queensland - Home of Tricky Performance Engineering
Geez you make me laugh, nearly wet myself....

Yep, that will be tomorrow, look out Leo, here I come!!

Cheers,
Tricky

_________________
"Not Speeding Officer..........Qualifying"


Top
 Profile  
 
PostPosted: Tue Apr 08, 2014 11:11 am 
Offline
1098cc
1098cc
User avatar

Joined: Thu Sep 30, 2004 3:12 pm
Posts: 1461
Location: Brisbane
I start to cringe every time it rains. No where near the damage your getting there though. Have you heard anything more about the drive shafts yet?

_________________
If you want more inches, stroke it
Life's a garden.... Dig It!
http://www.ausmini.com/forums/viewtopic.php?t=20746


Top
 Profile  
 
PostPosted: Tue Apr 08, 2014 7:06 pm 
Offline
848cc
848cc
User avatar

Joined: Wed Mar 17, 2004 6:05 pm
Posts: 310
Location: Kallangur, Brisbane
Hey Tricky,

Sorry to hear about the shed mate, cleaning up flood water is never fun . We also copped that storm but i don't think we got as much as you did but enough to flood my shed too :(

_________________
72 Clubbie - Current project - Vauxhall C20XE 2000cc 16v 150hp.
78 Clubbie - Future project.
Image


Top
 Profile  
 
PostPosted: Tue Apr 08, 2014 7:22 pm 
Offline
1275cc
1275cc
User avatar

Joined: Fri Jun 17, 2005 10:31 am
Posts: 3183
Location: Burpengary, Queensland - Home of Tricky Performance Engineering
Sad to hear that Cam - was it a hose out job for you???

It certainly was a monsoonla deluge of biblical proportions alright!! :shock:

_________________
"Not Speeding Officer..........Qualifying"


Top
 Profile  
 
Display posts from previous:  Sort by  
Post new topic Reply to topic  [ 1864 posts ]  Go to page Previous  1 ... 113, 114, 115, 116, 117, 118, 119 ... 125  Next

All times are UTC + 10 hours


Who is online

Users browsing this forum: No registered users and 54 guests


You cannot post new topics in this forum
You cannot reply to topics in this forum
You cannot edit your posts in this forum
You cannot delete your posts in this forum
You cannot post attachments in this forum

Jump to:  

© 2016 Ausmini. All garage work involves equal measures of enthusiasm, ingenuity and a fair degree of irresponsibility.