Ausmini
It is currently Wed May 22, 2024 4:10 am

All times are UTC + 10 hours


Post new topic Reply to topic  [ 219 posts ]  Go to page Previous  1, 2, 3, 4, 5, 6, 7 ... 15  Next
Author Message
 Post subject:
PostPosted: Thu Nov 27, 2008 9:41 pm 
Offline
This space for rent
User avatar

Joined: Thu Feb 08, 2007 12:40 pm
Posts: 5455
Location: Melbourne
Mmmm.. solder fumes. Smells good, must be *really* bad for you...

_________________
Simon

The adventures of an owner builder in the Tallarook Ranges

Image


Top
 Profile  
 
 Post subject:
PostPosted: Sat Jan 03, 2009 5:13 am 
Offline
The TIG
User avatar

Joined: Thu Oct 27, 2005 4:28 pm
Posts: 860
Location: Victoria, BC, Canada
I posted these pictures up in my car build thread but I should probably include them as part of my engine swap thread. Since I am trying to keep the car looking relatively stock inside and out I had to move the engine way back and notch the firewall for the intake manifold. This resulted in me having to move the stock Mini master cylinders on my left hand drive car. In other swaps people will modify the pedal box to have the master cylinders on top of the pedal box inside the car. However this solution will not work for me because I wanted to keep the parcel shelf dash. So I decided to go through the firewall underneath the intake manifold instead. The next problem I had was that since my engine was so far back I could not run a regular horizontal brake master cylinder. I wanted to use a horizontal Honda brake master cylinder since I am going to be running some Honda brakes and I don't want to mix to many parts from different manufacturers. I decided to use Honda clutch masters in stead, two for the brakes and one for the clutch. I opted for the Honda masters because they are easy to get and pretty cheap. I considered Wilwood masters they are also priced well but they need to be special ordered and if I am travelling in my Traveller I don't want to wait for apart. This set up allowed me to run a Wilwood brake balance bar so I can easily adjust my brake bias. With my experience from my Honda brakes on my other Mini, a little research and some calculations I think I have figured out the geometry and proper bore sizes for the project. But I guess it will come down to testing it when I can get more of the car together.

Image
Image
Image

_________________
email - turbomini@gmail.com
http://s28.photobucket.com/albums/c207/TurboOrangie/
Image
67 Traveller - Needs restoration
www.victoria-chiropractors.ca


Top
 Profile  
 
 Post subject:
PostPosted: Sun Jan 04, 2009 9:15 pm 
Offline
1275cc
1275cc
User avatar

Joined: Fri Jun 17, 2005 10:31 am
Posts: 3183
Location: Burpengary, Queensland - Home of Tricky Performance Engineering
Brilliant job Nigel, you have put a lot of effort and thought into this.

Please post a pick of the brake master cylinder setup when its in, I am interested to see how you have done it.

Cheers,
Tricky

_________________
"Not Speeding Officer..........Qualifying"


Top
 Profile  
 
 Post subject:
PostPosted: Mon Jan 05, 2009 3:06 pm 
Offline
The TIG
User avatar

Joined: Thu Oct 27, 2005 4:28 pm
Posts: 860
Location: Victoria, BC, Canada
Tricky, I will definitely post up some pics when I get it sorted. It's close now.

This weekend I made a plate to mount the Honda throttle cable to and welded it into the fire wall. I also made a small triangular cut out to make a little more room where my air intake will be.

Image
Image

_________________
email - turbomini@gmail.com
http://s28.photobucket.com/albums/c207/TurboOrangie/
Image
67 Traveller - Needs restoration
www.victoria-chiropractors.ca


Top
 Profile  
 
 Post subject:
PostPosted: Mon Jan 05, 2009 8:15 pm 
Offline
848cc
848cc
User avatar

Joined: Wed Mar 14, 2007 3:50 pm
Posts: 404
Location: MORNINGTON PENINSULA
Nige
Words fail me , this is a top quality build, well done
Cheers Hallsey


Top
 Profile  
 
 Post subject:
PostPosted: Tue Jan 06, 2009 3:48 am 
Offline
The TIG
User avatar

Joined: Thu Oct 27, 2005 4:28 pm
Posts: 860
Location: Victoria, BC, Canada
Thank you hallsey, I work on constantly improving my quality, I have a way to go before I'm really happy. I suppose it would help if I threw more money at a project, but I do enjoy trying to do builds as cheaply as possible and using parts that are cheap and easy to replace in the future.

_________________
email - turbomini@gmail.com
http://s28.photobucket.com/albums/c207/TurboOrangie/
Image
67 Traveller - Needs restoration
www.victoria-chiropractors.ca


Top
 Profile  
 
 Post subject:
PostPosted: Tue Feb 03, 2009 1:46 pm 
Offline
The TIG
User avatar

Joined: Thu Oct 27, 2005 4:28 pm
Posts: 860
Location: Victoria, BC, Canada
This information has already been posted in my full car build, but I like to repeat the info that is more directly involved in just the swap portion of the project here so it is easier for others who want to attempt a similar swap.
I mated the shift lever from the Mini to the pivot ball and lower lever of the Honda shfiter mechanism. I also modified the geometry so I would have a short throw even with the longer Mini shifter lever. The throw travel is shorter than the stock Honda shifter but not quite as short as a B&M short shifter for the Honda. I found the B&M shifter in the donor car a little too short and I didn't like the feel and if I were to duplicate the B&M geometry the shifter linkages under the car would come too close to the ground for my liking.

Image
Image

_________________
email - turbomini@gmail.com
http://s28.photobucket.com/albums/c207/TurboOrangie/
Image
67 Traveller - Needs restoration
www.victoria-chiropractors.ca


Top
 Profile  
 
 Post subject:
PostPosted: Tue Feb 03, 2009 10:13 pm 
Offline
1275cc
1275cc
User avatar

Joined: Thu May 24, 2007 7:19 pm
Posts: 5370
Location: Yandina,Sunshine Coast,QLD
It still looks like wire city :lol:
Did you make your own steering wheel boss kit?

_________________
Respect mine and I'll respect yours.


Top
 Profile  
 
 Post subject:
PostPosted: Wed Feb 04, 2009 1:51 am 
Offline
The TIG
User avatar

Joined: Thu Oct 27, 2005 4:28 pm
Posts: 860
Location: Victoria, BC, Canada
Kennomini, yes I did make my own boss kit. I used the splined section of a Honda steering wheel to fit onto the Honda steering column, some tubing and a piece of plate steel. There are quite a few modifications going into the column to get the wheel position where I want.

_________________
email - turbomini@gmail.com
http://s28.photobucket.com/albums/c207/TurboOrangie/
Image
67 Traveller - Needs restoration
www.victoria-chiropractors.ca


Top
 Profile  
 
 Post subject:
PostPosted: Wed Feb 11, 2009 1:32 pm 
Offline
The TIG
User avatar

Joined: Thu Oct 27, 2005 4:28 pm
Posts: 860
Location: Victoria, BC, Canada
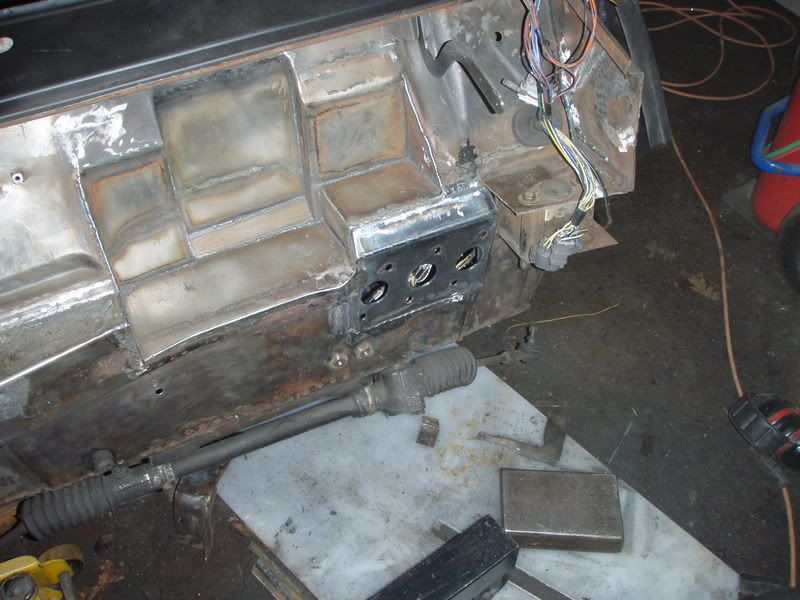
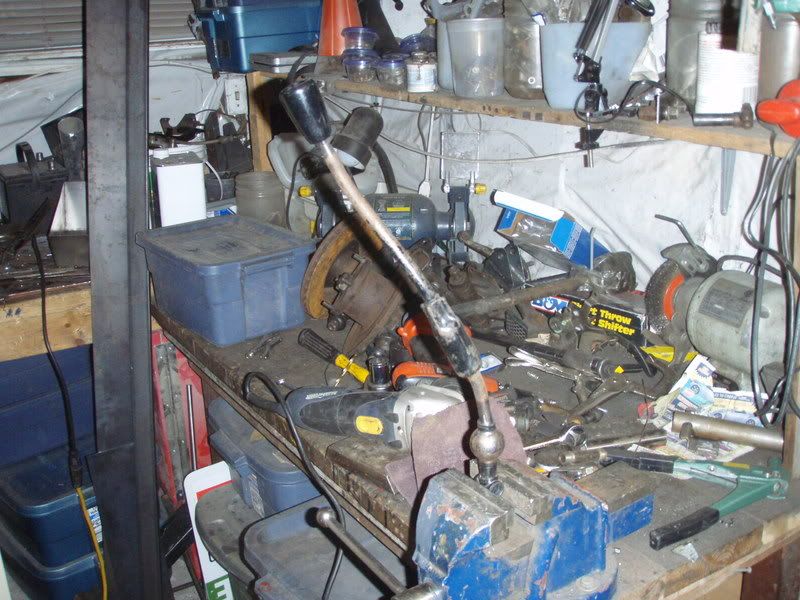
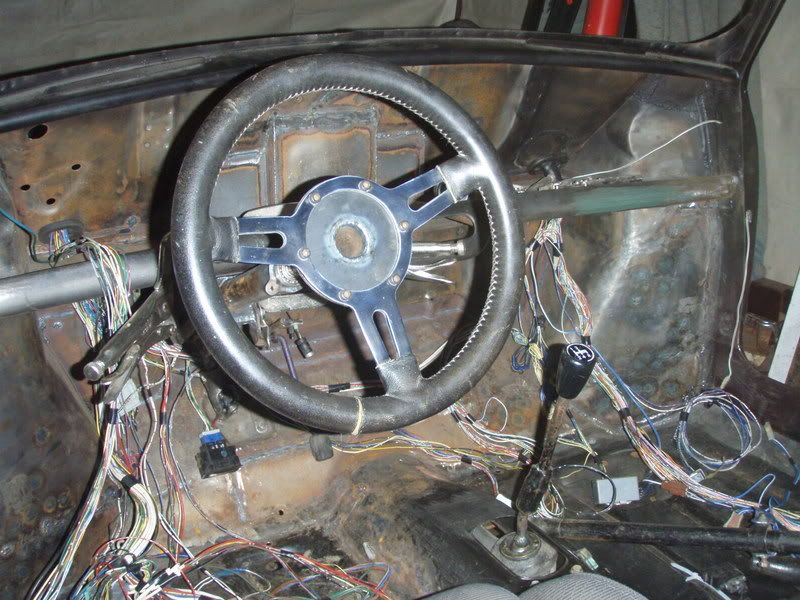
The pedal box is pretty much done, I might add a small gusset and it still needs to be powdercoated or painted. But I'll be testing it out first to make sure, I don't want to have to modify it after it's powdercoated. I will be fitting it in the car tonight so I can continue to set up the seating position and the steering column position.
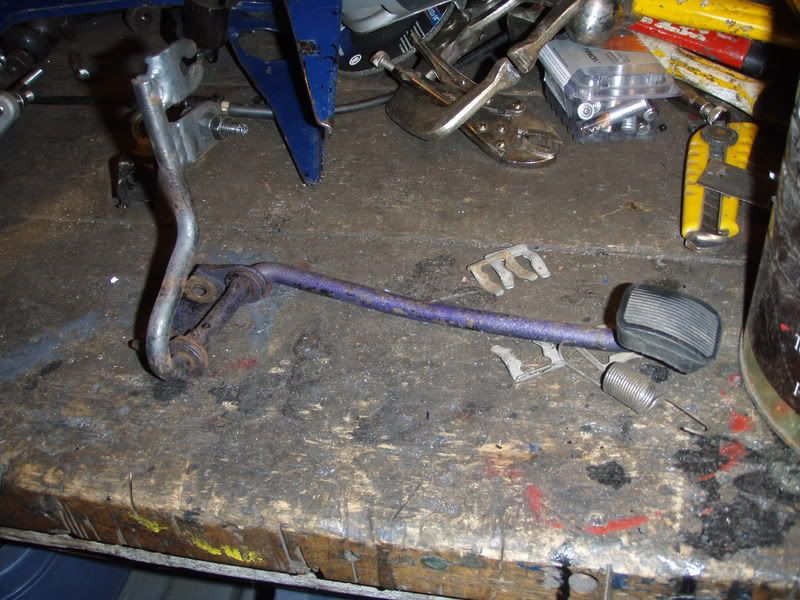
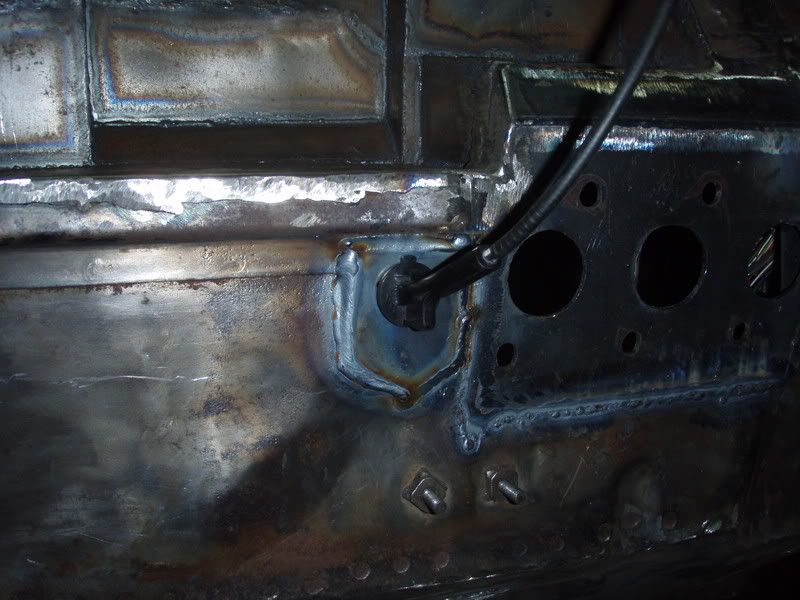
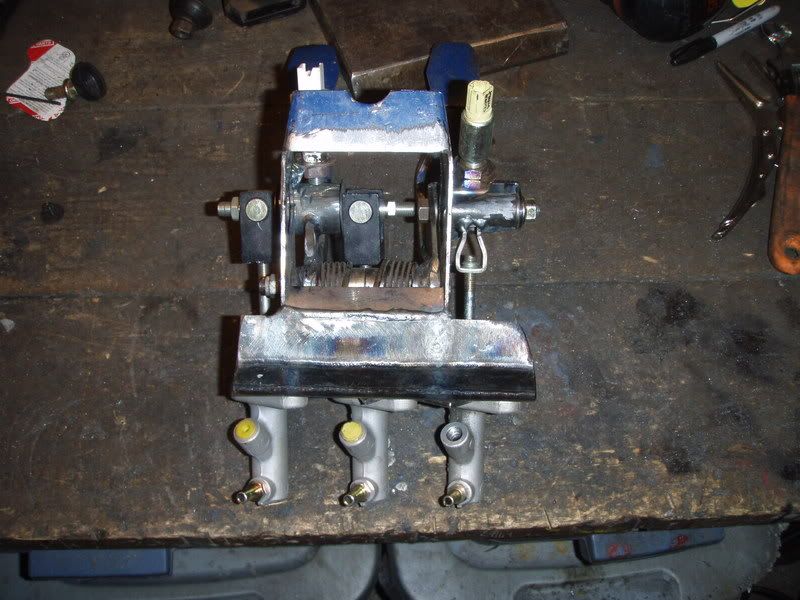
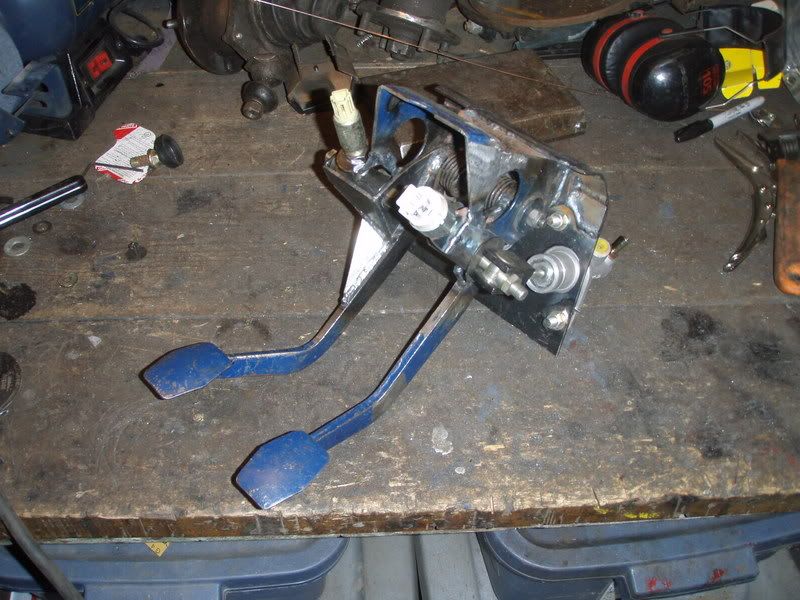
The pedal box started as a Mini pedal box and I cut it up and modified it from there. The brake and gas pedals will be in the stock location but the clutch pedal is positioned slightly more to the left because I straightened it out slightly and also because cut the weld and moved it over on the pivot to make a little room for the Wilwood balance bar. And also to make room for my size 12's. I'm running 3 Honda clutch master cylinders with remote reservoirs to are connected with a brake balance bar to adjust the brake bias and also because I didn't have enough room to run a longer brake master cylinder. I used the pivot/bushing assembly from the Honda clutch pedal and used it for a pivot for the attachment of the clutch master cylinder push rod to the Mini clutch pedal. I also integrated the Honda clutch start safety switch and the Honda brake lights switch. This is all probably quite confusing to read so hopefully you can figure it out from the pictures. Not that anybody is going to attempt replicating this anyway. I spent alot of time figuring out the geometry and building this crazy contraption. Unless I run in to any problems this should reach all my requirements I started with for the pedal box.
1. Stock looking dash (I wanted the old school shelf dash free of master cylinders).
2. Cheap master cylinders.
3. Master cylinders that are easy to get.
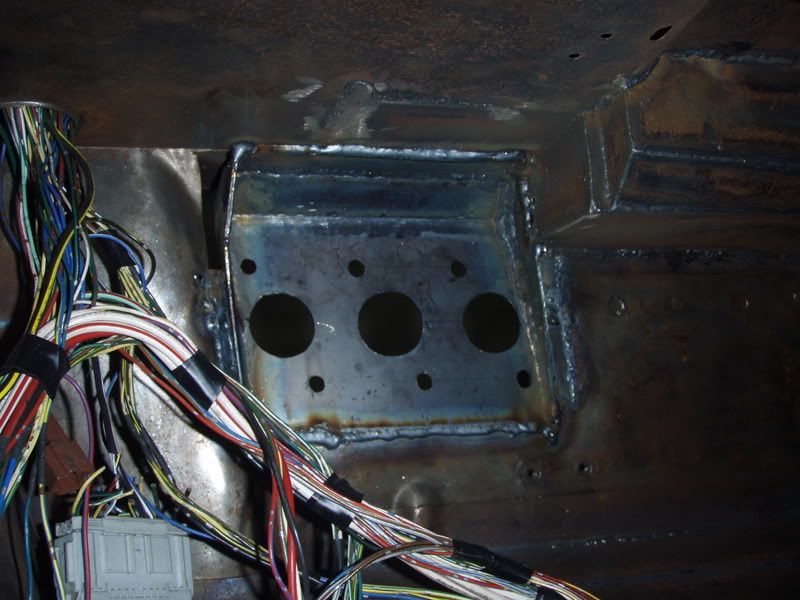
The down side is that it might be a little hard to access the master cylinders if I need to replace one of them since they will be located under the intake manifold.

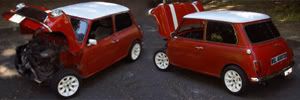
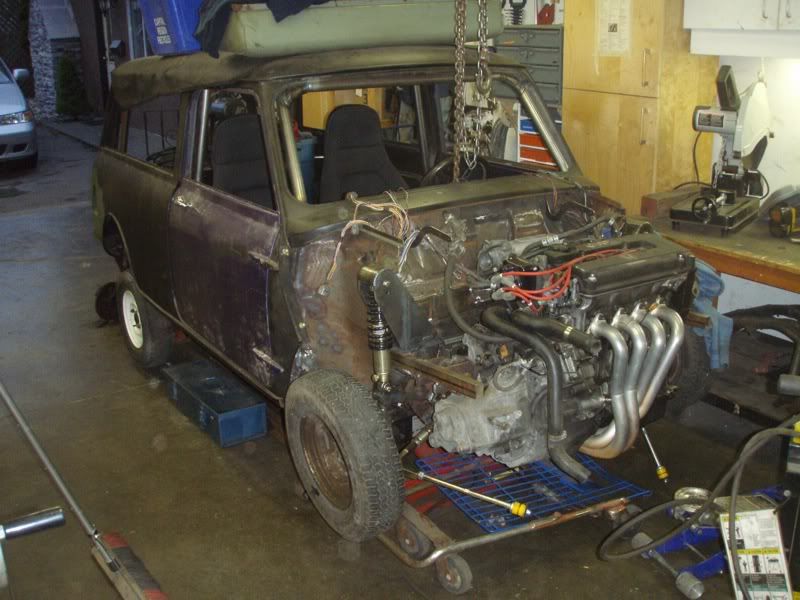
The wheel on the left makes more room for the VTEC! Here is an update on the pedal box, it's pretty much done, I might do a couple touch ups and maybe another small gusset in one area and then I will paint it once it's fine tuned, or maybe powdercoat it. Now I can continue with setting up my steering wheels and seating position.

Image
Image

PS Thank goodness for TIG welding!

_________________
email - turbomini@gmail.com
http://s28.photobucket.com/albums/c207/TurboOrangie/
Image
67 Traveller - Needs restoration
www.victoria-chiropractors.ca


Top
 Profile  
 
 Post subject:
PostPosted: Fri Jul 10, 2009 10:16 am 
Offline
The TIG
User avatar

Joined: Thu Oct 27, 2005 4:28 pm
Posts: 860
Location: Victoria, BC, Canada
Well I'm back at work on the engine swap part of the project. Not a whole lot of progress yet, but at least I have the engine and what I've got as far as a front subframe so far bolted into the car. I'm building a jig right now from a stock front subframe to help me get the proper mounting points for the front tie bars and for mounting the nose of the car. Then I will continue building the subframe out of the same tubing I used to build the cage.

Image

_________________
email - turbomini@gmail.com
http://s28.photobucket.com/albums/c207/TurboOrangie/
Image
67 Traveller - Needs restoration
www.victoria-chiropractors.ca


Top
 Profile  
 
 Post subject:
PostPosted: Fri Jul 10, 2009 11:03 pm 
Offline
1098cc
1098cc

Joined: Mon Jul 10, 2006 5:59 pm
Posts: 1275
Location: Bris / Syd
FIJI is impressed . GO boy GO :twisted:

_________________
PrOuDlY aSkInG qUeStIoNs FoR uR aMuEsMeNt


Top
 Profile  
 
 Post subject:
PostPosted: Sun Jul 12, 2009 4:33 pm 
Offline
The TIG
User avatar

Joined: Thu Oct 27, 2005 4:28 pm
Posts: 860
Location: Victoria, BC, Canada
I'll keep at it, just been side tracked with some other projects and helping friends out. Updates soon.

_________________
email - turbomini@gmail.com
http://s28.photobucket.com/albums/c207/TurboOrangie/
Image
67 Traveller - Needs restoration
www.victoria-chiropractors.ca


Top
 Profile  
 
 Post subject:
PostPosted: Wed Jul 22, 2009 3:33 am 
Offline
The TIG
User avatar

Joined: Thu Oct 27, 2005 4:28 pm
Posts: 860
Location: Victoria, BC, Canada
I've done some more work on the front subframe finally. I am going with the same round tubing I used on the cage instead of the square tubing I started with. I'm trying not to modify the external sheet metal for the engine or subframe. I may end up notching the panel under the front bumper and behind the license plate for the exhaust, so that won't be too bad if I end up doing that, but I'm still going to try not to.
I've put a horizontal tube so it fits behind the area the front bumper mounts to as far forward as I can. Then I mounted some tubes from it that go under the gearbox and engine on either side that mount back to the mount for the bottom suspension arms. The tubes do sit fairly low so they give a little clearance for the engine to rock in it's mounts a little. I also wanted them to be the lowest point to protect the sump and the gear box. If they end up being to low I will modify them later. The gap looks a little bigger on the gear box side because I built the bars for each side the same for symmetry. They also slope up slightly from the front of the car to where they mount at the suspension points. The the slope and they symmetry should help the car sit better on jack stands when the front end is up in the air. The second front

Image
Image
Image
This picture shows a clear path through the centre of the car where the exhaust pipe can flow straight under the car.
Image

_________________
email - turbomini@gmail.com
http://s28.photobucket.com/albums/c207/TurboOrangie/
Image
67 Traveller - Needs restoration
www.victoria-chiropractors.ca


Top
 Profile  
 
 Post subject:
PostPosted: Wed Jul 22, 2009 8:25 am 
Offline
1275cc
1275cc
User avatar

Joined: Fri Jun 17, 2005 10:31 am
Posts: 3183
Location: Burpengary, Queensland - Home of Tricky Performance Engineering
Nice work Nige!

_________________
"Not Speeding Officer..........Qualifying"


Top
 Profile  
 
Display posts from previous:  Sort by  
Post new topic Reply to topic  [ 219 posts ]  Go to page Previous  1, 2, 3, 4, 5, 6, 7 ... 15  Next

All times are UTC + 10 hours


Who is online

Users browsing this forum: No registered users and 11 guests


You cannot post new topics in this forum
You cannot reply to topics in this forum
You cannot edit your posts in this forum
You cannot delete your posts in this forum
You cannot post attachments in this forum

Jump to:  

© 2016 Ausmini. All garage work involves equal measures of enthusiasm, ingenuity and a fair degree of irresponsibility.