Ausmini
It is currently Sat Apr 27, 2024 10:00 pm

All times are UTC + 10 hours


Post new topic Reply to topic  [ 413 posts ]  Go to page Previous  1 ... 24, 25, 26, 27, 28
Author Message
 Post subject:
PostPosted: Tue Dec 19, 2023 7:56 pm 
Offline
998cc
998cc
User avatar

Joined: Tue Nov 13, 2007 4:17 pm
Posts: 946
Location: NOR, Perth, W.A.
Fill, sand, fill sand, fill, sand...
Both sides of the shell were worked on with repeated applications of filler and sanding to get everything mostly flat/smooth, and all areas with filler or bare metal were resealed with 2 coats of epoxy primer.
Image

Image

Image

Image

I also 3D printed a simple piece specifically for the rear quarter window opening when I was filling/sanding a rust repair.
Image

The rear bumper has been deseamed so this required a thin skim of filler over a majority of the beaver panel to get a even curvature over the panel.
Image

_________________
-Alan
I blame my dad for my love of minis. I think I was conceived in the back seat of one :D
I also blame my Dad for me being 6' 1" - not really the optimum height for driving a Mini.


Top
 Profile  
 
PostPosted: Wed Dec 20, 2023 12:57 pm 
Offline
848cc
848cc

Joined: Fri Oct 06, 2017 6:39 pm
Posts: 191
Location: Perth, WA
90% of painting is in the prep work they say.... looking good mate, this thing is going to be unreal!


Top
 Profile  
 
 Post subject: Re:
PostPosted: Wed Dec 27, 2023 12:25 pm 
Offline
848cc
848cc

Joined: Sat Feb 16, 2008 6:01 am
Posts: 47
Location: Santiago, Chile
Mearcat wrote:
I also 3D printed a simple piece specifically for the rear quarter window opening when I was filling/sanding a rust repair.
Image


share it please Mearcat!!!

_________________
Image


Top
 Profile  
 
 Post subject:
PostPosted: Thu Dec 28, 2023 10:44 pm 
Offline
998cc
998cc
User avatar

Joined: Tue Nov 13, 2007 4:17 pm
Posts: 946
Location: NOR, Perth, W.A.
clubman S wrote:
share it please Mearcat!!!

No problem : https://www.printables.com/model/696693-classic-mini-rear-quarter-window-sanding-block

_________________
-Alan
I blame my dad for my love of minis. I think I was conceived in the back seat of one :D
I also blame my Dad for me being 6' 1" - not really the optimum height for driving a Mini.


Top
 Profile  
 
PostPosted: Wed Jan 17, 2024 2:19 am 
Offline
848cc
848cc

Joined: Sat Feb 16, 2008 6:01 am
Posts: 47
Location: Santiago, Chile
legend!

_________________
Image


Top
 Profile  
 
 Post subject:
PostPosted: Mon Jan 29, 2024 2:53 pm 
Offline
998cc
998cc
User avatar

Joined: Tue Nov 13, 2007 4:17 pm
Posts: 946
Location: NOR, Perth, W.A.
Loads of filler & sanding has been completed, and everything had 2x additional coats of epoxy primer to cover filler & bare metal
Image

Image

The roof took an age to get right - about 4-5 skims of filler and 20 hours of work!
Image

Image

I also had to fix (cut, panel beat, re-weld) the shape of the panels around the base of the de-seamed C-pillar on the shell. The original welding resulted in average panel alignment and the panel creases sitting too high/proud.
Image

I never realised how different the profile of the top crease in the rear and side panel are so I had to blend the two where the vertical seam used to be.
Image

I've never liked the bracing design on the classic Mini Clubman bonnet due to the large centre area that has no support, which has a good chance of being dented if leaned on heavily. It looks like this bonnet had experienced that so I fabricated a custom brace with a similar shape/profile as the factory braces.
Image

Image

then filler & sand on the bonnet
Image

The doors were quite wavy although the thickness of filler used was thankfully relatively thin
Image

Detailed work on the bottom of the doors after the pocket was removed
Image

Boot lid :
Image

Image

_________________
-Alan
I blame my dad for my love of minis. I think I was conceived in the back seat of one :D
I also blame my Dad for me being 6' 1" - not really the optimum height for driving a Mini.


Top
 Profile  
 
PostPosted: Mon Jan 29, 2024 3:11 pm 
Offline
1360cc
1360cc
User avatar

Joined: Wed Oct 03, 2007 9:04 pm
Posts: 6654
Location: Melbourne, VIC
Impressive. You make bodywork look so easy.

_________________
ex-NSW Police 1970 MK II Cooper S
VMCI #43


Top
 Profile  
 
 Post subject:
PostPosted: Sun Mar 03, 2024 12:54 pm 
Offline
998cc
998cc
User avatar

Joined: Tue Nov 13, 2007 4:17 pm
Posts: 946
Location: NOR, Perth, W.A.
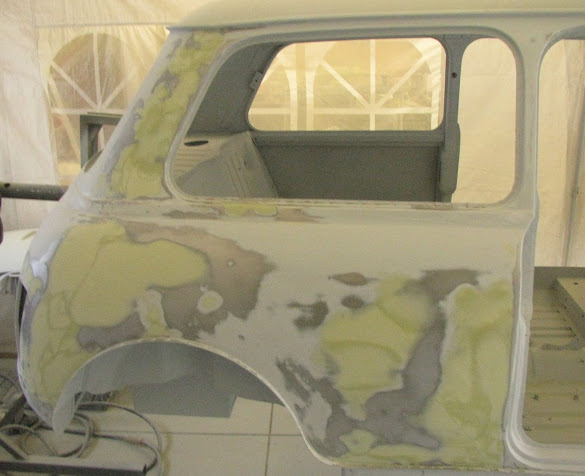
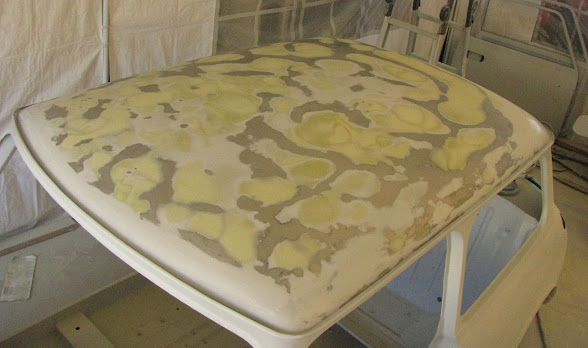
The body work is at a point where I can fit flares without worrying whether any part of the shell will be altered. Some time ago I had fitted the subframe, hubs & front rims to determine how far the wheels will stick out from the guard, which was measured as 42mm (with 0 degrees of camber) :
Image

Image

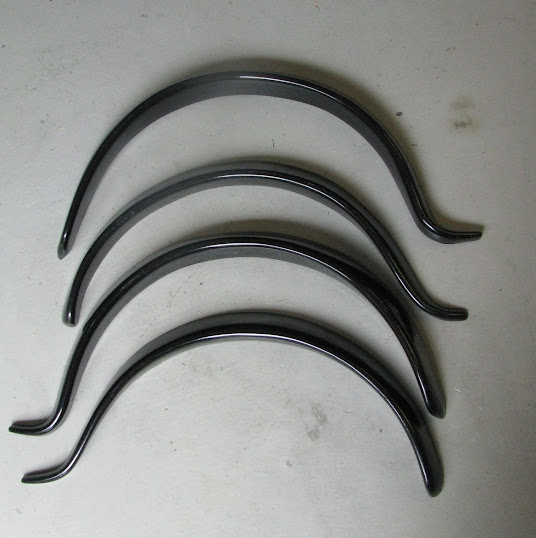
I sourced a set of fibreglass Wood and Pickett type flares which have a width of ~58mm (2.25") at the top of the arch.
Image

The flares were offered up to the shell and initially seemed like they all needed just a bit of work to butt up against the shell properly but that was the least of the problems. The flares didn't seem to match the curvature of the wheel arch lip. I scribed and cut some cardboard to the shape of the wheel arches to compare.
Image

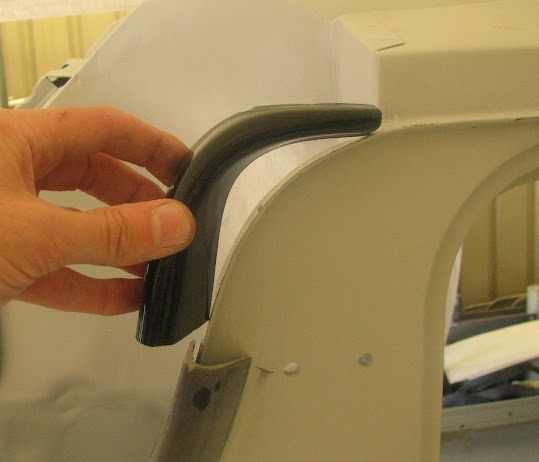
None of the four flares actually matched the wheel arch curves. For example this flare was okay at the top but tucked in at either end
Image

compared to a set of (narrower) ABS plastic flares which matched the curve perfectly
Image

To reshape the flares to match the wheel arch curvature I made a series of offset cuts along the length of each flare which allowed them to flex
Image

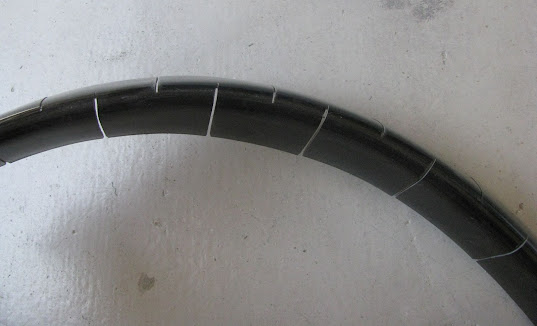
With the ends cut off this allowed me to clamp the flares to the body and superglue some small pieces of steel over the cuts to hold the corrected shape. A couple of layers of fibreglass was then applied to the back of the cuts.
Image

The curve of the front flare lower section also did not match the body seam so this also had offset cuts to fit it
Image

Image

I had to extend the rear flares by approx 100mm to give it a more completed look with bumperless rear end. I formed a shape for the missing sections and these were then fibreglassed into the gap.
Image

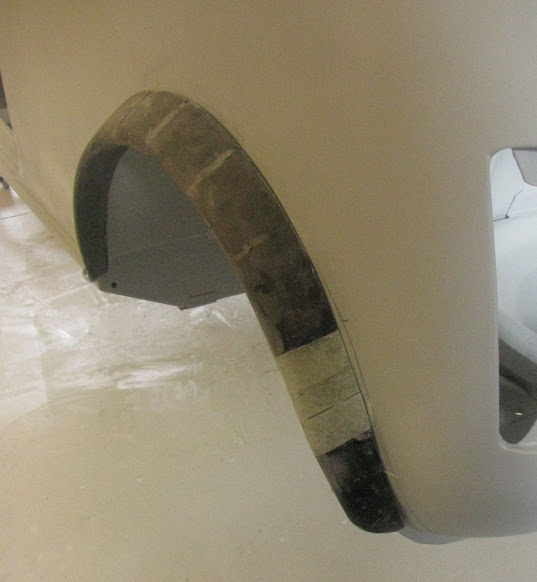
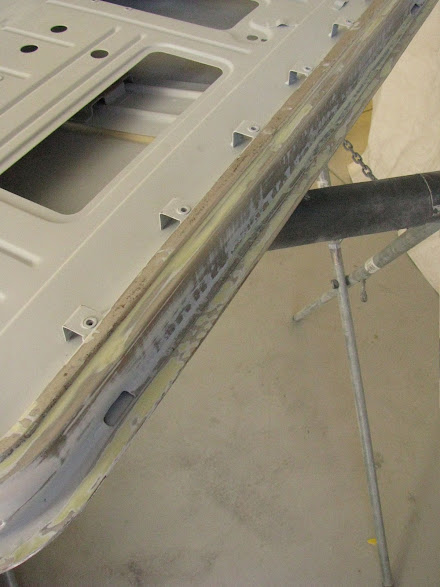
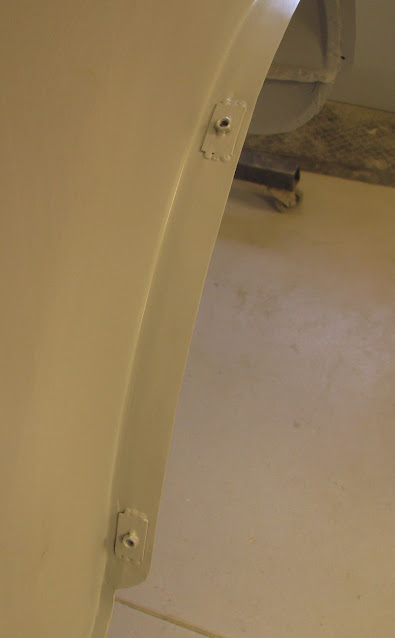
This style flare generally uses pop-rivets fitted from underneath, up into the wheel arch lips. I didn't like the idea of using pop-rivets to secure the flares as the wheel arch lip was as narrow as 8mm wide - not wide enough to be confident that they stay securely fitted so the lips were extended to approx 25mm
Image

Image

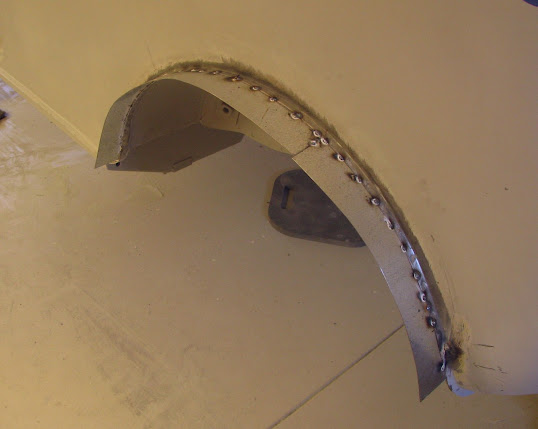
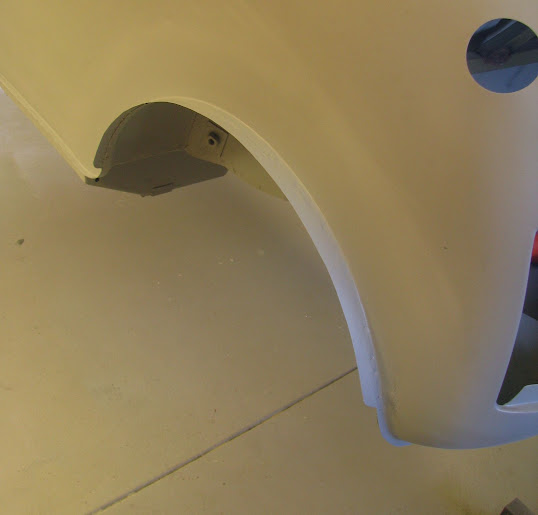
...then I welded on four M5 nuts on small plates for each flare to provide support for the thin-ish steel of the wheel lip extensions.
Image

The flares then needed new fibreglass added to get them to butt up neatly against the body. I applied painters tape on the body to cover the panels and some fibreglass to bridge any gaps
Image

This took well over a month of detailed work (and lots of time waiting for fibreglass to cure) to get just the flares completed and fitting really well. So much for what I thought would be just a weekend or so of work bolting them on :roll:
Image

_________________
-Alan
I blame my dad for my love of minis. I think I was conceived in the back seat of one :D
I also blame my Dad for me being 6' 1" - not really the optimum height for driving a Mini.


Top
 Profile  
 
Display posts from previous:  Sort by  
Post new topic Reply to topic  [ 413 posts ]  Go to page Previous  1 ... 24, 25, 26, 27, 28

All times are UTC + 10 hours


Who is online

Users browsing this forum: No registered users and 105 guests


You cannot post new topics in this forum
You cannot reply to topics in this forum
You cannot edit your posts in this forum
You cannot delete your posts in this forum
You cannot post attachments in this forum

Jump to:  

© 2016 Ausmini. All garage work involves equal measures of enthusiasm, ingenuity and a fair degree of irresponsibility.