Ausmini
It is currently Fri Apr 19, 2024 6:42 pm

All times are UTC + 10 hours


Post new topic Reply to topic  [ 89 posts ]  Go to page 1, 2, 3, 4, 5, 6  Next
Author Message
PostPosted: Sun Oct 07, 2012 9:09 pm 
Offline
Give Ash some flowers Nick .
User avatar

Joined: Wed Aug 09, 2006 1:22 pm
Posts: 10149
Location: Toowoomba Region, QLD
Hey guys,

I thought I should get around to posting a thread on this car that I bought quite a while back (18 months I think). I have taken a few photos and started doing some things to this car but always managed to lose track of the photos (i.e. left on an old work computer, thought I'd backed up my phone photos when I rooted it but didn't etc). A few other things happened in between and the car almost got sold to fund living expenses. It took a while to recover from that and now the bank balance is looking extremely healthy. Ash (wife) has just started a secondment in Brissy so I have loads more free time. So cash + free time to work on cars = completed car (hopefully).

A lot of you will recognise the car from way back. The car was known by the PO as 'Hefty' - I've never been one much for naming cars. I purchased it as an unfinished project with plenty of parts and it is still much in this position. It is a 1966 ish Morris Mini - the fleet level with 'all the trimmings' (i.e. none). I guess it doesn't really matter that much anymore because this car was a LONG way from being restored to original. It is essentially just what I wanted.

I've tried to do as much reading as I can on these conversions in the past so I can try to avoid some of the pit falls that others have made. In the same instance, I am also treading a path that not many have followed (4EFTE into a roundy). I can see why - there is so much more engine room in a clubby.

Anyway.... to the photos! I know this will seem as though the thread is starting part way through but as I said, it is because I've been slack and lost the photos (hence a thread on ausmini) and because this car already had a heap of work done to it before I bought it.

Through the week last week I decided to knock up an alternator bracket (the bit that bolts to the block). I was most of the way through it when I binned it and started over because I didn't like the 'on the fly design' I'd done.

Yesterday I moved off onto this:

Got in AutoCAD and knocked up a swarve looking design to follow (I love AutoCAD). Printed the bracket out 1:1, had one done that I quickly dimensioned up (so I could use as a reference) and the other was blank so I could mill around it. This seems to be a slightly unconventional way of doing things but it seems to have worked well for something that isn't totally dimension critical.
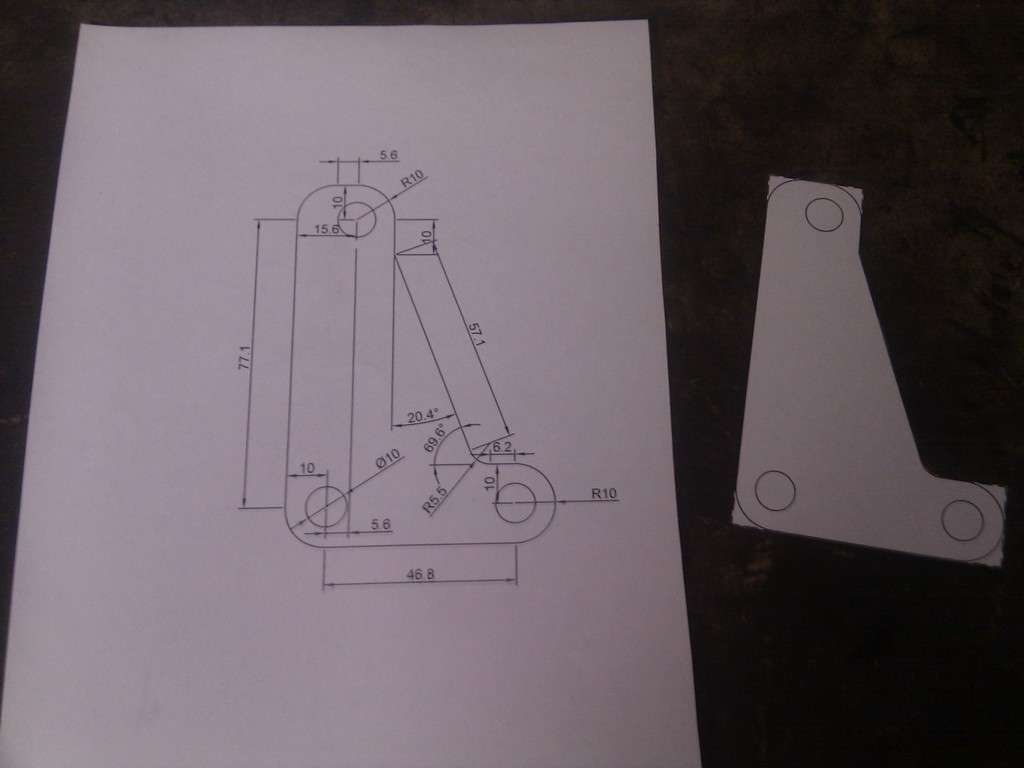
Image

Cut out to stick onto the piece of metal (the holes were reasonably well positioned over the holes in the engine block so that's a good sign):
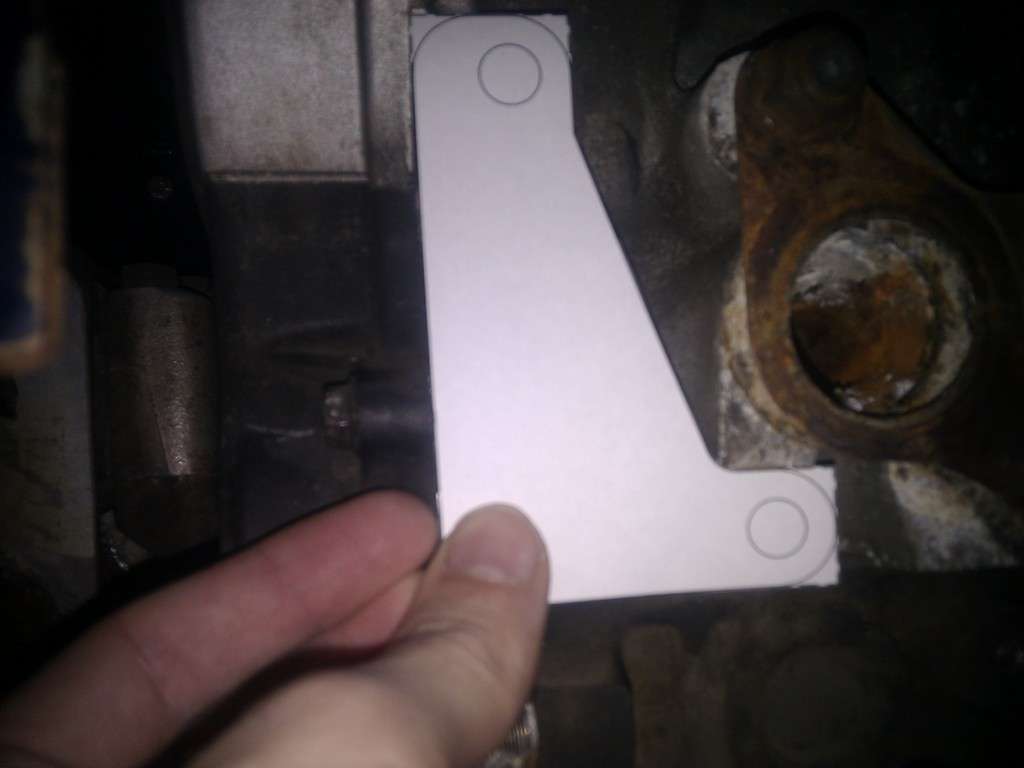
Image

Grabbed some 75mm wide, 6mm thick flat bar and squared off the end in the mill:
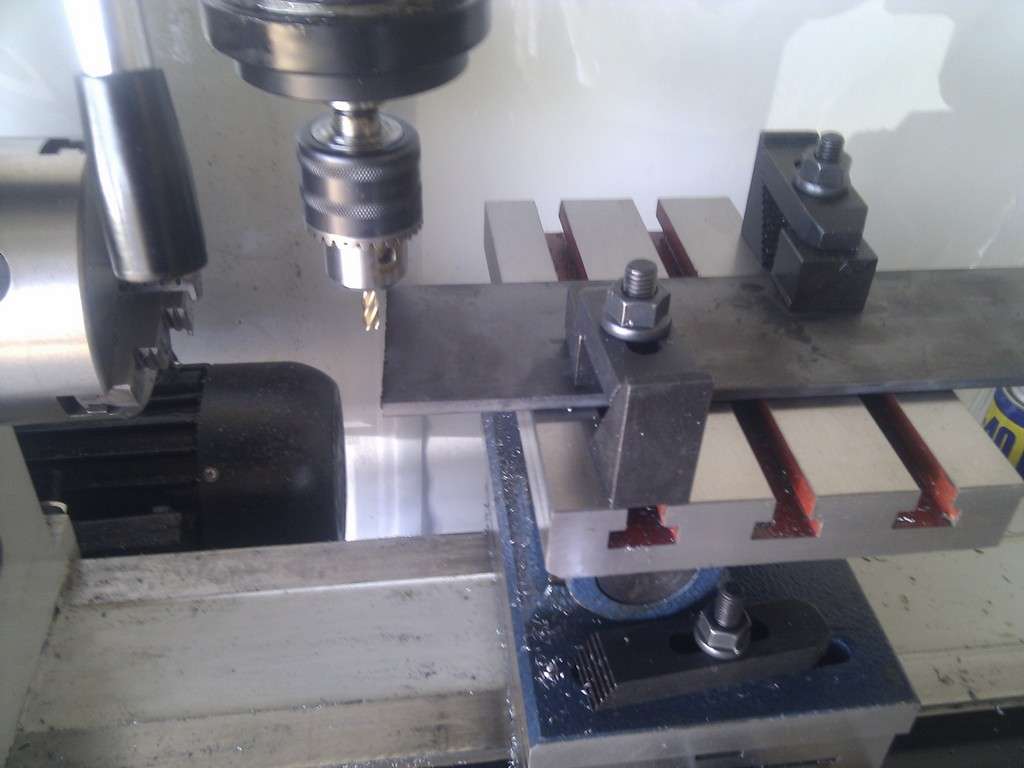
Image

Cut a piece that was slightly too big, sprayed it with contact adhesive and stuck the printed out bit on there.
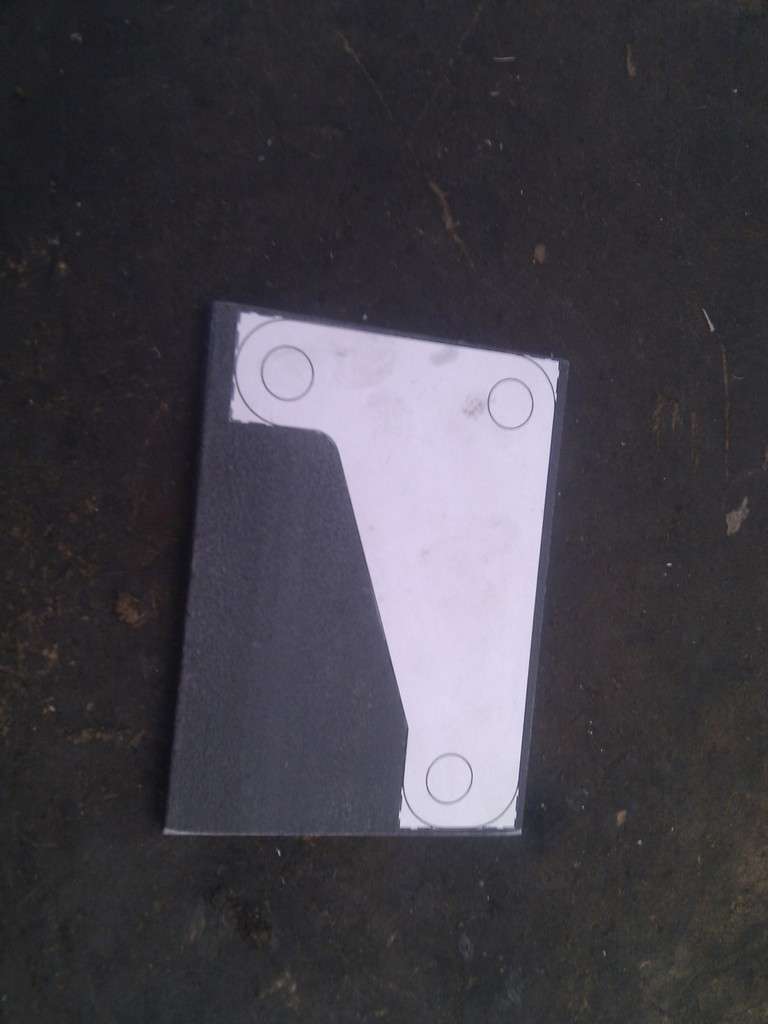
Image

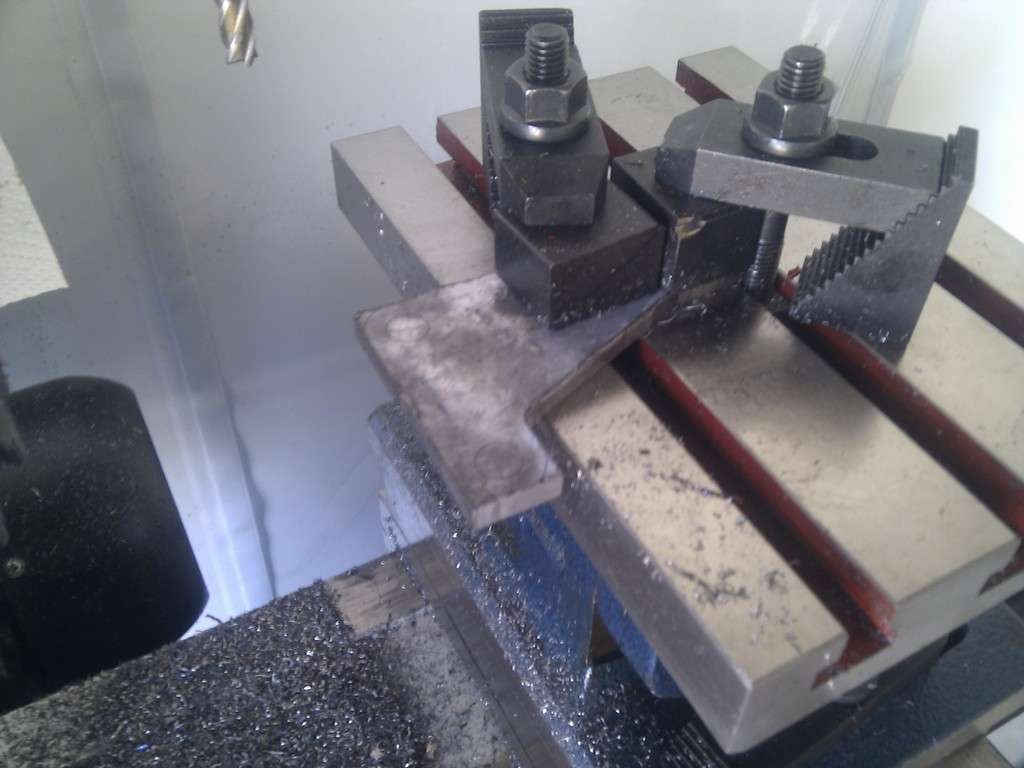
Bolt it down and start removing metal!
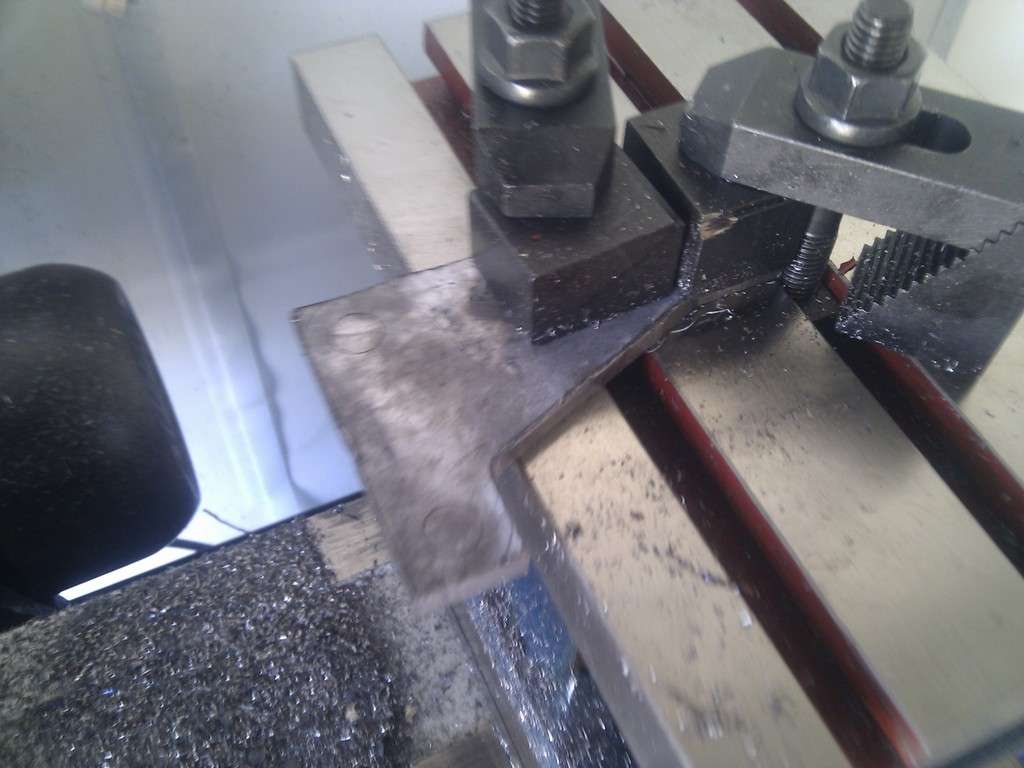
Image
Image

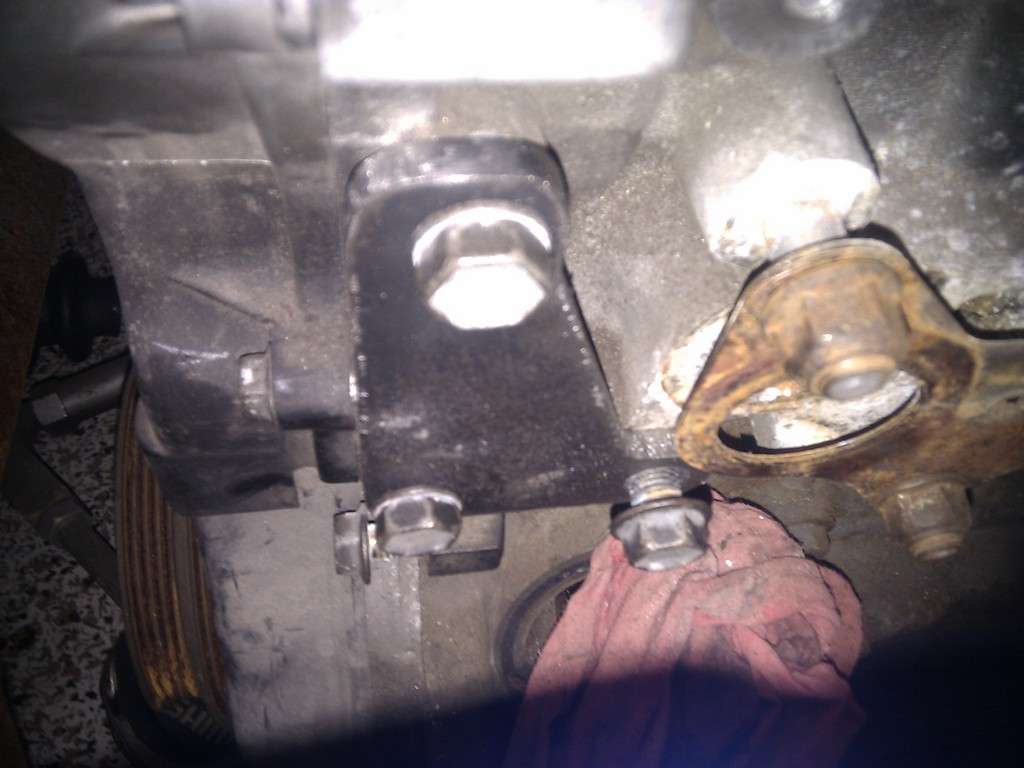
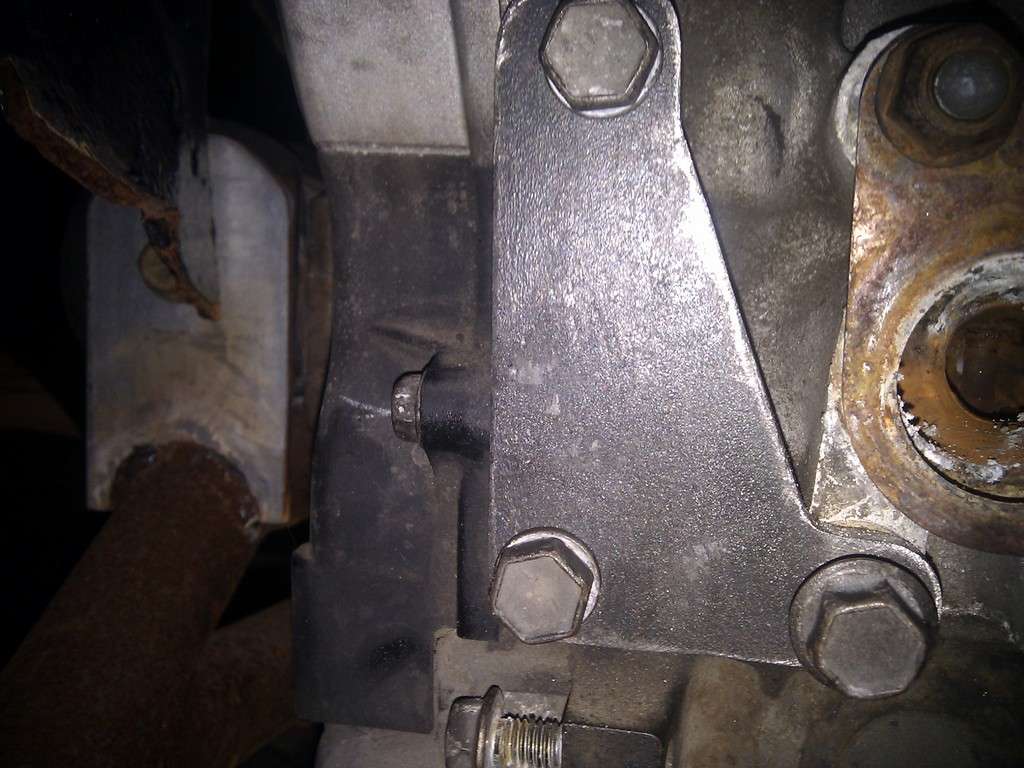
After all that was done it ended up fitting pretty well (I must've mis measured but I had to slot one of the mounting holes 2.5mm :evil: ).
Image
Image

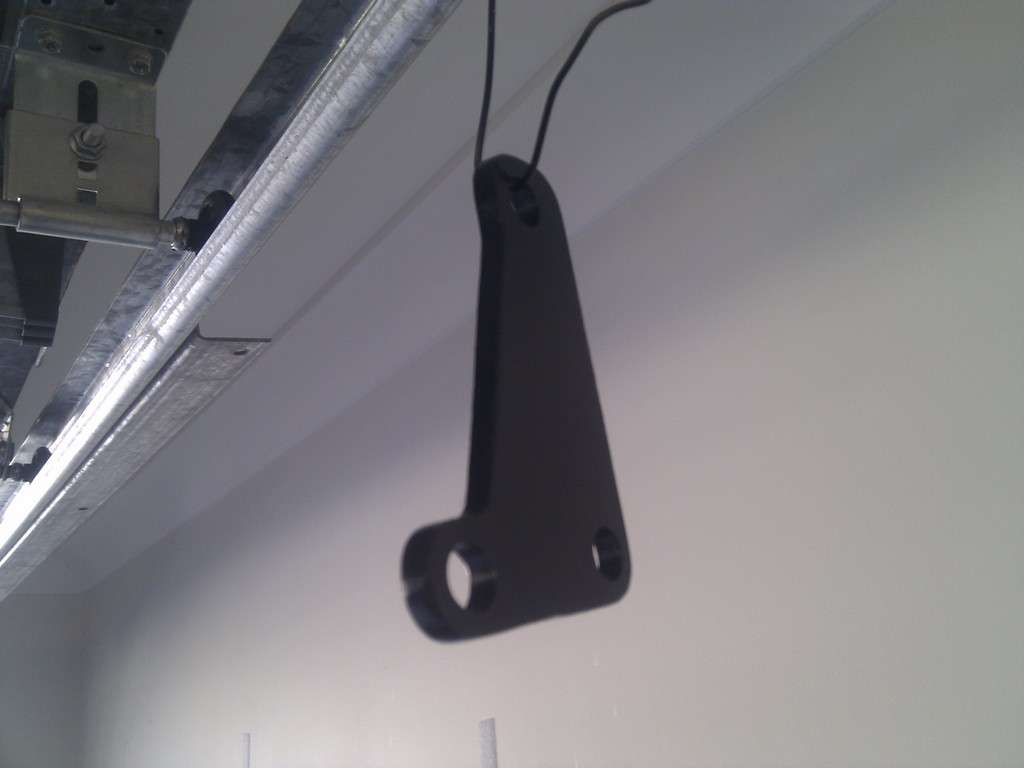
Pretty good I think. Better than the first and turned out better than what I could chuck out with an angle grinder!
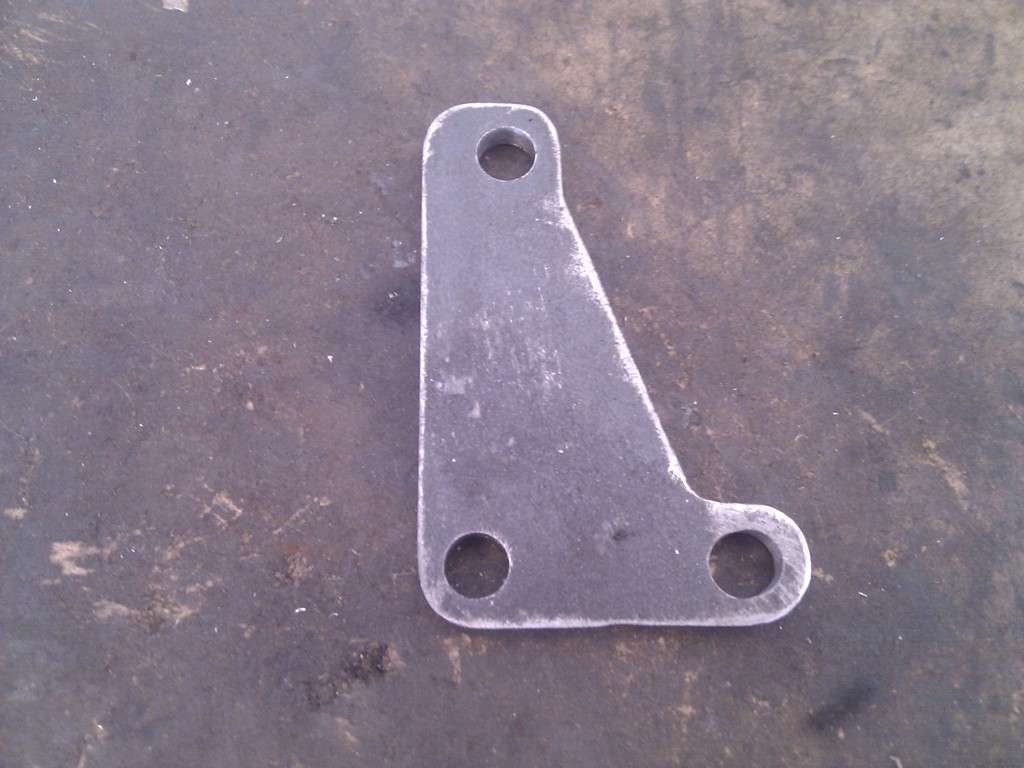
Image
Image
Image

Recently I have also de-rusted the front calipers for it using electrolysis (currently off getting sandblasted for nix).

Once I get my camera working properly I'll post up some more piccies.

Comments / constructive criticism welcome. Also, comments periodically to keep me motivated would be awesome too :D

_________________
"In two years time your car will be like a lady's clothes, out of date, my car will still be in fashion when I am dead" - Sir Alec speaking to Pininfarina


Last edited by 1018cc on Sun Oct 30, 2022 7:58 am, edited 20 times in total.

Top
 Profile  
 
 Post subject:
PostPosted: Mon Oct 08, 2012 1:55 pm 
Offline
1275cc
1275cc
User avatar

Joined: Fri Jun 17, 2005 10:31 am
Posts: 3183
Location: Burpengary, Queensland - Home of Tricky Performance Engineering
So that is where Hefty ended up!!!

Go for it Nick!

Cheers,
Tricky

_________________
"Not Speeding Officer..........Qualifying"


Top
 Profile  
 
 Post subject:
PostPosted: Mon Oct 08, 2012 2:21 pm 
Offline
1275cc
1275cc
User avatar

Joined: Thu Jun 03, 2004 2:56 pm
Posts: 3981
Location: Brisbane
Did you keep that trailer Nick?

_________________
But he's thriving and striving and hugging the turns.


Top
 Profile  
 
 Post subject:
PostPosted: Mon Oct 08, 2012 6:14 pm 
Offline
Give Ash some flowers Nick .
User avatar

Joined: Wed Aug 09, 2006 1:22 pm
Posts: 10149
Location: Toowoomba Region, QLD
I thought you knew Tricky? Or at least I thought I sent you a PM. I'll probably ask you a few things as they come along.

JC, yeah I did keep the trailer. The only difference since you had it is that the ramps have been majorly beefed up. I don't know if you remember but they had a 'whoop' in them from loading cars. I doubled the thickness on the main bearers and the ramps have stayed totally flat since.

_________________
"In two years time your car will be like a lady's clothes, out of date, my car will still be in fashion when I am dead" - Sir Alec speaking to Pininfarina


Top
 Profile  
 
 Post subject:
PostPosted: Tue Oct 09, 2012 9:48 am 
Offline
1275cc
1275cc
User avatar

Joined: Fri Jun 17, 2005 10:31 am
Posts: 3183
Location: Burpengary, Queensland - Home of Tricky Performance Engineering
Hi Nick,

Yes you probably did, but I have so much going on at the moment I probably forgot all about it.

Feel free to PM anytime mate!! Best of luck.

Cheers,
Tricky!

_________________
"Not Speeding Officer..........Qualifying"


Top
 Profile  
 
 Post subject:
PostPosted: Tue Oct 09, 2012 9:52 pm 
Offline
Give Ash some flowers Nick .
User avatar

Joined: Wed Aug 09, 2006 1:22 pm
Posts: 10149
Location: Toowoomba Region, QLD
Another little update.

Managed to do a bit tonight. Started on making the bracket to hold the brake booster onto the fire wall.

Drew something up in CAD:
Image

Cut it out on the mill:
Image

Eventually I want it to end up looking like this:
Image

I still need to add some hot glue to the area and grind it all flat.
Turned out reasonably close!
Image

_________________
"In two years time your car will be like a lady's clothes, out of date, my car will still be in fashion when I am dead" - Sir Alec speaking to Pininfarina


Top
 Profile  
 
 Post subject:
PostPosted: Sun Oct 21, 2012 7:37 pm 
Offline
Give Ash some flowers Nick .
User avatar

Joined: Wed Aug 09, 2006 1:22 pm
Posts: 10149
Location: Toowoomba Region, QLD
Over the weekend I managed to spend a bit of time in the garage.

As previously mentioned I used electrolysis to de-rust the calipers and then I sent them over to my FIL to give them a quick sand blast too in a couple of little areas. He even painted them up in rust preventative for me.

These are the calipers as I got them back:
Image
Image

There were a couple of bleed nipples that had been sheared off right at the base and were broken off before I got them. These needed some saving as I thought the electrolysis would've loosened them up a bit.

So I mounted them in the drill press (mill) and used a 1/4 slot mill to mill the face down level:
Image

Then I drilled it out carefully while trying not to drill too far through:
Image

I then ran an M7x1 tap through it as the bits still wouldn't even separate once I drilled it to 6mm. Faked up this set up to keep the tap straight.
Image

All cleaned up:
Image

With one of the old bleed nipples screwed in:
Image

Although it doesn't look like much it still took a while as the mounting and unmounting process takes a bit. Plus, as I didn't want to drill too far through I kept on checking on the progress through the hole. I ended up having to stick a 2mm drill bit through one of the bleeder holes after I drilled out the stuck bleed nipple. I think it has been quite some time since these actually functioned.

I hope to get these painted and assembled through the week. I've been told by the minister for war and finance that she wants gloss black (of course it is a colour that I don't have 'in stock') so that it my main hold up in progress on these.

_________________
"In two years time your car will be like a lady's clothes, out of date, my car will still be in fashion when I am dead" - Sir Alec speaking to Pininfarina


Top
 Profile  
 
 Post subject:
PostPosted: Mon Oct 22, 2012 6:47 am 
Offline
1275cc
1275cc
User avatar

Joined: Fri Jun 17, 2005 10:31 am
Posts: 3183
Location: Burpengary, Queensland - Home of Tricky Performance Engineering
I like your engineered approach Nick, keep up the good work!!

_________________
"Not Speeding Officer..........Qualifying"


Top
 Profile  
 
 Post subject:
PostPosted: Tue Oct 23, 2012 8:46 pm 
Offline
Give Ash some flowers Nick .
User avatar

Joined: Wed Aug 09, 2006 1:22 pm
Posts: 10149
Location: Toowoomba Region, QLD
Thanks Tricky :)

Managed to get out and do a bit more last night and tonight.

Continued with the brake calipers.

Masked off the important bits:
Image

Stuck hoses and bleed nipples in the other open bits:
Image

Sprayed some gloss black caliper paint on them and hung them up to dry:
Image
Image

After they'd dried:
Image

Peeled the tape off:
Image
Image
Image

Cleaned them up a bit and fitted up the seals, retainers and pistons (new stainless steel ones):
Image
Image
Image
Image

They turned out very sexy looking. It's amazing how good you feel after doing brakes up especially when they look like that. 8)

I only painted the other caliper tonight so I will give it a full 24 hours to dry before assembly. Hopefully more can be done tomorrow night.

_________________
"In two years time your car will be like a lady's clothes, out of date, my car will still be in fashion when I am dead" - Sir Alec speaking to Pininfarina


Top
 Profile  
 
PostPosted: Wed Oct 09, 2013 8:23 am 
Offline
Give Ash some flowers Nick .
User avatar

Joined: Wed Aug 09, 2006 1:22 pm
Posts: 10149
Location: Toowoomba Region, QLD
Time for an update!!!!

Well a lot has been happening on the car of late and I thought it should be about time that I update this thread!

A fair bit of time passed where time with the car had dropped off caused by working away from home through. As I am usually on ausmini, I saw a post by Tricky that he was opening his own business doing conversions. I spoke to the wife who ok'd the car getting done by Tricky (a lot of trust was placed in my judgement of Tricky by her) and at the beginning of August, the car was handed over to Tricky! I didn't have any problems with Tricky working on the car as I had met him before and seen El Gato in person so I knew the quality of the work would not be an issue.

Anyway, back to mid August:

Here are a few general shots of the subframe. The frame was put in the car bare at some stage and had a thick layer of surface rust and the gear shift mechanism needed further modifying:
Image

Image
^Tricky's plan was to redo the engine mounts and fabricate some new inner guards.

Image
^Rusty subframe

Image
^I sent the car down to Tricky's on a set of 10's but the car was always going to have Metro Turbo brakes so while looking around for a new set of wheels, Tricky put the wheels from El Gato on to get a feel for size of a spare.

Image
^On there to get more of an idea of diameter (even though these are 13's and I will be running 12's).

Image
^On the lift

Image
Image
^Tricky doing a trial fit of where he is going to put the alternator - I found a really small one so rather than doing the usual turn it around and put it in the wheel well, we think it would be better in the engine bay.

Image
^Fuel line needs redoing

Image
^ At one stage I think I took the rear wheel off of this side and the brake pipe was rusted solid so the line broke. Needs redoing / derusting like a lot of the things on this car.

Image
^The subframe required further modifications and updating from this point. There wasn't enough clearance here. I thought the frame was mostly right to go but you'll see in later pics Tricky basically redesigned the whole thing and it doesn't look !like a traditional subframe anymore!

Image

Image
^I've got some new wheels for it and this is the offset mock up for where they'd come out to.

More updates to come shortly until we are up to now! :D Oh and a big shout out to Tricky as with out him, none of this would've happened!

_________________
"In two years time your car will be like a lady's clothes, out of date, my car will still be in fashion when I am dead" - Sir Alec speaking to Pininfarina


Top
 Profile  
 
PostPosted: Wed Oct 09, 2013 8:47 am 
Offline
Give Ash some flowers Nick .
User avatar

Joined: Wed Aug 09, 2006 1:22 pm
Posts: 10149
Location: Toowoomba Region, QLD
Next update:

Tricky pulled the subframes out of the car:
Image
^As you can see, those flares aren't sticking around.
Image
^Doesn't look anything like this anymore.

....and noticed some rust present underneath to be fixed up:
Image
^rear beaver panel seam
Image
^front of rear subframe mounts

Tricky looked at turbo positioning. Even now, he doesn't know where it will go so it may go in a near stock position but with a custom exhaust manifold or it will be relocated. It has a new high flow turbo and uprated TMIC from speedvision - hence why the turbo looks new.

Pics of turbo position:
Image
^Tight squeeze!
Image
^No actuator
Image
^With actuator (don't want to modify the grille so this won't be happening)
Image
Image
Image
Image
^Some of the above don't line up with the aftermarket EM for a reason, may be going down the custom EM route - time will tell.

Image
Image
^Car with no subframes

Image
^Paperweight out and sitting on bench (you'll see why soon).

This is still early days of (Tricky) pulling things apart and I'll move onto the next chapter shortly!

_________________
"In two years time your car will be like a lady's clothes, out of date, my car will still be in fashion when I am dead" - Sir Alec speaking to Pininfarina


Top
 Profile  
 
PostPosted: Wed Oct 09, 2013 9:02 am 
Offline
Give Ash some flowers Nick .
User avatar

Joined: Wed Aug 09, 2006 1:22 pm
Posts: 10149
Location: Toowoomba Region, QLD
Another update!

Tricky revamped the subframe:
Image
^note much left of the frame that was in the car originally! This car had a MkII frame in it (I think) and this looks totally different to the other frames Tricky has done.
Image
Image
Image
^Repositioning the engine, almost starting from scratch again. Upon looking at it, Tricky thought that the engine position should be modified to give slightly more room for the turbo up front (due to limited space in the front of a roundy).

New front bar design - note the bottom bar now has a slight curve on it:
Image
Image
Image

New engine mount:
Image

That is all for now!

_________________
"In two years time your car will be like a lady's clothes, out of date, my car will still be in fashion when I am dead" - Sir Alec speaking to Pininfarina


Top
 Profile  
 
PostPosted: Wed Oct 09, 2013 9:30 am 
Offline
Give Ash some flowers Nick .
User avatar

Joined: Wed Aug 09, 2006 1:22 pm
Posts: 10149
Location: Toowoomba Region, QLD
Last update for now and there will be more later this arvo (hopefully).

Subframe finished and ready to be powder coated:
Image
Image
Image
^It is a really nice looking subframe compared to some that I've seen. I'm very happy with it and Tricky has done an excellent job. Seriously one of the best looking subframes I've seen and I like the extra gusseting around the bends. Ultimately it isn't up to me to like it the main thing is the engineer likes it!

It was around this time that I almost bought a Quaife diff for the car but then Tricky sent through the following pics to me because he noticed (and I had previously noticed) some rust in one of the exhaust runners when taking the EM off the engine. Pic speak for themselves:

Image
Image
^Hint of what lies within
Image
^This is what was in the sump - sorry again about your floor Tricky!
Image
Image
Image
Image
Image
Image

As you can probably imagine, I was gutted! This conversation went back and forward in emails for a bit and Tricky took the engine to an engine reconditioners and the bores cleaned up ok at 75mm (stock 74mm). So there is a new set of forged pistons and rods for it and the engine will be getting a complete rebuild with all the good gear. The head is beyond useable and Tricky has sourced another head off of another 4EFTE as it would take too much work to bring the head back to life. We suspect that the engine has sat outside at some point with the inlet manifold hose pointing up slightly and this has let rain into the engine and it has stuffed it. As with most of these front cut engines, it only had 98,xxxkm's on it (I think, was less than 100k km).

Luckily the gearbox and flywheel are ok!
Image
Image
Image

The engine will be getting a brand new HD Exedy clutch.

So after finding out about needing an engine rebuild (glad Tricky found it now that when it was already in the car) I decided not to buy a slippery diff for it and spend money on making the engine work instead. I was hoping just to risk it and see how the engine performed after just changing the timing belt and fluids. Tricky noticed something wrong when he couldn't turn the engine over with a breaker bar on the front pulley. That was something I never thought to try and do. Needless to say, he had a struggle getting everything apart after finding it like this!

So, this is where the story ends for now. I have a few things to do but at this stage it has taken the build of the car through until the end of August. While working on the car Tricky has also been setting his shed up (which looks fantastic and should end up as a great set up) so he has been cruising along quite nicely progress wise.

_________________
"In two years time your car will be like a lady's clothes, out of date, my car will still be in fashion when I am dead" - Sir Alec speaking to Pininfarina


Top
 Profile  
 
PostPosted: Wed Oct 09, 2013 11:08 am 
Offline
Give Ash some flowers Nick .
User avatar

Joined: Wed Aug 09, 2006 1:22 pm
Posts: 10149
Location: Toowoomba Region, QLD
After receiving the pictures in the last post, a few days later Tricky followed up with these photos from Medham Engineering:

Image
Image
Image
Image
The bores now look better than they did before! At this stage, they have not been cleaned up to final size as Tricky got them to do the worst bore out to 74.xxmm and it appeared to clean up ok so these have been left too small for the pistons as we were waiting for the pistons to come from OS for the engine.

Next up we have the rear boot space pretty much complete. This features a fuel filter, fuel pump, washer bottle and an electrical fuse box / connection point:
Image
Image
Image

The car is also getting power windows (Tricky pulled these right down, lubed everything and reassembled with all new rubbers etc as the ones that were on there weren't good enough to be used). I think he has also managed to do a neater / better job than what he did in El Gato in the first place (where I first saw good example photos of how to use a Spal kit):
Image
Image
Image

JC was initially going to do a Swift GTI conversion with this car and as such, no hole was cut in the bonnet for a scoop. As the plan has obviously changed to a 4EFTE conversion, and I am retaining the top mount, it needs a hole cut so Tricky managed to find a bonnet from a Starlet GT and set to work making it look at home on a mini bonnet:
Image
Image
Image
Image
Image
Image
Image
Image
Image
Image

A lot of stuff was also happening in the background but I know how people like pictures so I am trying to keep it to the pics! In the same time the rear swingarms were also rebuilt, fuel lines completed and the rear beaver panel fixed up (rust).

_________________
"In two years time your car will be like a lady's clothes, out of date, my car will still be in fashion when I am dead" - Sir Alec speaking to Pininfarina


Top
 Profile  
 
PostPosted: Wed Oct 09, 2013 11:31 am 
Offline
Give Ash some flowers Nick .
User avatar

Joined: Wed Aug 09, 2006 1:22 pm
Posts: 10149
Location: Toowoomba Region, QLD
Hey guys, another update while I am on a roll:

Tricky managed to source some replacement bits for the engine from another 4EFTE that just wouldn't clean up that nice on mine due to the extended time in wet weather:

Image
^New Inlet Manifold

Image
^New Cams and head beside old yukky cams

Image
^New rocker cover that should clean up nicer than the one I had

Onto the bonnet: mostly done and in high build primer:

Image
Image
Image
Image
Image
Image

As you can see, Tricky is a master of all trades and he has done a fantastic job of the bonnet. When he finishes all the body work on the car I'll be sure to post up some pics of how his paint turns out. I am really pleased with how everything has come together so far and would totally recommend people use him for their conversions!

_________________
"In two years time your car will be like a lady's clothes, out of date, my car will still be in fashion when I am dead" - Sir Alec speaking to Pininfarina


Top
 Profile  
 
Display posts from previous:  Sort by  
Post new topic Reply to topic  [ 89 posts ]  Go to page 1, 2, 3, 4, 5, 6  Next

All times are UTC + 10 hours


Who is online

Users browsing this forum: No registered users and 31 guests


You cannot post new topics in this forum
You cannot reply to topics in this forum
You cannot edit your posts in this forum
You cannot delete your posts in this forum
You cannot post attachments in this forum

Jump to:  

© 2016 Ausmini. All garage work involves equal measures of enthusiasm, ingenuity and a fair degree of irresponsibility.