FITTING 1/4 VENT WINDOW SEALS - Submitted by 'J_A_M'
Many people will tell you that fitting 1/4 vent window seals is one of the worst jobs yo can do on a Mini. THEY ARE RIGHT!! The first side took me 3 hours! The second side only took 45 minutes.
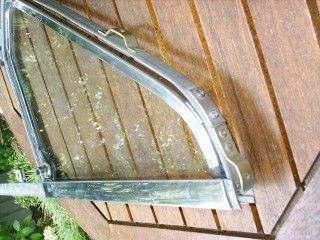
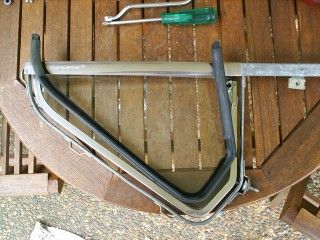
This job cannot be completed with the 1/4 vent window assembly fitted to the door, so the first step will be to remove the whole assembly from the door. Pull the old rubber seal out the window assembly, and drill out the 4 rivets holding the upright seal and remove this.
Remove the 2 screws from the top of the frame assembly, holding the hinge to the window, and remove the nyloc nut from the bottom of the window. Remove the window from the frame. It might need a gentle tap to separate it at the lower pivot point.
Expect to pay $60 for the long seal, and $12 for the upright seal.
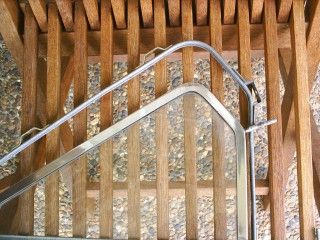
If you are doing both sides, ensure the correct seal is going into the correct frame (they are left and right handed). Lay the seal on the frame and picture in your mind how the window opens. Choose your seal accordingly.
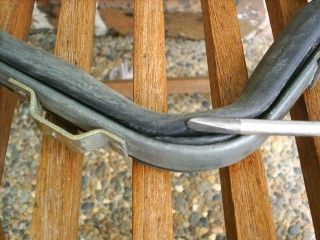
The next part can get tricky. As previously stated, it took 3 hours to figure this out, as no repair manual tells you how to do this. It is hard to describe this procedure, so I apologise if it is vague.
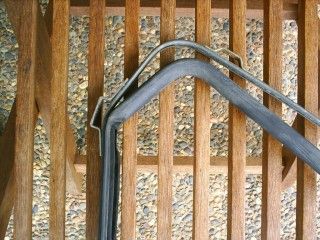
Start inserting your seal at the pivot point and work on the short length. Push one side into the groove with your finger, and use a flat blade screwdriver to push the other side of the seal into the securing groove. When you reach the end, you will need to trim a small amount off, as I found my seals longer than necessary. With the short length secured, start at the other end, and insert the seal into the groove in the same fashion, finishing at the window pivot point, where you previously started from.
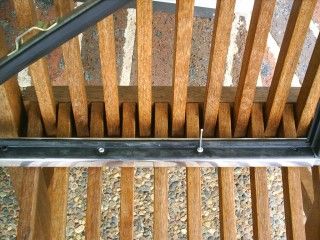
With the long seal fitted, it's time to fasten the short upright seal. This one is a piece of cake, in comparison. The original seal comes with 4 split rivets. I attempted to fit the seal with these, but found them useless. I used pop rivets instead, which held the seal very well, but didn't pull through, as the seal has metal inserts to prevent this.

With both seals fitted, reinstall your 1/4 vent window, which is a reversal of the removal procedure.
This repair will take some time to complete, but the end result will be a nicely sealed window, from moisture AND wind!
note: this guide was originally on
http://www.justanothermini.com, but this website has long since been shut down