1) This is the easiest part and ANYONE that owns a car and has a licence can do it. Take the car for a drive to warm up the oil a bit.
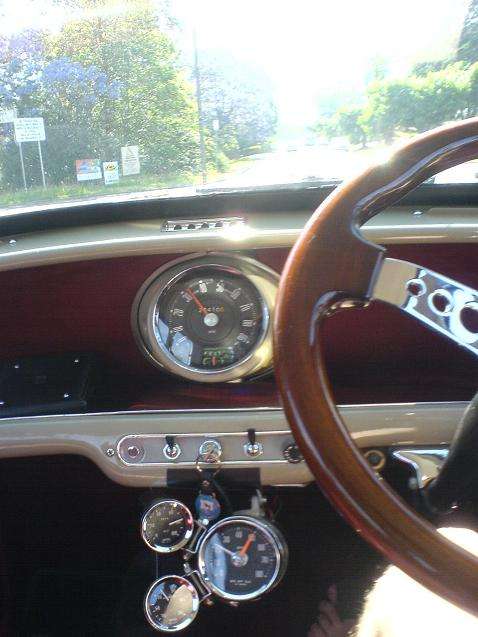
2) Find somewhere nice to drive to and admire the view

This is a great mini road, this is as straight as it gets

You can see Table Top Mountain from here.

Looking down into the Lockyer Valley more (Table Top is just off to the right of the shot).
3) Return home, try not to make the trip too long, you don’t want so much heat in the sump that you
burn yourself. For instance, My car usually idles about 22-23psi so I only let the idling pressure get to
30psi. That way the oil isn’t too hot. It can get A LOT hotter than that, 15psi just off the highway on a
hot day. I wouldn’t be able to do an oil change then, I would burn my hands.
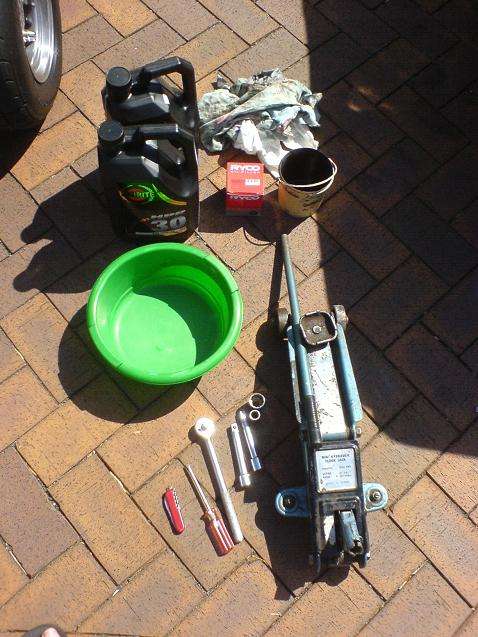
4) Things you will need:
• A jack (if your car is really low like mine)
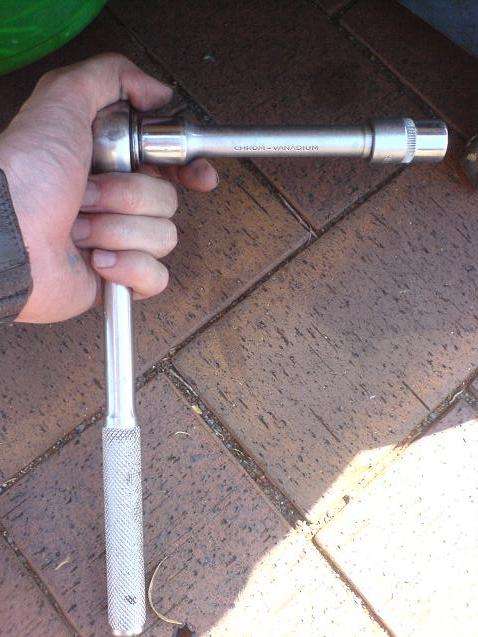
• A ratchet handle (1/2” drive – it was the first one I picked up)
• 1 x 9/16 socket (I use ½” drive because that’s what my ratchet handle is)
• 1 x 15/16 socket (again, ½” drive)
• AT LEAST 1 x socket extension bit (you may decide you need two, I only use one to do my car –
again, in ½” drive)
• Shallow bucket to catch the oil (make sure it is large enough to hold at least 5L of oil)
• Petrol (or degreaser)
• Phillips head screwdriver
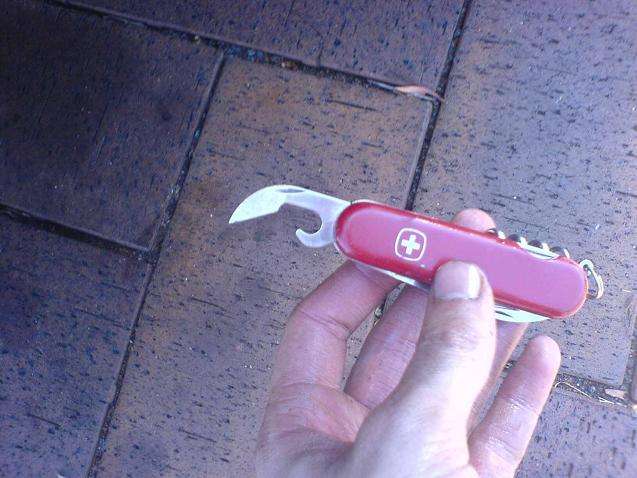
• Pocket Knife (not totally necessary)
• Fresh Oil (need at least 5L) ($18 - $35)
• Old oil bottle for a quick change over (so you can pour the old oil in while it is still nice and warm)
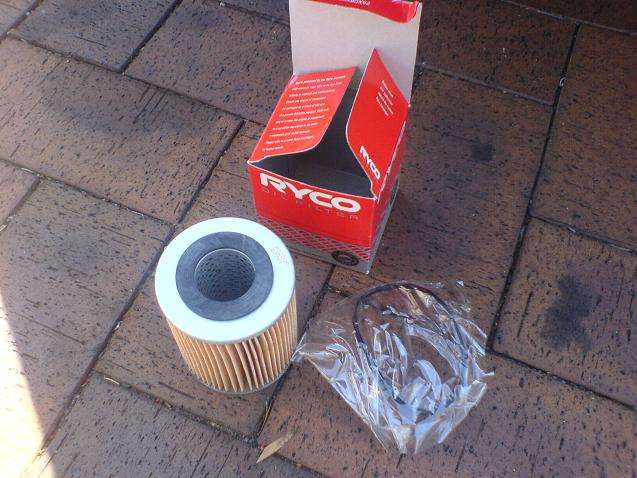
• An oil filter to suit your car (I use a Ryco R2200P – about $11) • Some old rags
• 2 x sets of wheel chocks (not pictured below)
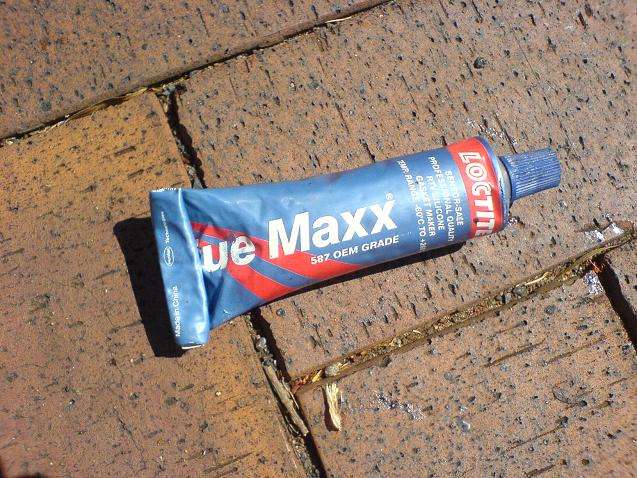
• Gasket Goo (I use Loctite Blue Maxx (I think it’s 587))
• You will also need some Gafmo Safety boots:

5) Safety first! Chock both the rear wheels front and rear on both sides. Also, do the oil change on nice
level ground.
6) Remove the Phillips headed self tapping screws that hold the grille on.
7) Put the grille and screws off to the side, somewhere safe where there is no chance of you
accidentally standing on it and stuffing it.

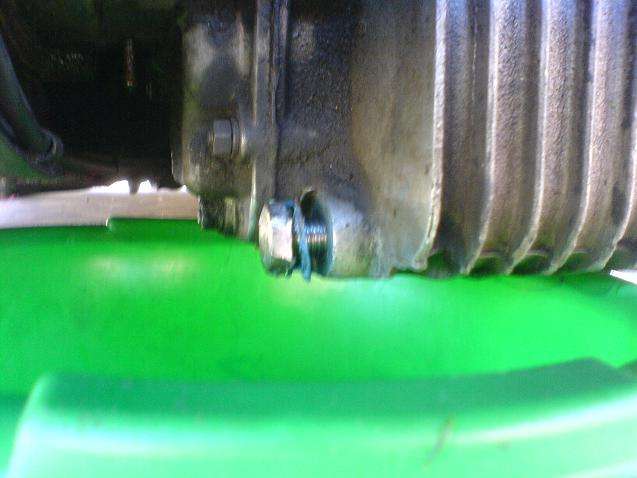
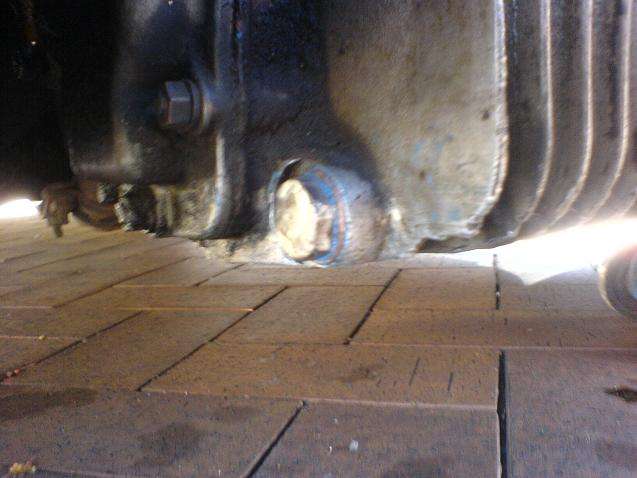
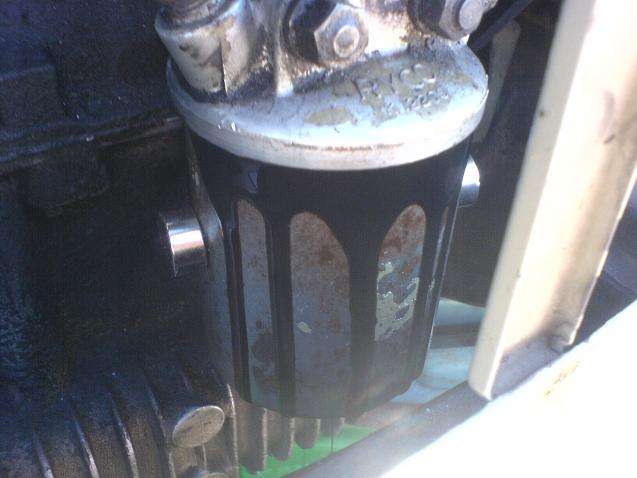
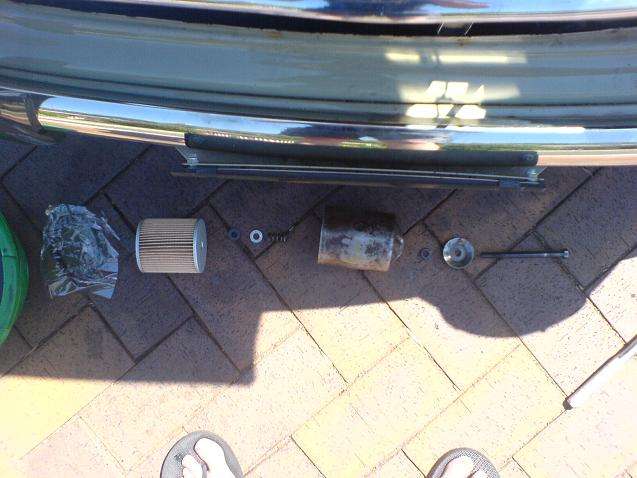
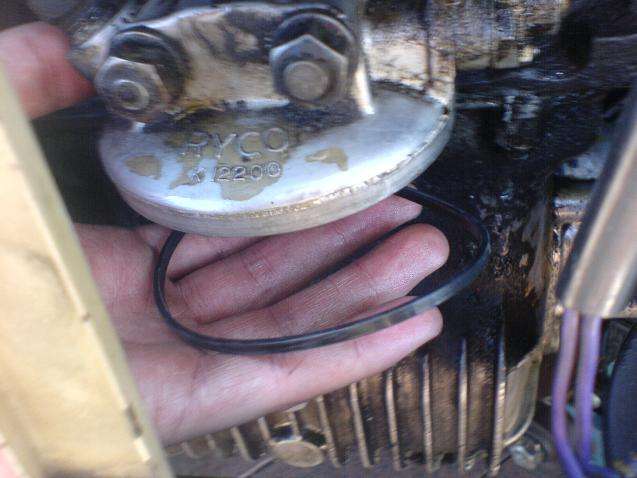
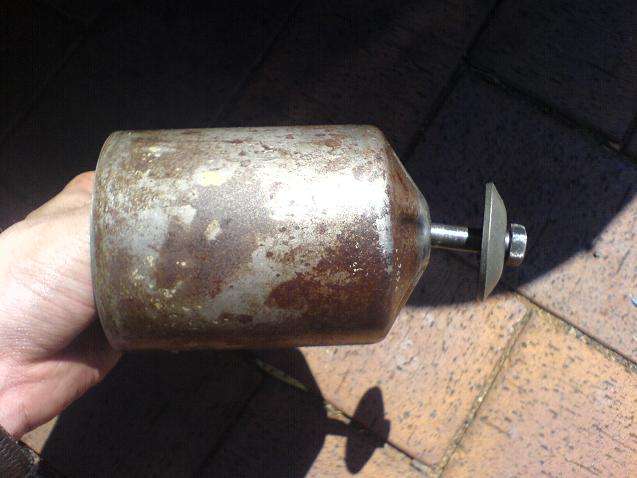
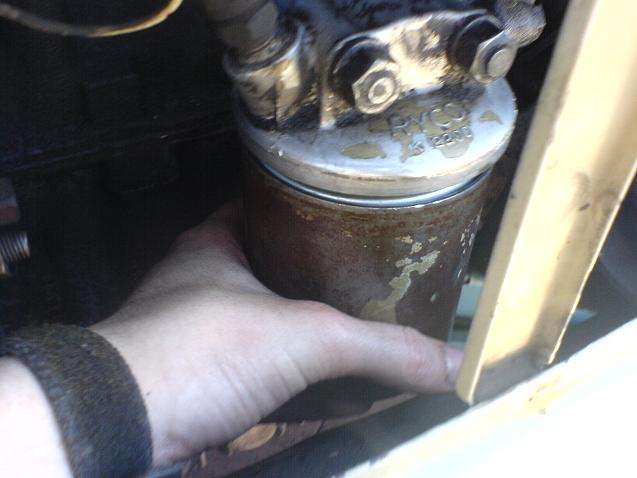
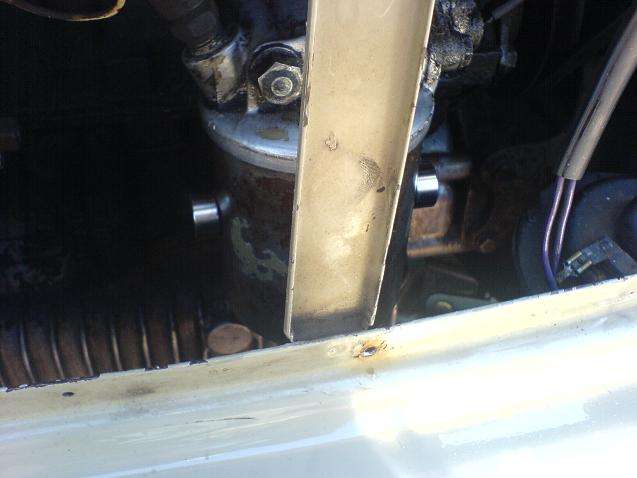
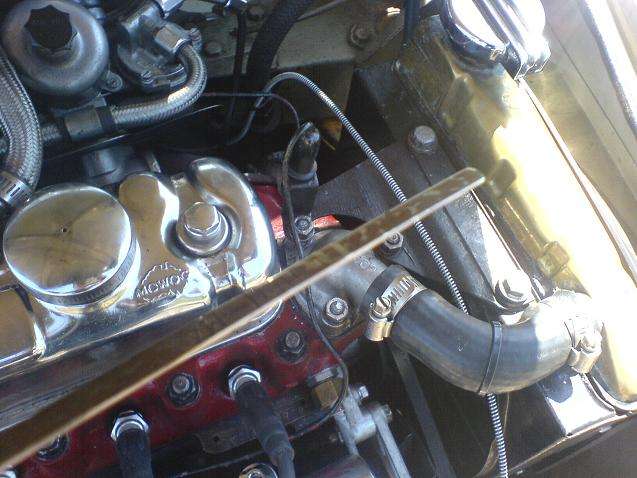
8 ) This is the oil filter that you are looking for. If you have a Cooper S the strengthing bar will be on a
45° angle starting at the top towards the centre of the grille area going down to the passenger side
of the car at the bottom.
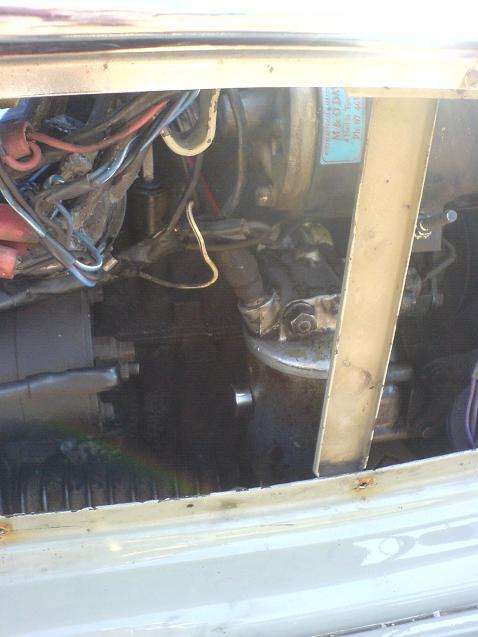
My oil filter does have two rare earth magnets on it to help get all the little bits of metal that the oil
filter can’t actually trap. Chances are your filter will not have any magnets on it (shiny silver bit on
the left hand side).
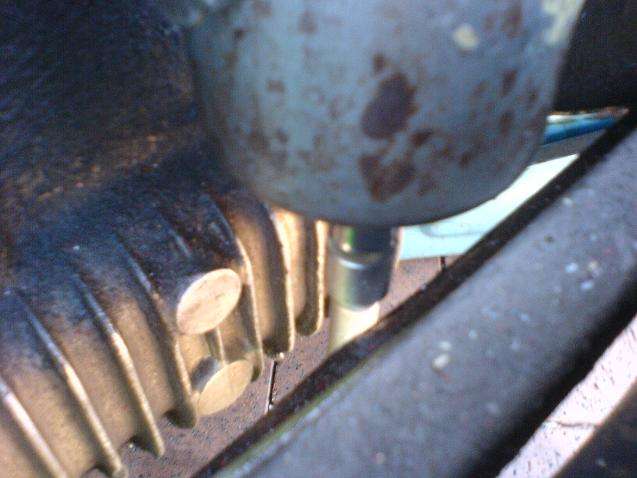
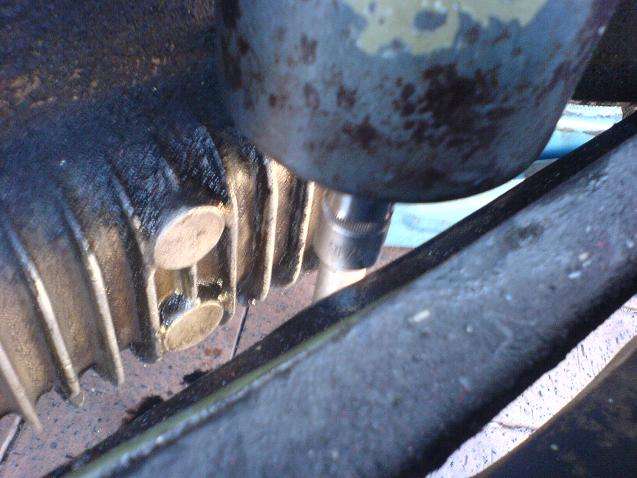
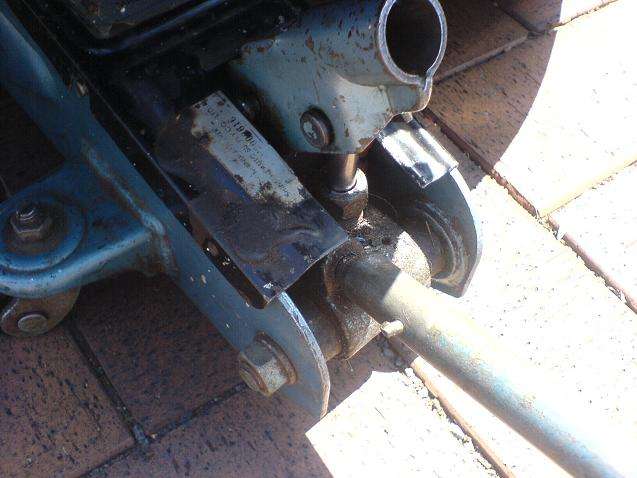
9) I also had a rare earth magnet on my sump plug for a couple of days. They are only new for me.
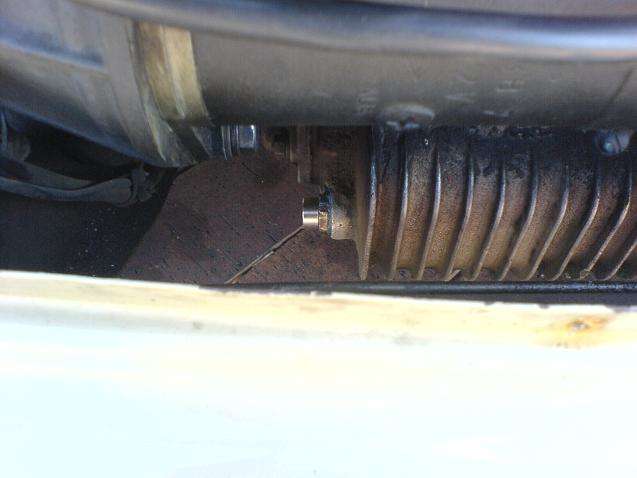
I will be putting this second one on the oil filter with the new oil this time. This also made it easier
for you guys to see where the sump plug is anyway so it all worked out.
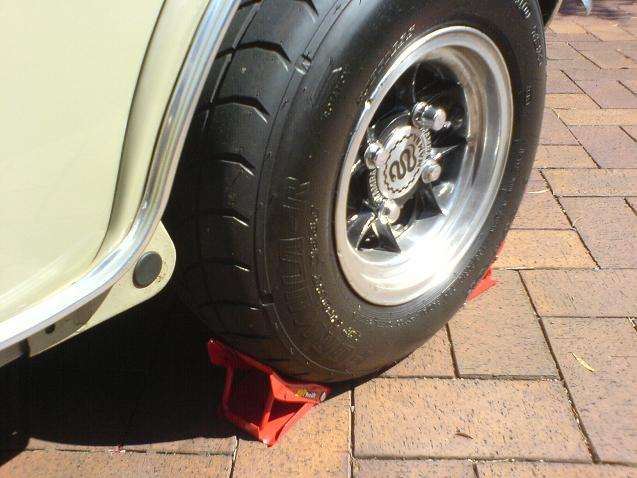
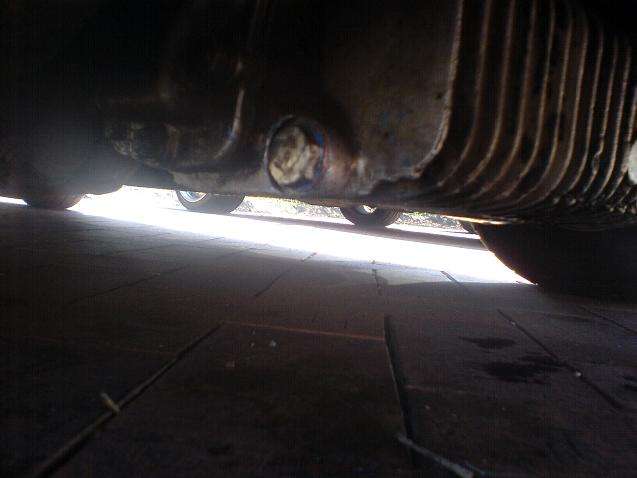
10) Jack the car up about 10 – 20mm so that you can actually fit your short bucket underneath the car. If
your car is of normal height, you will not need to use a jack to do an oil change.
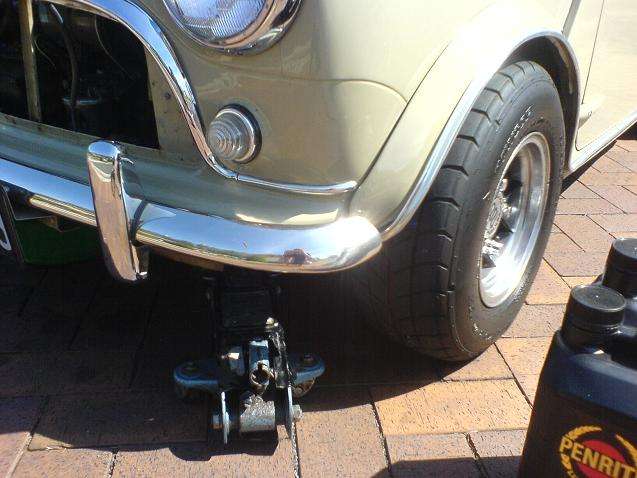
Note: That is only 2 finger’s worth of space between the tread on the tyre and the bottom of the
flare. I am not using jack stands because I will not be crawling under the car – if YOU are going to be
crawling under the car, please use jack stands. If my jack collapsed it would fall about 10mm from
that point.
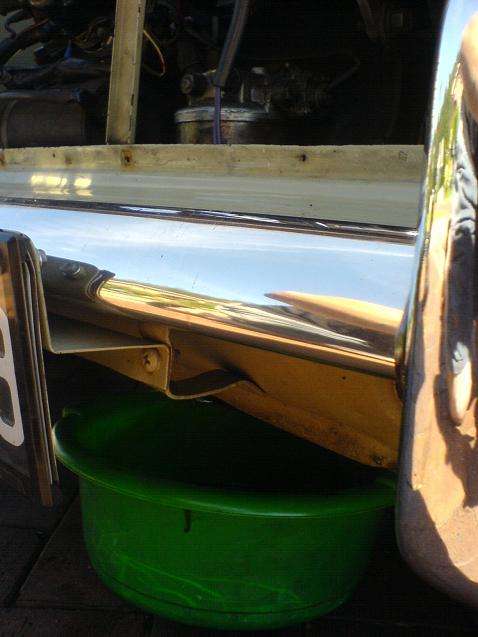
11) Make sure you have enough room to fit your bucket underneath the sump. I only make the car JUST
high enough to clear the bucket. If you are doing this outside it is a good idea to keep the sump
close to the bucket, once the stream of oil thins out it can get whipped up by the wind and spray
everywhere and make an even bigger mess.

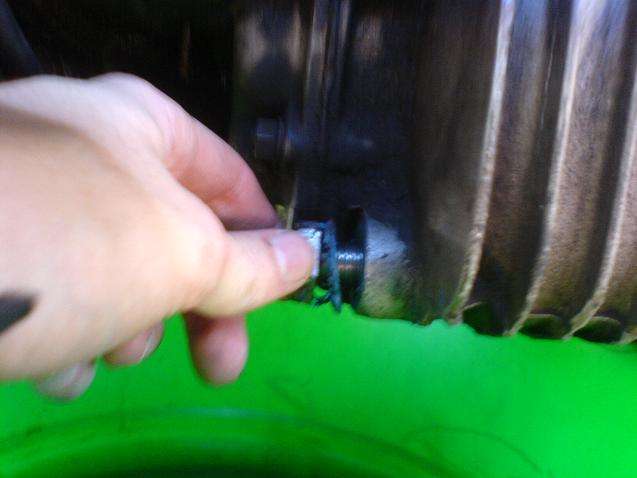
12) Grab you ratchet and 15/16
socket and start to undo the sump plug. I only undo it enough to be able
to undo it by hand. No oil should escape on you at this stage.
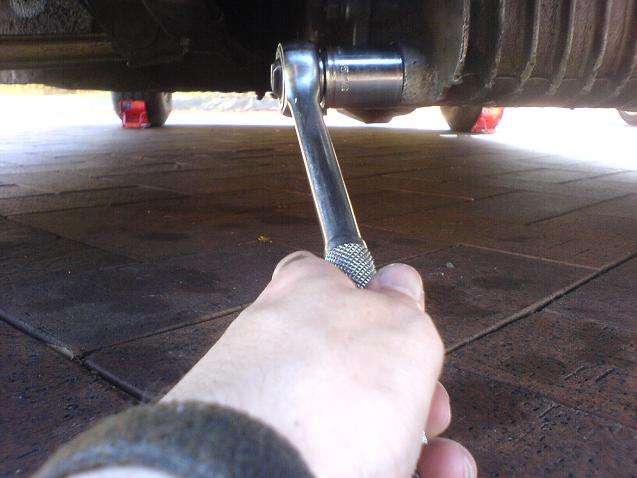
13) Start undoing the plug by hand.
I did the last oil change on this car so the plug was really easy to get off. You may have more of a
problem if someone who had no idea what they were doing has attacked your car before you.
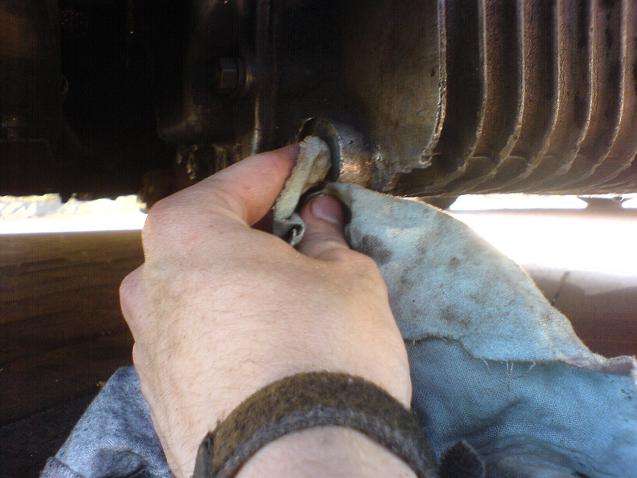
14) Push in on the plug while you are undoing it. It will help keep the oil from getting out and running all
over your hand.
15) Just as you feel it’s about to be able to be pulled away keep your arm (elbow and hand etc) as high
as it can go. Work fast, undo the plug the rest of the way and pull out and upwards from the hole.
Hopefully you shouldn’t get too oily and the oil should run straight into the bucket. Make sure the
bucket is under the plug once you start to undo it by hand.
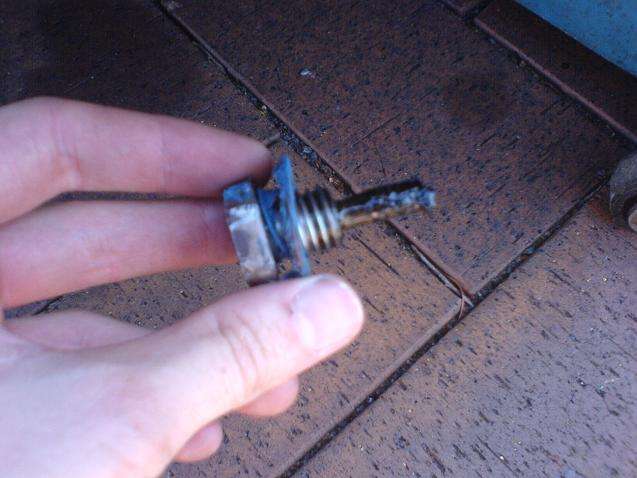
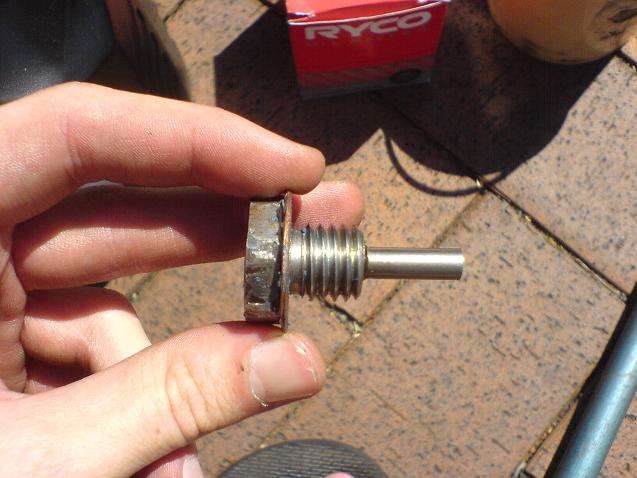
16) You plug should have a bit of swarf on it from the gearbox etc. This is normal. I am not concerned
with that – normally it would be less than that but those Magnets are super strong and can pull crap
out of the oil from further away. Even so, that’s not too much.
17) I had to go and get my Loctite Blue Maxx that I forgot to get at the beginning. This is good stuff and
can seal just about anything. Well worthwhile for many mini jobs.
18 ) Clean the sump plug with a dry, clean, lint free rag to remove the swarf and oil.
19) Check the condition of the copper washer. Mine looks fine, but I never do my sump plug up tight at
all.
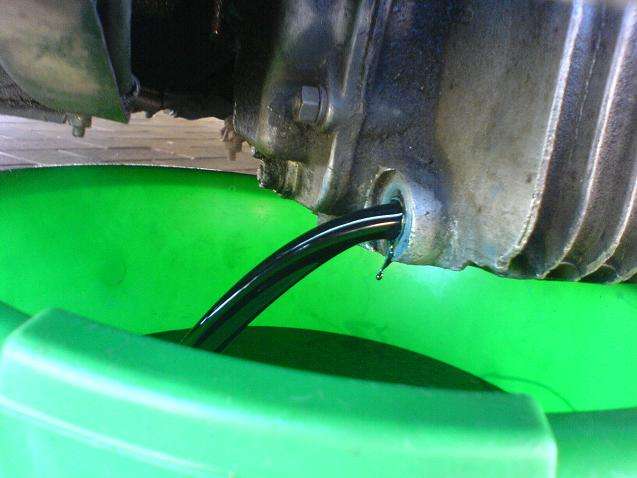
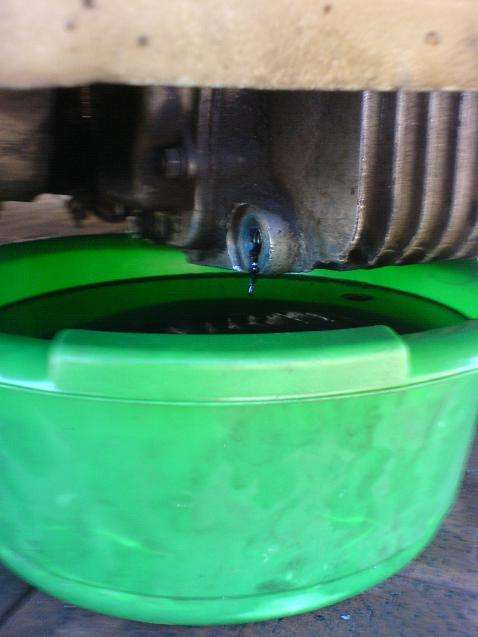
20) Check on the oil and see if it is almost done. I waited about 15 – 20 minutes (you can speed it up a
bit by removing the oil cap on the engine to allow air to enter easier so the oil can drain quicker).
Wait until the stream thins down a lot. I never wait for it to totally STOP flowing, there will be drips
for ages. A drip every couple of seconds is good enough to empty for me.
21) Remove the bucket of used oil and place a rag IMMEDIATELY below the sump plug to catch the small
drips. Clean the thread of the sump plug with another clean rag.
22) Get your Loctite (or any other oil resistant gasket goo).
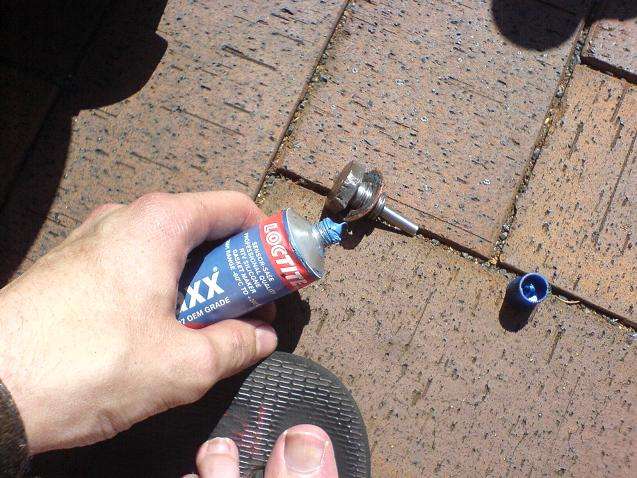
23) Smear the Loctite on both sides of the copper washer and on the thread of the plug.
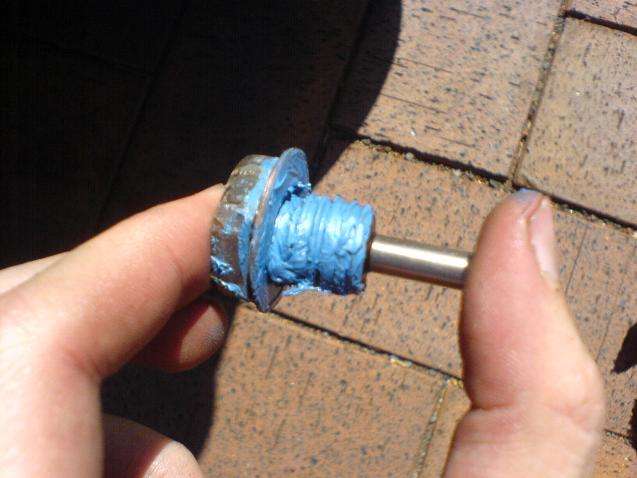
Try and keep the magnet Loctite free.
24) Put the sump plug back in the hole and do it up as far as you can by hand. This is to ensure the plug
is not CROSS THREADING in the sump. If you only get ½ a turn before it gets hard, don’t keep
turning! The alloy in the gearbox is MUCH softer than the thread of the sump plug, you will damage
the box before you damage the plug thread.
After you are happy that it is going in straight and it is NOT cross threaded then do it up with the
ratchet and 15/16 socket. DO NOT OVER TIGHTEN IT!!!! I repeat, DO NOT OVER TIGHTEN THE SUMP
PLUG. I do it up until the end of the plug is fully home against the gear box housing and then do
another 1/8th
of a turn (or there abouts). I rely on the Loctite to help seal the hole, not how tight the
sump plug is crushing the copper washer. That is me but MANY people don’t use gasket goo on the
sump plug at all.
My car does not leak oil from the sump plug and I have never stripped the thread on the gearbox
from over doing a sump plug. I reckon, method wise, if it ain’t broke, don’t fix it.

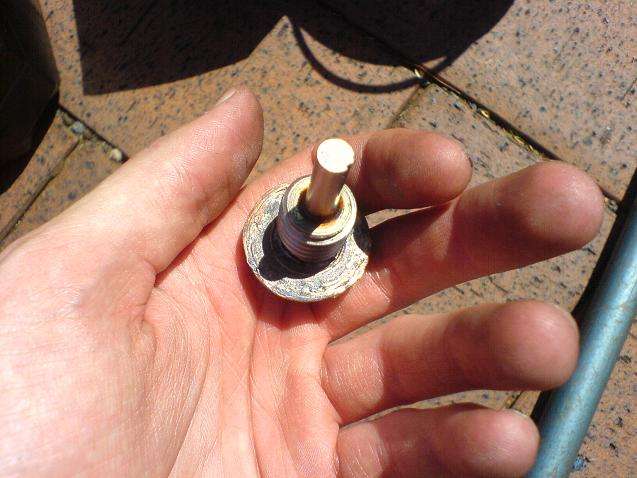
25) After the plug is done up and has compressed the excess gasket goo out, wipe away the excess
gasket goo.
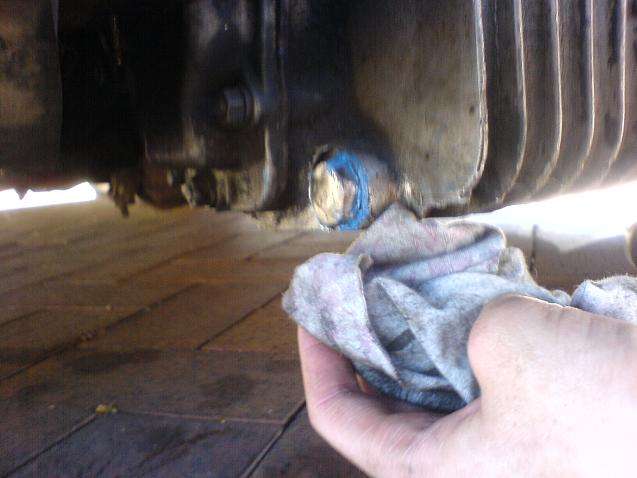
26) It should look like this:
27) I emptied the oil out of the bucket into the second, empty oil bottle I had. That step isn’t necessary
but I find it makes it easier for me. I then moved the container under the oil filter.
28 ) Get your ratchet handle, an extension and your 9/16 socket
29) Feed the socket / extension and ratchet up from the bottom of the car up to the bottom of the filter
housing.
You will be able to feel the hexagonal head of the bolt underneath. IF YOU ARE GOING TO LIE
UNDER THE CAR FOR THIS PART PLEASE USE AXLE STANDS, DO NOT RELY ON THE JACK TO KEEP THE
CAR RAISED.
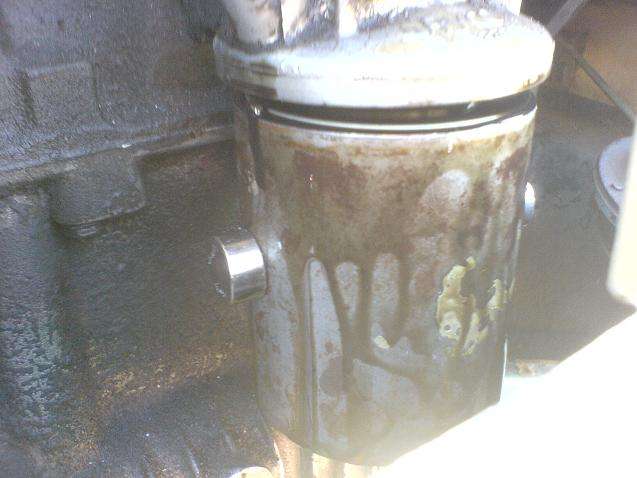
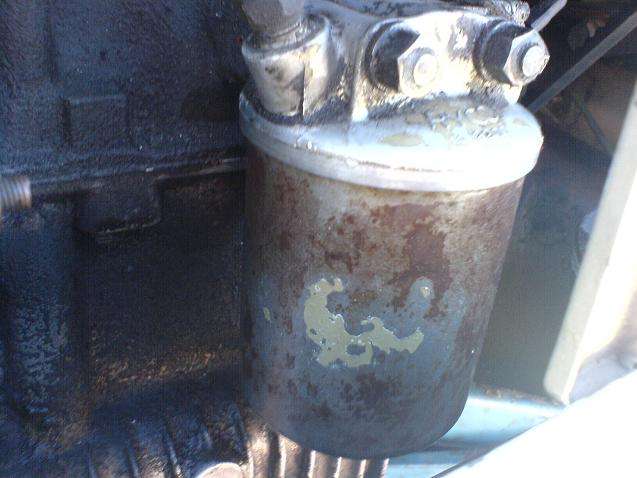
30) Start to undo the bolt. Once the seal is broken oil will run down the sides of the canister. That is why
I moved the container underneath the oil filter.
31) Keep undoing the nut. This is just before I am about to pull it off. It is probably held on by a couple
of turn here.
32) Undo the canister the rest of the way and pull away from the filter head. You need to tilt the
canister to get it out. Make sure that the oil container is underneath where it will spill. You need to
remove the canister out the bottom of the car, just in front of the passenger side engine mount and
behind the horn. My hands were very oily at that point and didn’t want to get my phone to oily. You
will work it out once you are in there giving it a go.
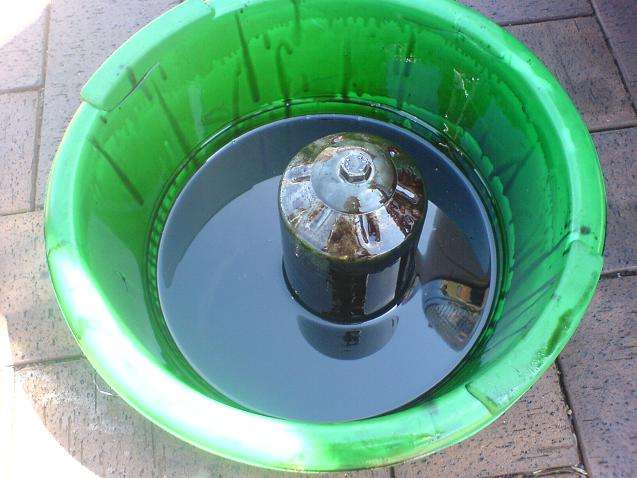
33) Put the whole thing into the container. If you never emptied the container, don’t bother putting it in
there. I do this to allow most of the oil to drain out before I start to pull it apart.
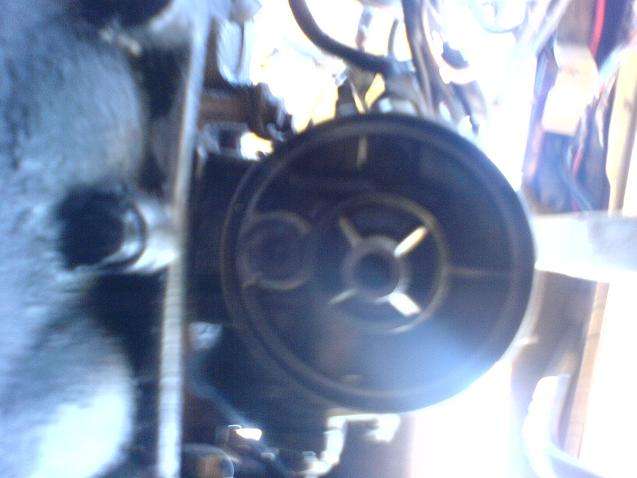
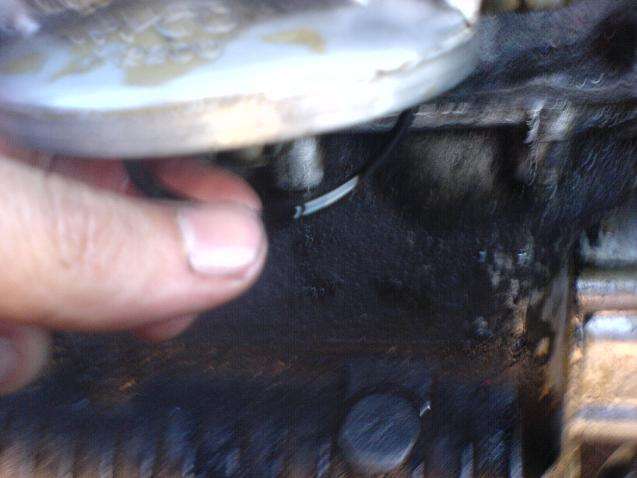
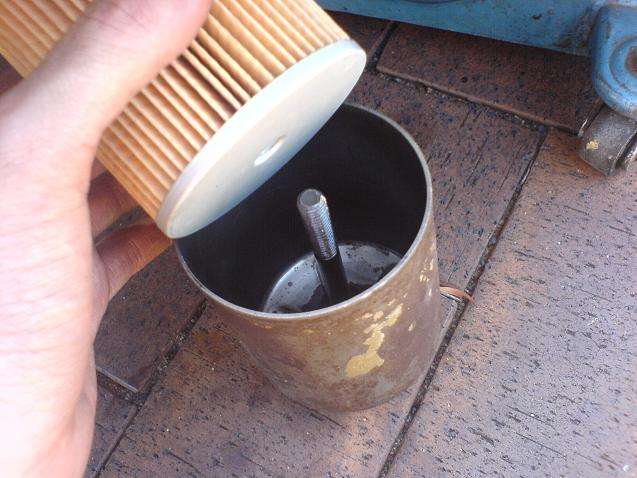
34) This is the bottom of the filter head, if you were to stick your head under the car and look (I just put
the camera under and took a shot).
35) Give the filter head a good clean with a lint free rag. Get rid of all the oil and any debris that is there.
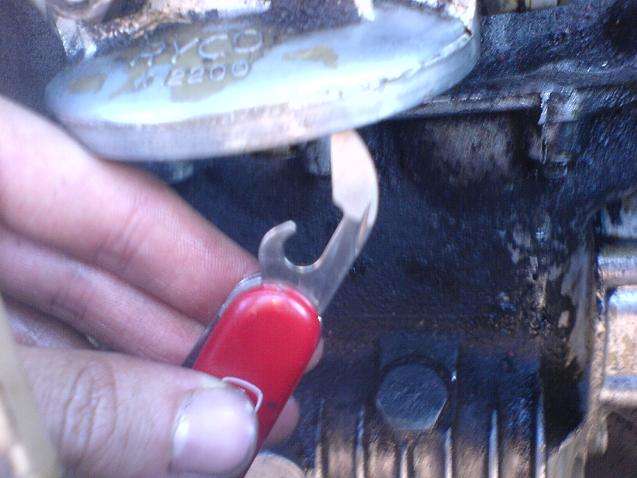
36) I then grabbed my pocket knife to get the thin seal out of the filter head. I used the can opener
attachment.
FFS, if you are doing the same as me (using a can opener on a pocket knife), DO NOT DAMAGE THE
FILTER HEAD while trying to get the seal out. I have done this enough times that I can get the seal
out first go without touching and metal of the filter head.
You will find the seal running around the outside of the filter head. It’s pretty easy to see and feel in
real life, that last shot is a bit too grainy.
37) You need to kind of stab the seal (but not too far through), and then pull it along so that it bunches
up and you can grab onto it with your fingers for the rest of the way.
This is just after I got the pocket knife onto it.
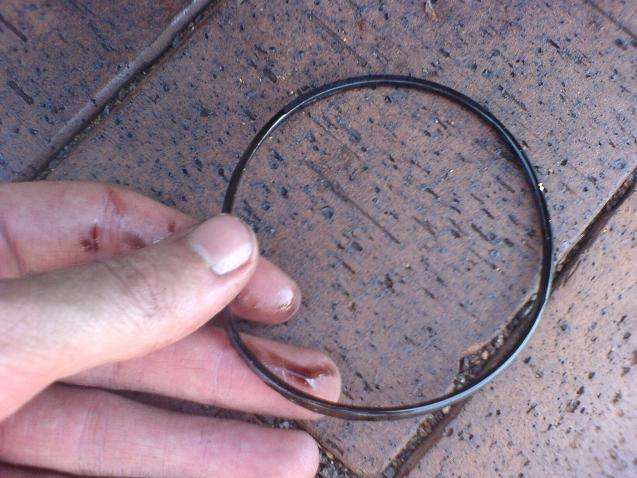
38 ) This is the old seal, out of the filter head.
39) Give all the different bits and pieces from the canister a good clean in the petrol (except for the
gaskets) including the canister itself and also the filter head.
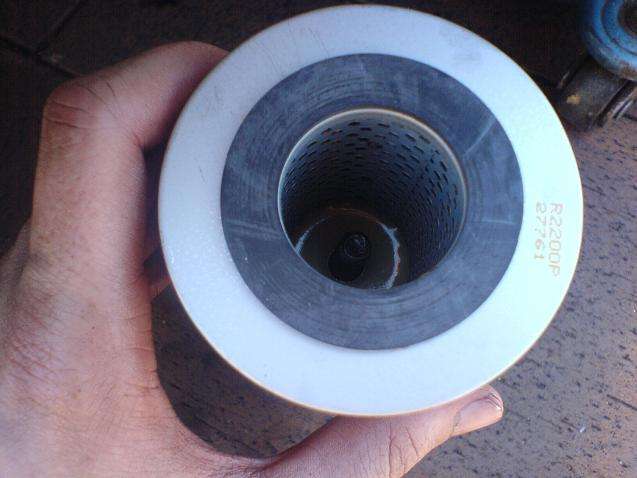
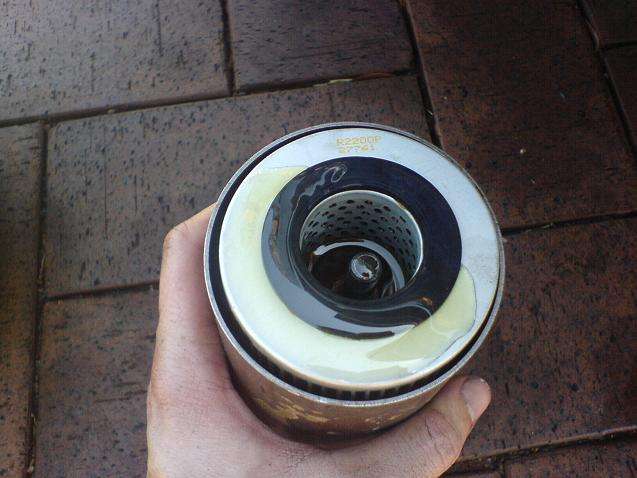
40) This is the contents of a Ryco R2200P oil filter. You need to check which one YOUR PARTICULAR car
needs. There is another similar filter to this, the R2180P which goes in cooper S and 850 (I think). It
has two open ends on it. There will be another plate in the filter assembly that is used in that filter
(to kind of make it look the same as the end with the small hole in it in the R2200P oil filter shown
here.
There SHOULD also be two little gaskets in there but for some reason Ryco aren’t putting them in
there anymore. They are currently rectifying that problem so you will have to re-use your old
gaskets. If you are like me and don’t like re-using and re-using gaskets then buy some new seals
from SuziSpares in Seven Hills in Sydney ((02) 9674 7000 or [email protected]).
41) This is the order in which all the parts go together
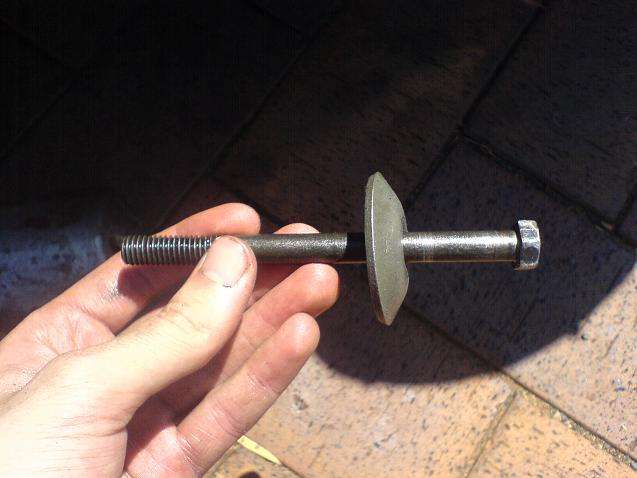
42) These are the bits that go on the OUTSIDE of the oil filter:
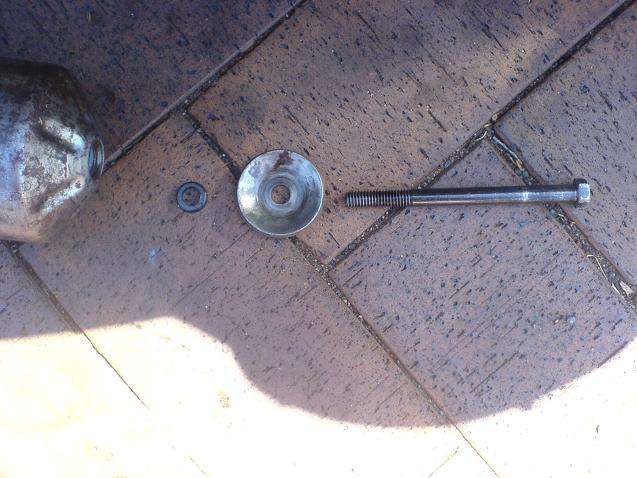
They go in the order shown here (right to left obviously) i.e. the curved metal bit gets threaded on
to the bolt, and then the smallest seal get threaded on after the curved metal bit and then the
canister gets threaded on after that.
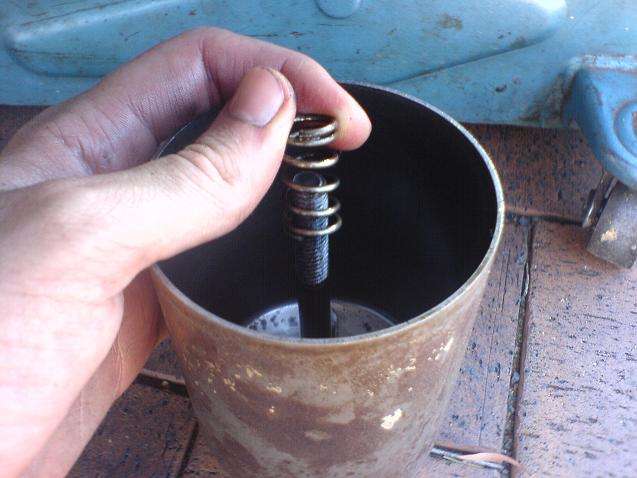
43) This is the order in which the stuff goes INSIDE the canister:
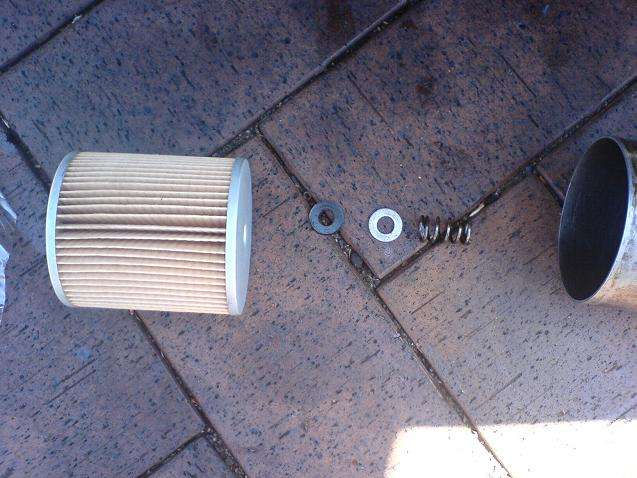
The order is (once the outside bits have been threaded through) is spring, flat washer, the 2nd smallest rubber seal and then the oil filter, small end goes next to the rubber seal. Note: the oil filter
shown here is the NEW one, the old one will come out black.
44) Put the new seal in the filter head (this is the really big thin one, that actually still does come in the
oil filter box still).
45) The fitting procedure for fitting the seal into the filter head is as follows. DO NOT put it in at one
place and then run your finger around to push it in the rest of the way! This will bunch up the seal
and you will have over hang when you get around to the end. You need to work around the seal like
you are doing up wheel nuts.
Put it in at one side, then push it in at the diagonally opposite side, then go half way in between
those two (i.e. 90° to where you have already pushed in, either side) and repeat the process all the
way around until the seal is fully seated in the filter head. This method will ensure no overhang of
the seal and proper sealing once it is put back together. Do not damage the seal putting it in, only
use your fingers to put it in.
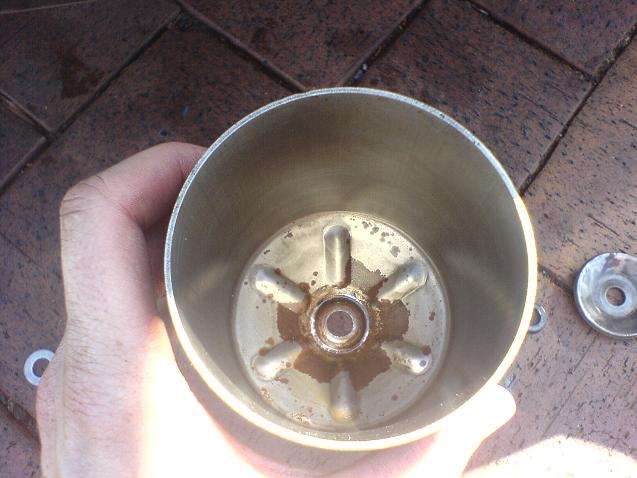
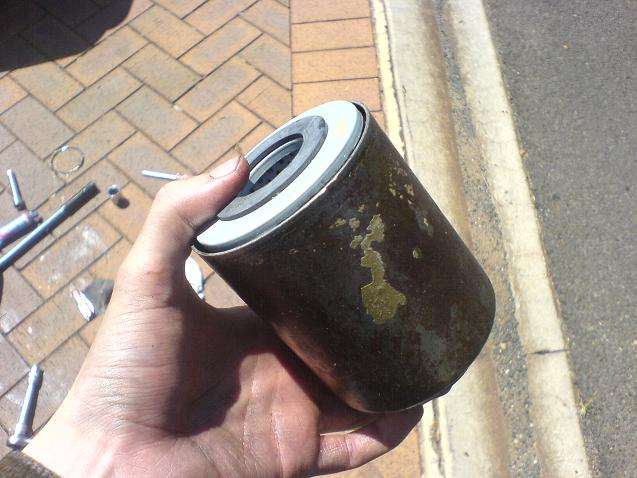
46) This is the canister all nice and clean after getting the petrol treatment.
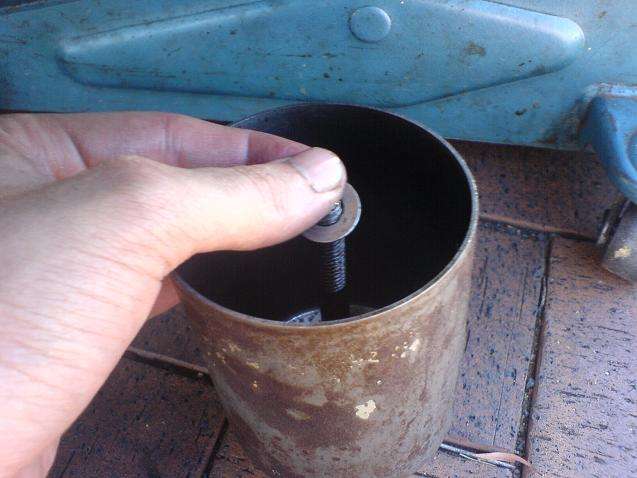
47) First step in putting it all back together, just to make sure you do it the RIGHT way. Grab the bolt and
thread on the curved bit of metal.
48 ) Next, put on the smallest seal after you have threaded on the curved bit.
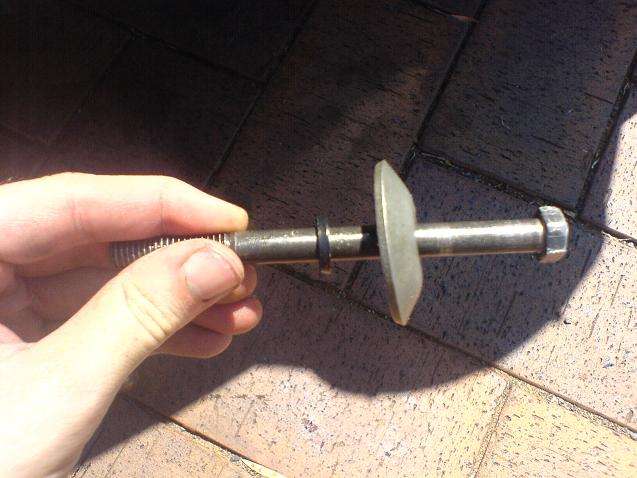
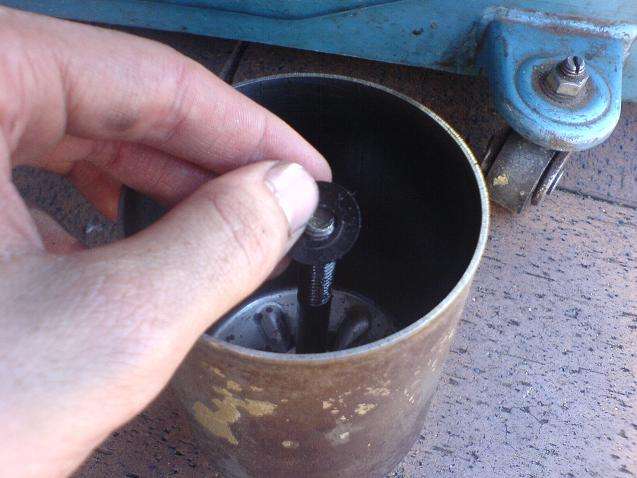
49) Then put the canister housing on.
NB: The little seal is hidden under the curved metal bit, trust me, it is still there. You need it, do not
take it off
50) Then thread the spring onto the bolt.
51) Followed by the METAL flat washer
52) Followed by the medium sized rubber gasket
53) Then comes the new oil filter, big end towards the open end, small end goes into the canister
54) The canister is now all assembled correctly
55) I prime the canister with some new oil so that getting oil pressure once the car is started doesn’t
take as long.
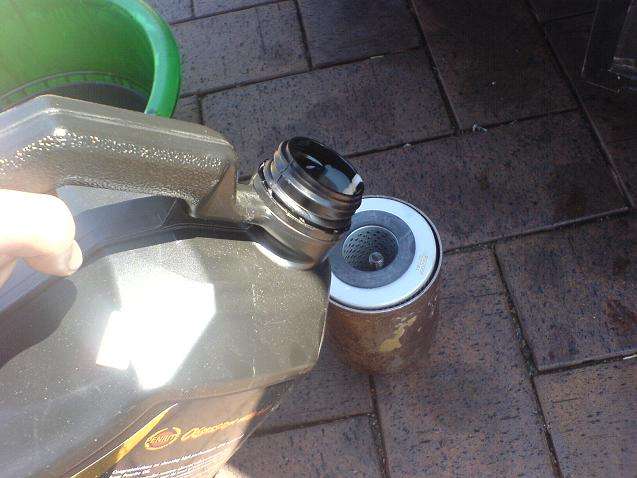
56) Don’t fill it too fast, the oil needs time to be absorbed through the oil filter.
57) Put the filter back into place and start to do up the bolt. It might take you a couple of attempts to
line up the bolt going into the filter head.
58 ) You will only be able to do it up a few turns. After a few turns the spring in the canister starts
fighting back so you have to get your 9/16 socket, extension and ratchet out to do it up.
59) When you are doing it up make sure that the canister is going to line up straight with the filter head.
Make sure the end of the canister is going to seat on the new gasket that you put in the filter head.
DO NOT let it go in crooked otherwise you will damage the filter head and it won’t seal as well. In
order to make sure it’s going in straight make sure the amount of overhang (while looking at the
filter) is the same all the way around. You can also feel the amount of gap at the back if you want.
You will be able to determine if it is going in straight or not.
This is it all back together. I only do it up tight enough to stop leaks when the engine is running. If
you’ve never done it before, do it up, then once you eventually start the engine (NO, DON’T START
IT NOW) go and have a look at the filter housing to see if it is leaking, if it is do it up a bit tighter. Try
not to strip the thread.
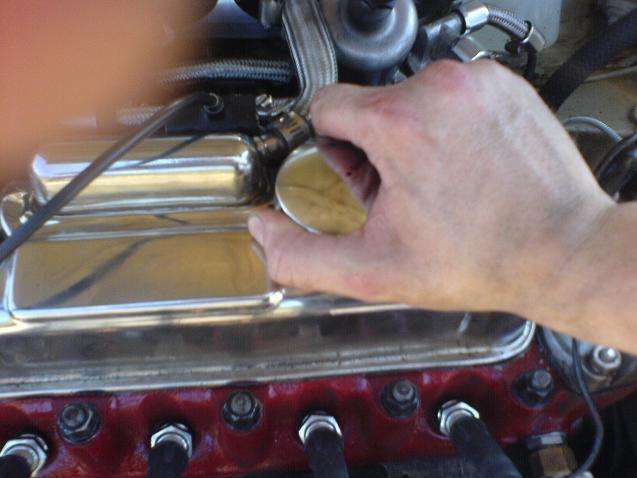
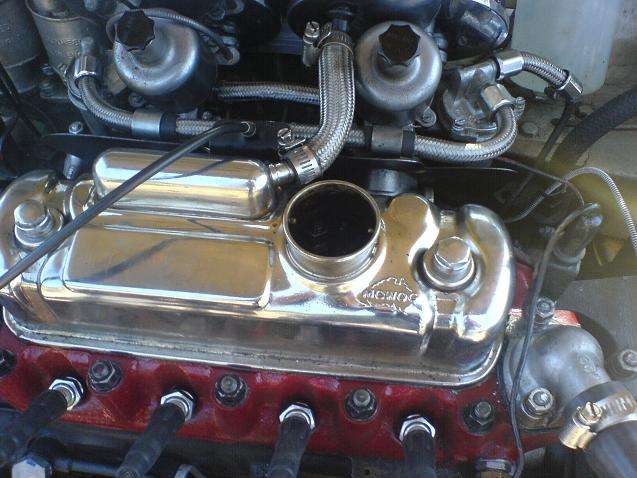
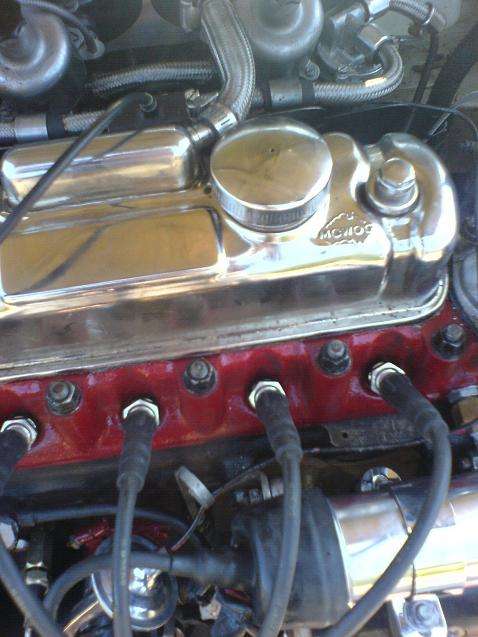
60) Take the oil cap off of the top of the engine
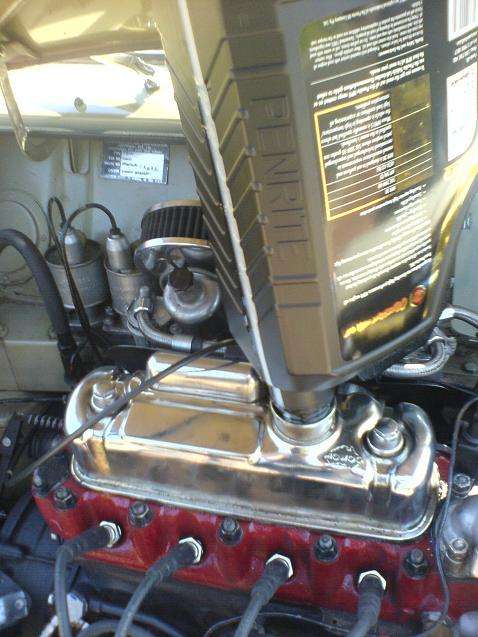
61) Pour in your choice of oil. I use Penrite HPR30. Whatever oil you choose, make sure it is a mineral
oil. Mini’s need at least 20W50 oil if in good condition, worn ones could quite easily take 40W70 oil.
There are many threads on here about oil, so do not ask me what other brands to use.
I think, that no matter what oil you use (as long as the grade etc is right) that cheap oil, changed
often is MUCH BETTER than expensive oil that’s never changed.
You will need 5L for a mini. This is the perfect amount for the sump and oil filter and the end result
will mean that the oil level on the dipstick is about 1mm past the MAX line. If you have an oil cooler
you will need more than this (I’d add on at least ½L to 1L extra for the oil cooler). I have never done
an oil change on a mini with an oil cooler so I don’t know if it’s even worth it to detach the oil cooler
and drain it.
62) I put my magnets back onto the oil filter.
63) Put the Oil cap back on and put the dipstick back in its hole.
64) Lower the jack and remove from under the car.
65) Put the grille back on with its Phillips headed self tapping screws with the screw driver. You can skip
this step and put the grille on later if you want to check for leaks.
66) Check the dipstick, this currently is up to the ‘M’ on MAX because the oil filter is only ½ full. It will
even out once the engine is started and the oil filter is filled.
67) Get in the car and watch the gauges as you start that car. My car ran for about 1.5 – 2 sec before it
got oil pressure (longer than usual but after an oil change it is ok). This is normal for an oil change
because the oil filter is getting filled with oil and the engine can’t build up pressure. You engine may
take longer to build up oil pressure due to thinner oil than what it had in it previously (if you just
guessed the grade) or due to worn bearings. If you engine runs for more than 5 – 7 seconds I would
shut it down and try and find why it isn’t building oil pressure.
While you are waiting for oil pressure, DO NOT REV THE ENGINE, just let it idle. Make sure you keep
an eye on the gauge and/or the idiot light at all times.
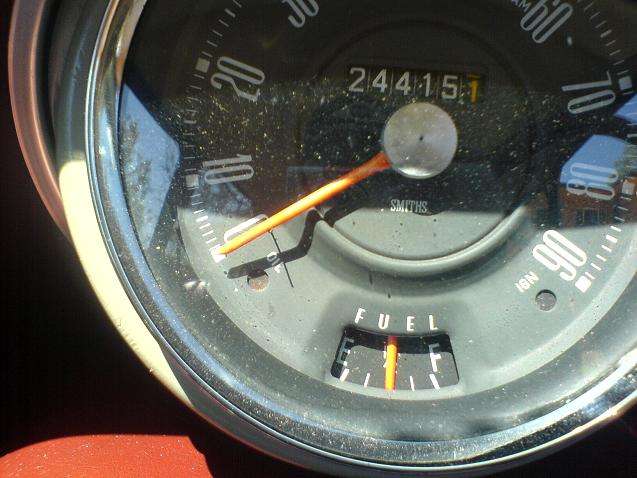
68 ) Beautiful! We have oil pressure.

69) If you don’t have an oil pressure gauge, check that the idiot light has gone out. I run a ‘T’ piece in my
oil line, so I run a gauge and the standard light. For those of you that want to know, the standard
light goes off at 9psi of oil pressure.
70) Stop the engine, and allow the oil some time to run back into the sump and check the dipstick again.
As you probably can’t see (couldn’t get it in focus) the oil level is now 0.5 – 1mm about the MAX line
on the dipstick. Beautiful!

71) Check for leaks at the sump plug and the oil filter. I just felt the oil filter, it was still dry. Once you do
it a few times you will know how tight to do it up the first time.
72) If you are pretty good at changing the oil you will make very little mess. I don’t bother putting down
anything on the floor. The floor already has oil stains and I don’t tend to spill very much oil when I
do an oil change.
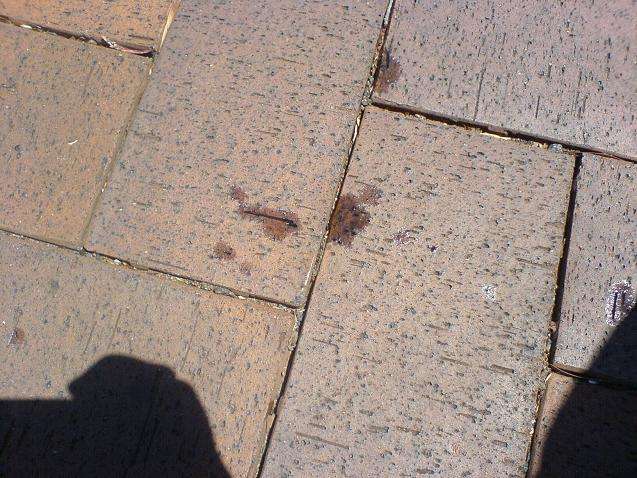
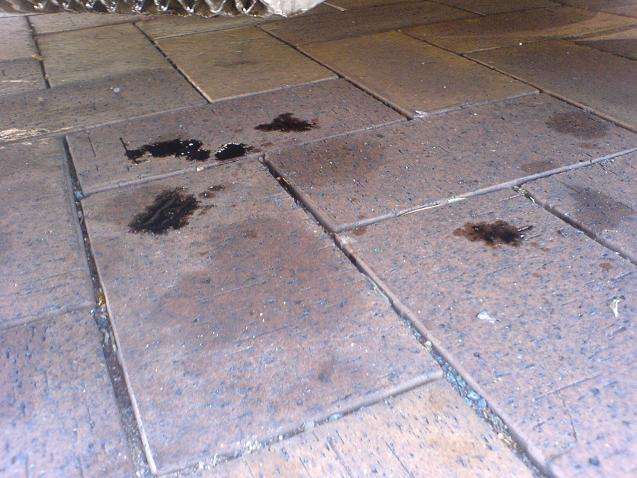
That is the extent of my spillage on the floor. I didn’t even get any oil down my arms.
73) Next is to see if the bottle of oil you use has a sticker on it for your next service. I particularly like this
and I use them to remind me when it needs to be done. Write on a date / mileage or both.
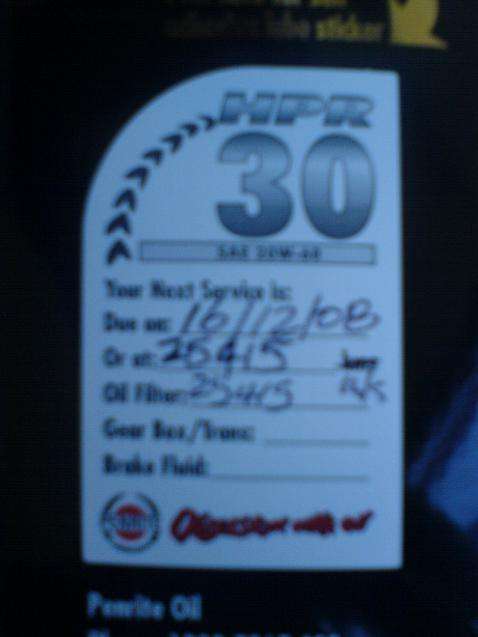
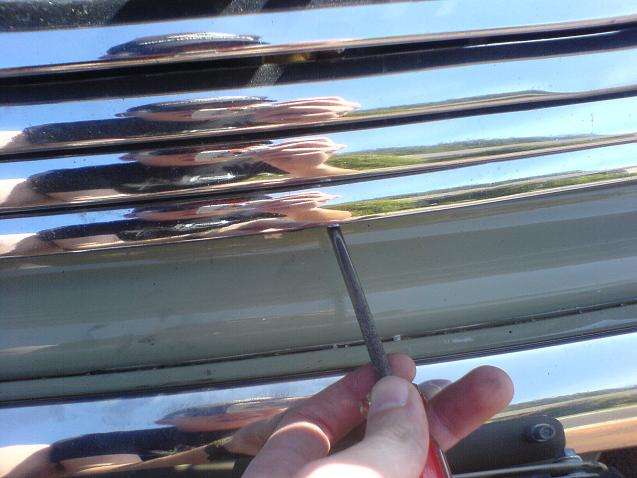
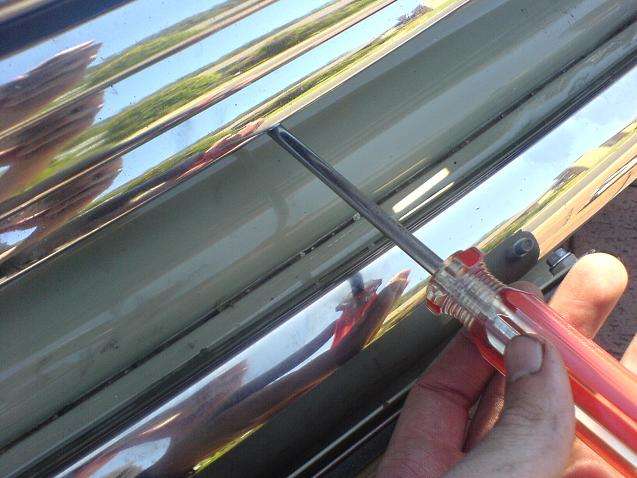
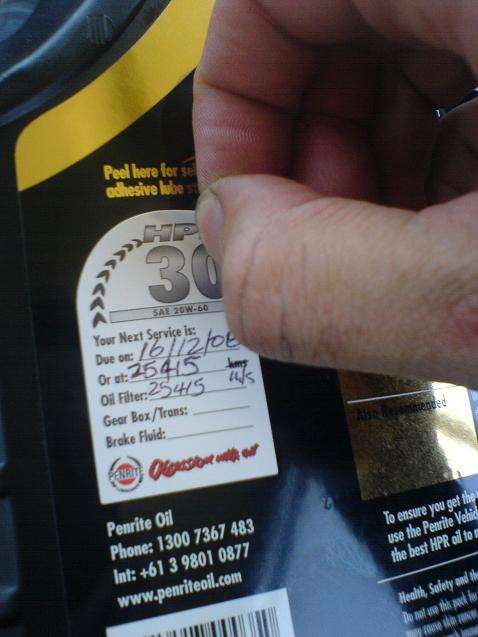
74) Peel the label off the back of the bottle
75) Stick it on the window to remind you when you next need to do another oil change.
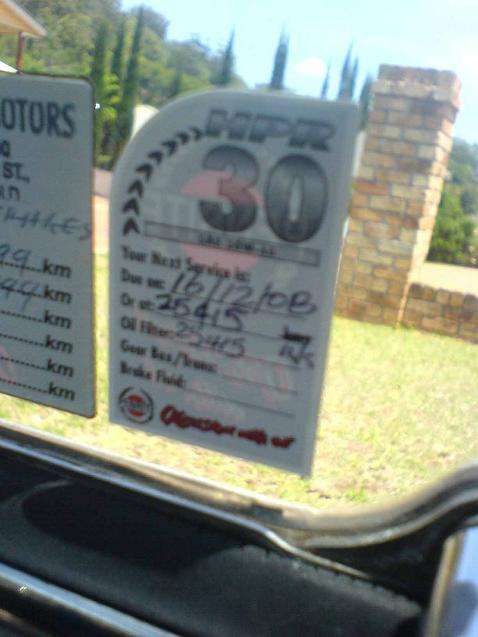
Generally just the mileage will be sufficient to tell when you next need an oil change. I know that I do
about 1,000 miles a month in my car and that is how often I change the oil and oil filter. It’s that easy,
add a month onto the date and 1,000 mile onto what your odometer is currently showing and you are
set.
The only other thing you might want to do is have another bottle of oil on standby just as a top up oil. I
also will go out and buy another bottle of oil and a oil filter tomorrow so that I don’t have to think about
it next time I want to do an oil change, but that is up to you.
Job Done! Congratulations, you have changed the oil on a cartridge mini in only 75 easy and simple
steps. I personally like the cartridge oil filter better than the spin on ones. The spin on ones are less messy and
easier to change (I have also changed spin on oil filter mini’s before). The cartridge ones allow you to
judge the condition of the engine easier and can withstand a greater pressure and don’t spin off. You
also get a bypass light with some cartridge filter heads (I have one, it’s the wire running off of the head
in the pictures) to tell you when the filter is being bypassed, you can’t tell if the filter is being bypassed
in a spin on filter. Some spin on filters are crappy and the bypass valve in them will open really early.
Personally I think the pro’s outweigh the con’s with a cartridge filter.
I am also able to get cartridge oil filters from AutoBarn, Repco and a couple of other smaller auto shops
(off the shelf, no ordering needed). Super Cheap does NOT stock Either Ryco R2200P or Ryco R2180P oil
filters.
Oil is the best mechanic, change it regularly and your engine will love you. I change it more often than I
need to. My original Passport to Service for my car states than you can leave it 3,000 miles in between
oil changes. Personally, I would do a oil and filter change at a maximum of 2,000 miles. But I’m not going
to tell you guys how often to change the oil in your own cars.
