Ausmini
It is currently Sat Apr 20, 2024 8:16 am

All times are UTC + 10 hours


Post new topic Reply to topic  [ 96 posts ]  Go to page 1, 2, 3, 4, 5 ... 7  Next
Author Message
PostPosted: Tue Oct 26, 2010 9:11 pm 
Offline
Yay For Hay!
User avatar

Joined: Wed Sep 08, 2004 9:27 pm
Posts: 15869
Location: Wodonga - Vic/NSW border
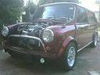
I've kept this quiet till it was finished - only about 8 people know, but it's out there now :D

Funny story behind this, about 6 years ago my mate showed me this little supercharger and said "here you go, see if you can put this on your mini", then a few weeks later I went to Hay, and here was this blue mini with the same blower. I spoke to the guy who set it up, who turned out to be Ben who is making the kits that are doing so well now!

Then I got busy, didn't get around to it and my mate took the blower back to put on a Volvo or something, but that didn't happen either, and it showed up again in the corner of the workshop a couple of months ago.

My mate was going away, and I joked that I could teach myself to weld aluminium with his AC/DC TIG while he was away - but he liked the idea, gave me the TIG to take home, and gave me the blower and said it was mine if I could get it on the brick by the time he came back - well he came back about 3 weeks ago, it was sitting on the car but not running - but close enough

Anyway - I asked Ben if he minded if I copied his ideas from some photos, and made my own setup... in reality there's basically only one way to do it. I had some design parameters though, it had to be aluminium, I needed to keep my hydrolastic suspension and heater, no cutting of bodywork, needed to use a REAL air filter, and I only wanted one fanbelt.

I'm broke so I did it CHEAP - using as much scrap and leftovers as I could. The most expensive bit was the air cleaner box, but dad paid for that, and for the head gasket - he owed me for giving him my reco harmonic balancer :D

SC12 blower 0
alloy channel for plenum 0
alloy tube for intake 0
alloy for relief valve 0
alternator and intake bends 45
welding rods 31
alloy for idler bracket 10
alloy for BOV inlet & circlip 5
landrover water pump pulley 0
nissan(?) idler pulley 0
fan belt 34
2mm head gasket 80
Getz air filter box 100
air fittings 20
radiator hose for intake 15
gemini starter motor 45
carb jet (+ freight!) 32

total cost $417

here are some pictures

modified alternator bracket to mount the alternator lower down
Image

completed install - just waiting for a replacement PCV to plumb in the breathers
Image
Image

there are two idlers, one to bring the belt up from the crossmember, and another to push it down under the head. It's tensioned by the alternator
Image
Image
Image

some 'during' pictures
Image
the alternator and the standard mini harmonic balancer machined down with a landrover discovery diesel water pump pulley fitted. The alternator is off a Subaru of some sort - dunno what, but it was the best one for the job I wanted. I made the water pump pulley (not pictured) by machining down the standard mini water pump pulley and welding on the ring from something else (maybe nissan, not sure). It's not perfect, but it'll do
Image

just some pics while I was making the intake side
Image
Image
Image

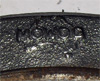
and if anyone is curious about what the SC12 looks like from inside, here you go
air goes in here
Image
the pulley is attached the other end of one of these, and it turns the other one
Image
which turn these around and squish the air (or air/fuel)
Image

it's going really well - I'm sorting out some bits and pieces before a motorkhana on Sunday... and I can weld aluminium now - some of it is a bit manky, but the more I did the better I got with it


Last edited by simon k on Fri Dec 14, 2012 9:13 pm, edited 3 times in total.

Top
 Profile  
 
 Post subject:
PostPosted: Tue Oct 26, 2010 9:37 pm 
Offline
998cc
998cc
User avatar

Joined: Sun Jun 07, 2009 10:27 pm
Posts: 718
Location: northern new england tablelands
i want one :D

_________________
one van, one mini s, one knitted cardigan


Top
 Profile  
 
 Post subject:
PostPosted: Tue Oct 26, 2010 9:50 pm 
Offline
1098cc
1098cc
User avatar

Joined: Wed Oct 01, 2008 11:14 am
Posts: 1906
Location: Brisbane Qld, North side
great work simon. get that bad boy boosting :D

im close to bolting mine up, wired my mega jolt now.

so much better!

a month more & im going to boost it! :D need to work out a few needles & then mod.

what is the engine stocky 1275?


Top
 Profile  
 
 Post subject:
PostPosted: Wed Oct 27, 2010 12:21 am 
Offline
Milatsmadmini
User avatar

Joined: Mon Nov 12, 2007 6:57 pm
Posts: 6273
Location: the inner west of sydeney!
great work Simon....

Kudo's to Ben for not being all secretive about his work...

Great display of a great community....

Top shop again mate

_________________
Here am I sitting in my tin can far above the Moon
Planet Earth is blue and there's nothing I can do...


“A turbo: exhaust gasses go into the turbocharger and spin it, witchcraft happens and you go faster.” - Jeremy Clarkson


Top
 Profile  
 
 Post subject:
PostPosted: Wed Oct 27, 2010 6:51 am 
Offline
Yay For Hay!
User avatar

Joined: Wed Sep 08, 2004 9:27 pm
Posts: 15869
Location: Wodonga - Vic/NSW border
mattsmadmini wrote:
Kudo's to Ben for not being all secretive about his work...

Great display of a great community....


yep - Ben is a great guy, people all over the world know about his stuff and he is very generous with his knowledge. He's helped me out before :)


Top
 Profile  
 
 Post subject:
PostPosted: Wed Oct 27, 2010 8:37 am 
Offline
1098cc
1098cc
User avatar

Joined: Thu Jul 15, 2004 9:53 pm
Posts: 1768
Location: Lake Macquarie NSW
Nice work Simon! I know where to come for my alloy welding now! Will your mate let you keep the welder too!

Isn't there a carb issue with these set ups? Transition from idle to boost or something?

What type of welder, I'd love to buy one!!

Well done! :P

_________________
Sir Alec! we are not worthy!


Top
 Profile  
 
 Post subject:
PostPosted: Wed Oct 27, 2010 9:22 am 
Offline
Yay For Hay!
User avatar

Joined: Wed Sep 08, 2004 9:27 pm
Posts: 15869
Location: Wodonga - Vic/NSW border
graham in aus wrote:
Nice work Simon! I know where to come for my alloy welding now! Will your mate let you keep the welder too!

What type of welder, I'd love to buy one!!


nah, I'd better give it back... it's a nice unit though. Kempii MasterTig AC/DC, similar unit retails for a bit over $4K :shock: he needs me to teach him how to use it now :lol:

Quote:
Isn't there a carb issue with these set ups? Transition from idle to boost or something?


yeah, there is - I'm yet to experience it, but I think the issue is when you snap the throttle shut, the blower tries to stop (no air) but the engine keeps turning it etc. etc. I tried to integrate a 'proper' turbo type blow off valve to counter it, but didn't have room. I made my own BOV that is small enough to do the job, but decided against it for the time being. I have welded a couple of bungs onto the inlet and plenum and plugged them, and I'll sort something out for it. Gr4h4m from UK has a simple solution using a signal from the megajolt that I'll use if I need to


Top
 Profile  
 
 Post subject:
PostPosted: Wed Oct 27, 2010 2:40 pm 
Offline
1098cc
1098cc

Joined: Mon Feb 12, 2007 2:40 pm
Posts: 1325
Location: wasleys S.A.
Simon ,you sly old dog. :D Very good set-up. It just proves that if you put your mind to things you can succeed and doing it on a shoe srting budget proves that most ideas can be done. It does not have to be all pretty bits and pieces to work.

With your blow off valve I use a set-up based on the auxiliary blowers on a big 2 stroke marine engine. They just have a disc on a arm with a counter weight on the other end[much like a rain cap on a exhaust pipe].
As the pressure rises the force on the disc {pressure X area} lifts the disc againts the counter weight. These engines have turbo's as well so when they kick in the blower just dumps the air and then a boost sensor [pressure guage] then shuts down the drive.

With the sc14 blow thru carby set-up the blow off is a lot more critical than suck thru carby when the butterflys are suddenly shut.

WELL DONE :) :)

_________________
Research is the difference between speculation and investment. Anyone who copys some one else will always be second
www.minisprintgt.com


Top
 Profile  
 
 Post subject: Home made manifolds
PostPosted: Wed Oct 27, 2010 3:50 pm 
Offline
848cc
848cc
User avatar

Joined: Wed Oct 22, 2008 5:06 pm
Posts: 199
Location: Coffs Harbour
Nice work and keen re the Alloy welding learning curve.
Mine is 3mm gal plated mild steel and old school ark welder as I like to go with what I know. Mind you I am pretty sure you are a few Kg's lighter than me on this one!
http://www.ausmini.com/forums/viewtopic ... highlight=

_________________
1310 SC 1969 Morris Deluxe - 15psi boost
1293 1968 Morris Deluxe Miglia - 45 Weber
HSV Maloo Z Series - Comp Cam - 300rwkw


Top
 Profile  
 
 Post subject:
PostPosted: Wed Oct 27, 2010 4:00 pm 
Offline
848cc
848cc
User avatar

Joined: Wed Oct 22, 2008 5:06 pm
Posts: 199
Location: Coffs Harbour
You dont want what to have a blow off valve for a draw through setup. You will be releasing an air fuel mixture into the engine bay (if externally vented that is)

I have more of a safety valve in case of a backfire or something through the carby. It is an adjustable pressure valve from a compressor. (Can adjust it through use of different springs inside)

I dont have any issue when I back off? Blower doesn't mind

_________________
1310 SC 1969 Morris Deluxe - 15psi boost
1293 1968 Morris Deluxe Miglia - 45 Weber
HSV Maloo Z Series - Comp Cam - 300rwkw


Top
 Profile  
 
 Post subject:
PostPosted: Wed Oct 27, 2010 8:08 pm 
Offline
Yay For Hay!
User avatar

Joined: Wed Sep 08, 2004 9:27 pm
Posts: 15869
Location: Wodonga - Vic/NSW border
MINI66 wrote:
You dont want what to have a blow off valve for a draw through setup. You will be releasing an air fuel mixture into the engine bay (if externally vented that is)

I have more of a safety valve in case of a backfire or something through the carby. It is an adjustable pressure valve from a compressor. (Can adjust it through use of different springs inside)

I dont have any issue when I back off? Blower doesn't mind


the BOV I made was to be plumbed back. Factory BOV's are plumb back, it's only the ricers that do the pssht atmosphere ones.

The idea with using the BOV was that it'd work as a backfire valve, and as a bypass under vaccum. There was a discussion a while ago about cars stalling if they didn't have something to stop whatever effect it was they were talking about - I figured I'd wait and see if I had an issue. Obviously you don't. Does your throttle plate have the springy valve in it?

To make the BOV, I went to the local spring manufacturers and got their catalogue of springs and did all the maths to work out which spring would get me what I wanted, then made it - and decided not to use it. I made the plate thats sitting on top instead. It has 2 springs and pops up when it backfires. It actually did backfire the other day, I had my head over the rockercover and it went off. No flames came out, but I saw it pop up and a rush of air hit my leg

I thought about using a valve off a compressor, but don't have any old compressors laying around :lol:


Top
 Profile  
 
 Post subject:
PostPosted: Wed Oct 27, 2010 8:21 pm 
Offline
Mods rock!
User avatar

Joined: Fri Oct 03, 2008 9:02 pm
Posts: 5079
Nice work there Simon. Bet your looking forward to sorting the tune and smaller details.

Great job :wink:

_________________
Image


Top
 Profile  
 
 Post subject:
PostPosted: Thu Oct 28, 2010 8:05 am 
Offline
848cc
848cc
User avatar

Joined: Wed Oct 22, 2008 5:06 pm
Posts: 199
Location: Coffs Harbour
Yeah true. The factory setup on the MR2/Corolla that the SC12 came of has more of a bypass system but similar. At idle the SC is bypassed altogether via a solenoid operated gate. The SC is also disengaged at this point hence the clutch. (This was to pass pollution standards at idle)
I am running a stock HIF6 no springy releif valve thing in the butterfly.
I have no problems. Nice smoothe idle at about 900rpm I am also running a vh44 brake booster ( +8.4 disks)and the booster picks up vaccuum fine from the plenum and works well (has a one way valve in the line to contain boost).

The only time that I have had a backfire through the SC was when the Air/Fuel ratio spiked to very lean.

I got the compressor releif valve off ebay brand new from the US.
It has a 20psi spring in it at the moment but it came with 4 springs.
$15 delivered. A standard compressor valve would be no good at 110psi.

_________________
1310 SC 1969 Morris Deluxe - 15psi boost
1293 1968 Morris Deluxe Miglia - 45 Weber
HSV Maloo Z Series - Comp Cam - 300rwkw


Top
 Profile  
 
 Post subject:
PostPosted: Sun Feb 19, 2012 4:47 pm 
Offline
Yay For Hay!
User avatar

Joined: Wed Sep 08, 2004 9:27 pm
Posts: 15869
Location: Wodonga - Vic/NSW border
been busy again - I made some injection for it :D I've had it off the road a couple of weeks sorting it out, then installed everything ready to go yesterday and it started first go today :D

Andrew (aka afh001) sourced me a nissan throttle body, and some sensors - thanks Andrew :)

My guru Ivan (the one who gave me the blower in the first place) gave me a fuel pump and the very old Haltech ECU, and let me use his welder again. The Haltech has been on a few cars, it's so old that it won't run on Windows, I need to run a DOS virtual machine :lol:

I'm using a pair of Honda injectors, which might be too lean, but we'll see how we go.

Obviously it's just throttle body injection, so essentially an electronic carb, but better than an actual carb. I have plans to make a new hot side manifold and incorporate injectors in that to run sequential to get around the siamese port issue. I need a megasquirt before I can do that though - money I don't have

I haven't kept track of costs this time, but it's couldn't be over $100 - although sh*tloads of hours planning, drawing, scrounging, welding, measuring, grinding etc. etc.

I scrounged some 60mm pipe, sliced it and lobsterbacked it, then cut out the recess for the injector boss I made
Image
Image
Image

this is the injector boss and how it fits
Image
Image
Image
Image
Image

throttle body mount plate
Image

throttle body, injector boss, injectors & the fuel rail I made
Image
Image

this is the blower intake mount flange
Image
Image
Image
Image
Image
Image
Image
Image
Image
Image

where it sits on the motor with all the bits & bobs - even though the tube is ~10mm bigger, it actually has more clearance to the firewall than the old carb version, it's mounted up a lot higher

Image
Image
Image

I forgot to take pictures inbetween where it was in pieces, and all welded together, but it ended up very nice inside - I ground it all smooth and used epoxy weld to fill up a couple of spots that I couldn't get to.

Image
Image
Image
Image
Image
Image
Image

fuses & relays mounted on an old heater intake blanking plate so I don't have to drill any holes
Image

pump & regulator under the back - need to make a proper pump bracket and a heat shield. Unfortunately I had to drill 1 hole in the body here.
Image

literally more processing power than the space shuttle :lol: need to tidy it up and mount the MAP sensor. The Haltech is mounted using military grade velcro - two strips 10mm x 50mm and you can't budge it, the megajolt is velcro'd to the Haltech :D
Image

a bit of fiddling with the maps with the colourtune and it runs quite nicely, I'll put the wheels back on and take it the doctors to use his gas analyser.


Top
 Profile  
 
 Post subject:
PostPosted: Sun Feb 19, 2012 5:17 pm 
Offline
848cc
848cc

Joined: Sun Nov 06, 2005 11:41 am
Posts: 192
Location: Melbourne
Good stuff! :D

Andrew


Top
 Profile  
 
Display posts from previous:  Sort by  
Post new topic Reply to topic  [ 96 posts ]  Go to page 1, 2, 3, 4, 5 ... 7  Next

All times are UTC + 10 hours


Who is online

Users browsing this forum: No registered users and 25 guests


You cannot post new topics in this forum
You cannot reply to topics in this forum
You cannot edit your posts in this forum
You cannot delete your posts in this forum
You cannot post attachments in this forum

Jump to:  

cron

© 2016 Ausmini. All garage work involves equal measures of enthusiasm, ingenuity and a fair degree of irresponsibility.