ausmini
https://www.ausmini.com/forums/

Started 7 Port Head Installation
https://www.ausmini.com/forums/viewtopic.php?f=5&t=84969
Page 3 of 5

Author:  MiniBob [ Mon Mar 31, 2014 9:24 pm ]
Post subject:  Re: Started 7 Port Head Installation

My car has a small c/case canister on the clutch side
Then the pipe goes over the manifold and splits; one tube goes back into top of throttle body the other continues into manifold. The tube over the manifold goes on into another pipe to canister on the other end of the block.
The fuel vapour is separate, charcoal canister under pass wing.
Entry into manf is controlled by ECU via a switch.
All entries into manf are BEFORE injectors.

Author:  Harley [ Mon Mar 31, 2014 9:53 pm ]
Post subject:  Re: Started 7 Port Head Installation

I'm really questioning whether or not you'll need to meet emissions still? Strictly speaking - yes you should, but an emissions test / engineering certificate to prove it meets the criteria costs a fair bit, if it does. Will the ECU you're running control the purge valve so it opens at the right time? Otherwise its pointless being there.

Here's the solution to all your problems: get a manifold spacer machined up that's tapered - thin at the top and thicker at the bottom. The throttle bodies can stick up at say 30 degrees, giving space for the filters, and room for a barb in the bottom of the spacer for each cylinder: one for brake servo, one for MAP sensor, one for crank case breathers and one for tank / canister vapours.

Author:  Slo998 [ Fri Apr 04, 2014 9:09 pm ]
Post subject:  Re: Started 7 Port Head Installation

Great to see someone else with this head in aus!
This is what I did about not having any vac take offs, we press fitted some tubes in to each port. Note the angle to clear the injectors..

Image

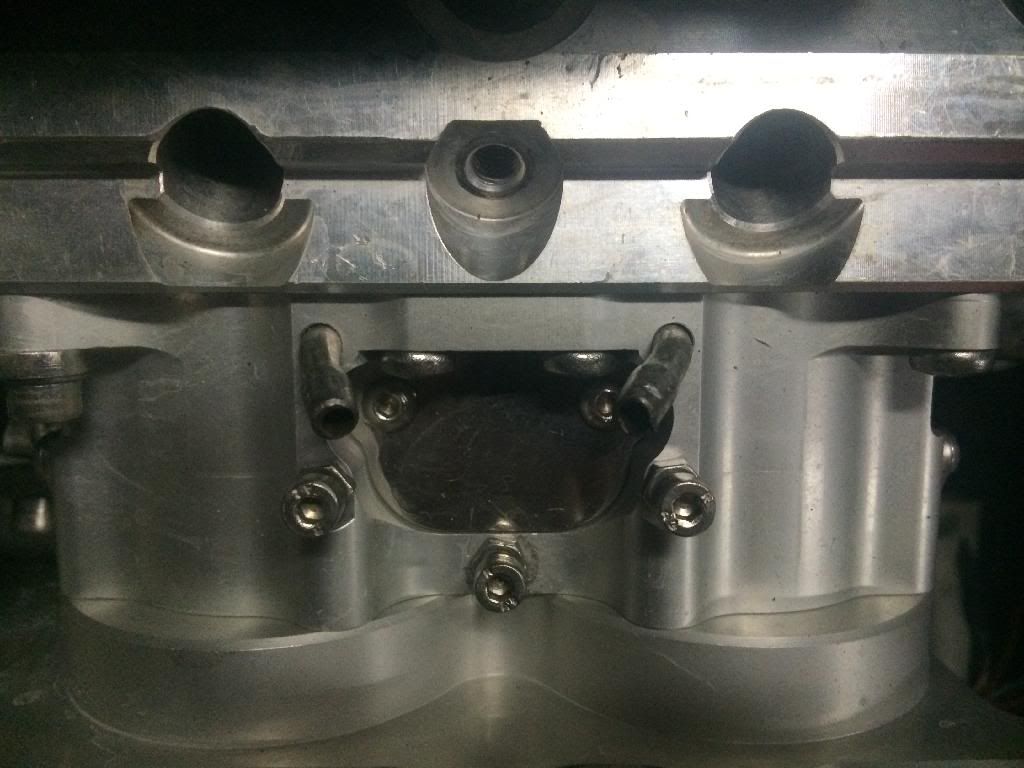
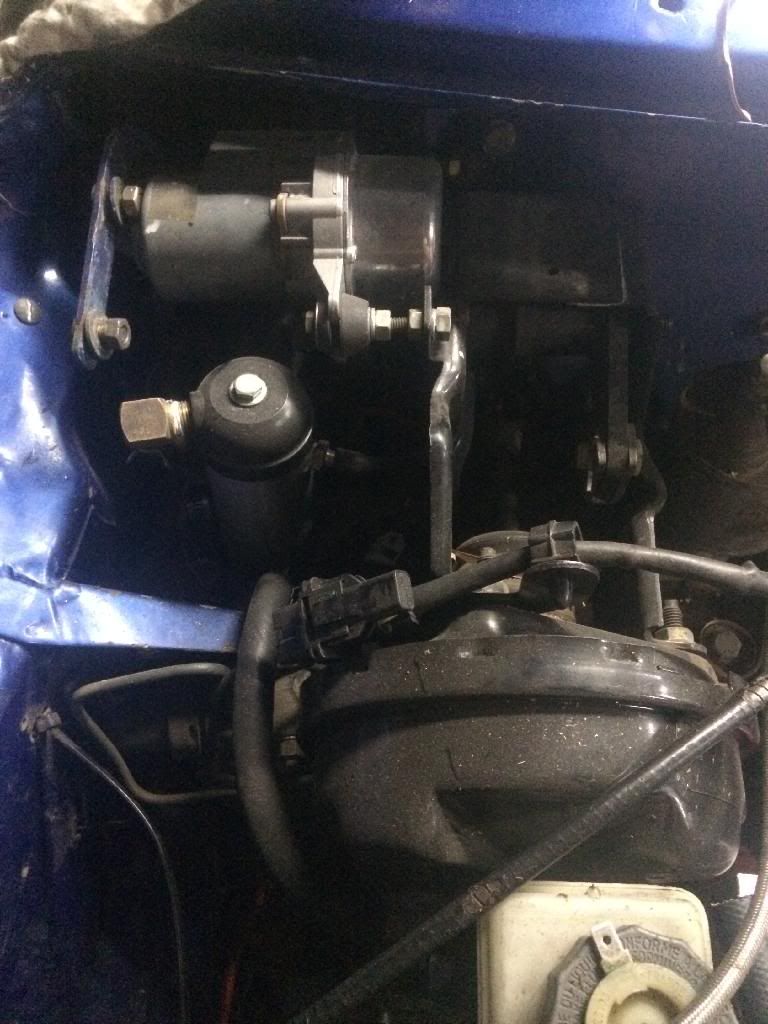
I wasnt convinced this would be enough to run my brake booster so I put a electric vac pump in just for that. It needed a little tank and a home made controller using a GM Map sensor to keep between 15-25" of vac to get a good feel to the brakes and not run the pump to hot.
Image

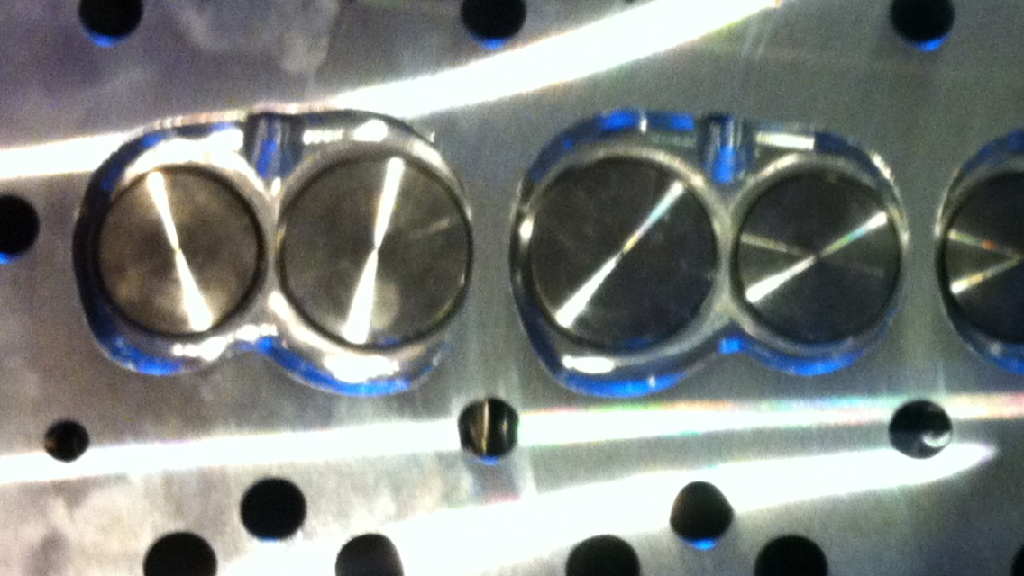
A few things I have found with mine that you might want to look at are, where the spark plugs are drilled and tapped in to the chamber there becomes a very thin section of the alloy that i had melt and crack. Mine was running with its turbo so maybe the extra heat from that didnt help but something to think about.

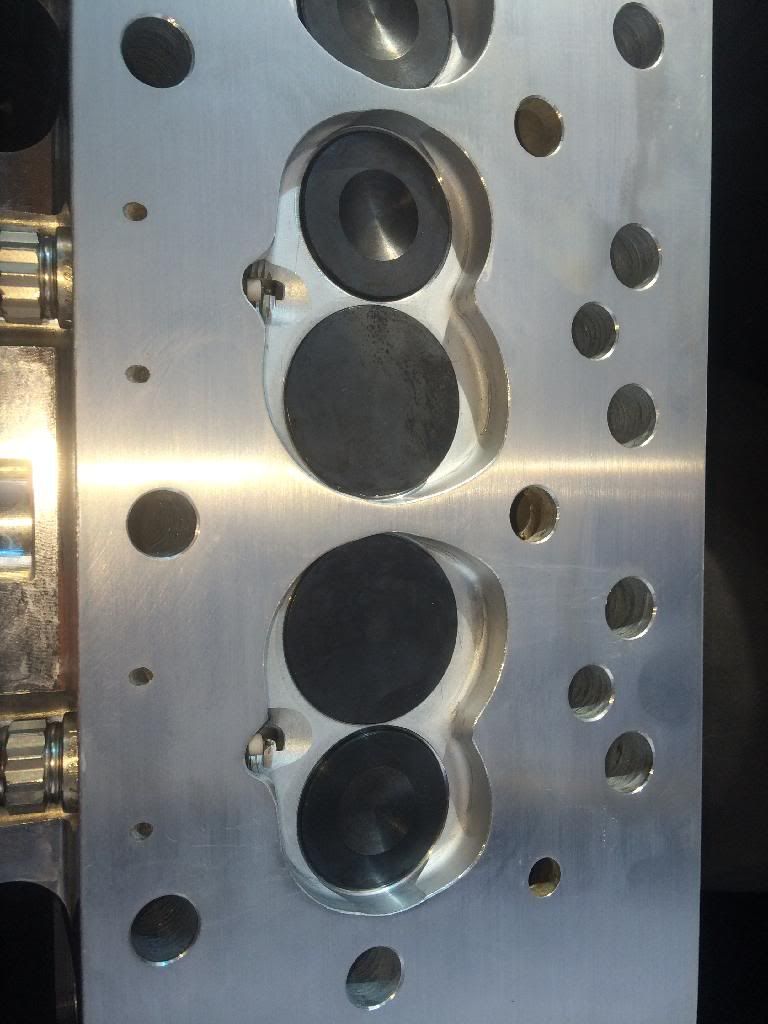
When the Head was new:
Image

After a few 100km inspection
Image
Image

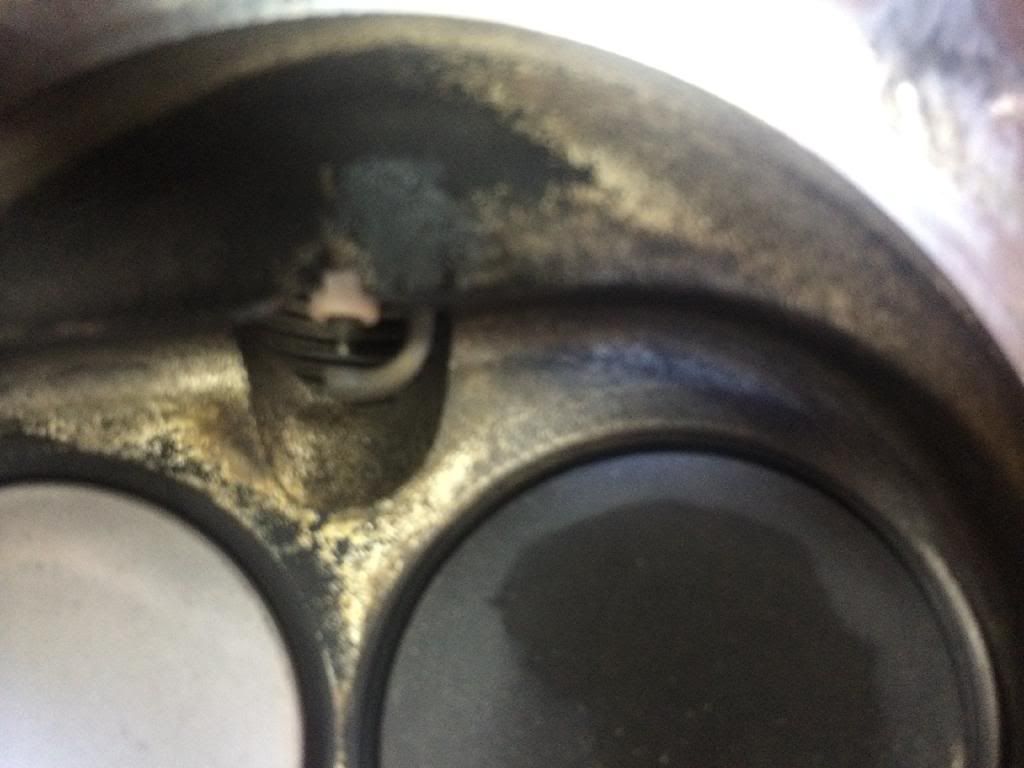
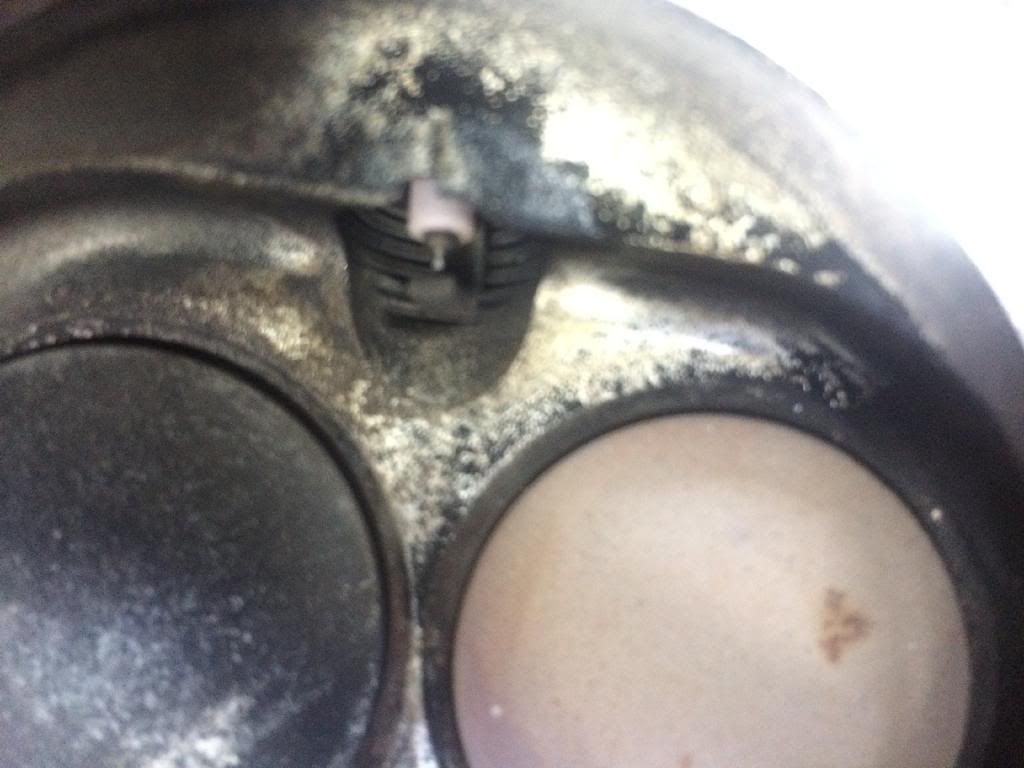
This is what I did to over come it:
Image

One other thing is the heads are very soft, my rocker posts and head studs sunk into the head a little, so re tension the head a few times after its been hot.
I also had the small rocker stud pull the threads out of the head when putting it together the 2nd time. ARP studs using a torque wrench, so we are having to helicoil them atm.

I had had mine flow tested twice after some mods if you are keen on seeing let me know :D

Thanks Nathan.

Author:  simon k [ Tue Apr 08, 2014 5:59 pm ]
Post subject:  Re: Started 7 Port Head Installation

Slo998 wrote:
Image


no personal experience on it, but after seeing those photos I'd definitely be doing that to the head, forced induction or not... very cheap bit of insurance over what could make a big mess

Author:  TheMiniMan [ Tue Apr 08, 2014 7:12 pm ]
Post subject:  Re: Started 7 Port Head Installation

looks to me like it`s been pinging it`s head off ,,, probly "because" of that "Hot-spot",,, i would also double check before you run any decent boost with a Knock-sensor, just to make sure
what ign advance were you running previously?

Author:  MiniBob [ Wed Apr 09, 2014 9:11 pm ]
Post subject:  Re: Started 7 Port Head Installation

Thanks for the details and pics Nathan.
Just been out and looked at my head. Metal is very thin there and I can see why you did the mod !!
Did you make any change to the gasket ?

I don't think I have enough confidence to drill into the ports to get a vac take-off.
Contacted SC and their suggestion is to route both crank and fuel vent to atmosphere inside the air filter (go in thru the back-plate).
I am also going to run a small pump to run the booster. The one I spotted is by SSBC in the US
Need to check out what it can do.

In the blurb that came with the head, SC recommended using hard washers under the studs to cushion it a little.
I plan to use the ARP set too.
Did you torque and re-torque to the same setting as with a cast head ?

Would be very keen to see the flow test results please.

Author:  MiniBob [ Tue May 13, 2014 3:40 pm ]
Post subject:  Re: Started 7 Port Head Installation

Here are some more pics.
Have got my new alternator fitted. Ground down the existing lower mounting bracket and it now hangs from it. Plenty of clearance :)
Have retained the belt adjuster too, another plus.
After removing both steady bars the space between the end of the air horns and the slam panel is better but I don't much like the gear selection with the motor leaning back too far, bit jerky.
Will put the bonnet back on and use an adjustable upper steady (lower has adjust slot anyway) and some blu-tak to see what touches where.
Used some cardboard and wire to suss out the air cleaner. Need to get hold of the ‘sausage’ type with a different (dished) back plate.
Reckon that if I still have to chop the slam panel, with the older style bonnet catch, it won’t be too drastic.

Also fitted the fluctuator wheel. The small bracket to hold the sensor fits snugly using two bolt positions on the timing cover.
But there is virtually no gap between the wheel and the engine mount. Need a gap there to fit the belt. Out with the grinder again 
Image

Image

Image

Image

Image

Author:  MiniBob [ Tue May 13, 2014 4:30 pm ]
Post subject:  Re: Started 7 Port Head Installation

Forgot to say thanks to Oscar, Boosh and Toolie for coming over and helping with the "think tank" :) 8)

Author:  drmini in aust [ Tue May 13, 2014 6:04 pm ]
Post subject:  Re: Started 7 Port Head Installation

Re the gearshift jerkiness with the motor tilted back, why not put a small neat fitting U/J on there, instead of the normal coupling?
It worked fine on Formula Vees etc back when I was building them.

Author:  MiniBob [ Tue May 13, 2014 9:22 pm ]
Post subject:  Re: Started 7 Port Head Installation

Thanks Doc may end up giving that a try.
Had to take the car off of the axle stands and it sits a little more level.

Author:  MiniBob [ Wed Jun 18, 2014 11:19 pm ]
Post subject:  Re: Started 7 Port Head Installation

So here's where I'm at now.
Got another back plate made of carbon fibre and a sausage type filter from Merlin Motorsport in the UK. Even with shipping this was $100 cheaper than getting them from the Aussie importer :(
I did not want to bugger up the backplate trying things out so got some BBQ trays from the local shop and made up a copy with masking tape.
Have this fitted to the throttle bodies and can mount the air cleaner on it.
It is sitting mid-way and can go down and/or up a little.

With the car on the ground and the lower steady in place, the upper steady bar front bolt is about an inch away from the hole in the block.
The motor is sitting more-or-less where it settled and I think with an adjustable top steady I can sort that out too. 8)
Now waiting for my articulated hinges to arrive and I can re-fit the bonnet.
That will be the acid test as to whether or not it touches anywhere.

Once I have it positioned satisfactorily I have to cut the real holes in the backplate.
Anyone had to cut holes in GRP ? Any tips welcomed please.


Next hurdle is the radiator and fan installation
Fifth image won't display properly for some reason.

Image

Image

Image

Image

[img]
http://i1291.photobucket.com/albums/b54 ... 58e985.jpg[/img]

Image

Author:  Oscar [ Thu Jun 19, 2014 9:29 am ]
Post subject:  Re: Started 7 Port Head Installation

That filter's certainly a much better option then the previous one Bob.

Looking at that last pic I'd pretty much guarantee it'll hit the bonnet tho...

Author:  MiniBob [ Thu Jun 19, 2014 9:37 am ]
Post subject:  Re: Started 7 Port Head Installation

Oscar wrote:
That filter's certainly a much better option then the previous one Bob.

Looking at that last pic I'd pretty much guarantee it'll hit the bonnet tho...


Reckon your right there Rod, but it will drop a bit more. Can also go on with the tabs pointing down. Still got clearance of the alternator.
My hinges arrived yesterday too so will have a go at refitting the bonnet on Saturday.

You cut carbon fibre before mate ?

Author:  Mick [ Thu Jun 19, 2014 10:56 am ]
Post subject:  Re: Started 7 Port Head Installation

Looks Great!

There's got to be a simple solution for this oft repeated cross flow inlet constriction excercise. Some slightly angled down inlet rams would maybe help, have the filter drawing from behind the grill perhaps?

I know I would be more interested in a conversion if I could keep the bonnet clean without holes in it.

Looks fantastic!

Author:  MiniBob [ Thu Jun 19, 2014 12:19 pm ]
Post subject:  Re: Started 7 Port Head Installation

Thanks Mick :D
I am hoping that I don't have to muck around with engine mounts and/or the sub frame.
The pencil line in the last pic above is the metal that might have to come out. I would do that first before considering changes to engine mounts etc.

Page 3 of 5 All times are UTC + 10 hours
Powered by phpBB® Forum Software © phpBB Group
http://www.phpbb.com/