ausmini
https://www.ausmini.com/forums/

Started 7 Port Head Installation
https://www.ausmini.com/forums/viewtopic.php?f=5&t=84969
Page 4 of 5

Author:  Morris 1100 [ Thu Jun 19, 2014 5:16 pm ]
Post subject:  Re: Started 7 Port Head Installation

Mick wrote:
Looks Great!

There's got to be a simple solution for this oft repeated cross flow inlet constriction excercise...

I was wondering about making a duct out of the front edge of bonnet, make a tray behind and under the inlets and when the bonnet closes it completes the duct, then feed a filter from the clutch side of the engine bay into the bonnet/duct.

Author:  Oscar [ Fri Jun 20, 2014 10:17 am ]
Post subject:  Re: Started 7 Port Head Installation

MiniBob wrote:
You cut carbon fibre before mate ?

Mucked around with GRP quite a bit in my younger years Bob. Very easy to work with but you have to make sure you use fine tools - abrasive rather than cutting is best. For drilling you tape over the work area, start small, work up and use high speed. Best to stop clear of the marked out line and sand to finish. A smear of super glue or nail polish around the cut edge seals it off.

Author:  MiniBob [ Fri Jun 20, 2014 11:50 am ]
Post subject:  Re: Started 7 Port Head Installation

Oscar wrote:
MiniBob wrote:
You cut carbon fibre before mate ?

Mucked around with GRP quite a bit in my younger years Bob. Very easy to work with but you have to make sure you use fine tools - abrasive rather than cutting is best. For drilling you tape over the work area, start small, work up and use high speed. Best to stop clear of the marked out line and sand to finish. A smear of super glue or nail polish around the cut edge seals it off.


Great thanks for that Rod.

Author:  Morris 1100 [ Fri Jun 20, 2014 3:42 pm ]
Post subject:  Re: Started 7 Port Head Installation

Tape over the job stops the drill running away and helps stop the edges from chipping.

Author:  MiniBob [ Fri Jun 20, 2014 3:47 pm ]
Post subject:  Re: Started 7 Port Head Installation

Morris 1100 wrote:
Tape over the job stops the drill running away and helps stop the edges from chipping.


Thanks, yes, have done that before such as drilling tiles etc.
Have to be careful 'cos it wasn't very cheap.

Author:  Oscar [ Mon Jul 28, 2014 12:54 pm ]
Post subject:  Re: Started 7 Port Head Installation

Hey Bob. How are you travelling with this?

I'd come around and check it out but I'm down n out with a bloody virus...

Author:  MiniBob [ Tue Jul 29, 2014 5:56 pm ]
Post subject:  Re: Started 7 Port Head Installation

Oscar wrote:
Hey Bob. How are you travelling with this?

I'd come around and check it out but I'm down n out with a bloody virus...


Hi Rod, haven't been out there for a while.........
Spent three days in bed with a bloody virus :(

Author:  Oscar [ Wed Jul 30, 2014 9:20 am ]
Post subject:  Re: Started 7 Port Head Installation

You too mate!

Geez there's a lot of it around...

Author:  MiniBob [ Thu Nov 06, 2014 2:14 pm ]
Post subject:  Re: Started 7 Port Head Installation

Forgive my ignorance but is there a timing chain tensioner with a duplex set up?
All the kits seem to show one when it's simplex, but nothing with the duplex versions.

Will not be trying out any of the timing belt kits. Too many negatives.

Author:  TK [ Thu Nov 06, 2014 5:16 pm ]
Post subject:  Re: Started 7 Port Head Installation

Shouldn't need a tensioner with a duplex set up.

Author:  drmini in aust [ Fri Nov 07, 2014 6:03 am ]
Post subject:  Re: Started 7 Port Head Installation

TK wrote:
Shouldn't need a tensioner with a duplex set up.

Duplex sold here on Cooper S and early 1100S had no tensioner. However you can use an A+ front plate, timing cover and simplex chain tensioner. But there is really no need, IMO.
I've only done this once, on a Cooper S motor that had been line bored by a PO, crank was .016" higher and the chain was loose as. It also needed .016" milled off the bottom flange, and a 10deg offset key fitted too.

Author:  MiniBob [ Fri Nov 07, 2014 8:14 pm ]
Post subject:  Re: Started 7 Port Head Installation

Thanks for clarifying that :)

Author:  MiniBob [ Fri Apr 10, 2015 3:47 pm ]
Post subject:  Re: Started 7 Port Head Installation

Have now got the block and head back from the machine shop.
Originally wanted just a hone / new rings because the crank and bores had very little wear.
Was under the impression that standard rings were not available and ordered a set of +20 pistons and rings. Found out afterwards that at least two companies here make piston rings :(
Murphy's Law!
The shop then pointed out that my conrods were rooted. Previous owner had taken a grinder to the shoulders, just above the caps. There is less than a mill of metal remaining in some spots.
Found some good quality second hand ones (eight of them!!) and asked the shop to sort out the best 4 and prep them. They have done a good job.
Also had new main caps, four bolt centre, and some other work done too.
Will post a few pics up.
Have been a busy bee with the rad in the meantime.
The mounting bracket is also the shroud and the fan goes under the wheelarch
Thanks to Kerr the younger and Boosh (Jason) for all assiatance :)

Image[/img]

Image[/img]

Image[/img]

Image[/img]
Image[/img]

Author:  MiniBob [ Thu Jun 15, 2017 12:38 pm ]
Post subject:  Re: Started 7 Port Head Installation

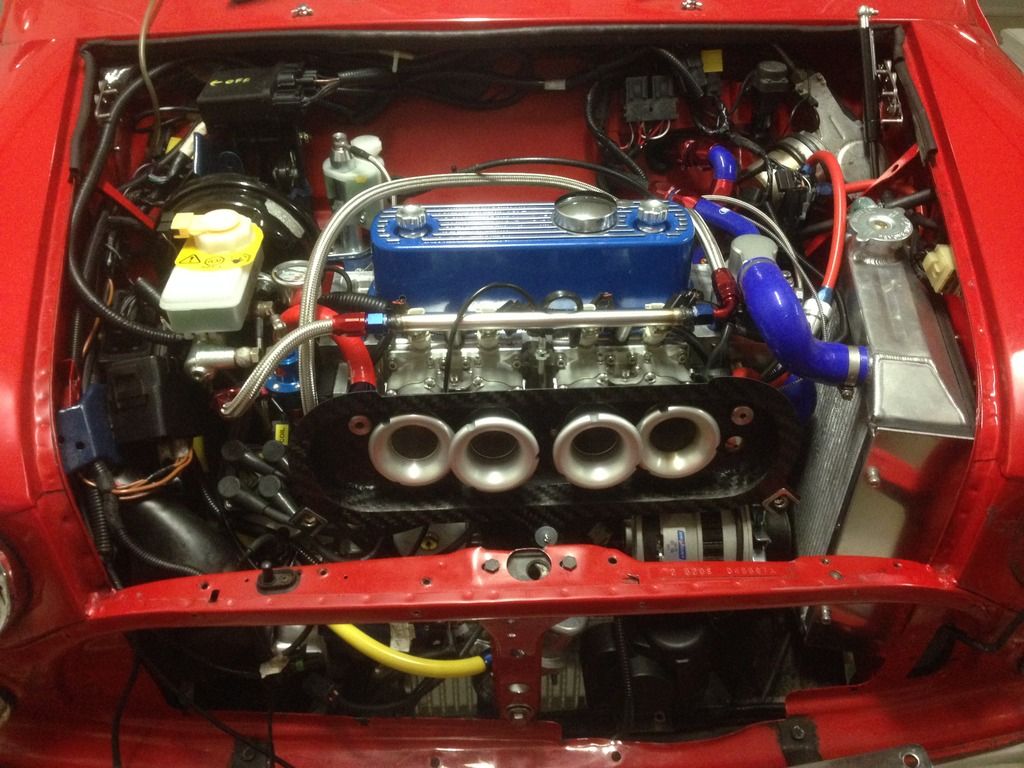
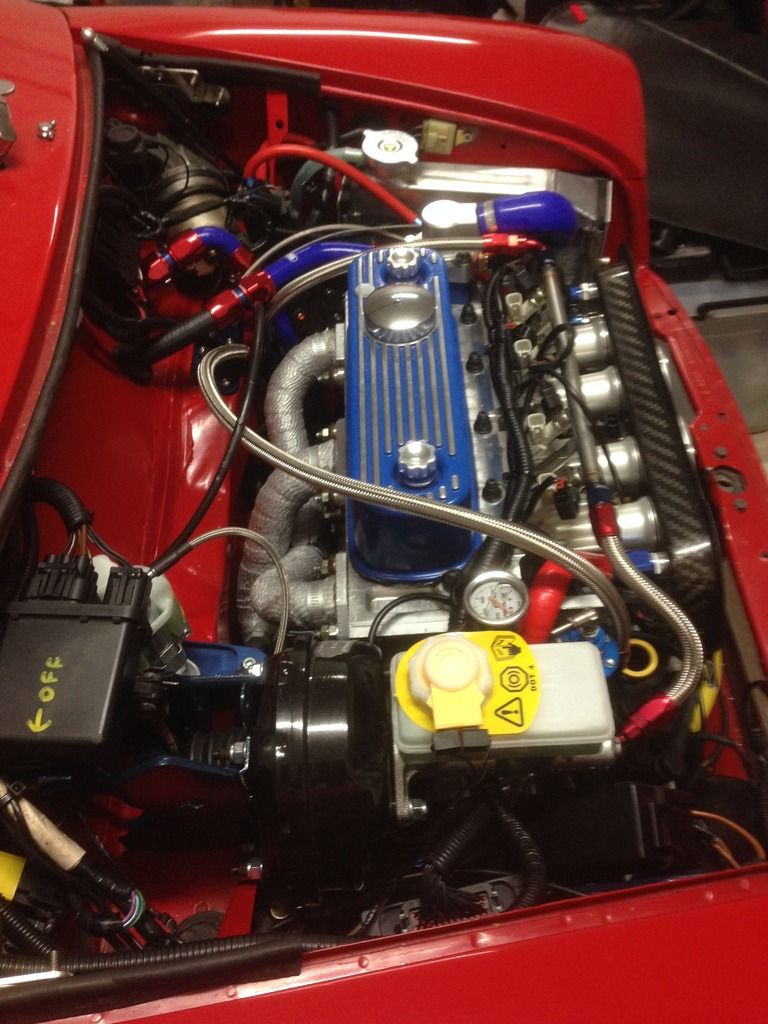
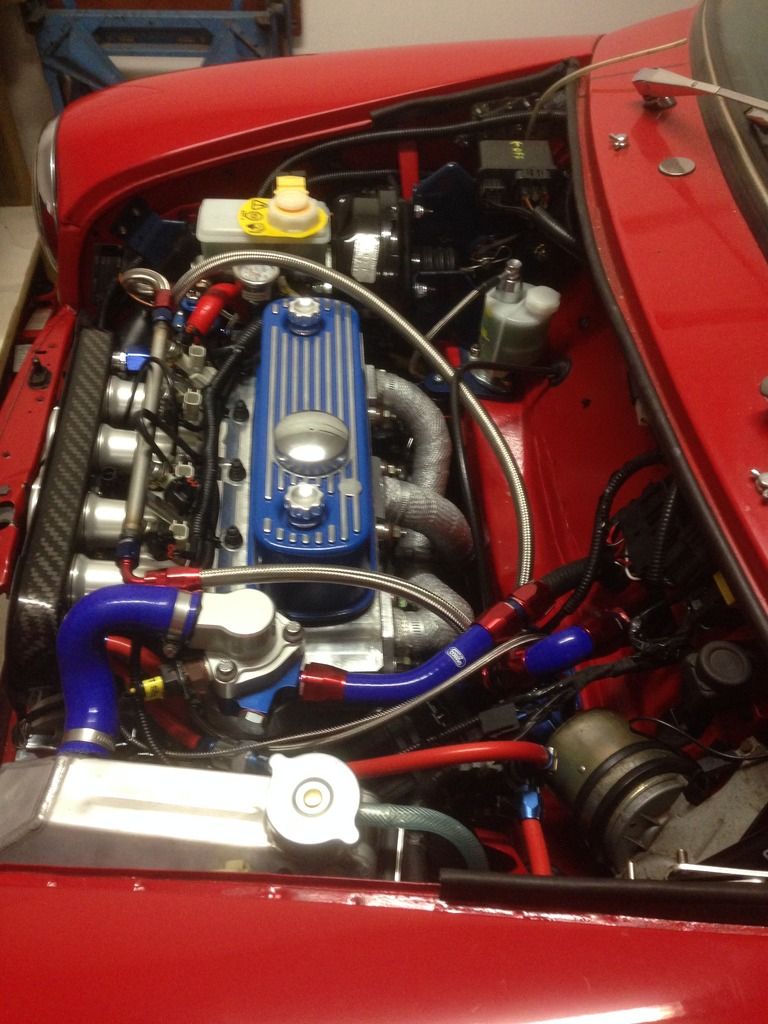
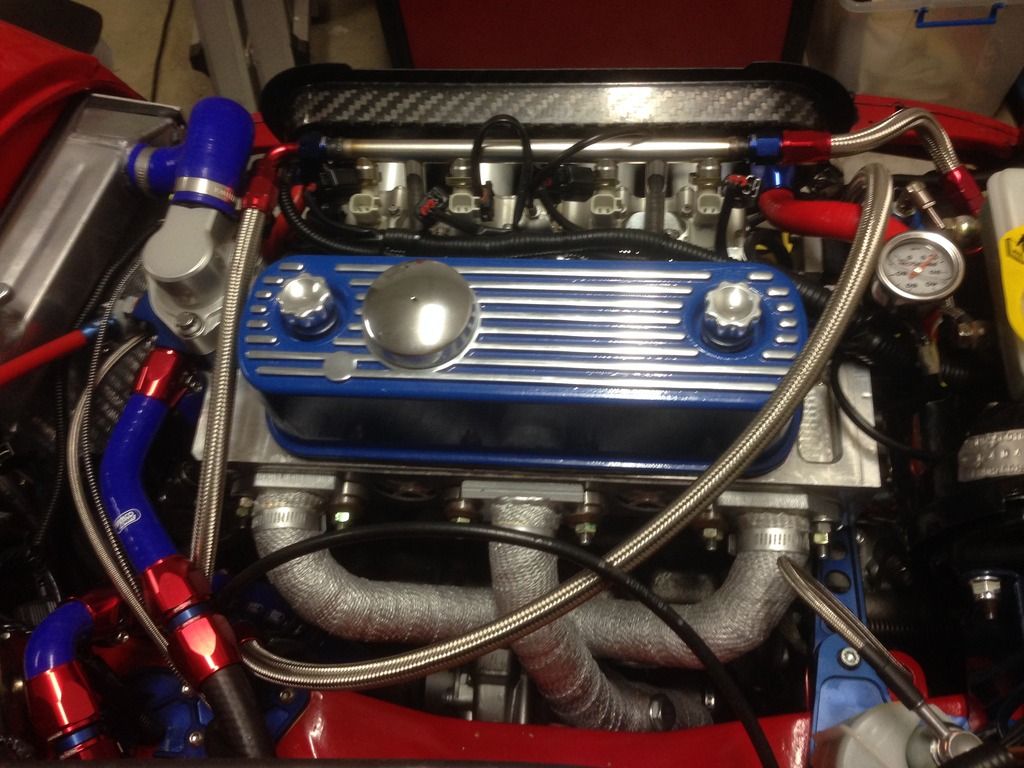
Well it's been a while but the title can now be read as "nearly finished......................
List of jobs I expected to do is outweighed by those not expected by about 10:1

Can anyone advise on throttle cable lengths please?
Version supplied by manufacturer pulls thru the hole in the bulkhead, there is no "stepped" end to the sheath.
I have measured up the RHD MPi cable and it would just fit. Have also ordered the LHD version too.
Will the pedal stop nipple go thru the bulkhead when fitting? (I cut this off to remove and can't remember :oops: )

Anyone know anything about the SPI versions? Looking at the web, believe these have a stepped end too?
Carby versions are totally different and won't do.

Author:  MiniBob [ Thu Jun 15, 2017 2:14 pm ]
Post subject:  Re: Started 7 Port Head Installation

some pics

Image
Image
Image
Image

Page 4 of 5 All times are UTC + 10 hours
Powered by phpBB® Forum Software © phpBB Group
http://www.phpbb.com/