ausmini https://www.ausmini.com/forums/ |
|
Painting contessa mags (an illustrated story, 6 pictures) https://www.ausmini.com/forums/viewtopic.php?f=2&t=11276 |
Page 1 of 2 |
Author: | Bromley [ Sat Sep 17, 2005 10:04 pm ] |
Post subject: | Painting contessa mags (an illustrated story, 6 pictures) |
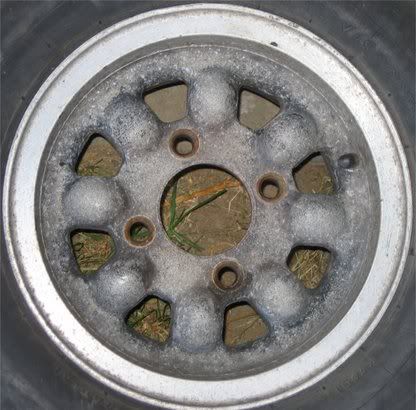
![]() This is was the condition of the rims when I got them. Very grubby with traces of pink paint. The tyre shop down the road removed the tyres for me free of charge. ![]() I tried a wire wheel attatchment on my drill and sandpaper to clean them up. I am fairly imaptient when it comes to these sort of jobs so decided to get them sandblasted. ($10/Rim) (Be warned - If sandblasting make sure they don't do the highly polished surrounds. This happened to me ![]() Another option is to use a paint stripper and a degreaser to clean the wheels. Sandblasting gives you a very tidy canvas to work with. ![]() 
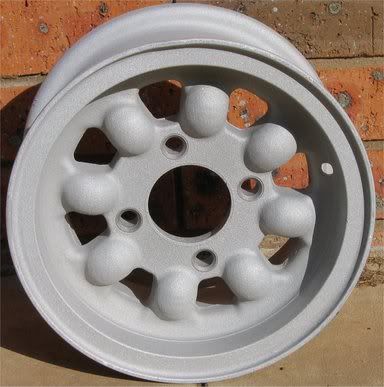
Because I got my surrounds sandblasted I used a wire wheel to bring back a bit of shine and it actually came up with a unique effect. Cover the parts you don't want painted with masking tape ($1.90) 
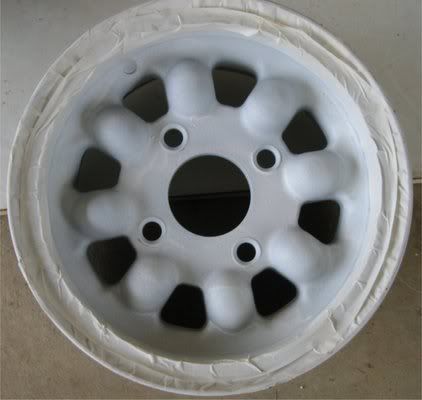
Then I used a pressure pack etch primer ($13). I gave the rims two coats all over and allowed time to dry. ![]() Next step was the application of the colour. I chose a standard silver in a pressure pack ($6.95). I used two of these because I gave the wheels about 6 coats. As per directions more thin coats are better than one or two thick ones. (Keep dogs away or else you will be picking bit of hair off your job all day ![]() ![]() 
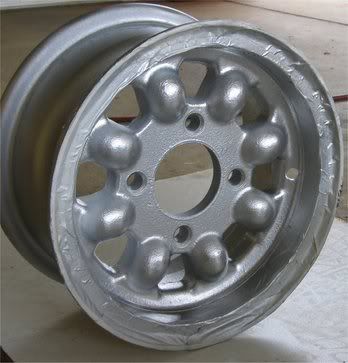
Last job was a couple of coats of gloss enamel that really made the colour glisten. One pressure pack (about $4 at BigW) was enough for this job. There is a one hour wait time between coats. ![]() 
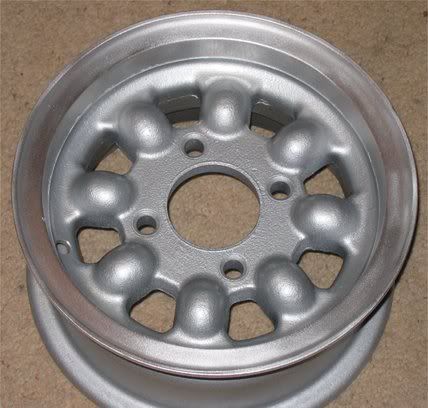
The Finished Product This photo does not do justice to the finished product. By the time the last coat of enamel dried it was dark and I had to take these photos inside with the flash. But they have come up really nice. Total Cost = Just under $60 If you would like any more info drop me a PM Andy. |
Author: | Maxi23 [ Sat Sep 17, 2005 11:42 pm ] |
Post subject: | |
Very well done and informative ![]() Was going to pay someone to do mine, so this has made me decide to do it myself! Well Done!! |
Author: | Maxi23 [ Sun Sep 18, 2005 12:10 am ] |
Post subject: | |
Was that $60 all up for all 4 rims ? or just one ? |
Author: | willy [ Sun Sep 18, 2005 1:57 am ] |
Post subject: | |
That looks bloody sweet man. Good effort! ![]() |
Author: | GT1360 [ Sun Sep 18, 2005 5:13 am ] |
Post subject: | |
nice work mate ![]() |
Author: | Wolfman [ Sun Sep 18, 2005 9:07 am ] |
Post subject: | |
They came up a treat ![]() ![]() |
Author: | Lillee [ Sun Sep 18, 2005 9:15 am ] |
Post subject: | |
Good job! I coated mine with 2-3 coats of clear to protect the painwork. Might not work with metallic colours? dunno. The clear works well, easy to clean! |
Author: | scotty [ Sun Sep 18, 2005 12:28 pm ] |
Post subject: | |
Very informative ![]() Could the same result be acheived with the tires still on? Obviously the sandblasting would be out of the question. |
Author: | Besser [ Sun Sep 18, 2005 4:41 pm ] |
Post subject: | options |
if you want to polish the outer lip, jack the car up, put it in 1st and then let the wheels spin. Some wet and dry then cut and polish for a gleem the mcleans would be proud of. |
Author: | danidad [ Sun Sep 18, 2005 7:54 pm ] |
Post subject: | |
excellent article and tips.. |
Author: | Mini Mad [ Sun Sep 18, 2005 7:59 pm ] |
Post subject: | |
nice work, get it put into the how-to section. |
Author: | willy [ Sun Sep 18, 2005 8:06 pm ] |
Post subject: | |
Mum reckons the wheels look pretty cool. ![]() |
Author: | NAV [ Sun Sep 18, 2005 9:21 pm ] |
Post subject: | |
Nothing like a nice set of fresh painted & polished set of rims This is how i did mine that SG (thanks mate) sold to me Before: ![]() Paint Stripping: ![]() Masked up: ![]() Etch priming: ![]() Final finish after clearcoat: (Pic is a bit dark we ran out of light) ![]() One of the advantages of stripping the wheels before you re-paint them is they keep that rough texture and look great. I think we took off about 3 layers of paint from those rims, then we got some autosol bolted the wheel onto the front of NAV and idled him in 4th and used it like a lathe. ![]() How'd that pic get in there? ![]() |
Author: | willy [ Sun Sep 18, 2005 9:46 pm ] |
Post subject: | |
freakin thats soo tuff! Mmmm contessas ![]() |
Author: | NAV [ Sun Sep 18, 2005 9:49 pm ] |
Post subject: | |
Those nice shiny wheel nuts cost $5ea so it cost $80 just to be able to bolt the rims on! ![]() |
Page 1 of 2 | All times are UTC + 10 hours |
Powered by phpBB® Forum Software © phpBB Group http://www.phpbb.com/ |