Ausmini
It is currently Fri Jul 18, 2025 9:30 am

All times are UTC + 10 hours


Post new topic Reply to topic  [ 41 posts ]  Go to page 1, 2, 3  Next
Author Message
 Post subject: hi-los help
PostPosted: Wed Jun 13, 2007 10:49 pm 
Offline
THIS SPACE FOR RENT
User avatar

Joined: Mon Aug 08, 2005 8:50 pm
Posts: 4112
Location: barossa valley sa
hey guys,
i recently bought hilos of gordo to put in my mk1.

how do i do it??

what needs to cum out etc? where does it go?

is there a difference between the front and rear "cones" the little trumpetey things u use..

cheers

jamie

_________________
-jamie-
1963morris 850
1965 solid side van
1994 rover racecar


Top
 Profile  
 
 Post subject:
PostPosted: Wed Jun 13, 2007 10:56 pm 
Offline
SooperDooperMiniCooper ExpertEngineering
User avatar

Joined: Fri Apr 29, 2005 9:46 am
Posts: 18887
Location: Under the bonnet son!
You need to remove the aluminium trumpets between the rubber spring and the upper suspension arm, as well as the ones on the rear.

The hi-low will replace the front trumpets completely, but for the rear you will need to obtain a rear pair from a hydrolastic car. They are basically just rods with a ball in the end and will sit in between the hi-low and the rear suspension arm.

_________________
SooperDooperMiniCooperExpertEngineering

All garage work involves equal measures of enthusiasm, ingenuity and a fair degree of irresponsibility.


Top
 Profile  
 
 Post subject:
PostPosted: Wed Jun 13, 2007 10:58 pm 
Offline
1360cc
1360cc

Joined: Mon Nov 01, 2004 4:36 pm
Posts: 7673
rear ones are easy

remove the fuel tank
unbolt the shock absorbers
free the cone from the trumpet
remove
reinstall with hilo wound so you can fit it back in,
re-attach shocker andfuel tank
then fiddle with the ride height

when i did the front ones they were an absolute bitch and involved removing the whole suspension, i think you can do it with a cone compressor though

edit: or you can cut the trumpets as you wont need them anymore


Top
 Profile  
 
 Post subject:
PostPosted: Wed Jun 13, 2007 11:03 pm 
Offline
THIS SPACE FOR RENT
User avatar

Joined: Mon Aug 08, 2005 8:50 pm
Posts: 4112
Location: barossa valley sa
sounds tricky


i ahve the 4 trumpety things and two bars, the bars are for the rear arent they

_________________
-jamie-
1963morris 850
1965 solid side van
1994 rover racecar


Top
 Profile  
 
 Post subject:
PostPosted: Wed Jun 13, 2007 11:05 pm 
Offline
SooperDooperMiniCooper ExpertEngineering
User avatar

Joined: Fri Apr 29, 2005 9:46 am
Posts: 18887
Location: Under the bonnet son!
yeah that's them.

Front one's not too tricky, just might take a while.

It's easier if you just undo the top arm (Using the large nut at the back of the subframe) and remove the shaft.

_________________
SooperDooperMiniCooperExpertEngineering

All garage work involves equal measures of enthusiasm, ingenuity and a fair degree of irresponsibility.


Top
 Profile  
 
 Post subject:
PostPosted: Wed Jun 13, 2007 11:08 pm 
Offline
THIS SPACE FOR RENT
User avatar

Joined: Mon Aug 08, 2005 8:50 pm
Posts: 4112
Location: barossa valley sa
thats what i was thinking sweet ill give it a go tomorrow

_________________
-jamie-
1963morris 850
1965 solid side van
1994 rover racecar


Top
 Profile  
 
 Post subject:
PostPosted: Wed Jun 13, 2007 11:10 pm 
Offline
1360cc
1360cc

Joined: Mon Nov 01, 2004 4:36 pm
Posts: 7673
Mick wrote:
yeah that's them.

Front one's not too tricky, just might take a while.

It's easier if you just undo the top arm (Using the large nut at the back of the subframe) and remove the shaft.


yeah thats the hard part, next time i'll try with a cone compressor or just cut the trumpets


Top
 Profile  
 
 Post subject:
PostPosted: Thu Jun 14, 2007 5:41 pm 
Offline
THIS SPACE FOR RENT
User avatar

Joined: Mon Aug 08, 2005 8:50 pm
Posts: 4112
Location: barossa valley sa
i need more help!!!

got the thingys out, now what??

pics?

i think i have done it right, where exactly do teh hilos go?

Image
Image
Image
Image
Image
Image

_________________
-jamie-
1963morris 850
1965 solid side van
1994 rover racecar


Top
 Profile  
 
 Post subject:
PostPosted: Thu Jun 14, 2007 5:46 pm 
Offline
1360cc
1360cc

Joined: Mon Nov 01, 2004 4:36 pm
Posts: 7673
remove the trumpet from the cone, the hi-lo goes where the trumpet does..


Top
 Profile  
 
 Post subject:
PostPosted: Thu Jun 14, 2007 5:48 pm 
Offline
1360cc
1360cc

Joined: Mon Nov 01, 2004 4:36 pm
Posts: 7673
have you got a new ball for the end of it? otherwise you gotta remove the ball from the trumpet


Top
 Profile  
 
 Post subject:
PostPosted: Thu Jun 14, 2007 7:13 pm 
Offline
THIS SPACE FOR RENT
User avatar

Joined: Mon Aug 08, 2005 8:50 pm
Posts: 4112
Location: barossa valley sa
its starting to make sense !!! ish


no no new ball thingn

get the old 1 of with a screwdriver??

tahnkyou

_________________
-jamie-
1963morris 850
1965 solid side van
1994 rover racecar


Top
 Profile  
 
 Post subject:
PostPosted: Thu Jun 14, 2007 9:07 pm 
Offline
1098cc
1098cc

Joined: Thu Mar 22, 2007 9:25 pm
Posts: 1322
Location: wooToomba
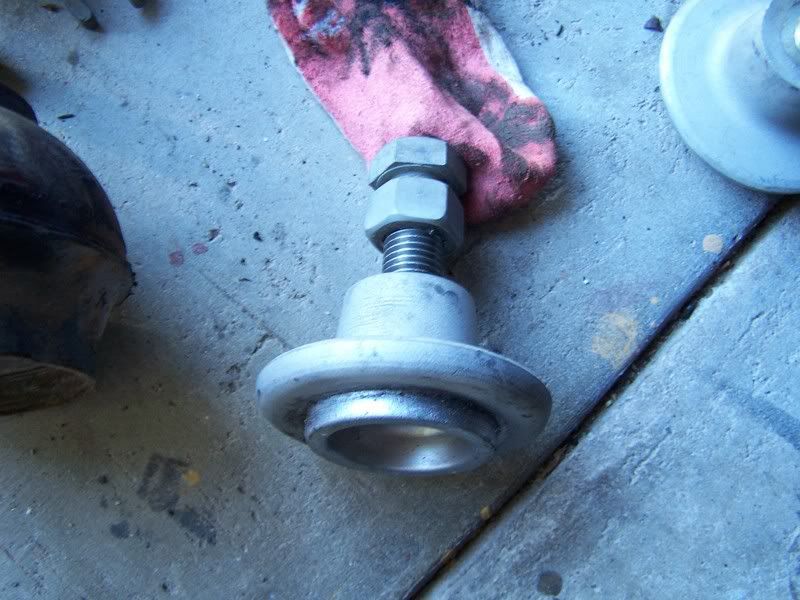
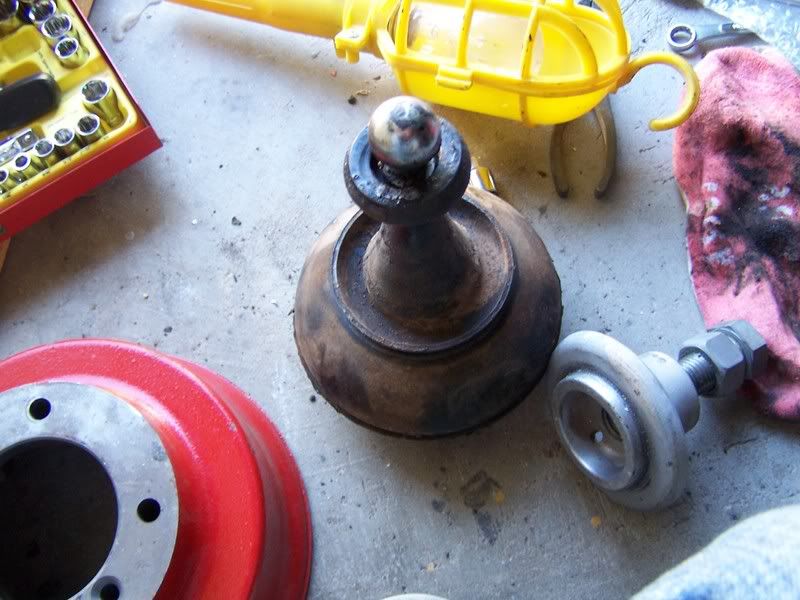
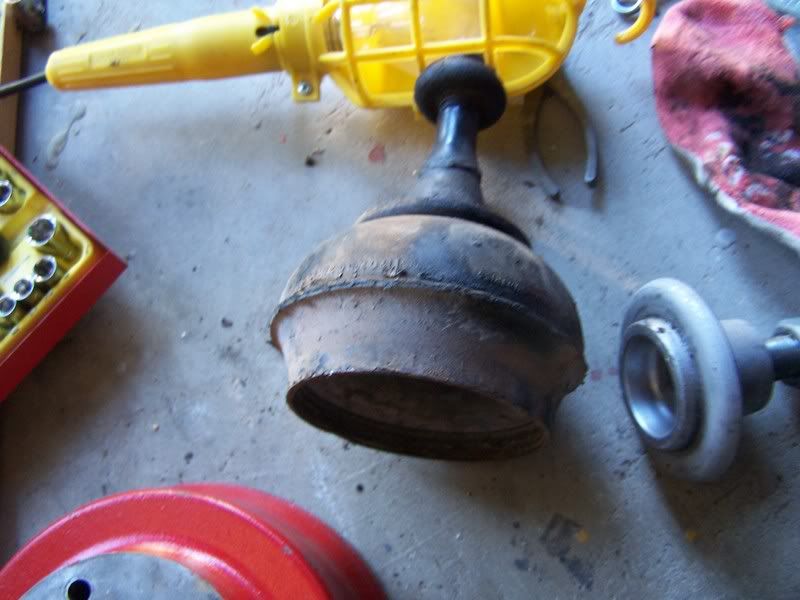
If you haven't had these out for a while, it's usually a good idea to throw a new cup-and-ball (also known as a knuckle joint, among other things) on there. There's a nylon cup which sits in the top arm at the front, and in the trailing arm at the back, which the rubber seal on the ball should've been hooked over. The cup is usually filled with grease, hence the rubber seal. If you can't see the lip of the nylon cup, it's a very good idea to dig the remnants of the cups out and replace them! The ball will last a good while, but the cup will wear faster. They're not too dear, and it means you can forget about your springs/hilos for a while. :wink: 
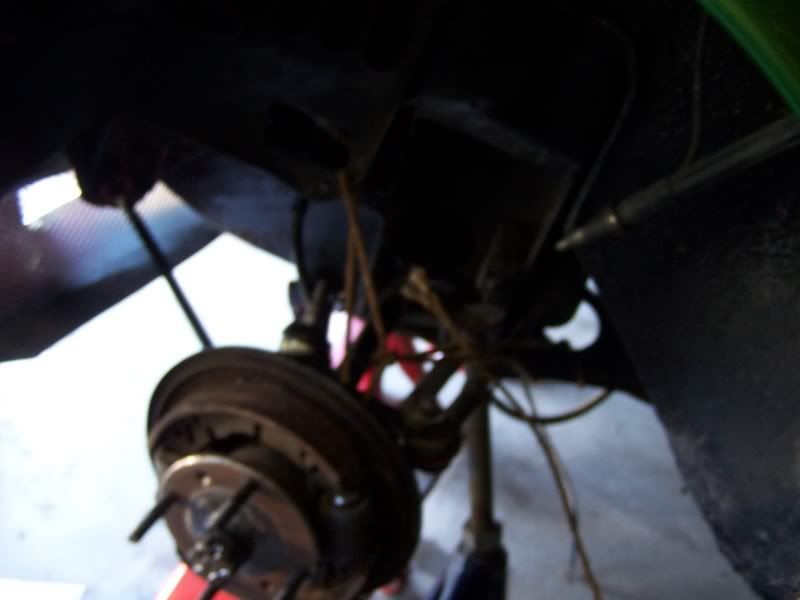
If you've got the hilos back in there, still look, having hilos in there makes it easier to get your springs out without using a compressor. They often sell the knuckle joint with hilos, but not always. :? :)
Just make sure the person behind the desk knows what you're after. I went in and asked for the cup and ball joint at my local shop (not a Mini specialist), and they told me to come back in a week when they came in (and quoted me $200!). I went away, only to discover when I came back they had a complete set of upper and lower ball joints - the ball joints at the hub, not the knuckle (cup and ball) joint! :oops: :roll: When the misunderstanding was cleared up, things were a lot cheaper. :lol:


Top
 Profile  
 
 Post subject:
PostPosted: Thu Jun 14, 2007 9:58 pm 
Offline
998cc
998cc
User avatar

Joined: Wed Dec 21, 2005 9:27 am
Posts: 519
Location: NSW
Well done so far, this is what i have to do to get the trumpet and the rubber cones out :evil: :evil:

Image

Image


Taking the trumpet out of the rubber cones is hard, but you already have everything out might as well get a new rubber cones put in with the new hi-lo's trust me its worth it and u know u'll get smoother ride.

Now the hardest part is taking the nylon cup out of the top arm. what i did burn the farkin thing up....like in the pic shown.... trust me it work so far to my moke "spot" and emm's clubbie "jack" :)
what you'll need lighter and heaps of WD40 :)

Image

Image
start with small fire

Image
I Want Fire!!! MORE FIRE!!!

Image
BIG FIRE!!! BURN!!!!

Image
Finally its out

Image
Nice n Clean...pretty good huh? :)

WARNING!!!
- Better take the top arm out of the car.
- Stay away from the fire when you spray WD40. 8)
- Do it in open space.

I'm sure sumone will add the movie clip how we did it on "JACK" :lol: :lol:

_________________
ImageImageImageImage


Top
 Profile  
 
 Post subject:
PostPosted: Thu Jun 14, 2007 10:01 pm 
Offline
1360cc
1360cc

Joined: Mon Nov 01, 2004 4:36 pm
Posts: 7673
what springs :lol:

harder than removing the trumpet from the cone is removing the ball from the trumpet, but spray wd40 and hit it from inside the cone with a long object and hammer oh and hold the trumpet in a vice while you do this.


Top
 Profile  
 
 Post subject:
PostPosted: Thu Jun 14, 2007 10:13 pm 
Offline
Slow-Po
User avatar

Joined: Fri Jul 08, 2005 8:56 pm
Posts: 9979
I've felt like setting fire to my Moke Gio, I feel better know to see that you've actually done it. :D

_________________
One should never skimp on the zip ties.

Image


Top
 Profile  
 
Display posts from previous:  Sort by  
Post new topic Reply to topic  [ 41 posts ]  Go to page 1, 2, 3  Next

All times are UTC + 10 hours


Who is online

Users browsing this forum: No registered users and 107 guests


You cannot post new topics in this forum
You cannot reply to topics in this forum
You cannot edit your posts in this forum
You cannot delete your posts in this forum
You cannot post attachments in this forum

Jump to:  

© 2016 Ausmini. All garage work involves equal measures of enthusiasm, ingenuity and a fair degree of irresponsibility.