phillz wrote:
Good stuff Simon, one other thing , couldn't you pick a colour you like for your motor

justincase42 wrote:
HA I was thinking the same.....Motor has an awesome colour scheme!
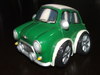
lol.... nah, after I rebuilt it at the start of last year I bought 4 cans of paint from The Warehouse, plus a couple of leftovers, and let the kids paint it - I helped a bit.... came up noice
the best patterns came up at the back of the motor, where the colours mixed together


but that's not what were talking about .....

Tombo super dad wrote:
He who drives his mini has dirty engine.
I like the idea Simon, Did you use seperate amber and white LEDs or color shift type? Let me guess, seperate ones because getting an accurate voltage is near impossible in a mini? Keen to see them at Hay
yep, engine is filthy now
separate amber and white - honestly I didn't think about colour shift ones for a second - the white ones are at the points of the triangle, the ambers are the circle of 7 in the centre
you'll definitely see them at Hay buddy - "oh my god, those indicators, they're too bright, I'm blind!"
gafmo wrote:
Any information you can pass on Simon
I was toying with the idea of making a batch of them - if people were keen... not sure what the total cost would come out at, but I'm told I can get a run of PCBs made in Melbourne pretty cheaply (maybe as low as $5-7 each for 20 or 30 of them), there is about (retail) $16 worth of LEDs on it, and 50 cents worth of resistors.... I bought new rubbers because mine weren't flash, they're about $7. Very easy to put together - I could make a killing on ebay
the board shown here is made with a fascinating, but time consuming process - good for prototyping, but no way you'd do it for a whole bunch of them. I've got some pictures of the PCB while being made, but they're on my phone, and it doesn't talk to this computer
PCB making process... after getting one of your work buddies to do a nice layout
1/ laser print the PCB layout on to special paper
2/ iron the paper onto a piece of blank copper circuitboard, it re-melts the laser printing which bonds to the copper
3/ cut the board up using a guillotine
4/ immerse the board in nasty chemicals (the kind that eats through glass) which "etches" (fancy term for "corrodes like all hell") the copper, the bits under the laser printing are protected, the rest gets eaten away
5/ drill the holes in the PCB
6/ solder the bits on
7/ that's it
_________________
did I tell you that I won a
trophy?


