Ausmini
It is currently Thu Aug 07, 2025 1:12 am

All times are UTC + 10 hours


Post new topic Reply to topic  [ 31 posts ]  Go to page 1, 2, 3  Next
Author Message
 Post subject: Cooper S Flare Template
PostPosted: Fri Jul 11, 2008 9:17 am 
Offline
848cc
848cc
User avatar

Joined: Thu Dec 07, 2006 12:15 pm
Posts: 167
Location: Adelaide
I am about to fit the standard cooper s flares to my van, and I plan to use the standard leyland fitting kit. Does anyone have or know where I can get a template to mark the hole positions for the plastic clips? I'm guessing back in the day there must have been a template for dealers and customers to fit these to their cars...

Any advice will be appreciated.


Top
 Profile  
 
 Post subject:
PostPosted: Fri Jul 11, 2008 9:58 am 
Offline
1360cc
1360cc
User avatar

Joined: Wed Oct 03, 2007 9:04 pm
Posts: 6751
Location: Melbourne, VIC
I assume you have the pieces of flat metal spot welded (or rivetted) to the lip of each guard as per the Cooper S? If so you don't really need the plastic button fitting kit to hold the flare against the guard. These buttons were held on by self-tappers which eventually caused rust to form around the hole in the guard. You can buy little metal clips like very tiny bulldog clips which hold the outer edge of the plastic flare to the outer edge of the flat metal base piece. Also, the pop rivets holding the chrome finisher on are sufficient to keep the flare in place.
All the above comes courtesy of John at Mini King, as do spare flares and clips. Suggest you give him a call.


Top
 Profile  
 
 Post subject:
PostPosted: Fri Jul 11, 2008 10:06 am 
Offline
848cc
848cc
User avatar

Joined: Thu Dec 07, 2006 12:15 pm
Posts: 167
Location: Adelaide
Yes, I have the sheet metal guard extensions. I have found that even with the chrome strip in place, the flares do not fit really nicely against the guards when compared with my S, which had the flares retro fitted in the 60's using the fasteners. Seems like they need a helping hand, which led me to get the plastic button clips. They must be a newer type repro item, as they just press fit into a hole. Would still like to explore using them for a nice result.

The last set of flares I fitted to another car had the same issue, and I ended up using sikaflex to get the right result. Unfortunately this car is red, and they don't make the sikaflex adhesive in red...


Top
 Profile  
 
 Post subject:
PostPosted: Fri Jul 11, 2008 11:11 am 
Offline
998cc
998cc
User avatar

Joined: Sat Jul 14, 2007 1:42 pm
Posts: 903
Location: Hunter Valley, NSW
I have just been through this process myself. Will include the following photos at some point in my gallery section, but this may give you some ideas.

I made up the metal strips myself from some 0.8mm zincaneal sheet. At the early stage it was wider than needed and would be trimed to size when the flare was sitting on top. The pencil line indicates the outer edge of the lip
Image
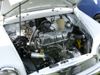
This was my guard when I started.
Image
First thing is to get the lip nice and square to the body so the flare sits against the body without having to use glue.
Image
Metal strip held in place by clamps.
Image
Spot welded with the MIG. Only enough to hold in place in case I want to remove in the future. You can also use rivets.
Image
Image
Sit the flare on top and draw a pencil line to trim the strip.
Image
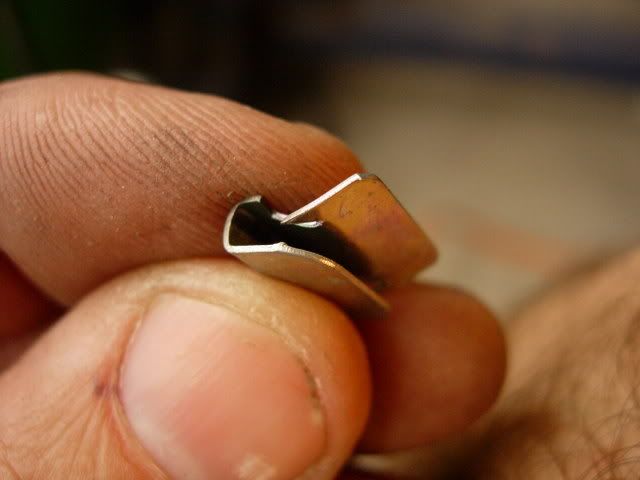
Cut down with angle grinder and file edges to remove sharp edge.
Image
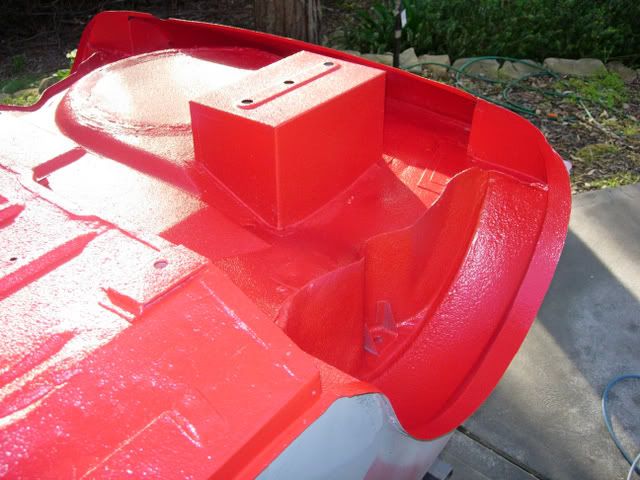
Basic completed shape with welds.
Image
Clips used for holding flare (is covered by chrome side moulding)
Image
Image
Flare should sit flat and without a gap against body.
Image
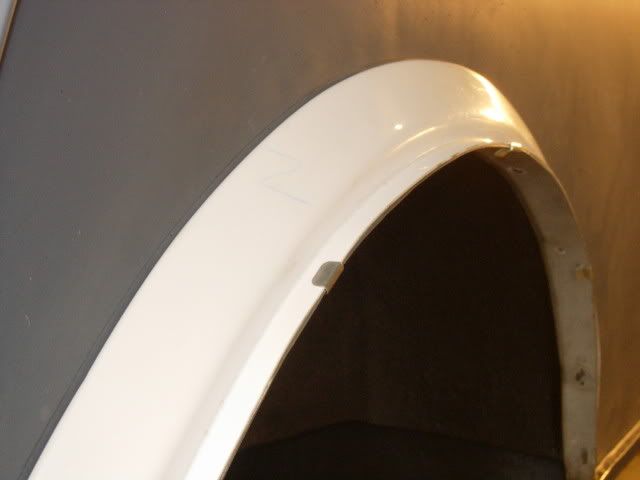
Finished shot - took a day to do all 4 corners. After this stage I sealed the strips on the join with the lip with sikaflex so water cannot get underneath. John at Mini King also advised against using the black clips as they have to be screwed on and this in itself can lead to rust problems.
Image

_________________
Dave K.
1979 Moke Californian + 1981 'Coke' Moke


Top
 Profile  
 
 Post subject:
PostPosted: Fri Jul 11, 2008 11:30 am 
Offline
848cc
848cc
User avatar

Joined: Thu Dec 07, 2006 12:15 pm
Posts: 167
Location: Adelaide
Thanks for the detailed description Dave.

I have riveted my metal strips and trimmed them up to suit the flares. Think I might need to do the hammer persuading part to get them square, should solve my issue.

Cheers for your help.


Top
 Profile  
 
 Post subject:
PostPosted: Sun May 22, 2011 3:07 pm 
Offline
1098cc
1098cc
User avatar

Joined: Wed Jun 02, 2010 7:25 pm
Posts: 1335
Location: Brissy
THREAD REVIVAL :!: :!: :!: :!:


So, does anyone have rough measurements for these metal strips?
I have metal at work i can use, i just want to know where to start.

Thanks 8)

_________________
Tim
Dusk Blue
1964 850


Top
 Profile  
 
 Post subject:
PostPosted: Sun May 22, 2011 3:24 pm 
Offline
1275cc
1275cc
User avatar

Joined: Thu Aug 31, 2006 7:56 pm
Posts: 2663
Location: Muswellbrook -- NSW
MrFail wrote:
THREAD REVIVAL :!: :!: :!: :!:


So, does anyone have rough measurements for these metal strips?
I have metal at work i can use, i just want to know where to start.

Thanks 8)


There was a guy on ebay selling them a while back, would make life easy.


Top
 Profile  
 
 Post subject:
PostPosted: Sun May 22, 2011 6:32 pm 
Offline
1275cc
1275cc
User avatar

Joined: Sat Apr 14, 2007 8:34 pm
Posts: 3415
Location: Cowra
This should be made into a howto. This is great

_________________
Image


Top
 Profile  
 
 Post subject:
PostPosted: Sun May 22, 2011 7:24 pm 
Offline
998cc
998cc
User avatar

Joined: Sat Jul 14, 2007 1:42 pm
Posts: 903
Location: Hunter Valley, NSW
Gawd! that was three years ago. :shock:

Tape the flares into place with tape on the top. Use a piece of card and line it up with the inside edge of the lip. Scribe a line a little wider than the width of the flare. Cut out the card and use as a template that will have to be trimmed later.

This is what it looks like underneath:

Image
Image

The flare is held with the clips (original one bought from, and still available from Mini King)

Image

You have to purchase the correct Cooper S chrome moulding that covers the clips and clicks on nice and tight. You should end up with the flare sitting flat against the body.

Image
Image
Image

_________________
Dave K.
1979 Moke Californian + 1981 'Coke' Moke


Top
 Profile  
 
 Post subject:
PostPosted: Sun May 22, 2011 7:59 pm 
Offline
1098cc
1098cc
User avatar

Joined: Wed Jun 02, 2010 7:25 pm
Posts: 1335
Location: Brissy
miniDave wrote:
Tape the flares into place with tape on the top. Use a piece of card and line it up with the inside edge of the lip. Scribe a line a little wider than the width of the flare. Cut out the card and use as a template that will have to be trimmed later.


Easy as....
Thanks Heaps 8)

_________________
Tim
Dusk Blue
1964 850


Top
 Profile  
 
 Post subject:
PostPosted: Sun May 22, 2011 8:17 pm 
Offline
1098cc
1098cc
User avatar

Joined: Sun Feb 20, 2005 8:11 pm
Posts: 1347
Location: Wellington,
Hi

Thay are really nice flares

Where could I get a set from

Also what is the width of the flare

Thanks

Bernard


Top
 Profile  
 
 Post subject:
PostPosted: Sun May 22, 2011 8:21 pm 
Offline
1098cc
1098cc
User avatar

Joined: Wed Jun 02, 2010 7:25 pm
Posts: 1335
Location: Brissy
kiwiinwgtn wrote:
Hi

Thay are really nice flares

Where could I get a set from

Also what is the width of the flare

Thanks

Bernard


I think if you read his comments, they are a reproduction of the original 's' type flares from John at Mini King
:wink:

_________________
Tim
Dusk Blue
1964 850


Top
 Profile  
 
 Post subject:
PostPosted: Sun May 22, 2011 8:52 pm 
Offline
998cc
998cc

Joined: Tue Feb 07, 2006 7:34 am
Posts: 950
Location: brisvages
i was going to fit mine after i get it polished, was going to put a few dots of sikaflex and duck tape it tight to the body over night
Image
Image
Image
Image

i kind of like not having them on and just keeping the extended sheet metal look

_________________
A good friend will come and bail you out of jail...but a true friend will be sitting next to you saying "Damn...that was fun!"


Top
 Profile  
 
 Post subject:
PostPosted: Mon May 23, 2011 4:07 pm 
Offline
998cc
998cc

Joined: Wed Sep 22, 2004 5:46 pm
Posts: 728
Location: Melbourne
Australian built cars, Cooper S or Clubman, never used the plastic buttons that require drilling holes in the guard or rear side panel.

RonR

_________________
68 build Mk1 Cooper S
72 Clubman GT project. Total restoration required


Top
 Profile  
 
 Post subject:
PostPosted: Mon May 23, 2011 4:17 pm 
Offline
1360cc
1360cc

Joined: Mon May 03, 2004 6:46 pm
Posts: 13688
Location: ADL
Dodge... put those flares on man!

Not only do they increase the look of the vehicle tenfold, they also add protection (every little bit counts!) to the legs of pedestrians you may strike in the event of an accident - or that's what the police will say when they fine you for not having finished bodywork.


Top
 Profile  
 
Display posts from previous:  Sort by  
Post new topic Reply to topic  [ 31 posts ]  Go to page 1, 2, 3  Next

All times are UTC + 10 hours


Who is online

Users browsing this forum: No registered users and 93 guests


You cannot post new topics in this forum
You cannot reply to topics in this forum
You cannot edit your posts in this forum
You cannot delete your posts in this forum
You cannot post attachments in this forum

Jump to:  

cron

© 2016 Ausmini. All garage work involves equal measures of enthusiasm, ingenuity and a fair degree of irresponsibility.