Ausmini
It is currently Wed Aug 20, 2025 4:17 am

All times are UTC + 10 hours


Post new topic Reply to topic  [ 52 posts ]  Go to page 1, 2, 3, 4  Next
Author Message
PostPosted: Wed Aug 10, 2011 8:53 pm 
Offline
848cc
848cc

Joined: Sat Jun 18, 2011 6:15 pm
Posts: 22
Location: Canberra
Hello everyone!

I've been rebuilding and upgrading the suspension and brakes in a 1977 Mini and have hit a few problems. I'm hoping that someone here can help.

First, has anyone ever had an upper arm bearing that's too small for the upper arm shaft to fit through? I bought a pair of upper arm repair kits, and one of the bearings is extremely tight on the shaft (needs a huge amount of force to get it in, and once it's in I can't turn it). The other three bearings are fine.

In order to fix that, I ordered a new 88G302 bearing which is apparently used both here and in some early gearboxes for the idler gear. The original bearing and all the ones from the arm rebuild kits look like this:

Image
(Picture from MiniSpares)

The replacement one is like this:

Image
(Picture from MiniSport UK)

The new one fits fine; it's just got far fewer rollers. Is that likely to be a problem?


Finally, after removing four of these bearings from the upper arm already, I'm well and truly sick of doing that with whatever tools I've got handy. Could someone tell me what the right tool for the job is called so I can go and buy one?

_________________
1977 Mini LS


Top
 Profile  
 
 Post subject:
PostPosted: Wed Aug 10, 2011 9:27 pm 
Offline
998cc
998cc
User avatar

Joined: Fri Mar 26, 2004 8:44 pm
Posts: 1084
Location: Far North Queensland
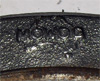
88G302 is the correct part number for the top arm bearings, as shown in your first pic. Same as early 3 synchro idler gear bearing.

The second pic looks like a later 4 synchro idler gear bearing. Won't fit, OD is bigger.

Now, with the tight pin, what has probably happened is the bearing has been crushed slightly when installing it. Do the needle rollers still turn freely? If not, then been crushed. Could also be a dodgy bearing.

How were the thrust ends of the arm? Where the large thrusth washers run. These are usually worn and once you fit the pin and washers to the arm there is slop. I find in almost all occasions, I have to shorten the shoulders on the pin to restore closer clearances. Have my friendly machinist do that for me.

As for the right tool, that's easy, get someone else to do it :D

I know your pain, these bearings have tested my patience over the years. I've not found a blind puller that fits properly and always had success with a ground down thick manifold washer that fits inside the arm and stands up behind the bearing. Put a long enough bolt thru, large socket on the outside and wind the sucker out. Always worked for me.

_________________
Steve


Top
 Profile  
 
 Post subject:
PostPosted: Wed Aug 10, 2011 10:23 pm 
Offline
848cc
848cc

Joined: Sat Jun 18, 2011 6:15 pm
Posts: 22
Location: Canberra
The new bearing does appear to fit (haven't actually installed it, but it's not visibly larger than the old one). The picture was from here, and that item has the correct part number (88G302) and dimensions (1" outer diameter).

The needle rollers do not appear to turn freely, so I guess it probably has been crushed.

The thrust ends of the other arm (already installed) seemed fine - I didn't find any noticeable slop. I haven't checked this one yet due to the difficulty in getting the shaft in. However I'll be sure to check when I get to that stage.

Thanks for the suggestion on the thick manifold washer. I had tried a few normal (thin) washers when getting the old bearings out, but they kept bending.

_________________
1977 Mini LS


Top
 Profile  
 
 Post subject:
PostPosted: Thu Aug 11, 2011 7:44 am 
Offline
Mods rock!
User avatar

Joined: Fri Oct 03, 2008 9:02 pm
Posts: 5079
The bearing in your first pic is correct as it has no cage. Remember, this is a low speed, high load application, so we want maximum bearing surface area / contact.

The one in the lower pic, with the cage, is dimensionally the same, but for high speed, low(er) load applications, usually bathed in oil, like the idler gear in the early gearboxes.

It could be the bearing is crook (very unlikely, but possible), has a contaminate in there somewhere, or was fitted to an arm with too small a tunnen and has been crushed.

I have noticed some kits are now being suppied with the wrong bearings (idler gear bearings) and other kits have pins that have not been hardened. You can do quick check for this with a file, the originals were only hardened on the ends where the bearing run. I now have my own made but they are rediculously expensive.

_________________
Image


Top
 Profile  
 
 Post subject:
PostPosted: Thu Aug 11, 2011 8:10 am 
Offline
religious status
religious status
User avatar

Joined: Fri Mar 19, 2004 6:19 pm
Posts: 39764
Location: near Baulkham Hills, NSW
If the shaft is not hard (RC62 or better) the rollers will chew it up in no time flat. The same problem we had a while back with crook layshafts.
Quality is becoming a problem with a lot of this aftermarket stuff. :x

_________________
DrMini- 1970 wasaMatic 1360, Mk1S crank, 86.6HP (ATW) =~125 @ crank, 45 Dellorto (38 chokes), RE282 sprint cam, 1.5 rockers, 11.0:1 C/R. :mrgreen:


Top
 Profile  
 
 Post subject:
PostPosted: Thu Aug 11, 2011 9:38 am 
Offline
848cc
848cc

Joined: Sat Jun 18, 2011 6:15 pm
Posts: 22
Location: Canberra
Right, thanks for all the replies. I'll check the hardening on the shaft. This appears to be the correct bearing so I'll order one of those too.

Edit: an update.

  • I got the old bearing out by bending a thick washer into a U-shape (so I could fit it inside the bearing), pushing it up to the other side of the bearing, then putting a bolt through it and hammering on the top of the bolt. It damaged the top of the bearing a lot, but the bearing was useless anyway.
  • The shaft still doesn't fit inside the bearing now that it's out.
  • Running a file over the shaft (on the end, where the bearing goes) left a mark. Does this mean the shaft isn't hardened?


Thanks for all the help so far.

_________________
1977 Mini LS


Top
 Profile  
 
 Post subject:
PostPosted: Fri Aug 12, 2011 9:25 am 
Offline
848cc
848cc

Joined: Sat Jun 18, 2011 6:15 pm
Posts: 22
Location: Canberra
I've ordered another top-arm repair kit from Minispares. We'll see how that goes when it turns up.

Also, with the lower arm, could someone tell me which rubber bushes I need to use? The arms are the tapered type, so I figured that these would work. However, I can't push them into the holes far enough to get the arm back on. Do I just need to apply more force, or have I ordered the wrong thing?

_________________
1977 Mini LS


Top
 Profile  
 
 Post subject:
PostPosted: Fri Aug 12, 2011 9:35 am 
Offline
religious status
religious status
User avatar

Joined: Fri Mar 19, 2004 6:19 pm
Posts: 39764
Location: near Baulkham Hills, NSW
You have ordered the right ones. The flanged rubber bushes are only for the early arms with a straight bore.
Put the bushes in, put the bent shaft/bolt thing through, then squeeze it into the subframe with a pair of multigrips until you can get the nut started.

Important: do NOT tighten the nut right up until car is back on its wheels and sitting at normal height.

re the top arm shaft- if you can file it near the end it is a dud. Go complain...

_________________
DrMini- 1970 wasaMatic 1360, Mk1S crank, 86.6HP (ATW) =~125 @ crank, 45 Dellorto (38 chokes), RE282 sprint cam, 1.5 rockers, 11.0:1 C/R. :mrgreen:


Top
 Profile  
 
 Post subject:
PostPosted: Fri Aug 12, 2011 12:52 pm 
Offline
Mods rock!
User avatar

Joined: Fri Oct 03, 2008 9:02 pm
Posts: 5079
Evan_S wrote:
[*]Running a file over the shaft (on the end, where the bearing goes) left a mark. Does this mean the shaft isn't hardened?
[/list]

Thanks for all the help so far.


The shaft is soft, don't use it.

_________________
Image


Top
 Profile  
 
 Post subject:
PostPosted: Fri Aug 12, 2011 5:20 pm 
Offline
848cc
848cc

Joined: Sat Jun 18, 2011 6:15 pm
Posts: 22
Location: Canberra
Great, thanks for the replies. I'll put the lower arms on this weekend.

It's disappointing about the upper arm shaft - especially because I've already put one side on, and it was a pain in the neck to do that. Would it be safe to assume that the Minispares shaft is a good quality (hardened) one?

_________________
1977 Mini LS


Top
 Profile  
 
 Post subject:
PostPosted: Fri Aug 12, 2011 5:48 pm 
Offline
religious status
religious status
User avatar

Joined: Fri Mar 19, 2004 6:19 pm
Posts: 39764
Location: near Baulkham Hills, NSW
IMO it's a 50/50 bet- they did sell some soft layshafts a while ago...

_________________
DrMini- 1970 wasaMatic 1360, Mk1S crank, 86.6HP (ATW) =~125 @ crank, 45 Dellorto (38 chokes), RE282 sprint cam, 1.5 rockers, 11.0:1 C/R. :mrgreen:


Top
 Profile  
 
 Post subject:
PostPosted: Fri Aug 12, 2011 6:08 pm 
Offline
Mods rock!
User avatar

Joined: Fri Oct 03, 2008 9:02 pm
Posts: 5079
I haven't explored every 'brand' of shaft on the market of late, however every one I have picked up in recent times (from local and O/S suppliers) have been soft. I've checked them from 11 different suppliers, hence why I have paid silly money and have them made.

_________________
Image


Top
 Profile  
 
 Post subject:
PostPosted: Fri Aug 12, 2011 6:19 pm 
Offline
848cc
848cc

Joined: Sat Jun 18, 2011 6:15 pm
Posts: 22
Location: Canberra
Right, thanks for the information. I'll just wait and see.

_________________
1977 Mini LS


Top
 Profile  
 
 Post subject:
PostPosted: Fri Aug 12, 2011 6:34 pm 
Offline
SooperDooperMiniCooper ExpertEngineering
User avatar

Joined: Fri Apr 29, 2005 9:46 am
Posts: 18888
Location: Under the bonnet son!
They're rather heavy for post, it might be worth picking them up locally and saving the post. At least you can send them back if they're soft.

_________________
SooperDooperMiniCooperExpertEngineering

All garage work involves equal measures of enthusiasm, ingenuity and a fair degree of irresponsibility.


Top
 Profile  
 
 Post subject:
PostPosted: Fri Aug 12, 2011 7:58 pm 
Offline
1098cc
1098cc
User avatar

Joined: Sun Feb 20, 2005 8:11 pm
Posts: 1347
Location: Wellington,
To answer your question there is a churchill tool which you insert and wind out the bearings

I have only seen two and I brought one, they are crazy money I paid $500 usd for mine in 2000 (it was new)

You need to get a blind bearing puller and a slide hammer as this would be the cheaper option and more useful too

Ta Kiwiinwgtn


Top
 Profile  
 
Display posts from previous:  Sort by  
Post new topic Reply to topic  [ 52 posts ]  Go to page 1, 2, 3, 4  Next

All times are UTC + 10 hours


Who is online

Users browsing this forum: No registered users and 409 guests


You cannot post new topics in this forum
You cannot reply to topics in this forum
You cannot edit your posts in this forum
You cannot delete your posts in this forum
You cannot post attachments in this forum

Jump to:  

© 2016 Ausmini. All garage work involves equal measures of enthusiasm, ingenuity and a fair degree of irresponsibility.