Ausmini
It is currently Wed Jul 23, 2025 10:46 pm

All times are UTC + 10 hours


Post new topic Reply to topic  [ 45 posts ]  Go to page 1, 2, 3  Next
Author Message
PostPosted: Wed Mar 20, 2013 4:24 pm 
Offline
848cc
848cc

Joined: Tue Mar 12, 2013 3:20 pm
Posts: 82
Location: Australia, Rockhampton
So I've been cruising the forums for a while now and checking out a heap of posts to help me but I thought I'd introduce myself and ask for some help. I'm currently studying mechanical Engineering in Rockhampton and thought to myself, surely I can't be a mechanical engineer and not know a thing about engines or cars!? So I bought myself a 1963 mini minor to do up as a project and to teach myself a thing or 2, or 100... paid $2100 cash and I am happy with where it is, very little rust and the body is in decent nick. anyway I was hoping to hear what you guys think and to help me identify some parts that came with the vehicle :D

The mini:
Image
it's a dark green colour and was told it was a colour that was original to the time. looks blue because of the tarp I guess.

The body number :Image
after checking some guide on how to identify a mini I couldn't find this number in any of the tables, any ideas?

The engine as it sits:
Image

and the engine number, again couldn't find this number referenced anywhere:
Image

This is also stamped near the water intake I think, any tips for removing the rust?:
Image

or cleaning up the engine itself?
Image

I was told by a mate to scrap this distributor cap but luckily I found another 2 in the boot :wink:
Image

The extractors and carbie, I was told to just get a new set of extractors considering they are relatively cheap, is there any specific size I should get/ recommendations?
Image

The dash as it is, hoping to get an original style speedo though: Image

nearly all the window seals are buggered so I'll have to replace these:
Image


Now parts, as I said before I got a heap of parts with it. Apparently 99% is here to finish the project but I am missing a few things I know for sure. but I have no idea what some of the parts are which came with the car:

pretty sure these go on the steering points things haha:
Image

these I have no idea but expect something to do with the brakes;
Image
Image
Image

not a clue for these but I suspect the middle is a wheel bearing?:
Image

Pretty sure this is what my steering wheel bolts onto:
Image

I know the big blue thing is a shock absorber, thats it :oops:
Image

possibly the fluid for the windscreen wipers?
Image

Finally , the steering column wasn't installed which made getting the car off the tilt tray and into the carport particular fun. anyone have a guide on how to re install it?
Image


So that's my project. I have a workshop manual for the engine (at least I think it's for the engine) and a mini restoration manual en route from the UK which I hope will also help. also where do you guys buy allot of your parts and can you recommend any other how to sites? I was on mini spares and they had a few good guides put my first plan is to rebuild the engine using Phat Kats guide.

Thanks for taking the time to read this noobies intro :)


Top
 Profile  
 
 Post subject:
PostPosted: Wed Mar 20, 2013 4:35 pm 
Offline
1098cc
1098cc
User avatar

Joined: Wed Aug 04, 2004 6:21 am
Posts: 1788
Location: Wullingtun, Unzud
In the photo with the shock absorber, the steel shaft and the cone are adjustable suspension parts which replace the fixed length 'trumpets' (cause that's what they look like). There should be 4 cones and two shafts. The shafts go in the rear suspension, the front doesn't use them.

[quote}not a clue for these but I suspect the middle is a wheel bearing?: [/quote]

CV joint (goes from diff to wheel hub), bearing and brake cylinder for inside the drums (as are a lot of the other bits you've photographed. The 15/16" bit etc refers to the size of the bore in the hydraulic cylinders)

Window washer bottle (and pump): correct.

Steering points thing: correct, the label helps :)

Steering wheel boss (adaptor): correct, if you're fitting an aftermarket steering wheel and it fits.

The steering column just bolts in, but you've also got an adjustable steering height bracket (the chrome thing with slots in it). You may want to remove that and see how you like the standard height. I don't like them much but it depends on your stature.

No idea about the numbers sorry. They don't look factory...

I'd put all the bits on as standard and see what's running and what needs replacing.

A Haynes manual or similar would be a grand investment but there's more knowledge on here to be honest. Dr Mini in particular has helped me out no end.

The 'original style speedo' is fitted and correct for the car. If you want an upgrade, I'd look for a three dial dash from a GT1275 rather than a centre mounted speedo. You do need the cover for the hole in the firewall otherwise you'll breathe in a lot of BMC fumes.

I've learnt loads working on my Mini, mainly using this forum for guidance. Perfect project for an engineering student - you'll be welding before you know it (another skill which I picked up and now LOVE doing.)

And welcome to the forum.


Last edited by Angusdog on Wed Mar 20, 2013 4:44 pm, edited 1 time in total.

Top
 Profile  
 
 Post subject:
PostPosted: Wed Mar 20, 2013 4:43 pm 
Offline
848cc
848cc

Joined: Tue Mar 12, 2013 3:20 pm
Posts: 82
Location: Australia, Rockhampton
Angusdog wrote:
In the photo with the shock absorber, the steel shaft and the cone are adjustable suspension parts which replace the fixed length 'trumpets' (cause that's what they look like). There should be 4 cones and two shafts. The shafts go in the rear suspension, the front doesn't use them.

Window washer bottle (and pump): correct.

Steering wheel boss (adaptor): correct, if you're fitting an aftermarket steering wheel and it fits.

The steering column just bolts in, but you've also got an adjustable steering height bracket (the chrome thing with slots in it). You may want to remove that and see how you like the standard height. I don't like them much but it depends on your stature.

No idea about the numbers sorry. They don't look factory...

I'd put all the bits on as standard and see what's running and what needs replacing.

A Haynes manual or similar would be a grand investment but there's more knowledge on here to be honest. Dr Mini in particular has helped me out no end.


fantastic thanks for that, with the steering column any tips for removing the surface rust? and what are the benefits of replacing the suspension trumpets?


Top
 Profile  
 
 Post subject:
PostPosted: Wed Mar 20, 2013 4:48 pm 
Offline
1098cc
1098cc
User avatar

Joined: Wed Aug 04, 2004 6:21 am
Posts: 1788
Location: Wullingtun, Unzud
Adjustable suspension allows you to restore the ride height to standard (the rubber cones compress over the years) or lower it, or make the corner weights (the weight of the car in each corner) uniform. All up, better handling.

I'd use those pads that look like pot scrubs which you can get from Bunnings which are labelled 'steel conditioning' or something. Brown things that look just like dishwashing pot scrubbing pads but sort of 'tougher'. They'd wrap around and take most of the rust of fairly quickly.


Top
 Profile  
 
 Post subject:
PostPosted: Wed Mar 20, 2013 5:17 pm 
Offline
848cc
848cc

Joined: Tue Mar 12, 2013 3:20 pm
Posts: 82
Location: Australia, Rockhampton
Angusdog wrote:
Adjustable suspension allows you to restore the ride height to standard (the rubber cones compress over the years) or lower it, or make the corner weights (the weight of the car in each corner) uniform. All up, better handling.

I'd use those pads that look like pot scrubs which you can get from Bunnings which are labelled 'steel conditioning' or something. Brown things that look just like dishwashing pot scrubbing pads but sort of 'tougher'. They'd wrap around and take most of the rust of fairly quickly.


awesome thanks for that, might even be able to jack the rear end up and see how that looks


Top
 Profile  
 
 Post subject:
PostPosted: Wed Mar 20, 2013 5:22 pm 
Offline
848cc
848cc
User avatar

Joined: Sun Dec 25, 2011 10:45 pm
Posts: 416
Location: Brisbane, Australia
The interior is interesting, once was a center dial dash, but now a leyland cluster & clubby heater/wiper controls under the dash too. Then someone has made a center console for it too. Looks like someone made it a bit of this, bit of that project!

You're obviously missing a radiator, fan, thermostat housing & hoses as well.

Should be fun though.

_________________
1978 Leyland Clubman


Top
 Profile  
 
 Post subject:
PostPosted: Wed Mar 20, 2013 6:02 pm 
Offline
High heel ninja
User avatar

Joined: Sat Apr 10, 2004 6:36 pm
Posts: 4979
Location: Radelaide, South Australia
By the front apron it's not a 1963 model, unless it's been replaced in it's lifetime.

Doogie

_________________
I won Hay once, here's the pic to prove it..
Image

Hay, it's not about the car, it's not about the venue, it's about the people that come here. Peter Dwyer, Mayor of Hay NSW.


Top
 Profile  
 
 Post subject:
PostPosted: Wed Mar 20, 2013 6:23 pm 
Offline
998cc
998cc
User avatar

Joined: Sat Mar 13, 2010 4:19 pm
Posts: 840
Location: Ridin' the rails somewhere
Wow, that's a bitsa...

Leyland dash, steering column & engine (engine number indicates 1098cc), but Morris 850 outside.

As already said, not a '63 with that front apron - but looks to have been debumpered :(

The body number should be on the firewall behind the master cyls on that year of car, look under the paint, that should give us a better idea.

Also as suggested, get a manual and have a read....

cheers,

Jacob

_________________
'72 Clubman Van - 1022cc, 295 head, 731 cam - Daily Driver :D
'69 Morris 1100 S - Dinged by a bus, in shed under repair
'64 Morris 1100 - Early 1100, long term project


Image


Top
 Profile  
 
 Post subject:
PostPosted: Wed Mar 20, 2013 6:56 pm 
Offline
Yay For Hay!
User avatar

Joined: Wed Sep 08, 2004 9:27 pm
Posts: 15912
Location: Wodonga - Vic/NSW border
buy this - worth it's weight in gold

http://www.ebay.com.au/itm/Gregorys-MOR ... 500wt_1414

_________________
did I tell you that I won a trophy?


Top
 Profile  
 
 Post subject:
PostPosted: Wed Mar 20, 2013 7:46 pm 
Offline
1275cc
1275cc
User avatar

Joined: Thu May 24, 2007 7:19 pm
Posts: 5370
Location: Yandina,Sunshine Coast,QLD
Their is a lot to talk about, I'll try to add my 2c.
From the top congratulations on jumping in the deep end :lol: . It looks like the previous 
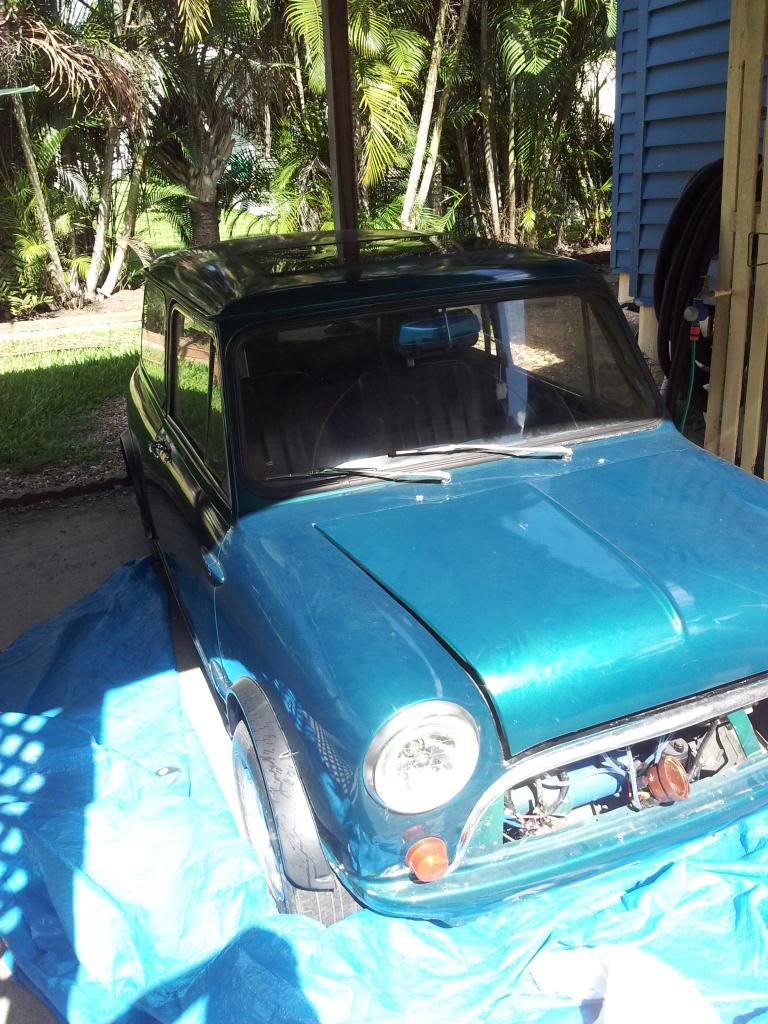
owner (po) was spending a bit of money on the car doing it up and upgrading things.
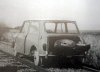
Being a 1963 Morris 850 their is not a lot of parts left that are original, my guess is it was rebuilt at some stage using a early to mid 70's Leyland mini. It's been de-seamed and de-bumpered, the doors are from a later Delux or mini k, the seats and dash are Leyland mini items but that's all fine 8) .
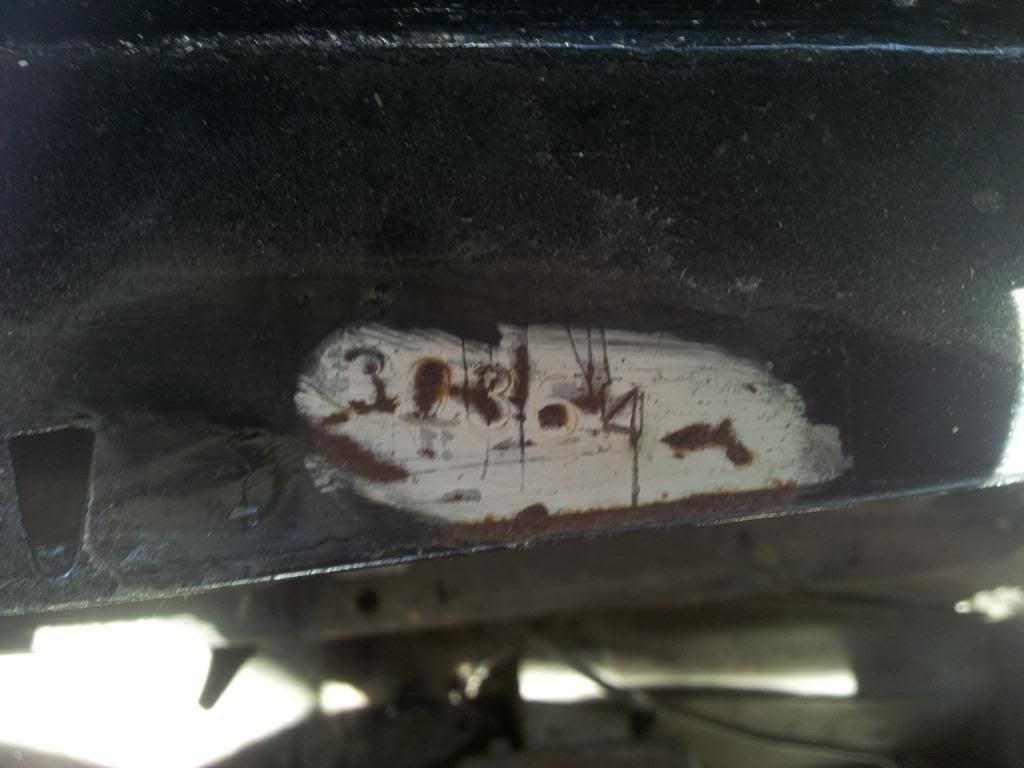
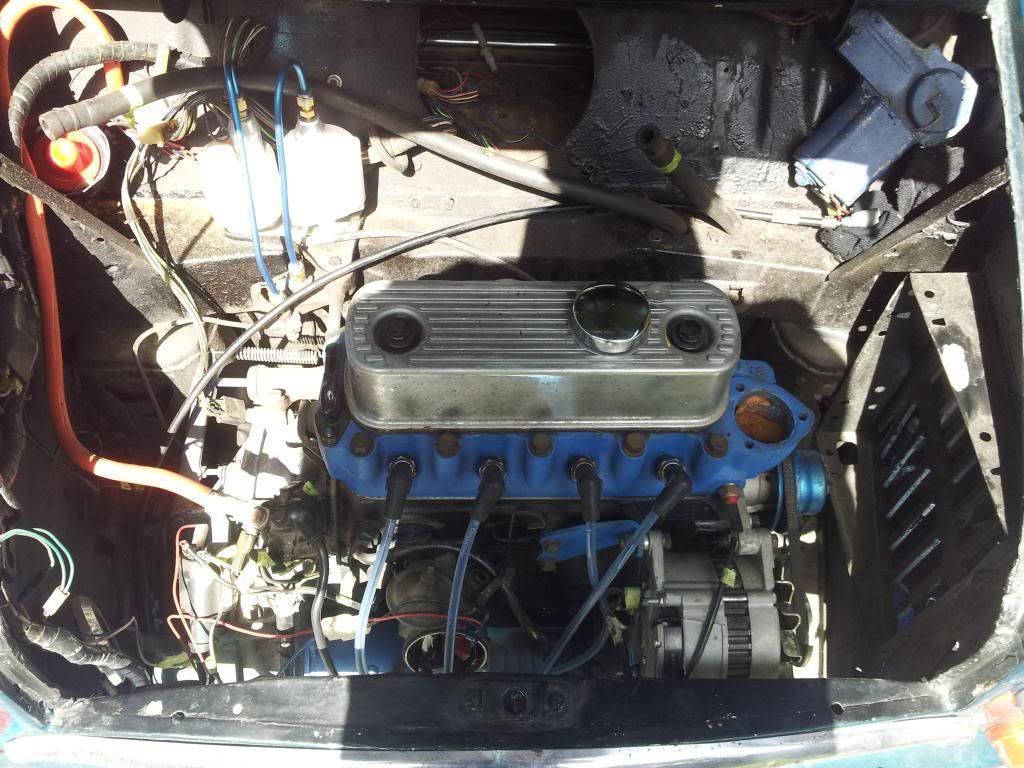
When looking for ID numbers your mini should have a body number half way up the firewall behind the master cylinders + the one on the radiator shroud, post them up and some of the smarter people on here will be able to tell you the year and roughly the month of production. Just by looking at the engine number I'd say it's a 1098cc engine and I'd guess it has a "rod change" 4 syncro gearbox. Look under the car at the back of the gear box, if it has two rods running back to a gear stick selector it's a rod change (if it has a solid alloy box section running from the gearbox back to the gearstick it's a "remote change" gearbox).
It has "dry" rubber cone suspension, this is stiffer than the "hydro" suspension but their is no risk of it leaking and dropping the car down on it's guts, it's also much more common.
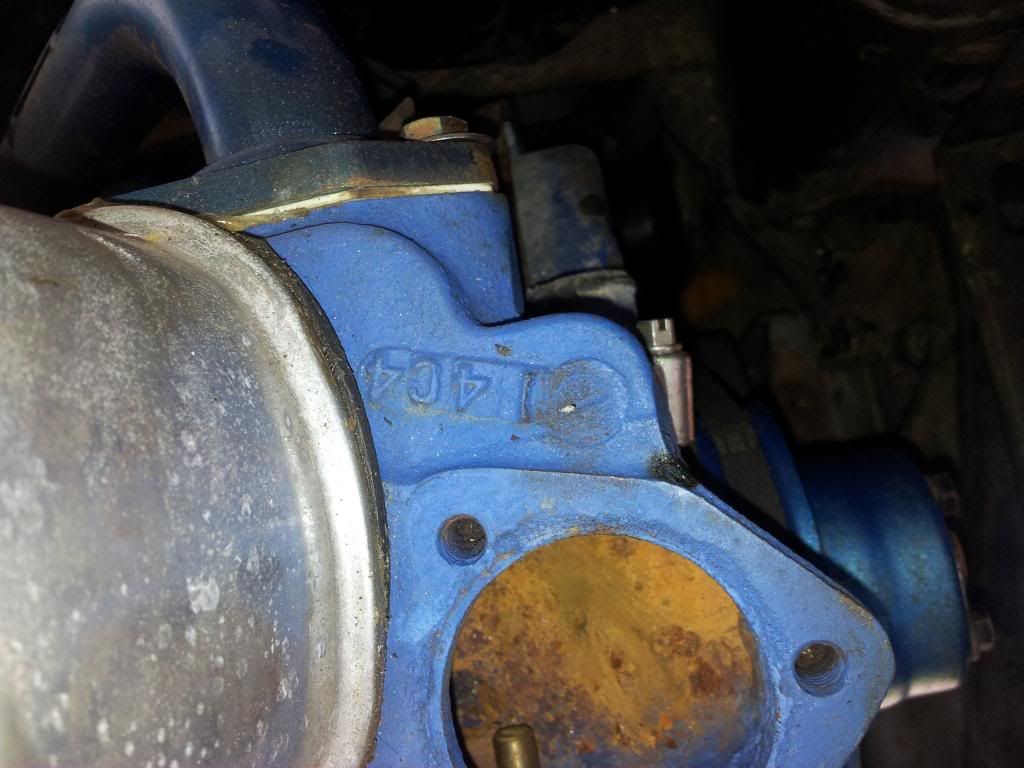
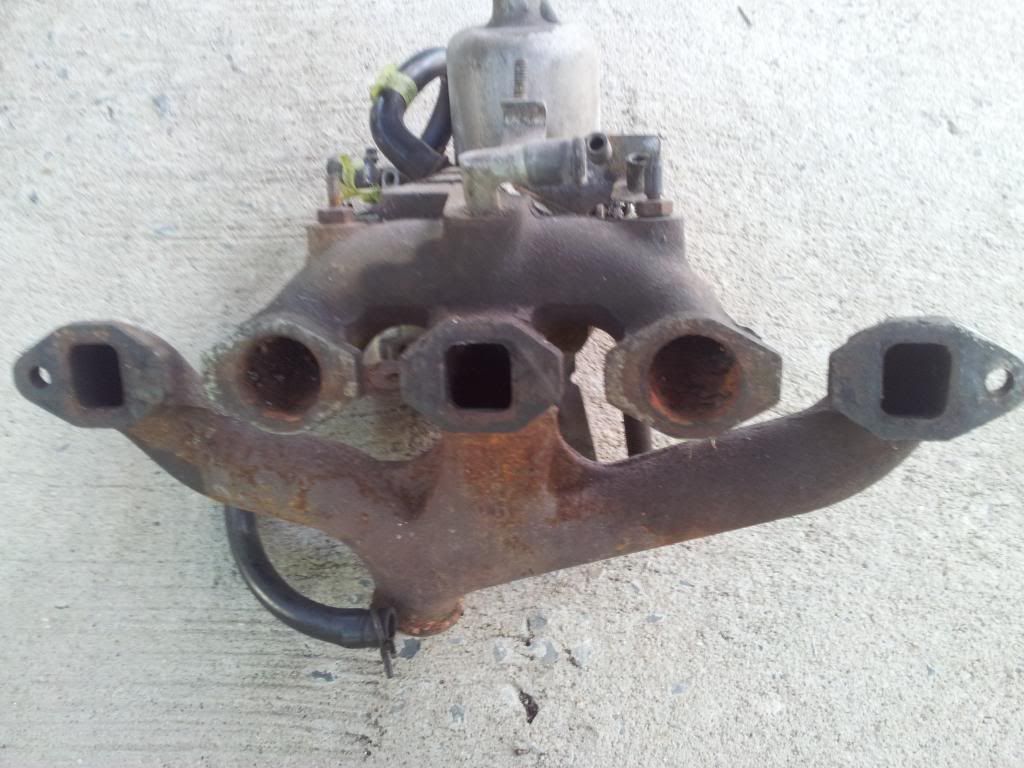
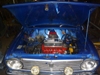
The pic you put up of the carby is actually a standard exhaust manifold not extractors, however their is already a set of extractors installed on the engine :D . From the pics I can't tell if you have an inlet manifold on the engine but what you can do is get a hacksaw and cut the inlet manifold (the bit that the carby bolts to and meets up to the head) off the exhaust manifold then with a grinder or a file neaten up where you just cut so it fit's on the head without hitting the extractors.
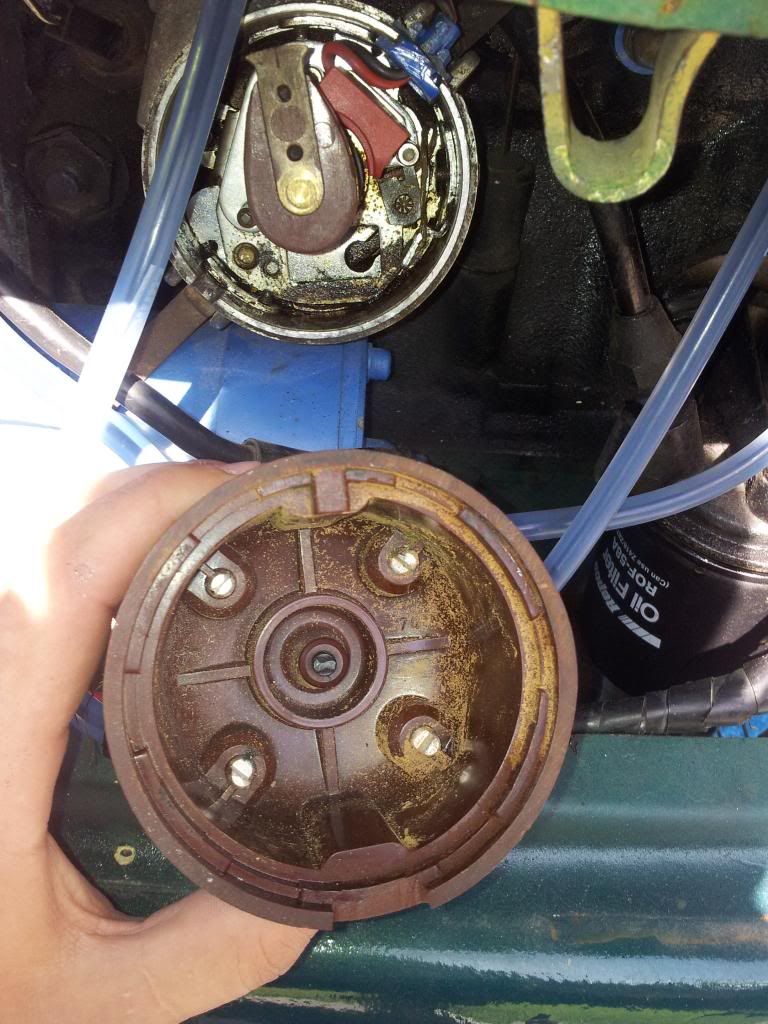
The dizzy and cap may still be good just use a bit of fine sandpaper and rub up the connecting points (5 in the cap) and on the dizzy (the blade section of the rotor button and the top center section where it will contact the dizzy cap) also the points may need adjusting and cleaning but I don't want to go into that now. Any way all that cleaning should be done when your just about ready to try and start the engine so there's no point doing it now, just make a mental note of it.
Personally at this stage I'd only give the engine a degrease and a good pressure wash, concentrate on getting it running before you try to make it look too pretty. I wouldn't worry about the "rust" in the head it just looks normal. By the way that is where the thermostat and thermostat housing go and it is a water outlet. The flow goes from the bottom of the radiator, through the water pump, through the block and up into the head then back out the thermostat and into the top of the radiator.
Now with your parts collection;
1st pic-steering rack boots.
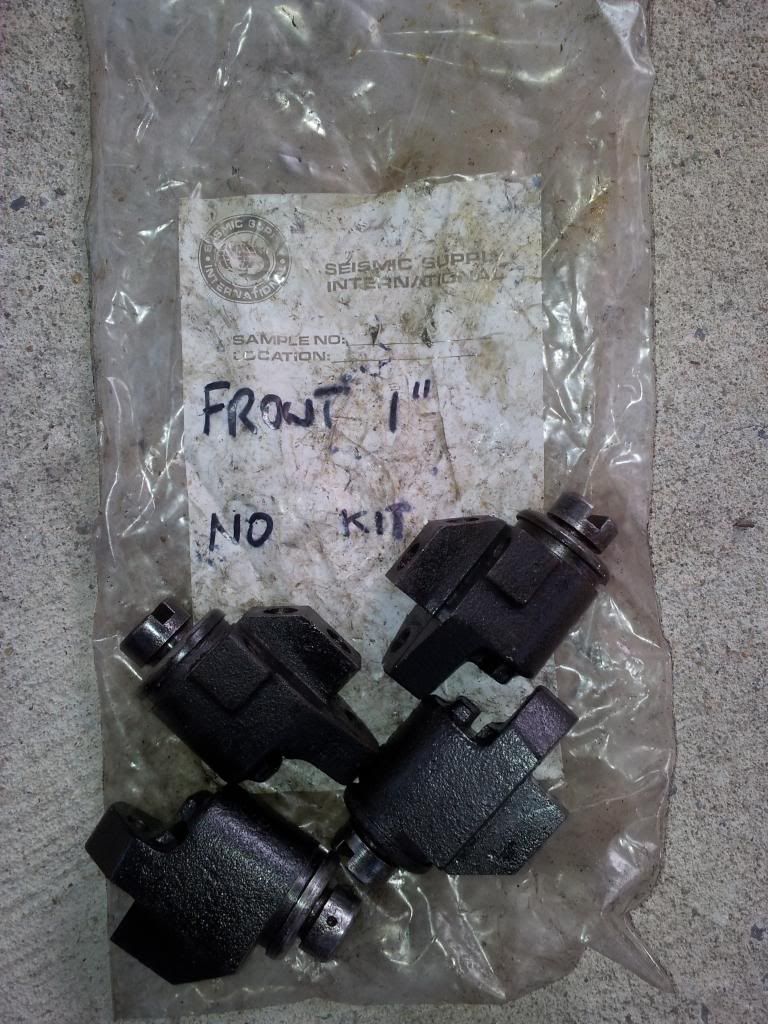
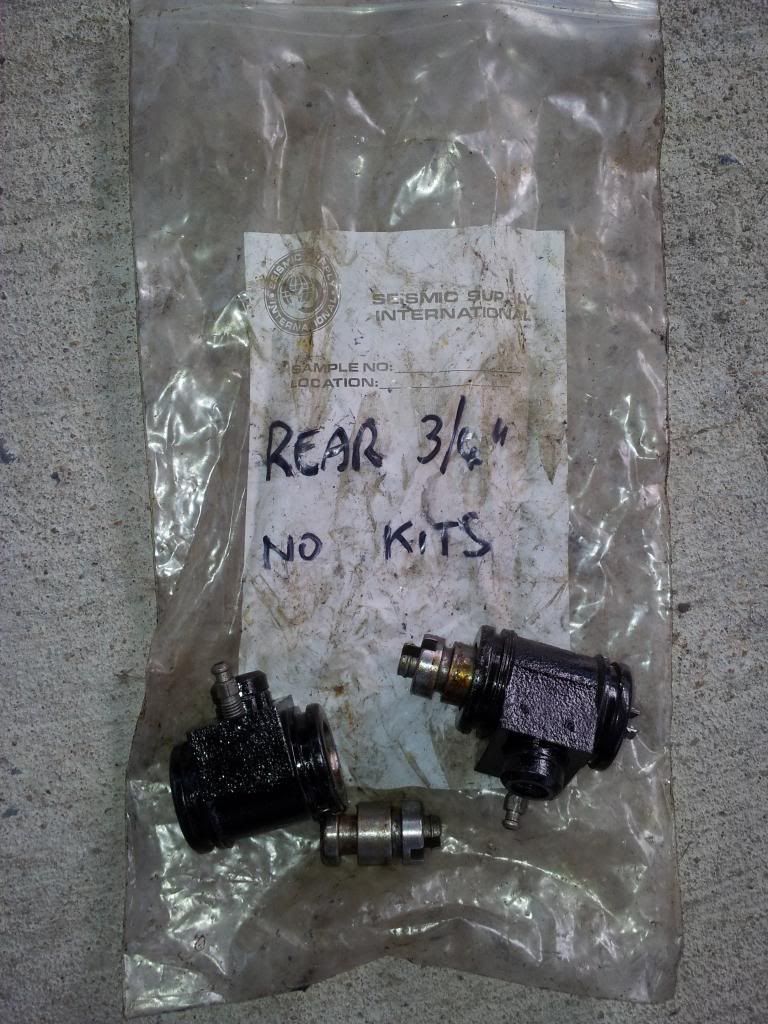
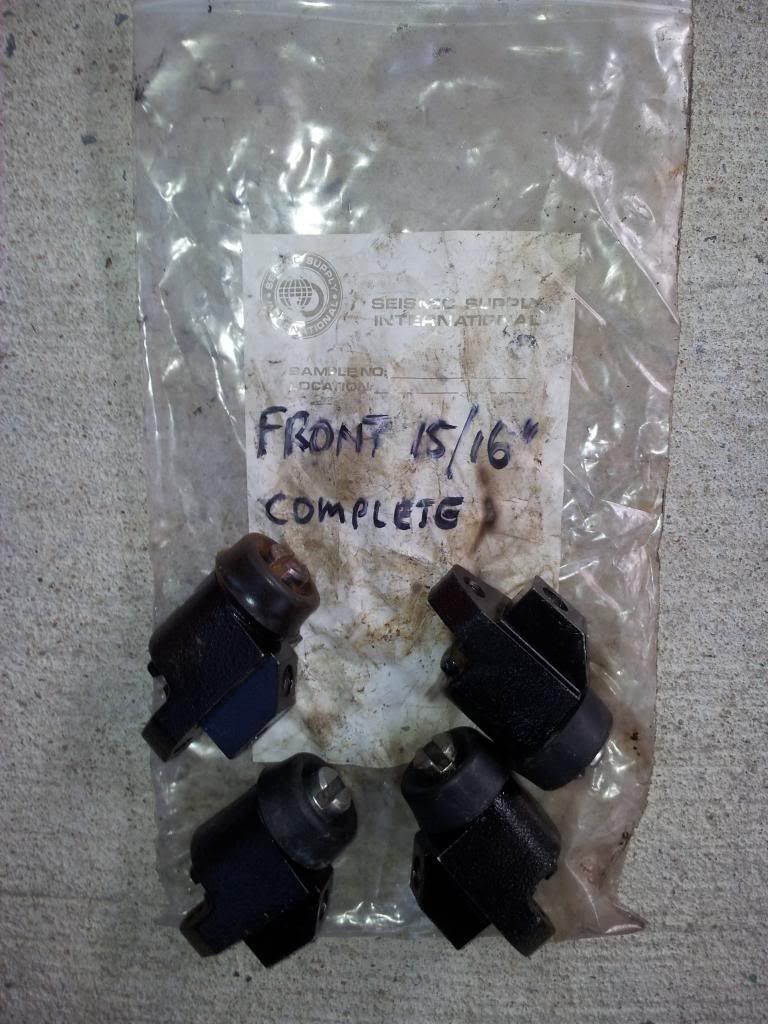
2nd to 4th-(I'm pretty sure) are brake slave cylinders.
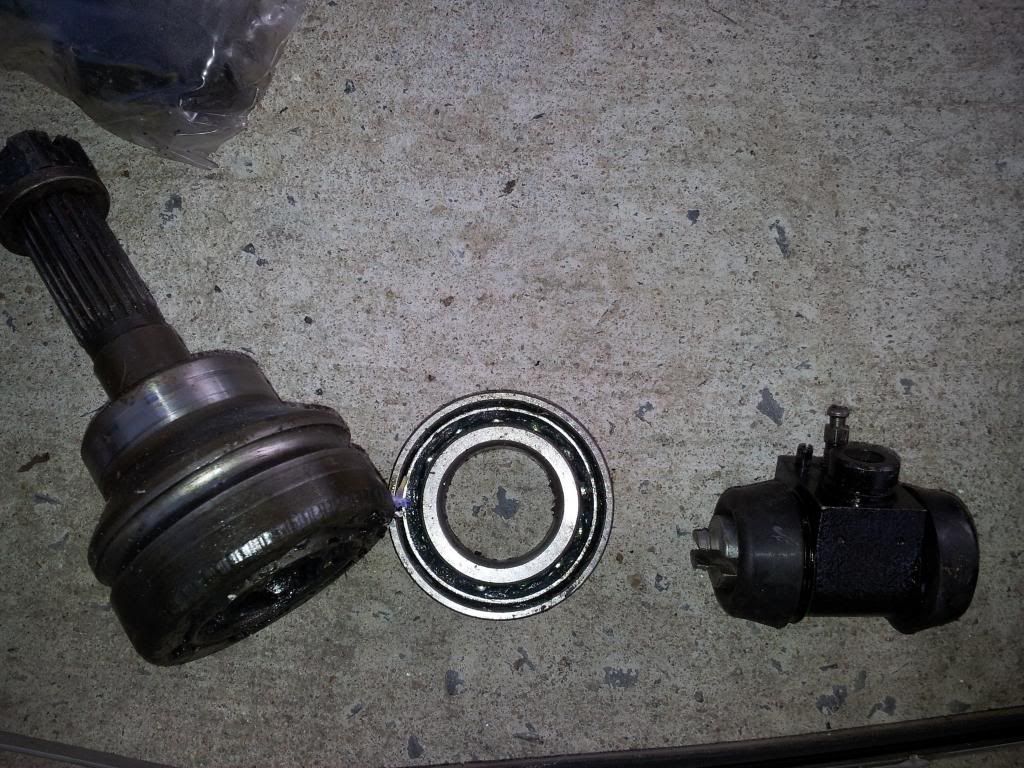
5th-I'd say an outer CV (only the front has CV's) then a CV/swivel hub bearing and then another rear brake cylinder.
6th-aftermarket steering wheel boss.
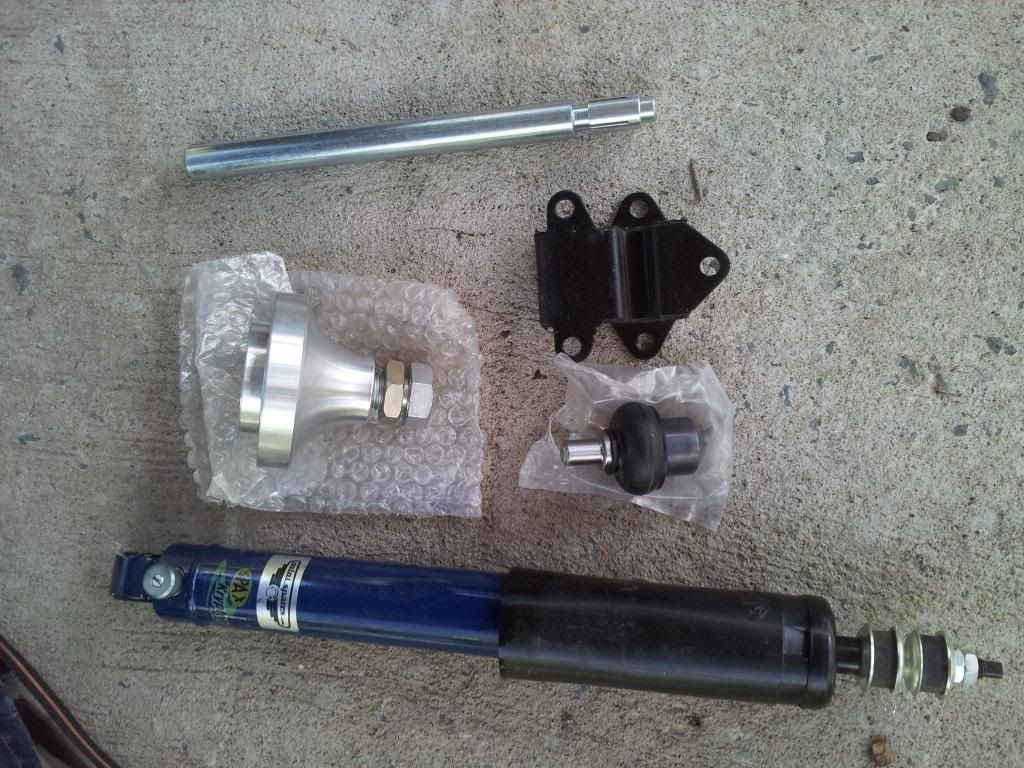
7th-the rod is for the rear suspension and is part of an aftermarket "hi lo" kit sames as the alloy cone (look on say minisport's website for hi lo's and you'll gat a better idea of how they go together. The black thing is a engine mount and the blue thing is a shock but it's a fancy spax adjustable shock look them up too and you'll see why I said the po was spending a bit of money on doing the car up.
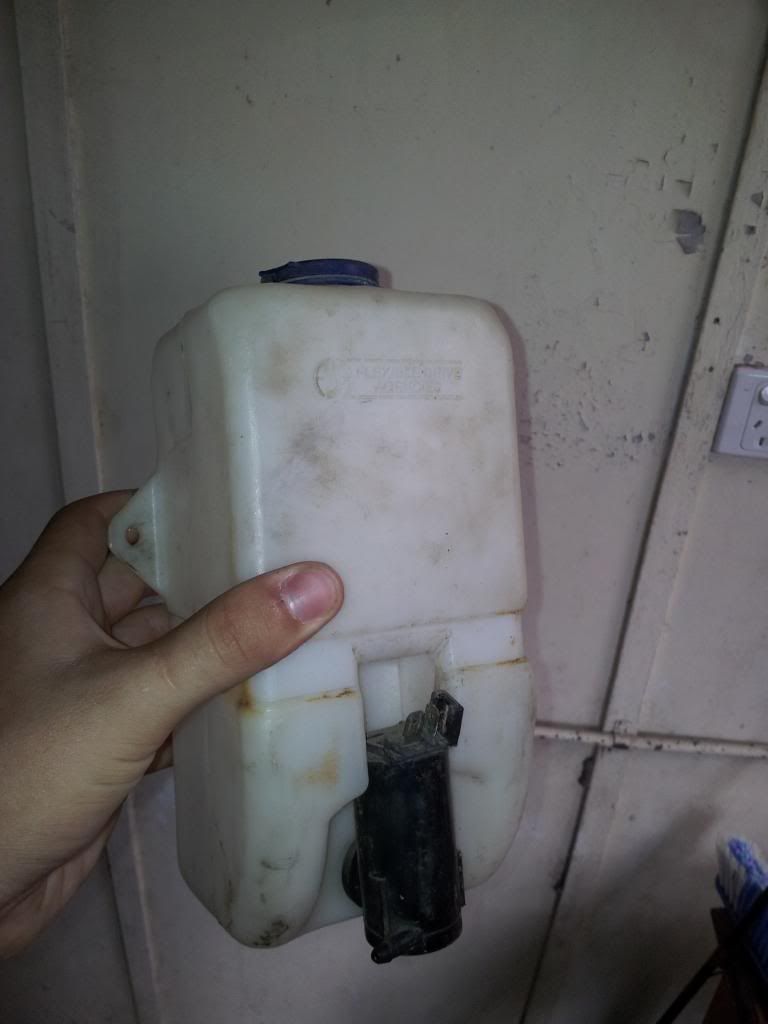
8th-Is a windscreen washer bottle and pump but I'm not 100% sure if it's from a mini, it'll still work fine though.
9th-Is the steering column. take the bolt out of the bottom and it should slip onto the spline of the steering rack which should be poking through the floor about 3/4 of an inch between the clutch and the brake pedals, you may also need to spread the spline on the bottom of the steering column by carefully tapping a flat screwdriver between the two lugs that the bolt goes through. If you can get it on great other wise look up in detail how to correctly fit a steering column and adjust the steering rack. It's easy just in depth like most things on a mini.
Getting a workshop manual from Australia will help you much more than a UK one. We branched off and started doing thins better around the start of the 60's and as time went by UK and ozzy minis kept getting even more different. Go on ebay or something and look for a manual, around $20 will get you what you need.
Good luck with it.

_________________
Respect mine and I'll respect yours.


Top
 Profile  
 
 Post subject:
PostPosted: Wed Mar 20, 2013 9:45 pm 
Offline
998cc
998cc
User avatar

Joined: Sun Jan 08, 2006 12:04 am
Posts: 648
Location: Ballarat, Victoria
I'm not sure if anyone has mentioned it (lots of long posts i just skimmed through) but its probably going to pay to get in contact with someone in the know about roadworthy / rego requirements in your state and find out if you need an engineers certificate for the deseaming thats been done to the shell.

deseaming is a pretty series modification to the structure of the vechicle and if you need an engineers certificate to get it registered, you should find out sooner rather than later as im fairly sure its going to cost alot to get one if you need it and dont have it already.

_________________
1975 Hairy Lime/White Clubby
Build Thread: http://www.ausmini.com/forums/viewtopic.php?f=3&t=80657


Top
 Profile  
 
 Post subject:
PostPosted: Wed Mar 20, 2013 10:08 pm 
Offline
1275cc
1275cc
User avatar

Joined: Thu May 24, 2007 7:19 pm
Posts: 5370
Location: Yandina,Sunshine Coast,QLD
Technically yes it should be mod plated.

_________________
Respect mine and I'll respect yours.


Top
 Profile  
 
 Post subject:
PostPosted: Wed Mar 20, 2013 11:14 pm 
Offline
848cc
848cc
User avatar

Joined: Thu Feb 16, 2012 10:56 pm
Posts: 274
I'm a final year mech eng, bought a mini 12 months ago and had no clue about cars- now I know the damn thing inside out and back the front and she goes like a dream, only way you will learn engines properly is being thrown in the deep end.
Great fun, meet some awesome people, you will have a million questions to ask and enjoy every second.
Rebuilding a mini goes a long way in the engineering industry... Not only does everyone love them, it shows you can troubleshoot, get your hands dirty, and you've got your head screwed on to get amongst it and learn. I brought photos to my grad job interview! Great talking point and they even gave me the job!

_________________
1975 Clubman
1152cc, 40dcoe weber, RE83 cam, GRed head.


Top
 Profile  
 
 Post subject:
PostPosted: Thu Mar 21, 2013 8:43 am 
Offline
848cc
848cc

Joined: Tue Mar 12, 2013 3:20 pm
Posts: 82
Location: Australia, Rockhampton
thanks for your feedback Kennomini and you're right the PO did spend a bit on the car, he said $10g so I thought I got a good deal, he also said it was a 1000cc engine so that's another bonus.

When you mentioned deseamed, as in they took the front half of one vehicle and and welded it to the back end half of another? hmm have to investigate that with the PO. Also de-bumpered as in they removed the bumper? I have a rubber/ plastic one off to the side I didn't get a pic of that matches the wheel trim. the PO also mentioned it is the only one in AUS with those because he got them special imported or something.

sam_1100, great to hear it all worked out for you and you got your grad position, I'm currently on my first placement so I wont be home to work on it for another 2 weeks :( but I'm glad I'm not the only one who thought about this as a project during uni


Top
 Profile  
 
 Post subject:
PostPosted: Thu Mar 21, 2013 10:05 am 
Offline
religious status
religious status
User avatar

Joined: Fri Mar 19, 2004 6:19 pm
Posts: 39756
Location: near Baulkham Hills, NSW
Deseamed means they have cut the 4 external vertical seams off at the A and C pillars, and butt welded the joins instead.
There are good and bad ways to do this, and these days as said above it would need to be engineered/mod plated to be legal on the road.

_________________
DrMini- 1970 wasaMatic 1360, Mk1S crank, 86.6HP (ATW) =~125 @ crank, 45 Dellorto (38 chokes), RE282 sprint cam, 1.5 rockers, 11.0:1 C/R. :mrgreen:


Top
 Profile  
 
Display posts from previous:  Sort by  
Post new topic Reply to topic  [ 45 posts ]  Go to page 1, 2, 3  Next

All times are UTC + 10 hours


Who is online

Users browsing this forum: Bing [Bot] and 109 guests


You cannot post new topics in this forum
You cannot reply to topics in this forum
You cannot edit your posts in this forum
You cannot delete your posts in this forum
You cannot post attachments in this forum

Jump to:  

© 2016 Ausmini. All garage work involves equal measures of enthusiasm, ingenuity and a fair degree of irresponsibility.