ausmini
https://www.ausmini.com/forums/

Home built alignment contraptions
https://www.ausmini.com/forums/viewtopic.php?f=2&t=88771
Page 1 of 2

Author:  Mick [ Mon Mar 02, 2015 6:11 pm ]
Post subject:  Home built alignment contraptions

How does everyone do their wheel alignments when they're too cheap to pay for them :P

I am not that good at them, and previously used stringlines to try and measure them, but got the irrits and have tried something different this time.

I bought four pieces of right angle 40x40x2.5 steel, and had them cut to 500mm lengths (Usefully, only a little greater than the diameter of the wheels 165x70x10 wheels and tyres at 490mm, so it turns within the guard without touching anything). I drilled them to fit onto two studs of the wheel hubs (not diagonally to avoid the CV nut, with the holes drilled 72mm apart).

The car was jacked up, with axle stands under each hub so that the suspension is in compression.

I then used a stringline through the center of the car from front to rear as a datum, and used two 1500 mm long rulers to measure toe on front and rear relative to the datum. This way I had all four wheels aligned to the datum, with the right amount of toe on each. Doing the camber was easy, I turned the hubs until the bars were upright, and used a large square to measure camber angle, with the gap between the bar and the square being the opposite angle on a camber=500mmxArctan(gap mm) calculation. I did the camber on all four wheels before I did the alignment as it will upset the toe if I dial it in last.

Anyway, that was all a bit painful, how does everyone else do it?
Author:  Harley [ Mon Mar 02, 2015 6:25 pm ]
Post subject:  Re: Home built alignment contraptions

Thats pretty clever. How to simulate the side load on the lower rubber bushes on the bottom arms?

Author:  Mick [ Mon Mar 02, 2015 6:33 pm ]
Post subject:  Re: Home built alignment contraptions

Harley wrote:
Thats pretty clever. How to simulate the side load on the lower rubber bushes on the bottom arms?


By this do you mean I've missed a loading with the stands under the hubs? I used the lower ball joints on the front, and removed the hand brake cableswhere they connect to the hus to put the stands under the swing arm (inline to the center of the drum) on the rear.

Author:  Harley [ Mon Mar 02, 2015 6:51 pm ]
Post subject:  Re: Home built alignment contraptions

Putting the jack under the front balljoint would simulate weight on the car - but not the offset of the wheel which depending on how much that is (and if you have toe-out), would put side load on the bottom arms by trying to pull them outward.

Compression is minimal - so I'm mainly being a smart-ass.
:P

Author:  mini_mad_matt [ Mon Mar 02, 2015 6:55 pm ]
Post subject:  Re: Home built alignment contraptions

I hang a bit of tubing off the bumper bars which i use to set up string front to back. My setup is very basic so i need to be careful setting up the string in a rectangle.

A more advanced design which is much quicker to set up on the car is as follows.

A long round tube and a short piece of square tube, so that the round just fits inside the square. Attach a bracket to the square which you can fix to the car. In the example i saw, the bracket was setup to bolt onto the number plate holes on the car. (suzuki swift)
So if you can imagine, you have a bracket bolted onto the car with a long tube sitting in it.
At a point on both ends of the round tube which is wider then the car, make a groove line for string to sit on. When doing the second device the groove lines must be the same distance apart.

Then just fit both devices to the car and line string up front to rear in the grooves. Then measure the distance for the front hubs to the string and do the same for the rear, adjusting the tubing so that the string is an even distance from the hubs to give you a rectangle.
You can setup a locking system like drill a hole in the square tube, then weld on a nut and use a bolt to hold the round tube in place incase you bump it.

Then just measure the distance from the string to the rim to work out toe.

With that sort of setup it only takes a couple of minutes to setup and measure the toe and it's easy to work around, just unhook the string and do what adjusting needs doing.

Author:  Phil 850 [ Mon Mar 02, 2015 8:24 pm ]
Post subject:  Re: Home built alignment contraptions

I've seen mini_mad_matt's method used at many race meetings on all sorts of cars.
Simple and accurate.

Author:  Mick [ Mon Mar 02, 2015 8:33 pm ]
Post subject:  Re: Home built alignment contraptions

The reason I cut away the string line was that the steel wheels I am using are a little shaky to measure off, as there's not a lot of flat edge on them, and they have a little run out as they turn. Alloys are better. I think the string line method would still go well with the 500mm plates bolted on though, would actually be really accurate due to the larger radius from the hub perhaps.

What about front wheel camber? How do people measure that at home?

Author:  IndigoBlueCooperS [ Mon Mar 02, 2015 10:07 pm ]
Post subject:  Re: Home built alignment contraptions

Watched a guy do a Porsche at the Clipsal yesterday.
Had bars mounted across the front and rear of the car with threads on the ends which supported a stringline either side from front to rear. String ran at the centre height of the wheels.
Checked the string was parallel with the car using a steel rule of the wheel centre cap. Used the threaded ends on the bars to adjust this. (you would need to consider the different track front and rear).
Then you check your toe measuring from the front and rear of the tyre to the string using a little trigonometry to give an angle.
An easy job once you have the bars to drop in place.
I do the camber using a spirit level on the wheel and a little trigonometry.
This all assumes the wheels run true.

I don't like the idea of putting the hub on a jack or stand as the spring (cone) compression would be different unless it is under the centre line of the tyre.

Author:  Oscar [ Tue Mar 03, 2015 7:37 am ]
Post subject:  Re: Home built alignment contraptions

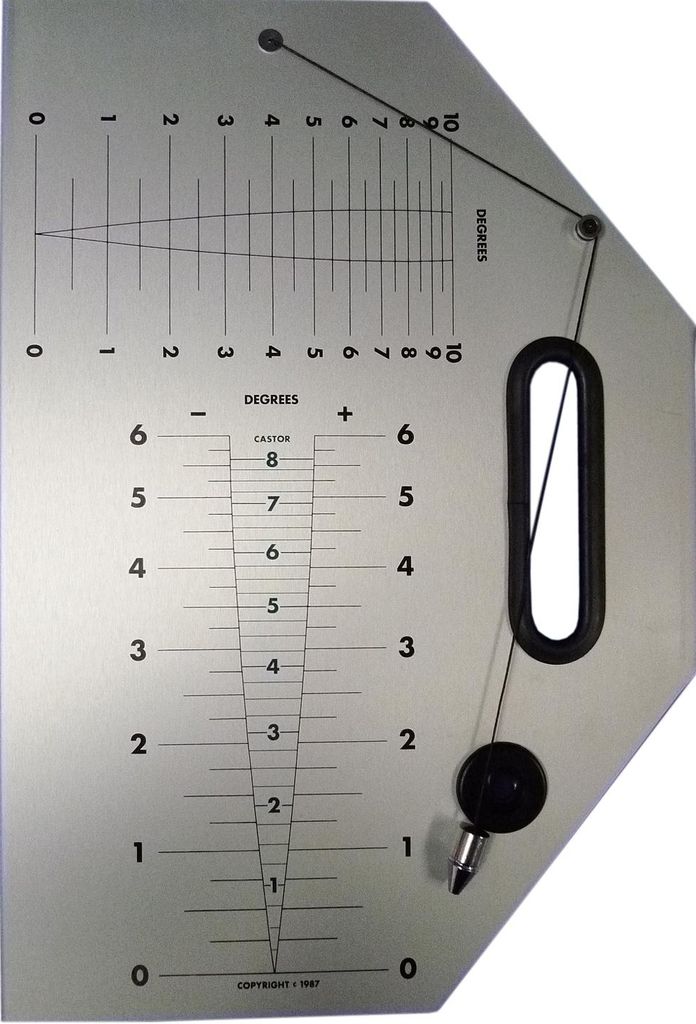
I used to use a spirit level too, but a couple of years ago I treated myself to a Joes Racing caster/camber gauge from the US on Ebay - makes life very easy.

I still use the good 'ol stringlines for toe...

Author:  Irish Yobbo [ Tue Mar 03, 2015 9:32 am ]
Post subject:  Re: Home built alignment contraptions

I did it by eye last time. When I eventually took it in to be professionally done I was out by less than 1mm. Not bad!

Author:  Curly [ Tue Mar 03, 2015 6:34 pm ]
Post subject:  Re: Home built alignment contraptions

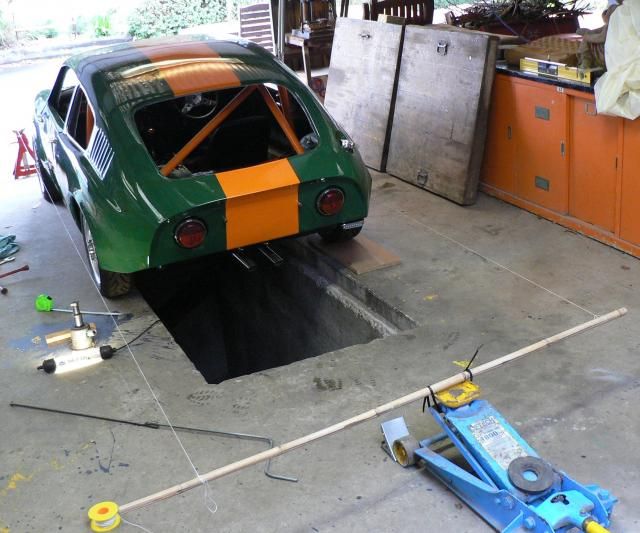
Image

Of course doing it over a pit helps because you don't have to take the wheels off or jack it up.

Author:  Rookiepilot [ Wed Mar 04, 2015 5:02 pm ]
Post subject:  Re: Home built alignment contraptions

I use a laser aligner, same as below on ebay, although mine is made by Gunson
A bit fiddly to use but it does the job

http://www.ebay.com.au/itm/TRACKACE-Las ... 20f78a5a62

Author:  gtogreen1969 [ Tue Apr 21, 2015 11:43 pm ]
Post subject:  Re: Home built alignment contraptions

I tried using the camber phone app and it was crap. So I googled camber gauges and found 3 that I could make and compare to each other to see what is the most accurate to make.

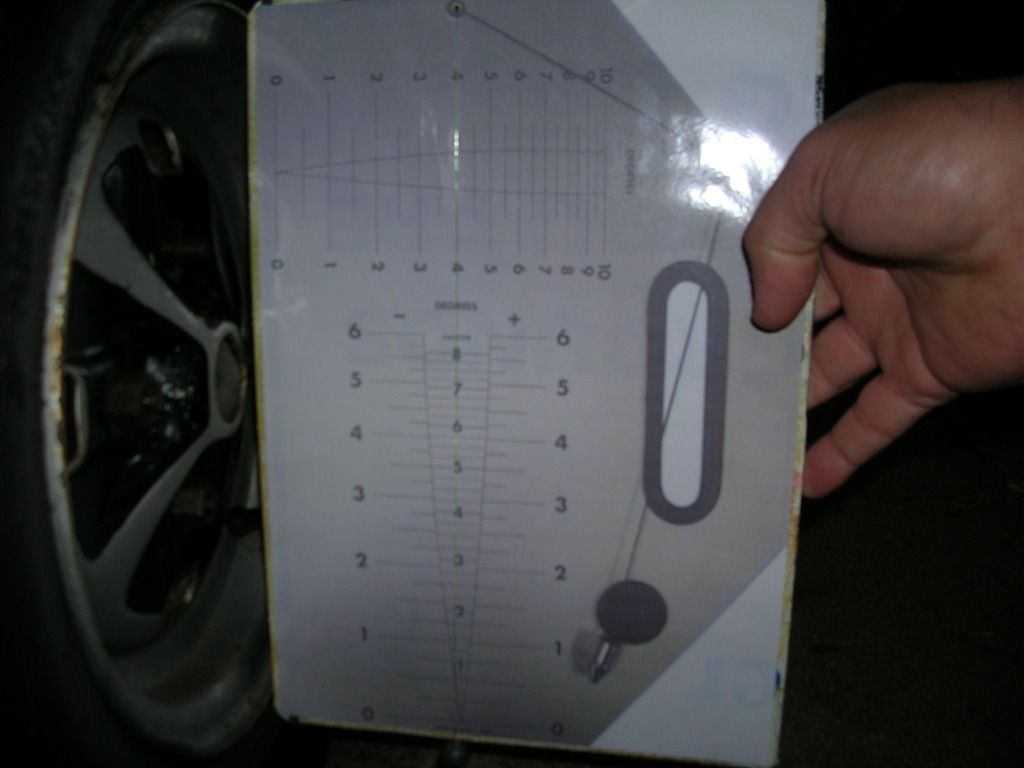
First one I made was an A4 print of the camber gauge from this thread viewtopic.php?f=2&t=86234&hilit=camber&start=15. A how to is located here of a similar one - http://www.minimania.com/TOOL10___Instr ... An A4 print off is very close to perfect for the 10 inch rim. Just had to cut the corners back a few mm at a 45 degree angle to prevent it rubbing on the tyre. I Laminated it and glued it to a piece of metal. This actually works very well. Even with a slightly off scan.
Image
Image

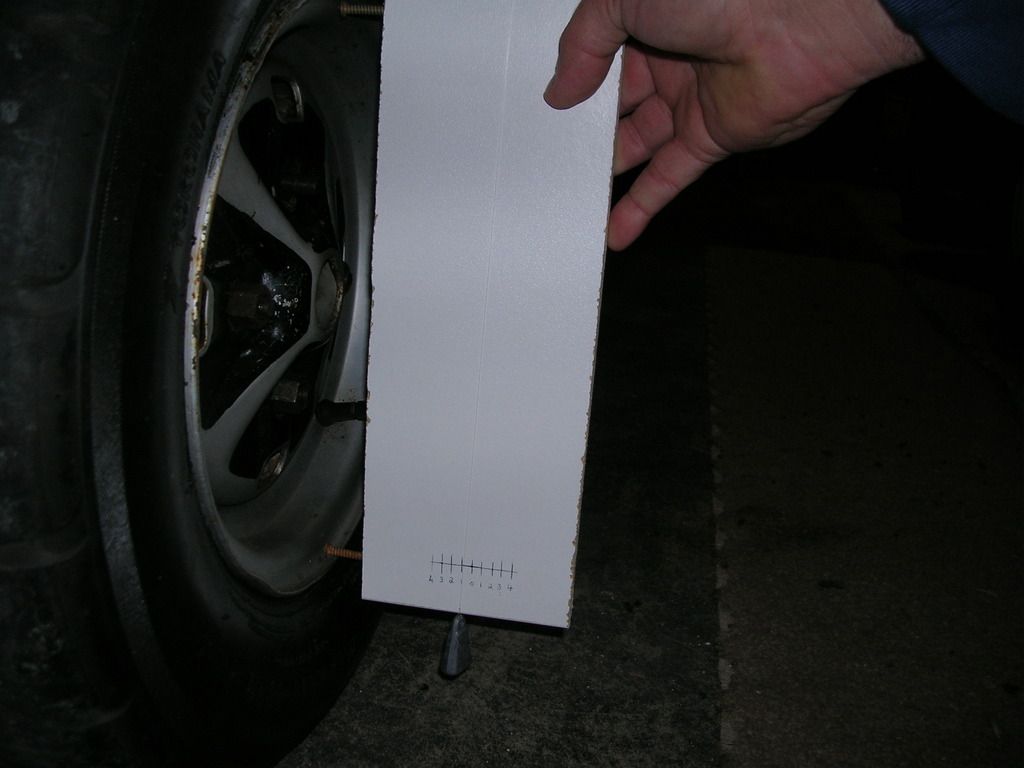
The second one I made was taken from here - http://www.pistonheads.com/gassing/topic.asp?t=1172232 - its a wooden gauge very similar to the tool used above. Just need to adjust the measurements to suit your rim size. The 10 inch mini rims I have actually measure out at 286mm across the rim so I made my increments at 5mm = 1 degree. Here is a useful calculator that will help with the measurements. http://www.gtsparkplugs.com/Camber-Offs ... lator.html

Image

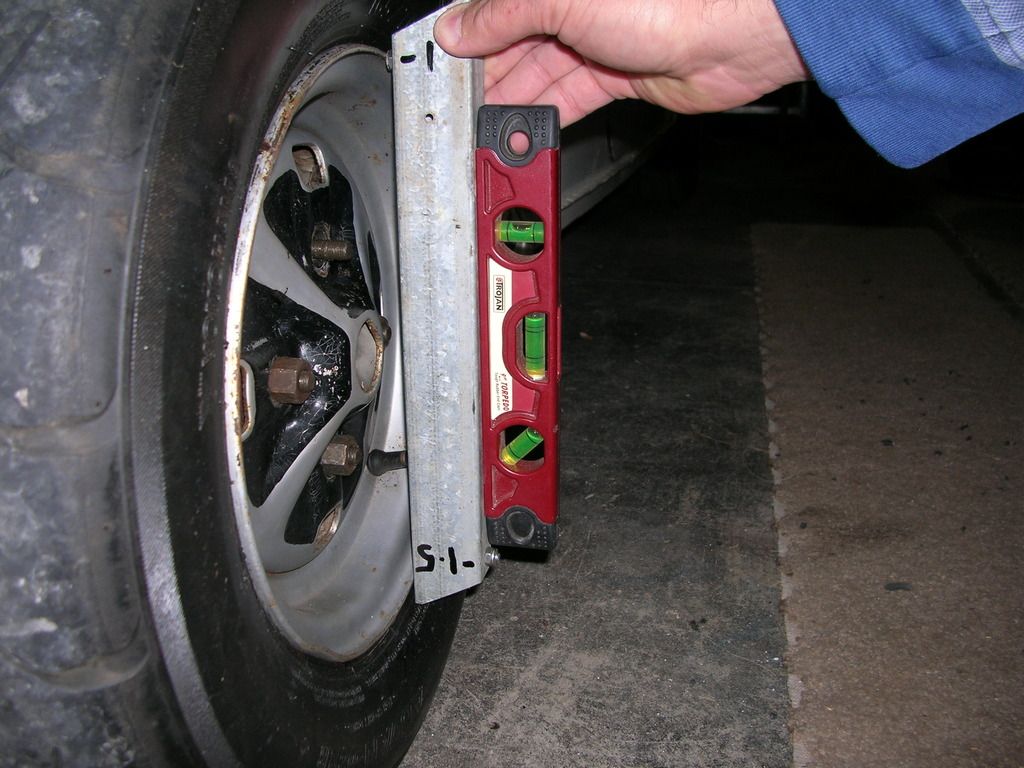
The third one I made was from the same page above and is a fixed type made from a 300mm length of metal that fits across the rim. Using the 286.5mm @ 1degree it needed a bolt sticking out 5mm. This placed against the rim with a level held against it. When the bubble is central it is then set at -1 degree. I also have a bolt sticking out the opposite side 7.5mm so I spin it around and have a -1.5degree offset.

Image

edit.
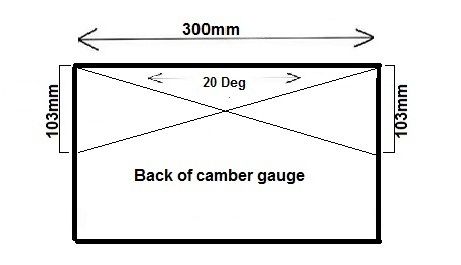
The castor is calculated by the same procedure. The only difference is that the wheels are turned to 20 degrees each way. I have drawn the 20 degree angles on the back of the camber gauge. Just flip it over, place it on the ground parallel to the car so the angles can be marked in chalk on the ground. Turn the wheel 20 degrees one way and take a reading - back to straight ahead then turn it the opposite direction 20 degrees to calculate the difference.
Image

When I am all finished and happy with my setup I will go and pay for an alignment to double check the accuracy, then its free wheel alignments. Just need to find a good wheel aligner is Adelaide that does 10" wheels.

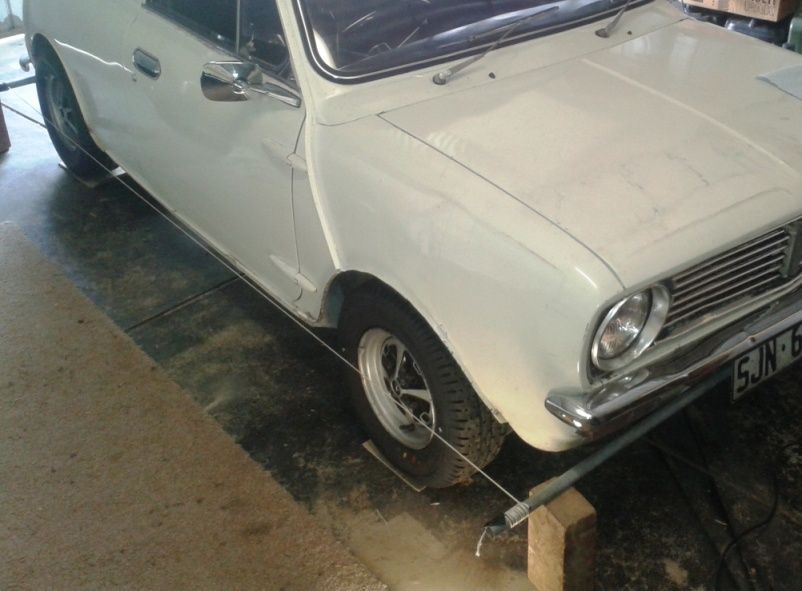
My front toe out and rear toe in is checked by using a string line down both sides the car.
Image

Author:  Hobson [ Wed Apr 22, 2015 10:27 am ]
Post subject:  Re: Home built alignment contraptions

Curly wrote:
Image

Of course doing it over a pit helps because you don't have to take the wheels off or jack it up.


Hate to be off topic but that is a nice looking Marcos

Author:  Mick [ Wed Apr 22, 2015 1:10 pm ]
Post subject:  Re: Home built alignment contraptions

How are people calculating the castor?

Page 1 of 2 All times are UTC + 10 hours
Powered by phpBB® Forum Software © phpBB Group
http://www.phpbb.com/