Ausmini
It is currently Sun May 28, 2023 11:15 pm

All times are UTC + 10 hours


Post new topic Reply to topic  [ 399 posts ]  Go to page Previous  1 ... 23, 24, 25, 26, 27
Author Message
 Post subject:
PostPosted: Mon Feb 13, 2023 11:26 pm 
Offline
998cc
998cc
User avatar

Joined: Tue Nov 13, 2007 4:17 pm
Posts: 938
Location: NOR, Perth, W.A.
Next stage is to start again on the shell repairs - of which there is lots.
Blanking off the fresh air duct into the cabin (since the duct won't fit anymore)
Image

Image

Redoing the crappy de-seaming welds in the A-Pillar
Image

The de-seam welds on the C-pillar were atrocious and a lot of the panel grinded back too much
Image

It was time to add some strength back with some 30mm x 1.6mm steel backing strips, bent to shape, tacked & welded in place
Image

Image

Image

Image

The upper/lower door hinge holes has no even surface on the inside for the washer & nut to tighten against due to how the door skin panel folds over the door edge
Image

I've never like this so I added a small steel plate in and redrilled the hole
Image

_________________
-Alan
I blame my dad for my love of minis. I think I was conceived in the back seat of one :D
I also blame my Dad for me being 6' 1" - not really the optimum height for driving a Mini.


Top
 Profile  
 
 Post subject:
PostPosted: Sun Apr 02, 2023 10:03 am 
Offline
998cc
998cc
User avatar

Joined: Tue Nov 13, 2007 4:17 pm
Posts: 938
Location: NOR, Perth, W.A.
Body work now started and continuing to fix the crappy repairs previously done by a 3rd party :

Outward bulge at the rear of the drivers door opening :
Image

Huge 7mm indent on passengers side behind the door opening :
Image

To help hang and gap the door, I designed some 3D printed pieces
Image

Image

Image

Fixing door gaps where the lower corners were very tight :
Before
Image

After
Image

Attempted break in damage in door locks
Image

I started this project so many years ago that rust was making it's way through the etch primer so I made the choice to take it all back to bare metal (again) and get some 2K epoxy primer on it. I purchased a cheap party tent and squeezed it in the workshop
Image

So many hours of wire wheeling, grinding and sandblasting in hard-to-reach areas finally got it all back to a surface ready for new primer.
Image

Image

Image

Image

Image

Then doors/bonnet/bootlid
Image

Image

Image

The custom front subframe was also blasted
Image

Unfortunately what was revealed after this sandblasting has added a lot more work to my to-do list

_________________
-Alan
I blame my dad for my love of minis. I think I was conceived in the back seat of one :D
I also blame my Dad for me being 6' 1" - not really the optimum height for driving a Mini.


Top
 Profile  
 
PostPosted: Sun Apr 02, 2023 11:30 am 
Offline
848cc
848cc

Joined: Sat Feb 16, 2008 6:01 am
Posts: 44
Location: Santiago, Chile
top job!!! may you share the file for the door gap "tool" 3d printed?

_________________
Image


Top
 Profile  
 
PostPosted: Sun Apr 02, 2023 1:09 pm 
Offline
1098cc
1098cc
User avatar

Joined: Tue Jan 11, 2005 9:07 pm
Posts: 1317
Location: Emu Plains, NSW
What size is the party tent. Looks like a good idea for a spray booth.
Pete

_________________
A recent study found the average Aussie walks about 900 miles a year
Another study found Aussies drink, on average, 22 gallons of alcohol a year
That means, on average, Australians get about 41 miles per gallon

Kind of makes you proud to be an AUSSIE


Top
 Profile  
 
PostPosted: Sun Apr 02, 2023 1:52 pm 
Offline
998cc
998cc
User avatar

Joined: Tue Nov 13, 2007 4:17 pm
Posts: 938
Location: NOR, Perth, W.A.
clubman S wrote:
top job!!! may you share the file for the door gap "tool" 3d printed?

The two designs are available for free here :
Door clamp : https://www.printables.com/model/250164 ... door-clamp
Panel gap tools : https://www.printables.com/model/244897 ... gauge-tool
The gap tool STL models have panel gap sizes ranging from 3mm to 7mm, and for a couple of sized round magnets that glue into the prints.
I have sold a few sets for those who don't have a 3D printer but I've put them online for anyone who at least has access to one.

EST-071 wrote:
What size is the party tent. Looks like a good idea for a spray booth.

6x3m I purchased it from https://www.vidaxl.com.au/ for about $140. I'll be using it for primers but would be a lot of effort to seal it well enough to stop dust getting on base/top coat/clear.

_________________
-Alan
I blame my dad for my love of minis. I think I was conceived in the back seat of one :D
I also blame my Dad for me being 6' 1" - not really the optimum height for driving a Mini.


Top
 Profile  
 
PostPosted: Sun Apr 16, 2023 7:32 am 
Offline
848cc
848cc

Joined: Sat Feb 16, 2008 6:01 am
Posts: 44
Location: Santiago, Chile
Mearcat wrote:
clubman S wrote:
top job!!! may you share the file for the door gap "tool" 3d printed?

The two designs are available for free here :
Door clamp : https://www.printables.com/model/250164 ... door-clamp
Panel gap tools : https://www.printables.com/model/244897 ... gauge-tool
The gap tool STL models have panel gap sizes ranging from 3mm to 7mm, and for a couple of sized round magnets that glue into the prints.
I have sold a few sets for those who don't have a 3D printer but I've put them online for anyone who at least has access to one.

EST-071 wrote:
What size is the party tent. Looks like a good idea for a spray booth.

6x3m I purchased it from https://www.vidaxl.com.au/ for about $140. I'll be using it for primers but would be a lot of effort to seal it well enough to stop dust getting on base/top coat/clear.


thanks!!!! will print it to do door gap on mines!!!

_________________
Image


Top
 Profile  
 
 Post subject:
PostPosted: Fri May 19, 2023 6:19 pm 
Offline
998cc
998cc
User avatar

Joined: Tue Nov 13, 2007 4:17 pm
Posts: 938
Location: NOR, Perth, W.A.
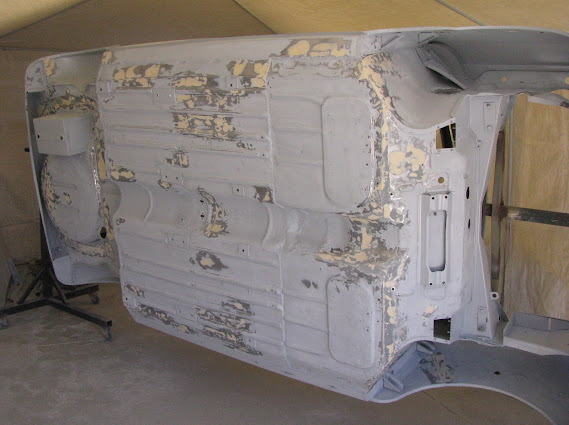
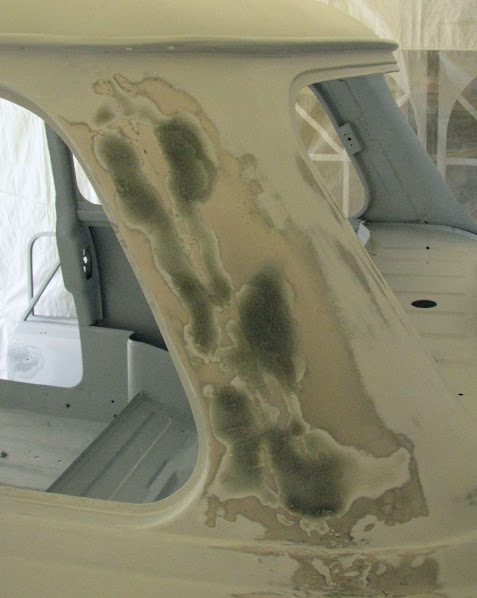
With the old etch primer and patches of spray can primer now removed from the Mini shell, more defects were exposed...

The curved panel section next to the rear wheel arch seam wasn't repaired well and had some pinholes so the panel was cut away and replaced (painted with black zinc paint before patching)
Image

Image

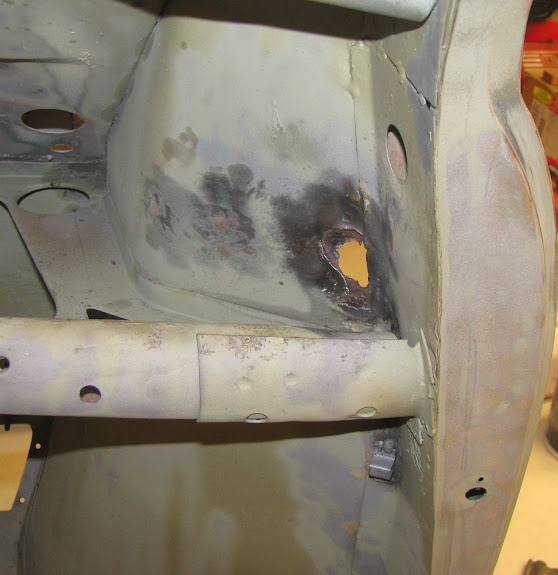
The drivers side wheel arch had an (attempted) repair which was just a glob of messy welds ... another patch
Image

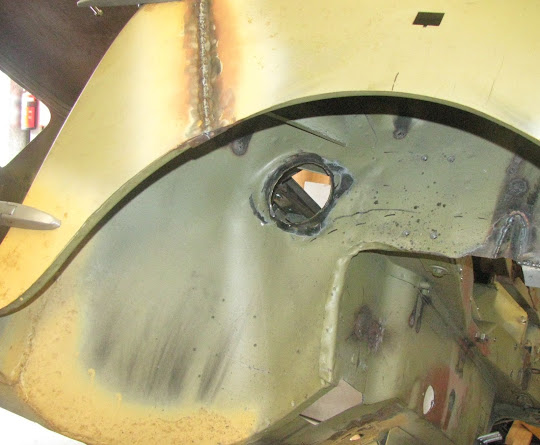
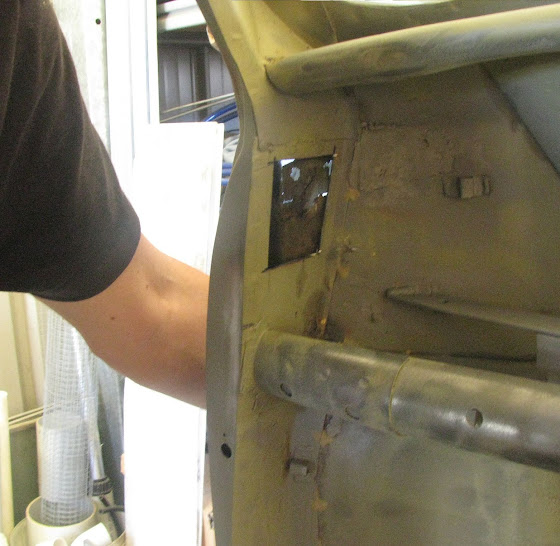
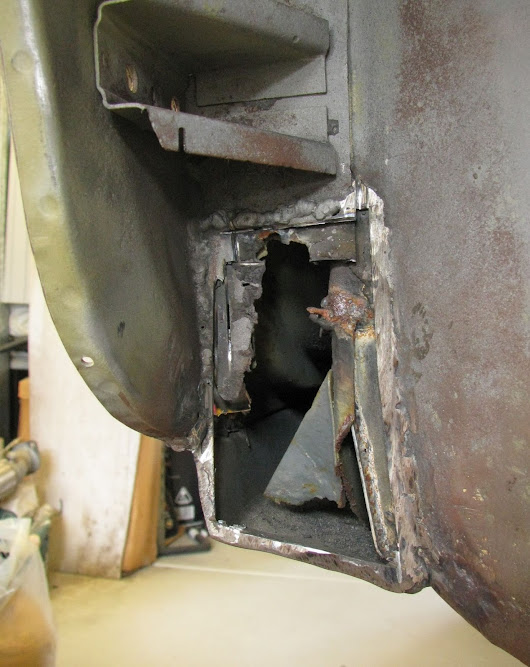
The passenger wheel arch had a couple of rust holes at the (very hard to reach) top corner of the wheel arch. I cut an access hole next to the door to investigate and found multiple rust holes large enough to stick a 12mm drill bit through (Torch shining through from the wheel arch in this pic)
Image

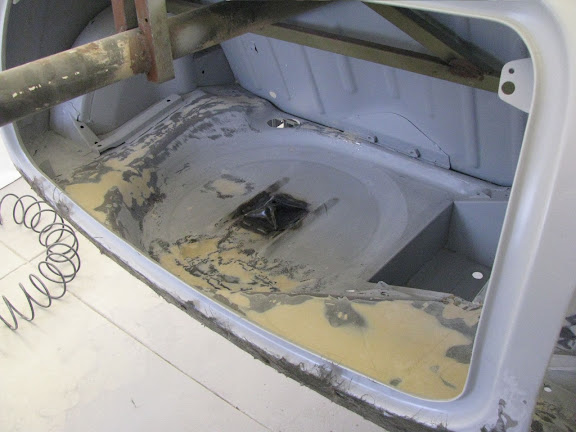
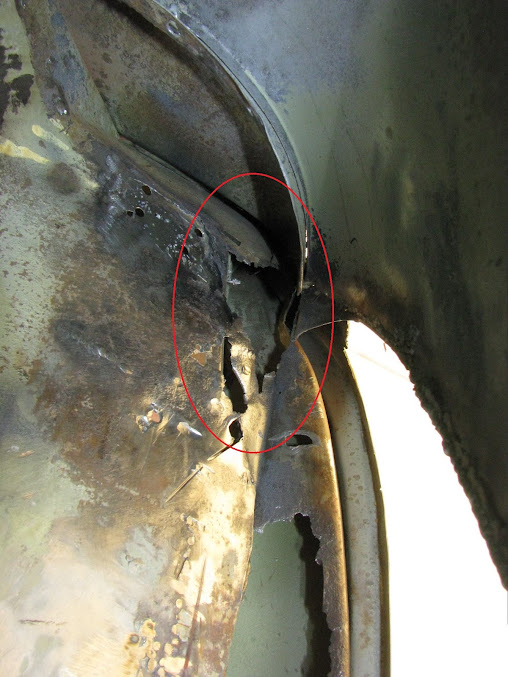
After removing the outer & inner A-panels it exposed a huge section of rust damage that had never been repaired properly - just a piece of steel welded over it. There is supposed to be a vertical panel here, not a gaping rusty hole :shock: :shock:
Image

After the couple of gussets in the upper wheel arch had the spot welds drilled out and removed, it revealed a massive rust hole that was hiding behind them. I'm super glad I wanted to go to the effort of fixing this - it would have rusted out again in no time after driving in any wet weather.
Image

More patches...
Image

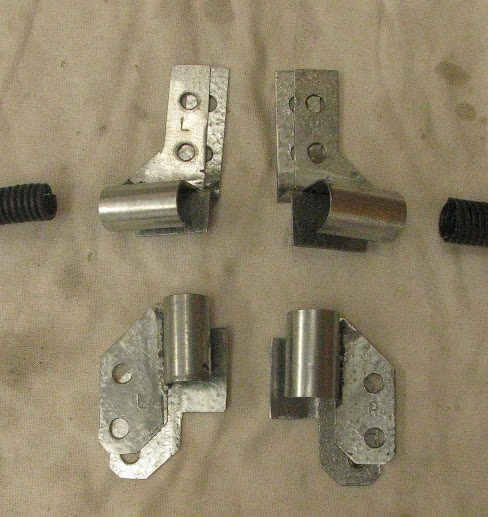
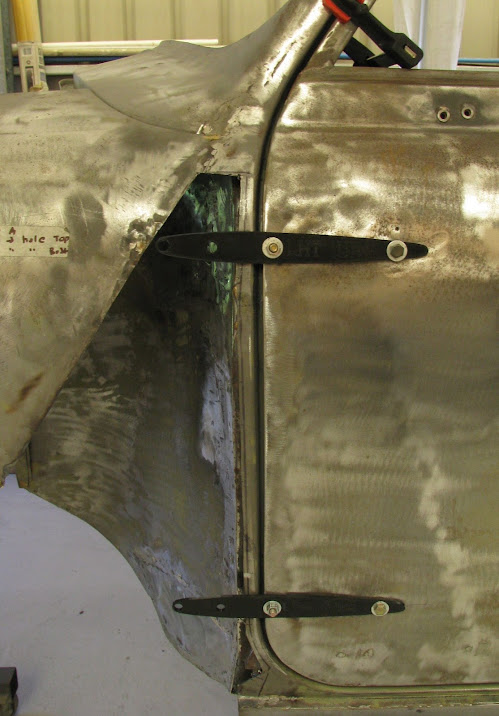
Some 3D prints which matched the external hinge hole positions exactly were bolted to the door. These hinge prints allowed me to determine the exact position required by the A panels by aligning the holes in the prints with the holes in the new A-pillar panels.
Image

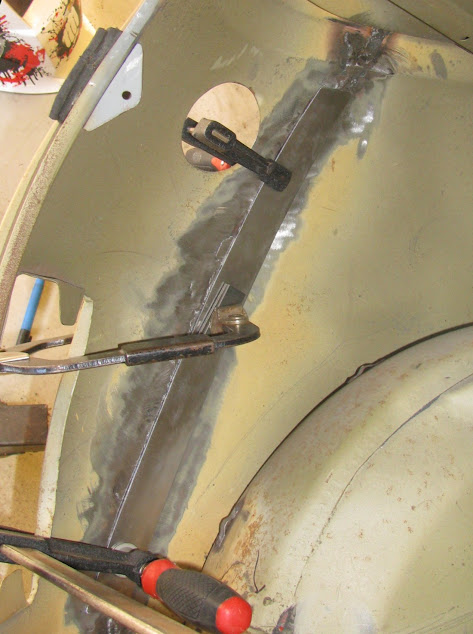
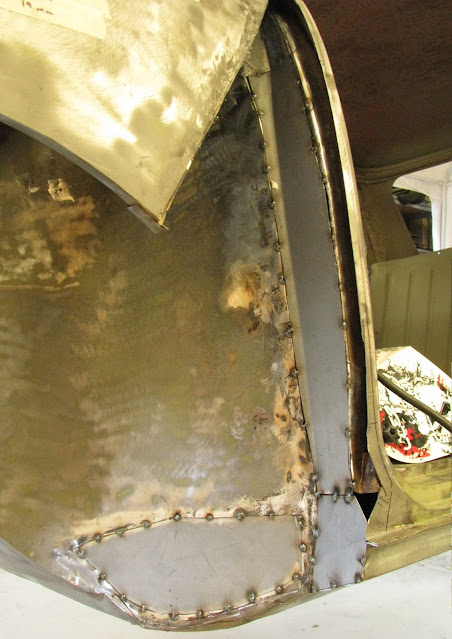
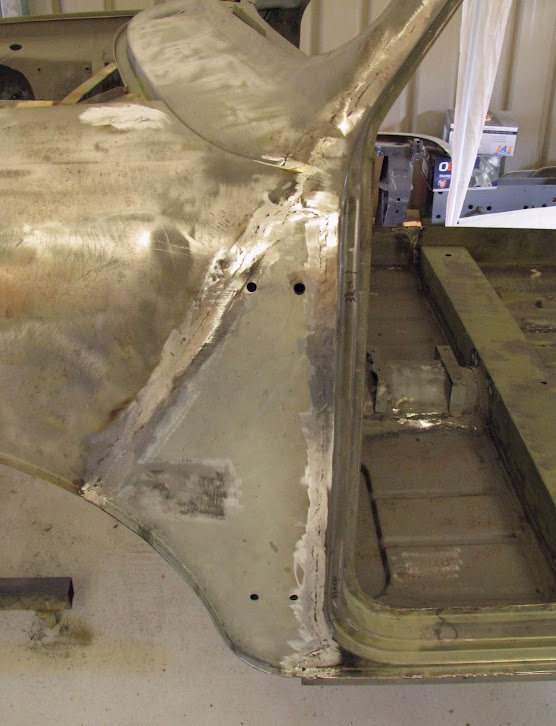
Much trimming, tweaking and panel beating later, the new A-pillar panels were welded in
Image

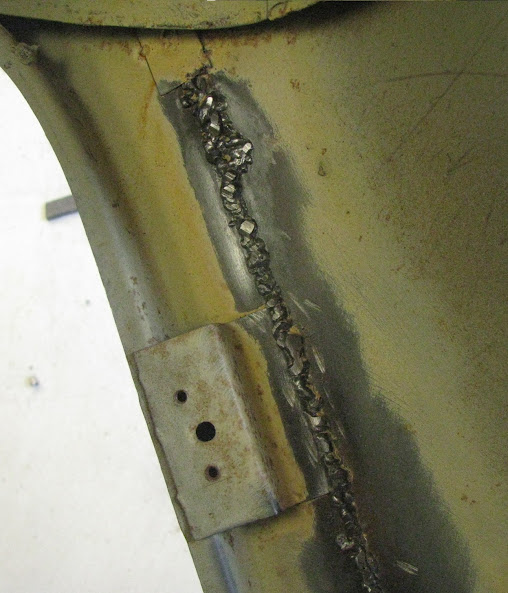
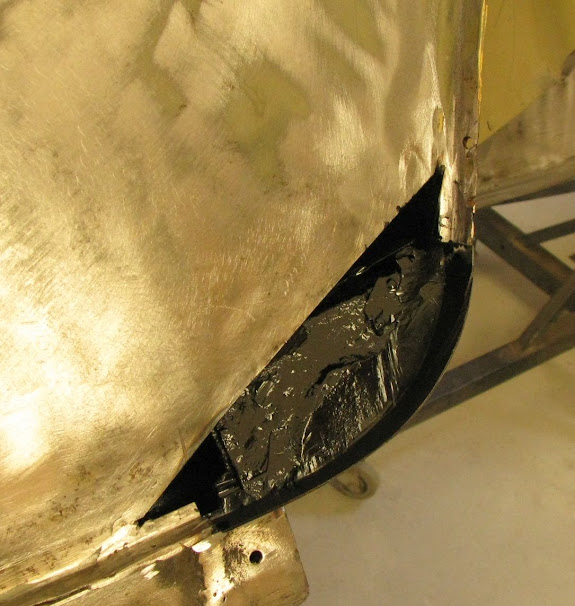
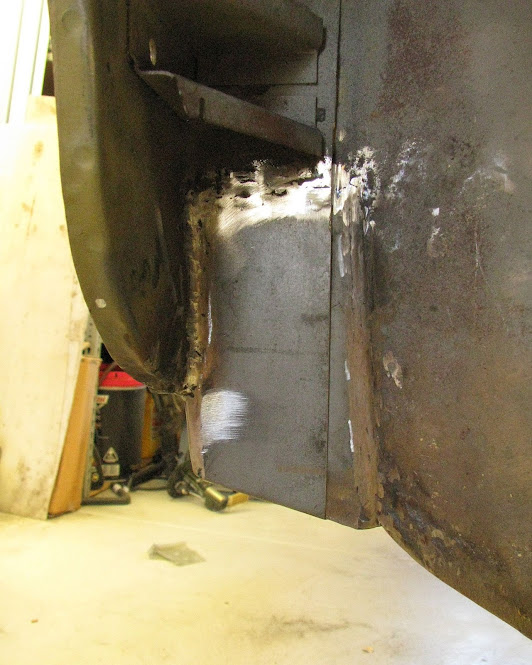
A repair patch had also been welded in the drivers side front wheel arch and given the low quality of repairs I'd already found, I cut this patch off... and found yet another example of a steel piece just welded over the top of rust damage.
Image

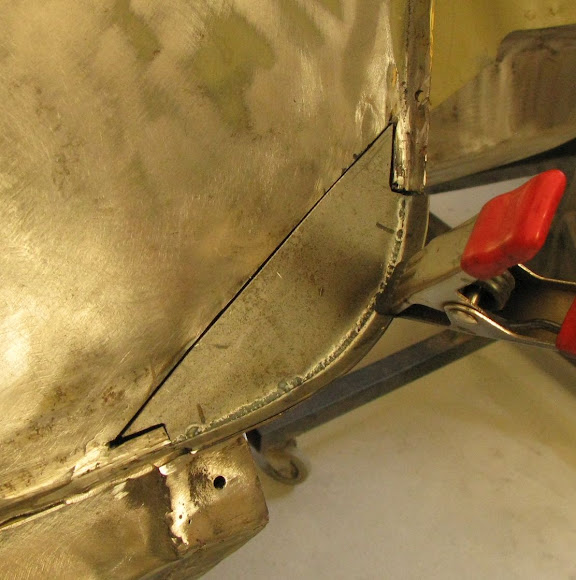
This was fixed after treating the rust behind the wheel arch with zinc paint. I welded in some new steel - correctly this time which includes the way the separate inner A-panel is supposed to wrap under the sill.
Image

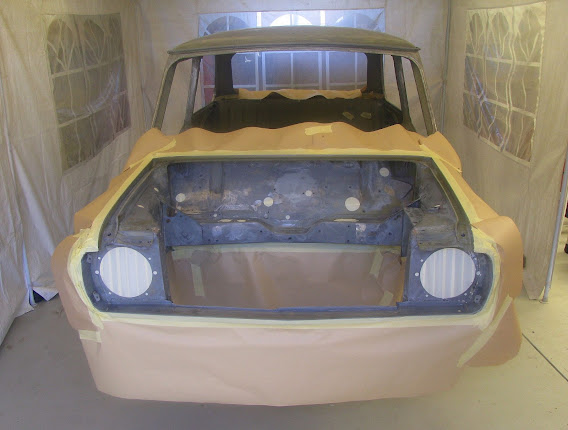
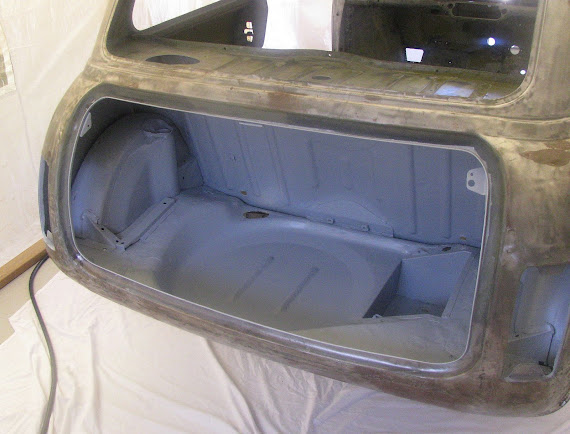
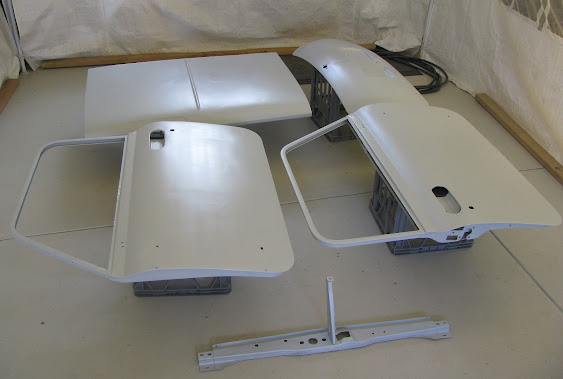
So that completes all rust repairs and fixing previous shoddy repairs (Am I jinxing myself here?). Now onto the next stage of bodywork and panel alignment.

_________________
-Alan
I blame my dad for my love of minis. I think I was conceived in the back seat of one :D
I also blame my Dad for me being 6' 1" - not really the optimum height for driving a Mini.


Last edited by Mearcat on Sat May 20, 2023 8:20 am, edited 1 time in total.

Top
 Profile  
 
PostPosted: Sat May 20, 2023 5:45 am 
Offline
848cc
848cc
User avatar

Joined: Tue Sep 13, 2005 10:59 pm
Posts: 86
Location: Boddington , perth
Looking great & some awesome 3d printed ideas , my mate has just purchased a rusty traveler & im sure some of these ideas will help him out

_________________
live life to the full as yesterdays gone, & tommorow never comes.

1974 LEYLAND P/VAN


Top
 Profile  
 
PostPosted: Fri May 26, 2023 5:23 pm 
Offline
848cc
848cc

Joined: Fri Oct 06, 2017 6:39 pm
Posts: 165
Location: Perth, WA
I'm glad you're discovering all this now Alan. Well done.


Top
 Profile  
 
Display posts from previous:  Sort by  
Post new topic Reply to topic  [ 399 posts ]  Go to page Previous  1 ... 23, 24, 25, 26, 27

All times are UTC + 10 hours


Who is online

Users browsing this forum: No registered users and 2 guests


You cannot post new topics in this forum
You cannot reply to topics in this forum
You cannot edit your posts in this forum
You cannot delete your posts in this forum
You cannot post attachments in this forum

Jump to:  

© 2016 Ausmini. All garage work involves equal measures of enthusiasm, ingenuity and a fair degree of irresponsibility.