How much Ben? - what's it like to drive?
| ausmini https://www.ausmini.com/forums/ |
|
| Madmorrie's 4EFTE Morris 1100 conversion https://www.ausmini.com/forums/viewtopic.php?f=23&t=22593 |
Page 6 of 24 |
| Author: | Mini Mad [ Mon May 28, 2007 9:06 pm ] |
| Post subject: | |
How much Ben? - what's it like to drive? |
|
| Author: | 92 [ Thu May 31, 2007 7:25 pm ] |
| Post subject: | |
The diff I got fairly cheap from a mate who we fitted a starlet engine into a motorkhana special and it was useless in that but is quite drivable in a mini not a great deal different from an open diff except you get some grip. I believe you can buy them new for around $950. |
|
| Author: | madmorrie [ Wed Jun 06, 2007 9:55 am ] |
| Post subject: | some progress |
Well, I have been busy cutting and positioning, and cutting some more... I have almost got the engine to sit where I want it, getting it far enough back has been my main concern. I want equal length driveshafts and a straight line through both hubs and the diff if possible. All this means that the things that get in the way will be attended to first, before the position of the motor are finalised. Firstly the the gearshift. It was never going to work as Toyota intended. This is the across gate. Where it was mounted would have gone right through the left hydrolastic unit. By making a new mount to mount it on the other side, and chopping up the lever I can flip the whole mechanism round so it clears the suspension and still works in its original way. i.e. left for first-second gate, right for 5th - reverse gate. 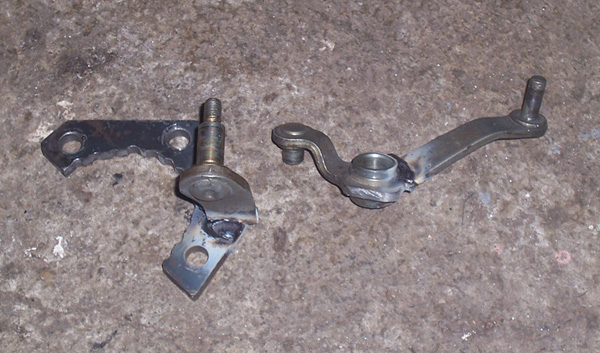 By removing and dismantling the shifter shaft, it is easy enough to remove 1 spline on the shaft and reassemble everything 180 degrees from where it was. This give more clearance lower, where its needed, but flips 1 axis of your shift pattern. eg. 1st is down instead of up. To rectify this I had planned to use a bellcrank arrangement like 92s (which is very nicely engineered) but I have a cunning plan to do a bit more cross-pollination of the species and get around it with a Honda part. 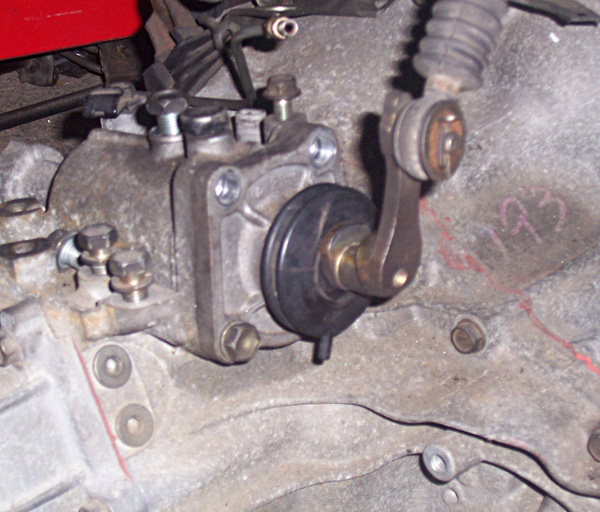 I have actually nearly finished this part, just need to mount the cable stops and give it a test, but so far it looks promising. Next up, the water pump... Madmorrie |
|
| Author: | rehab1964 [ Wed Jun 06, 2007 8:29 pm ] |
| Post subject: | |
looking good Ross, the progress must feel great |
|
| Author: | madmorrie [ Mon Jul 09, 2007 11:46 pm ] |
| Post subject: | getting there |
OK, have made a lot of progress lately. Just not much to show for it. Here is a cardboard mockup I made of the plan for the side tubes. I am going with 42mm tubes for the uppers and the cross beam at the front. Will probably go with 25mm square for a beam to run back under to tie it all together. 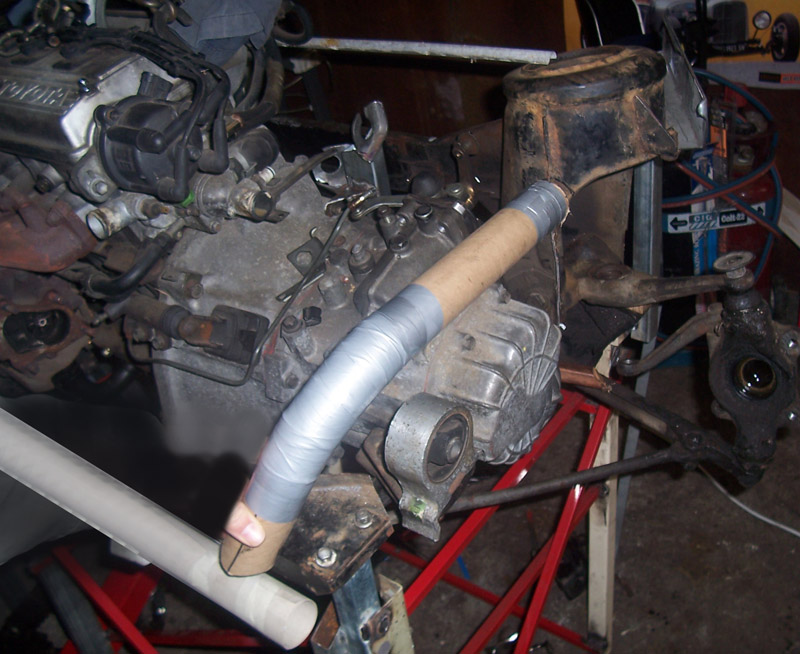 Will 3mm wall thickness be massively heavy? I had a bit of 2mm stuff there and its seemed to be OK. Also made a up tube notcher so I can get nice fishmouths. (Not that I need many joins like this, but I had the technology - may have to make the next project a spaceframe!!) First time I have threaded anything on the lathe, and I just swapped the gears till it looked about right. After messing about for a while the holesaw spun straight on! 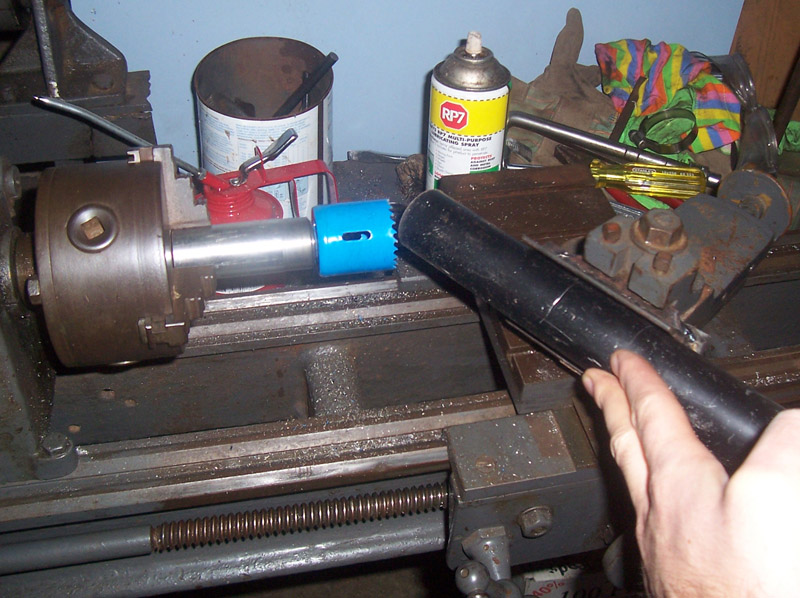 And here is my perfect fishmouth. I left a bit not welded to show how nice the join came out. This is only 2mm but I reckon it would be tough enough. Anyone?  Will hopefully get steel this week and get the frame happening soon. Cheers Madmorrie |
|
| Author: | Archangel007 [ Mon Jul 09, 2007 11:50 pm ] |
| Post subject: | |
With that diamter pipe, 2mm should be ample! Cheers, Tricky |
|
| Author: | madmorrie [ Tue Jul 10, 2007 10:24 am ] |
| Post subject: | |

Ooops, messed up the link to the last photo. |
|
| Author: | goffy [ Tue Jul 10, 2007 10:30 am ] |
| Post subject: | |
Thats a perfect cut!! ive got to get myself one of those, i've jsut been using a grinder cheers |
|
| Author: | awdmoke [ Tue Jul 10, 2007 10:36 am ] |
| Post subject: | |
That is sweet. Make sure you keep copies of those pics for your engineer. He will be impressed by your quality of workmanship. |
|
| Author: | madmorrie [ Tue Jul 10, 2007 12:38 pm ] |
| Post subject: | |
Yeah, part of the reason for going to the effort is to impress the engineer. I was rapt with how my test one came out. It just ate straight thru. The lathe is about 80-90 years old as far as I can guess, but bloody handy to have around, $400 well spent I reckon... |
|
| Author: | dove grey 64 [ Tue Jul 10, 2007 1:33 pm ] |
| Post subject: | |
old doesnt always mean bad, somethings they improve over time and others they dont. i have an old sewing machine like that. keep up the work mate, looks good |
|
| Author: | rehab1964 [ Tue Jul 10, 2007 2:04 pm ] |
| Post subject: | |
that's a nasty piece of thumb left on the side tube in the first pic - lets hope the engineer isn't one for ohs |
|
| Author: | dove grey 64 [ Tue Jul 10, 2007 2:56 pm ] |
| Post subject: | |
Quote: that's a nasty piece of thumb left on the side tube in the first pic - lets hope the engineer isn't one for ohs
|
|
| Author: | sports850 [ Tue Jul 10, 2007 3:02 pm ] |
| Post subject: | |
madmorrie wrote: The lathe is about 80-90 years old as far as I can guess, but bloody handy to have around, $400 well spent I reckon...
And is probably twice as solid and heavy as a modern one so it isn't going to move or wander while you're working . |
|
| Author: | madmorrie [ Sat Aug 11, 2007 1:15 am ] |
| Post subject: | Time for an update |
Got the steel this morning. Very happy as it has been along time coming. 42mm round for front (gal bit???) and bends for the sides. 30x30 square for underneath and anywhere else I need it and 5mm plate for mounts and strengthening webs etc. At least that was the plan.  So tonight I got out there to knock up the subframe. 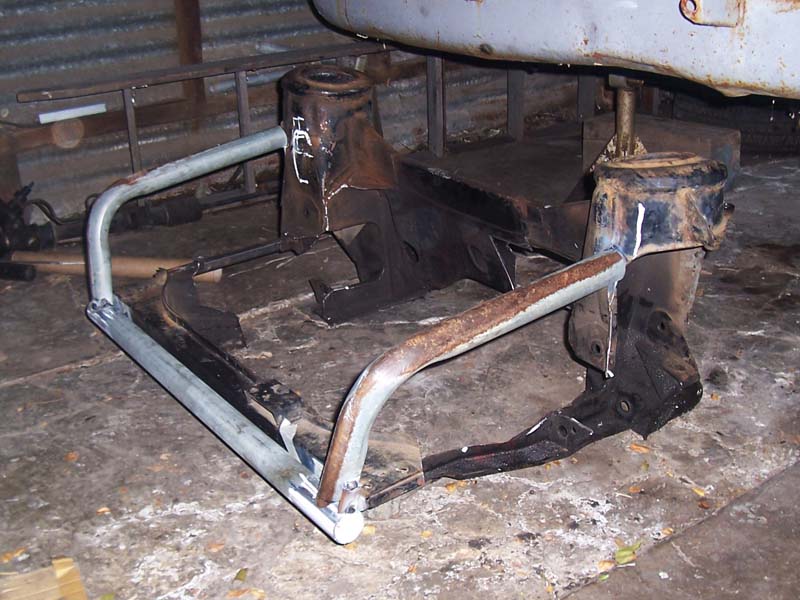 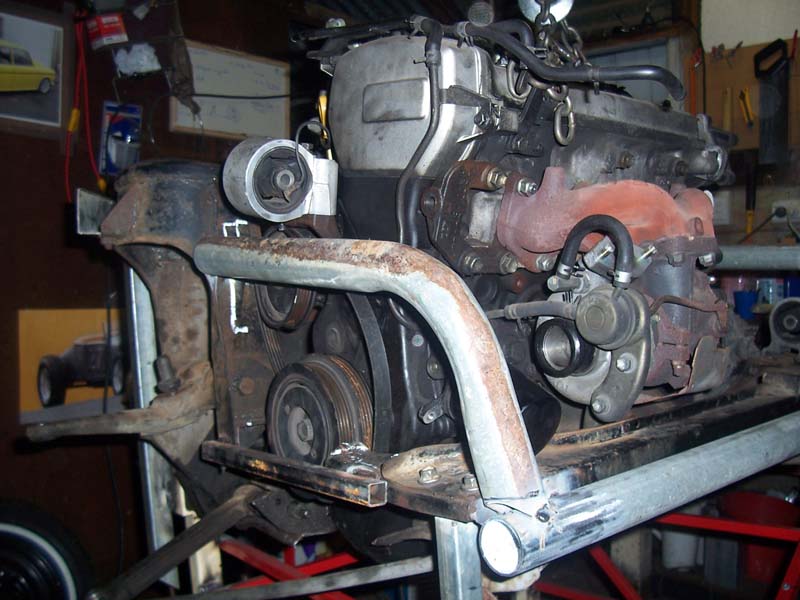 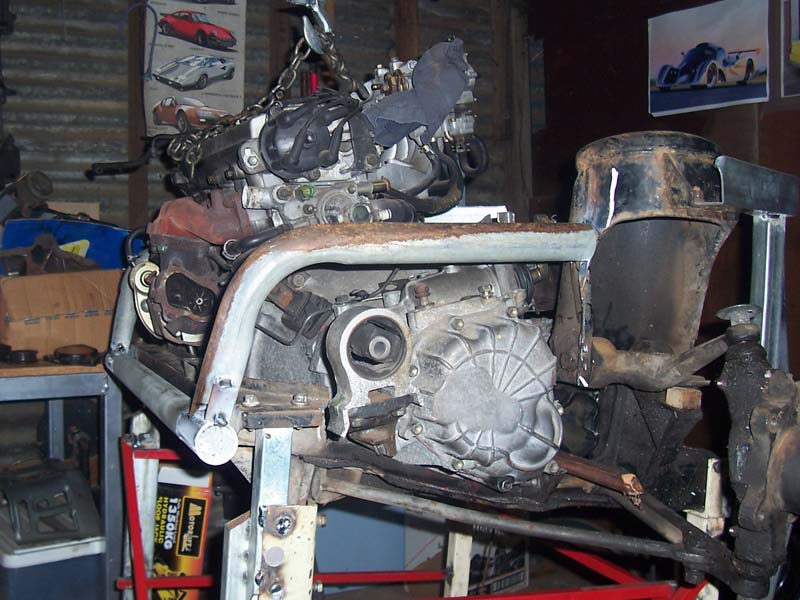 Test fitted it in to the car for the first time which showed up a few problems. While I have plenty of room for the rails up high, the bay tapers a fair bit and it was a real bastard to get it in. Even a few mm would have given me clearance, which is what I'm after so I don't need to cut the inner guards at all. Also the engine is going to have to come forward about 30mm to clear the rack. I welded a bit of steel wrapping around the back of the gearbox as a guide for room, and it hit the rack! I've decided that while I like the bends, I just can't afford the width and am going to get some 50x25 RHS and do the sides in that. That should give me an extra 17mm each side to play with. Should make getting the engine in and out a bit easier too! Also got a set of new discs for my partners Lantra of ebay and reckon that they will go OK on this as well. Will post pics next time. Cheers Madmorrie |
|
| Page 6 of 24 | All times are UTC + 10 hours |
| Powered by phpBB® Forum Software © phpBB Group http://www.phpbb.com/ |
|