Ausmini
It is currently Wed Apr 17, 2024 9:38 am

All times are UTC + 10 hours


Post new topic Reply to topic  [ 89 posts ]  Go to page Previous  1, 2, 3, 4, 5, 6  Next
Author Message
PostPosted: Fri May 09, 2014 1:45 pm 
Offline
Give Ash some flowers Nick .
User avatar

Joined: Wed Aug 09, 2006 1:22 pm
Posts: 10149
Location: Toowoomba Region, QLD
Well I've done a bit more but I have things on this afternoon so I couldn't finish it off. I'll let the pictures do most of the talking.

I cut the stock down to the approximate size before chucking it up as I thought less weight would be better. It also gave me a chance to really use my 4 jaw independent chuck.
Image
^Centre punched the hole for the stub axle
Image
^Lined a drill bit in the tail stock up with the mark so I knew it was in the right spot. If anyone has a 4 jaw independent chuck on their lathe, I really suggest making up a second chuck key for it as it is super easy to adjust if you work with both.
Image
^Drilled the hole as large as I could go with a drill bit (I have upto a 14.5mm)
Image
^Because the hole started out so small for boring, I couldn't get my normal tools in there tight enough so I had to use a HSS 1/4" tool blank and grind it myself. Couldn't lean on it too much as I needed it sticking out a fair way and it is only 1/4". Took quite a while. Also ran the lathe at a really slow speed as it was vibrating a bit from being out of balance.
Image
^This is where I left it as I have things to do this afternoon.. Currently doing the main hole where the axle and flange fits through. Still got a few mm to go and will also be putting a taper on it too so each side will be side specific.

I'll finish it off next time I get a chance. Hopefully the last bit I made should start to be making more sense now.

_________________
"In two years time your car will be like a lady's clothes, out of date, my car will still be in fashion when I am dead" - Sir Alec speaking to Pininfarina


Top
 Profile  
 
PostPosted: Tue May 13, 2014 4:54 pm 
Offline
Give Ash some flowers Nick .
User avatar

Joined: Wed Aug 09, 2006 1:22 pm
Posts: 10149
Location: Toowoomba Region, QLD
Managed to spend a bit longer on the bracket this afternoon and made some progress.

Image
^Ready for a fit up to make sure my marking out lined up.
Image
^Taper worked out. Took forever as I got some tool chatter due to the tool sticking out a fair way. Only took light passes.
Image
^Just put a couple of short bolts in the holes to keep everything aligned while I saw if the flange could rotate freely.
Image
^Seems to have a reasonably even gap all the way around and the flange spins freely.
Image
^This is how it fits up and the piece I made earlier will bolt on the bottom of this.

I still have some finishing off to go but this was good to see that it bolts up and the axle sticks out where I measured it would stick out. Planning on running an end mill around the edges and tidying up all the radii on the outside using my rotary table and mill. All going well I will then run a slot along the bottom for the earlier piece to join into and then use a fly cutter to tidy up the look of the alloy on both sides rather than the dirty extruded look.

Hopefully there will be more pics tomorrow!

_________________
"In two years time your car will be like a lady's clothes, out of date, my car will still be in fashion when I am dead" - Sir Alec speaking to Pininfarina


Top
 Profile  
 
PostPosted: Wed May 14, 2014 9:44 am 
Offline
1275cc
1275cc
User avatar

Joined: Fri Jun 17, 2005 10:31 am
Posts: 3183
Location: Burpengary, Queensland - Home of Tricky Performance Engineering
Smokin' Nick, really nice!

_________________
"Not Speeding Officer..........Qualifying"


Top
 Profile  
 
PostPosted: Wed May 14, 2014 5:24 pm 
Offline
Give Ash some flowers Nick .
User avatar

Joined: Wed Aug 09, 2006 1:22 pm
Posts: 10149
Location: Toowoomba Region, QLD
Thanks Tricky. Always good when a man of your talents likes what a pleb like me is doing. It certainly takes me long enough to churn out something 1/2 decent.

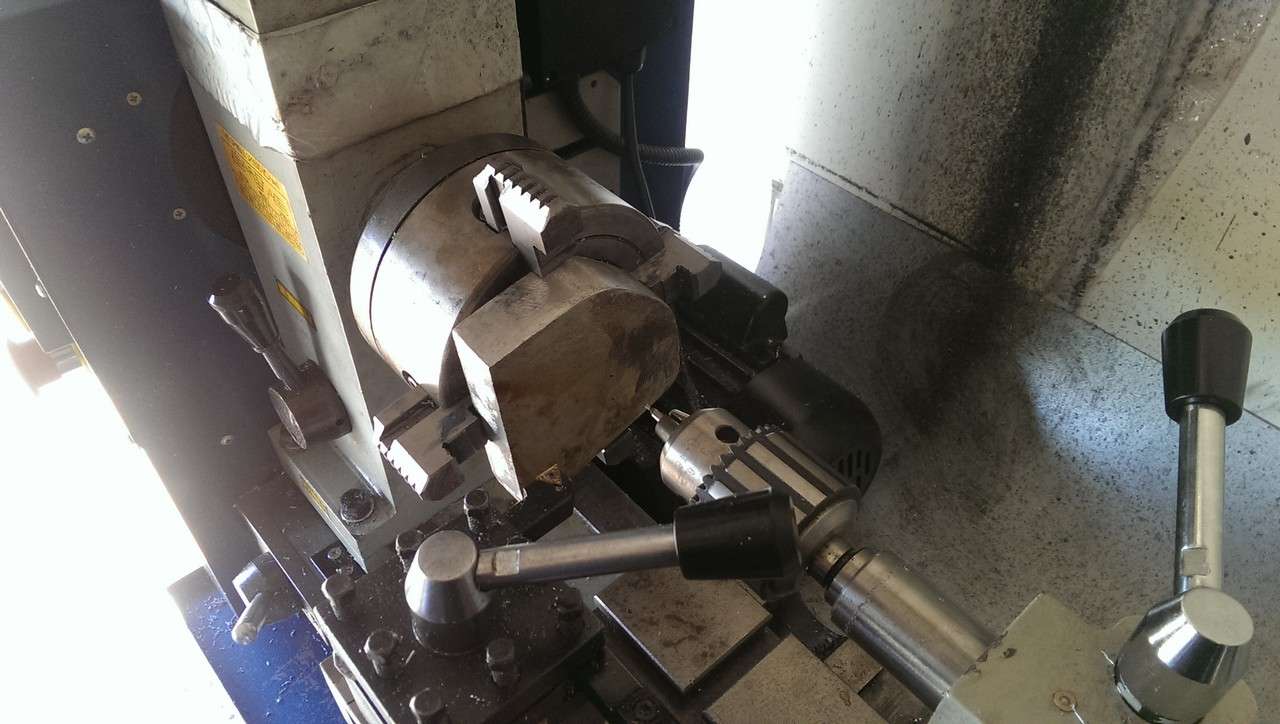
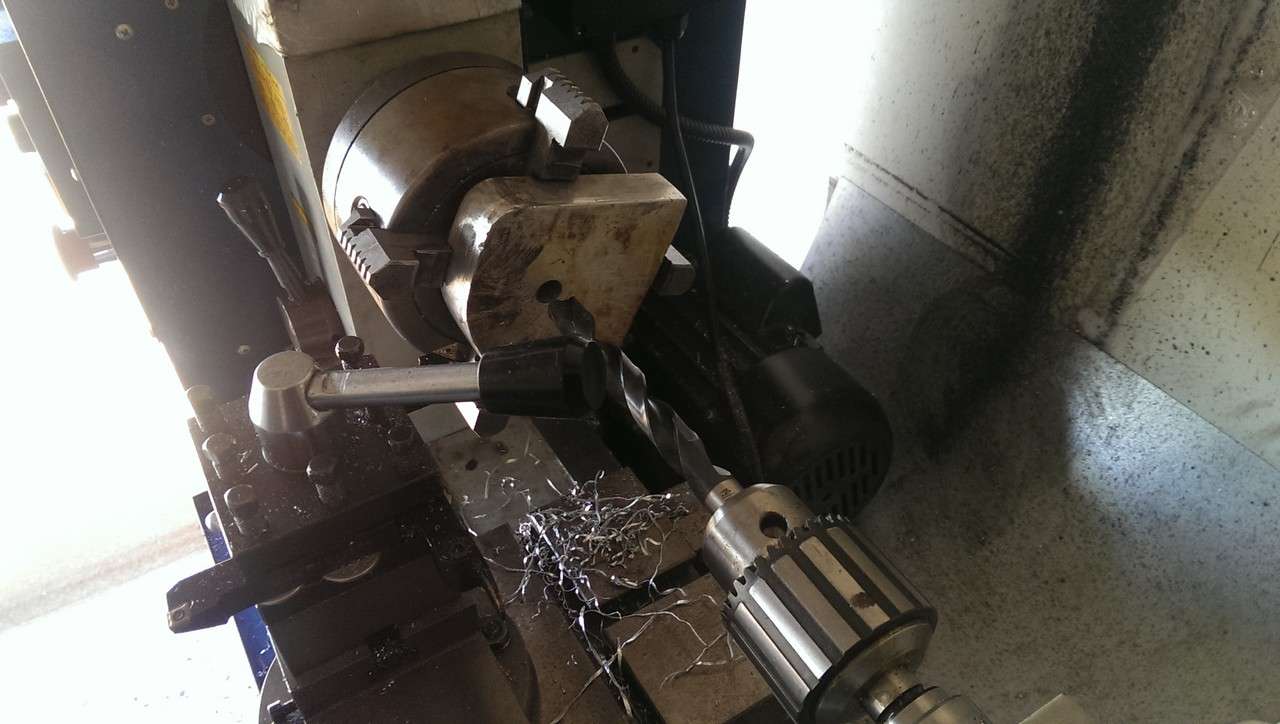
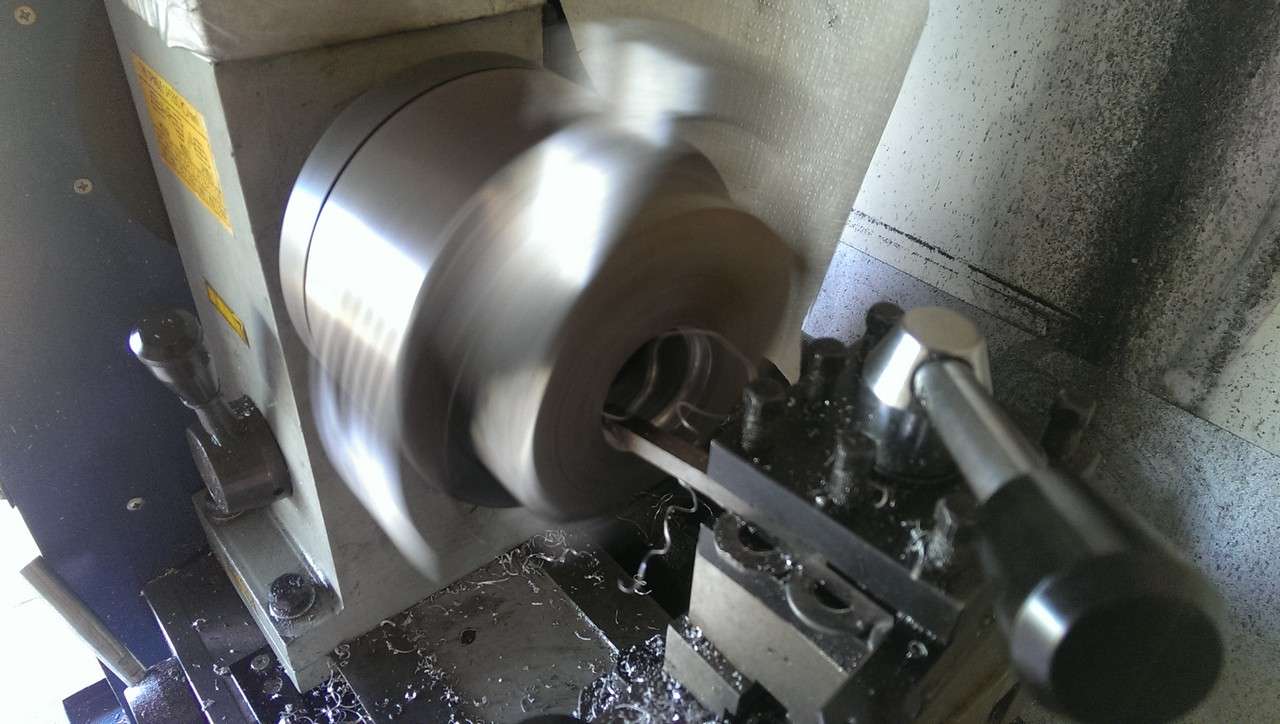
I managed to spend a few more hours in the garage today but it doesn't really show. I thought I had finished making a fly cutter but it turns out that it still needed more work done to it so I spent some time on that instead of working solely on the bracketry. Didn't take any progress photos today so I'll just cut straight through to an almost finished bit.

Image
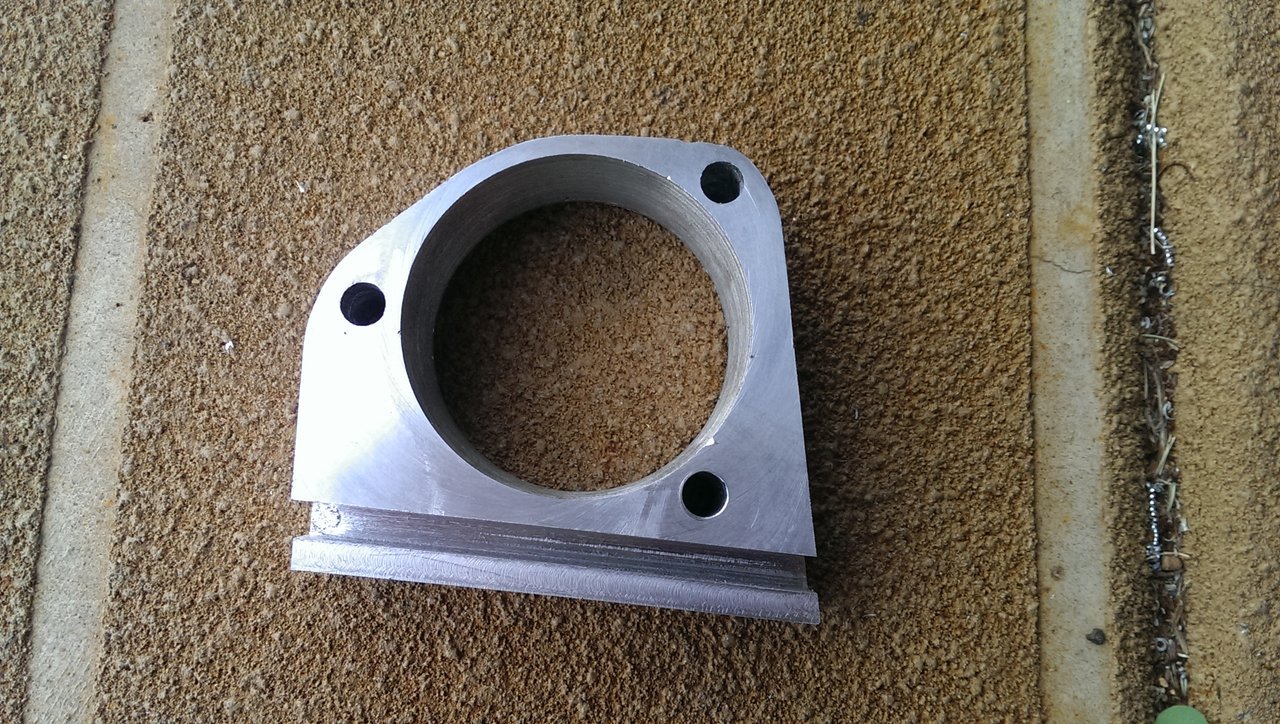
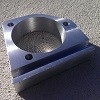
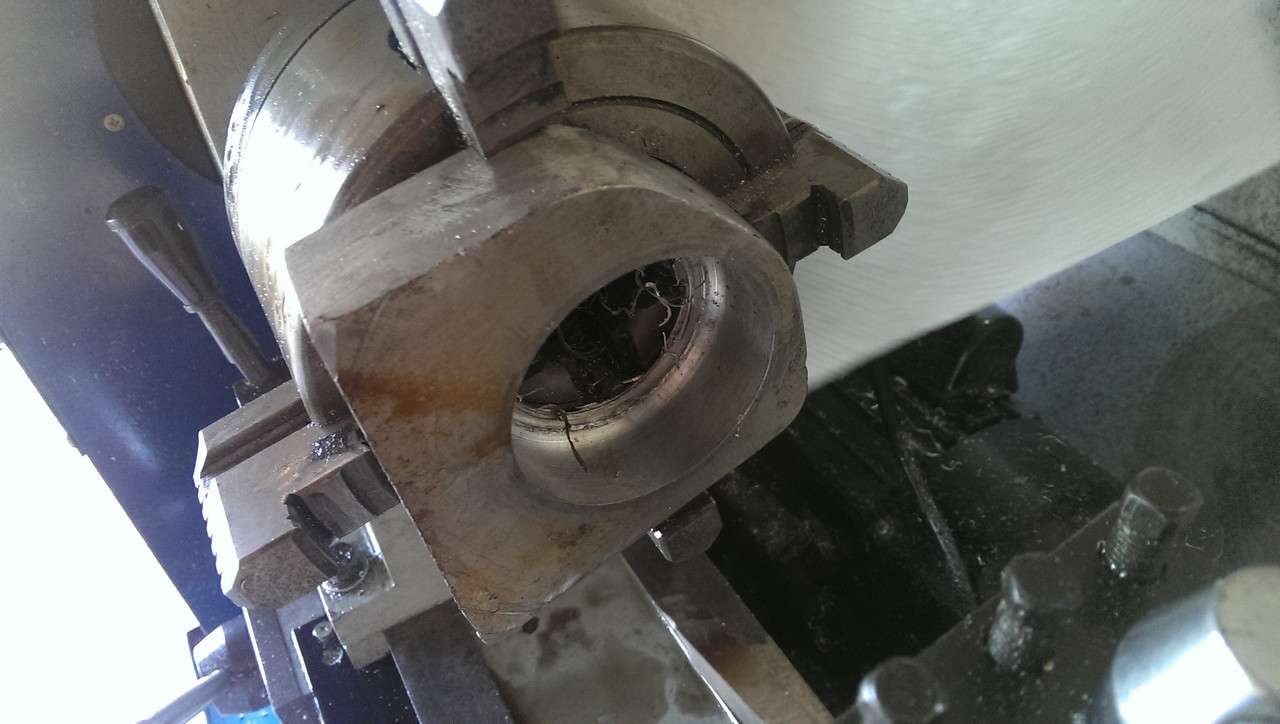
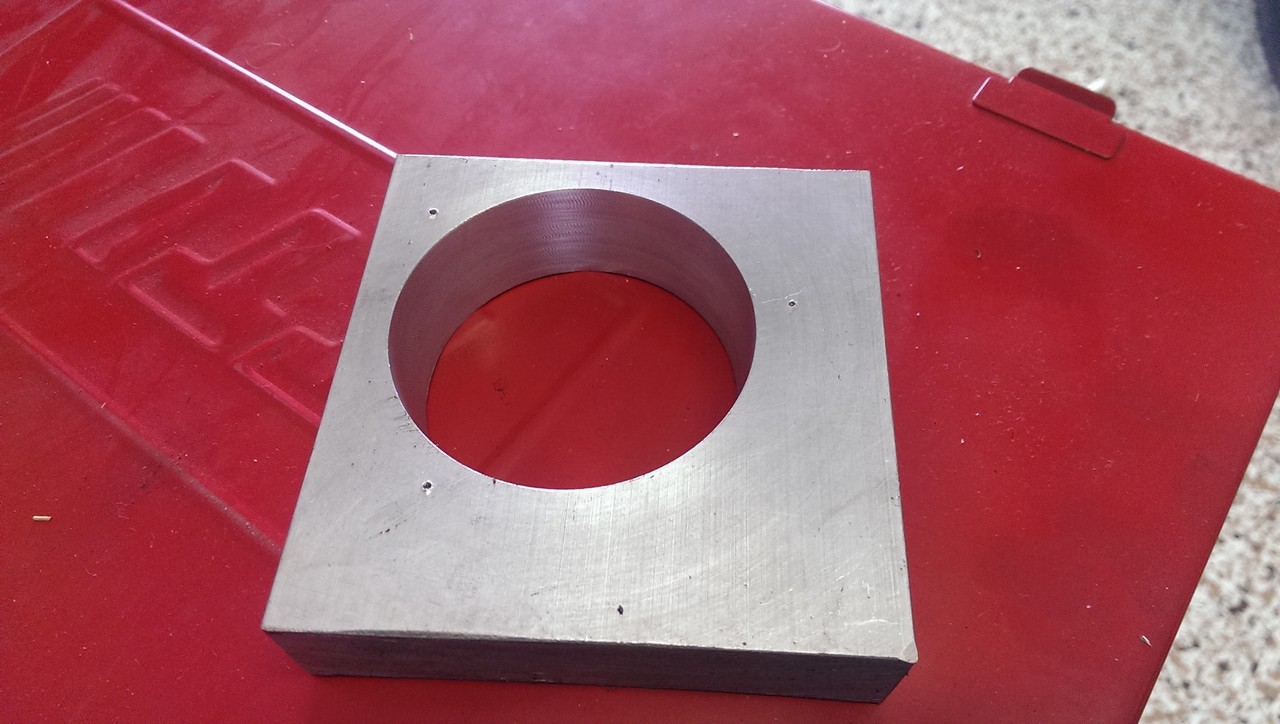
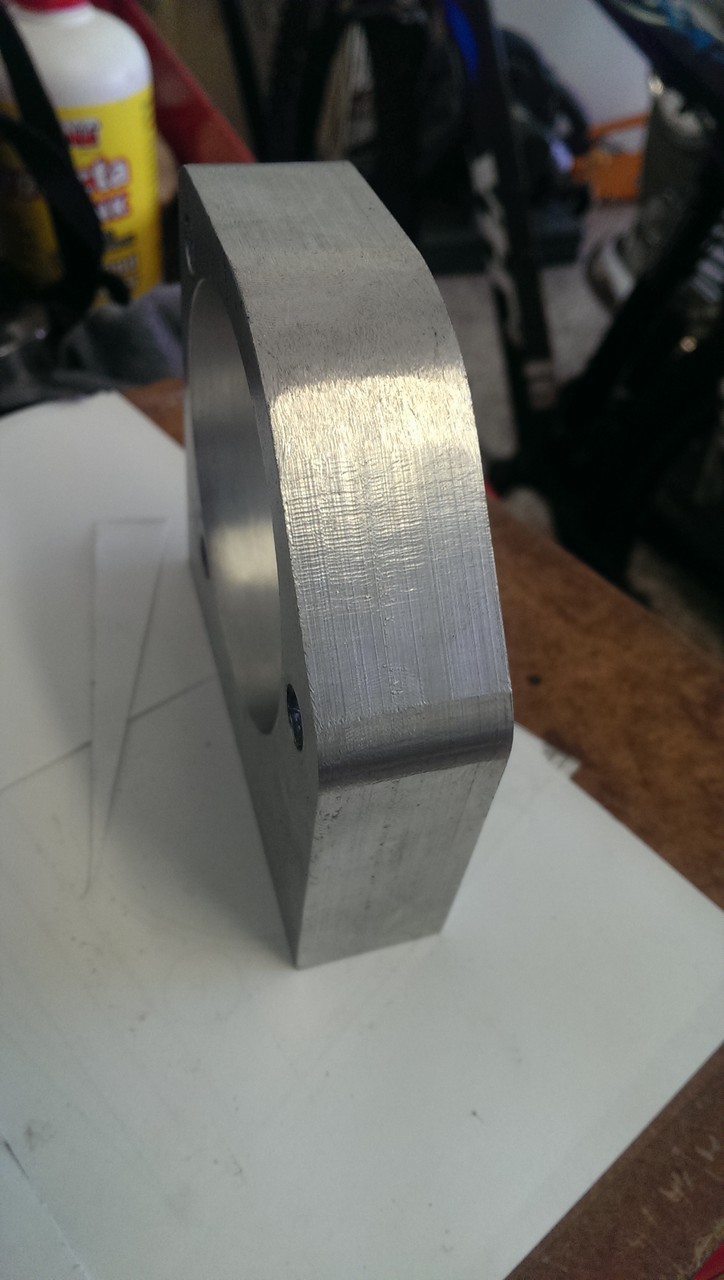
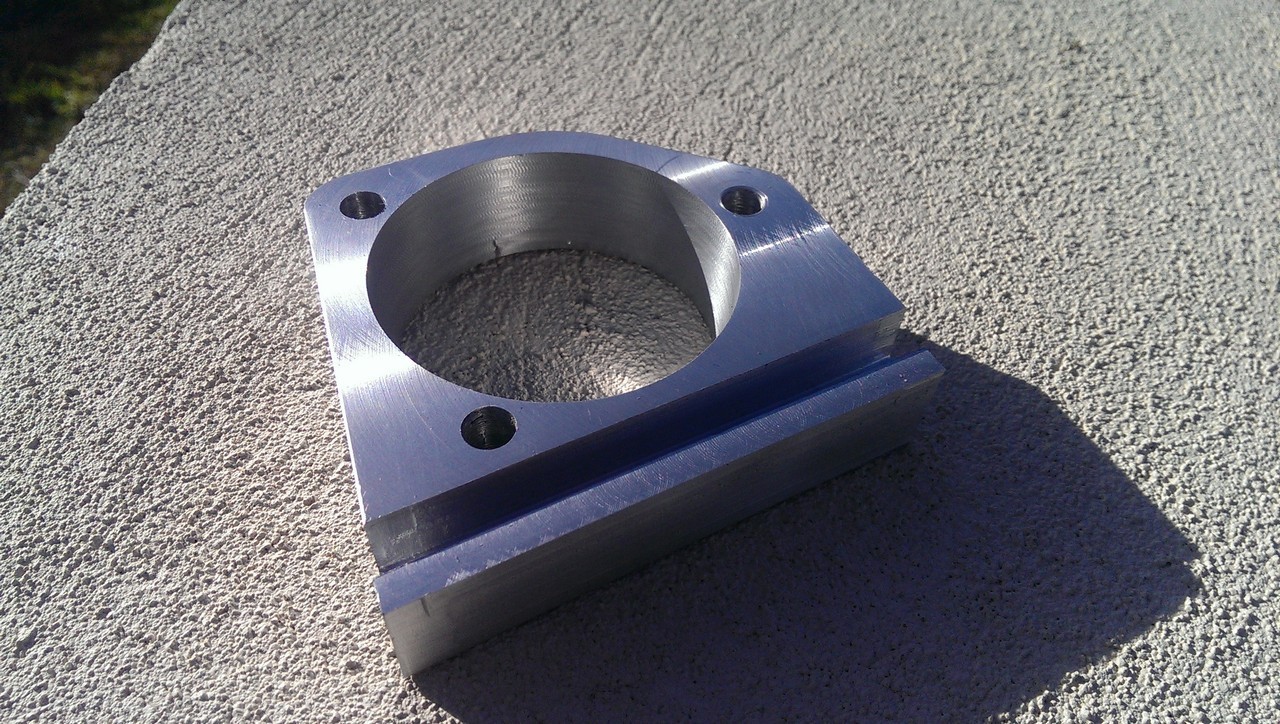
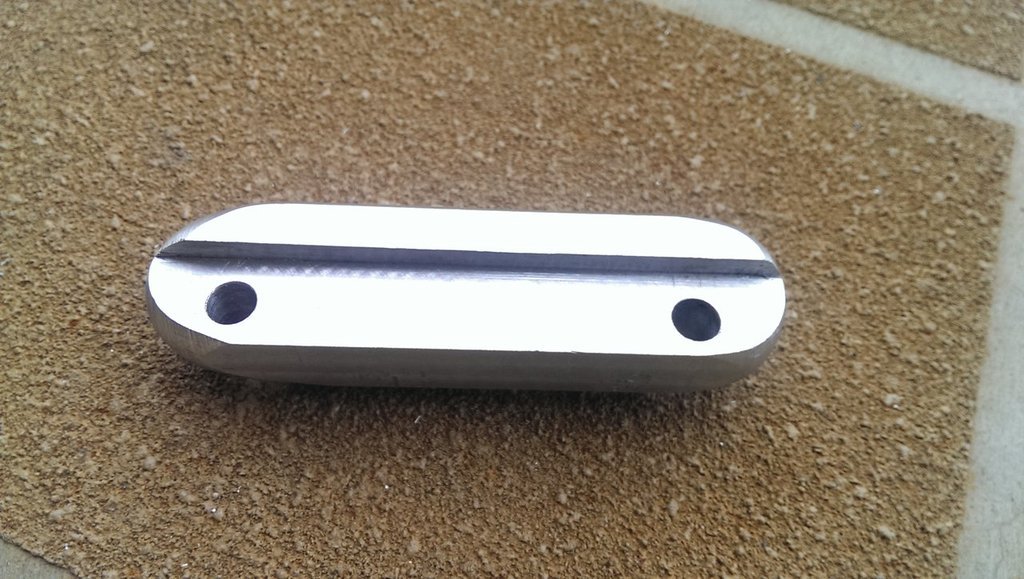
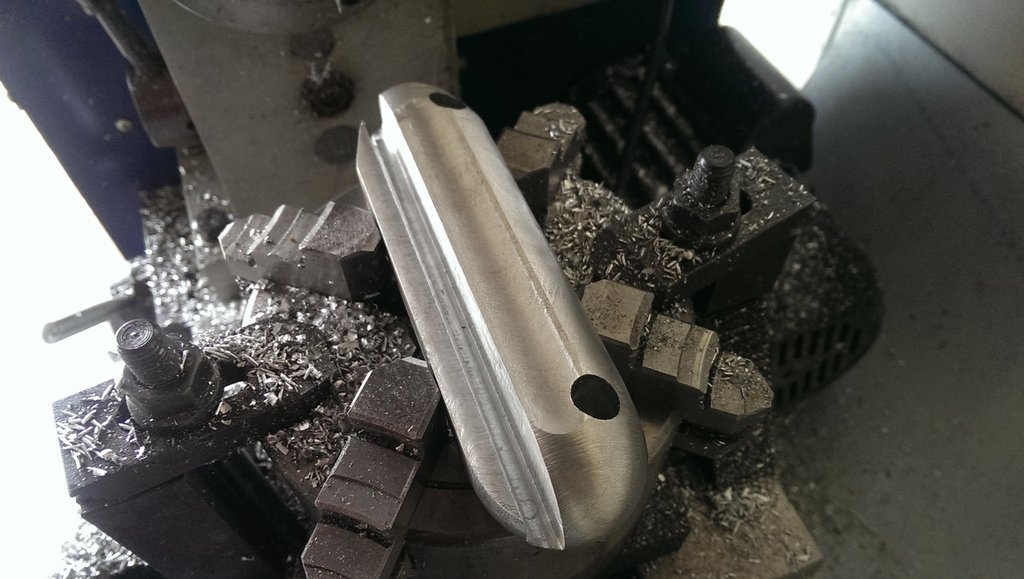
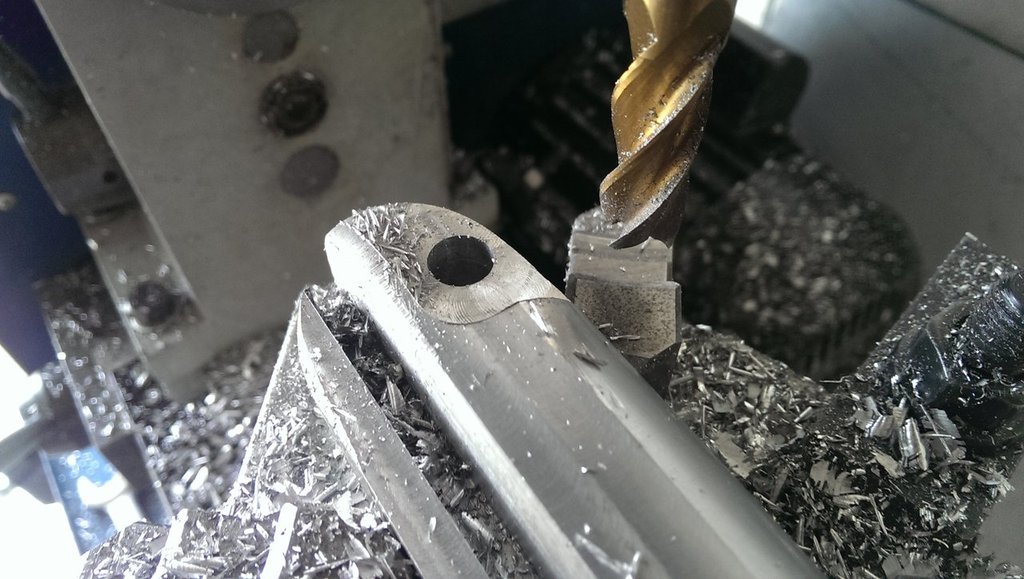
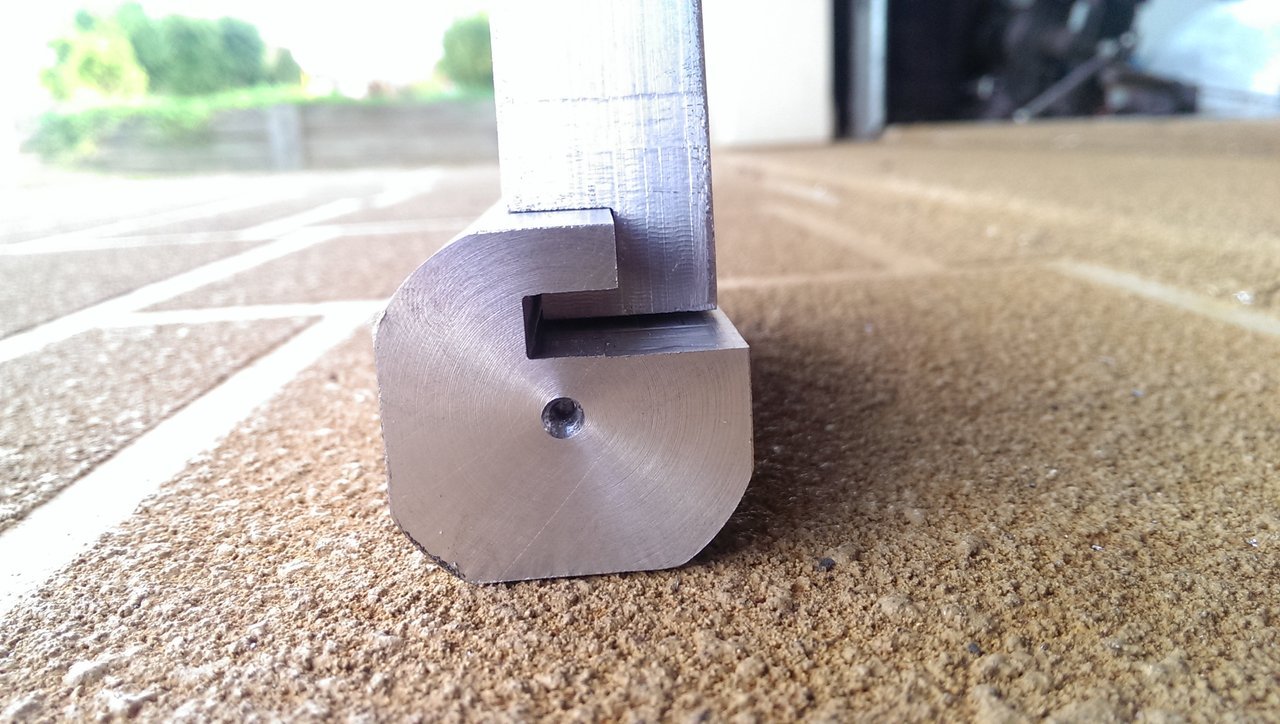
^Fly cut both sides and cut the 1/4" slot in the front
Image
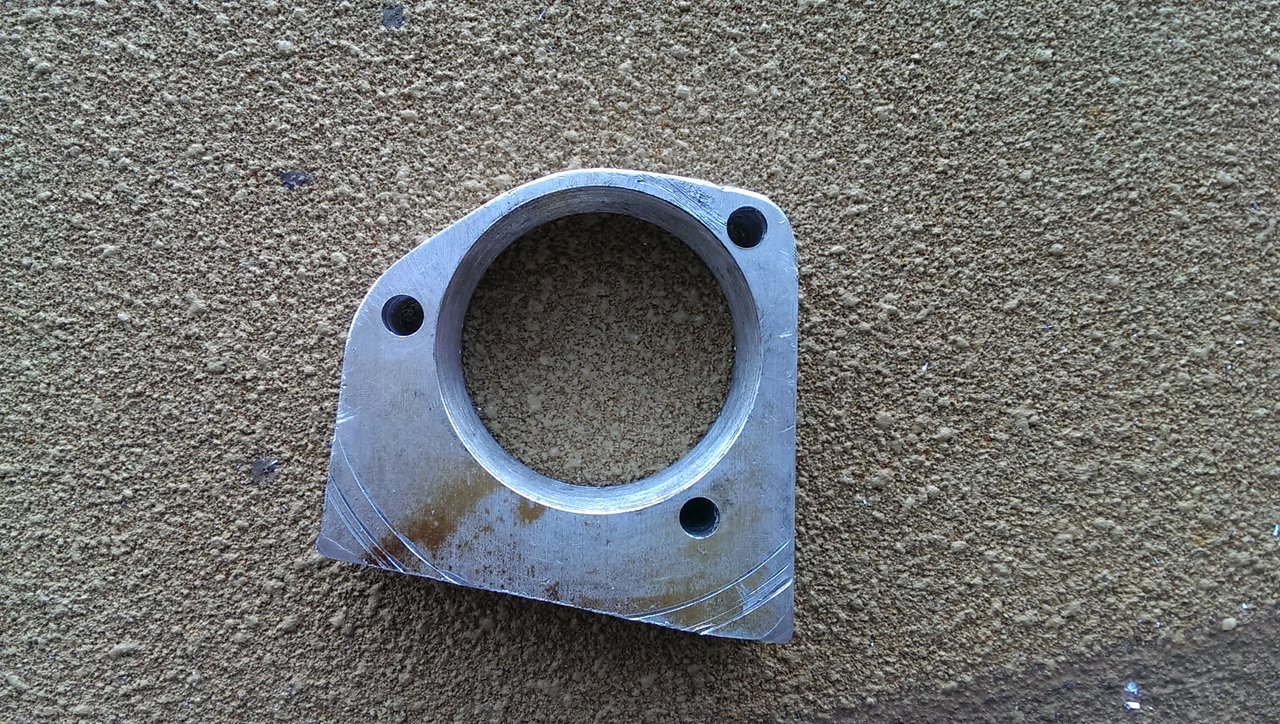
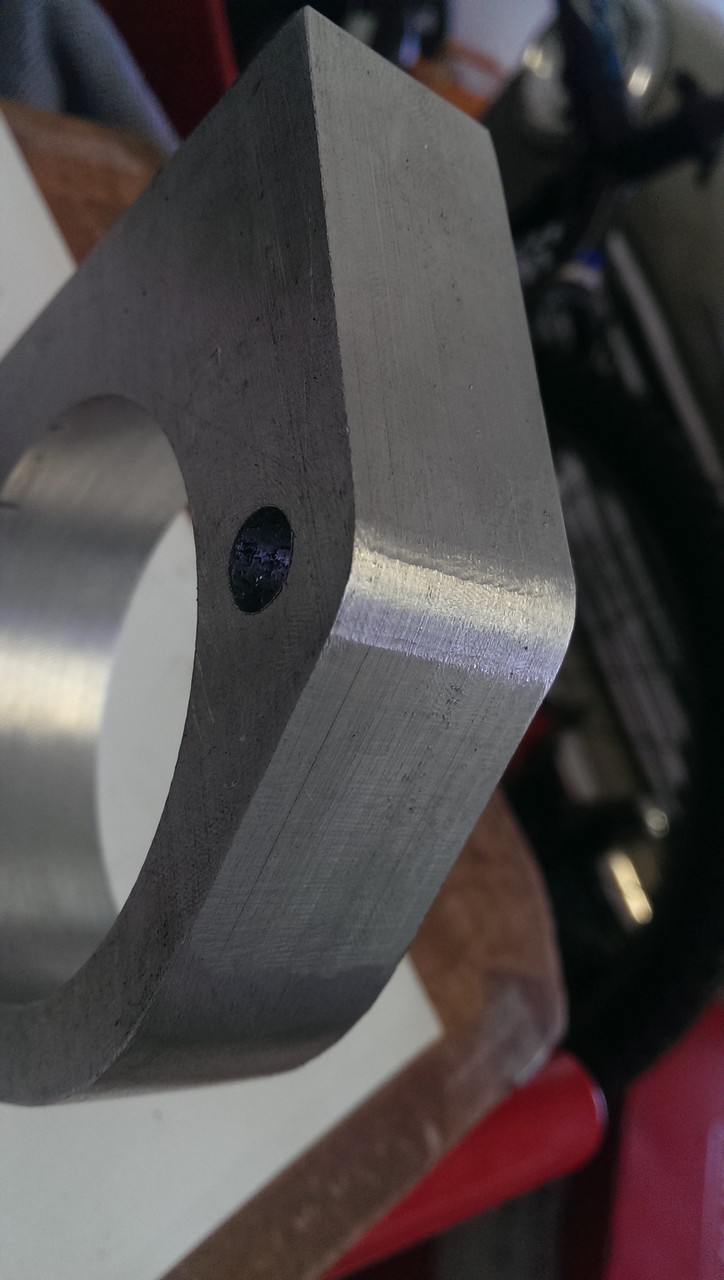
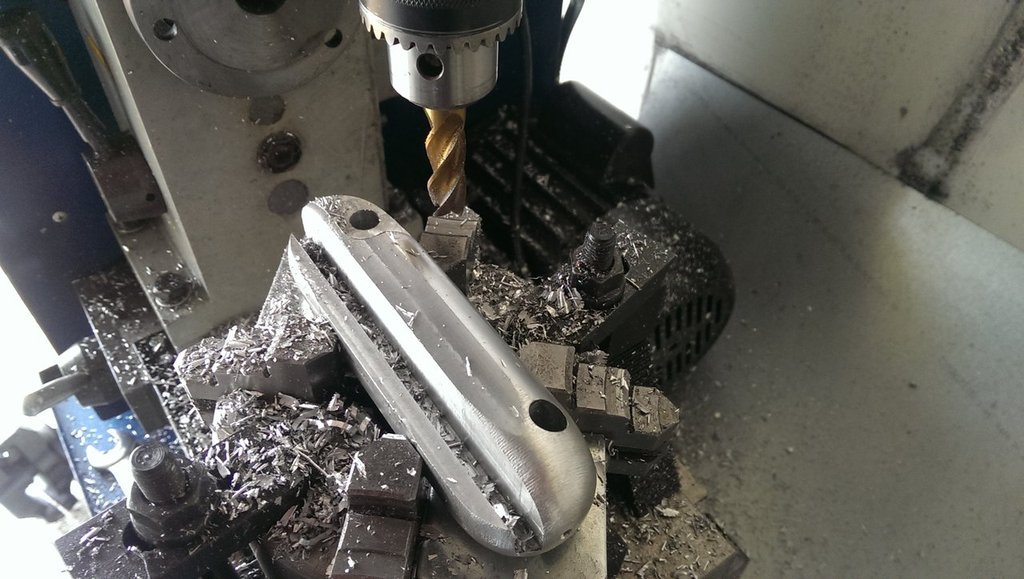
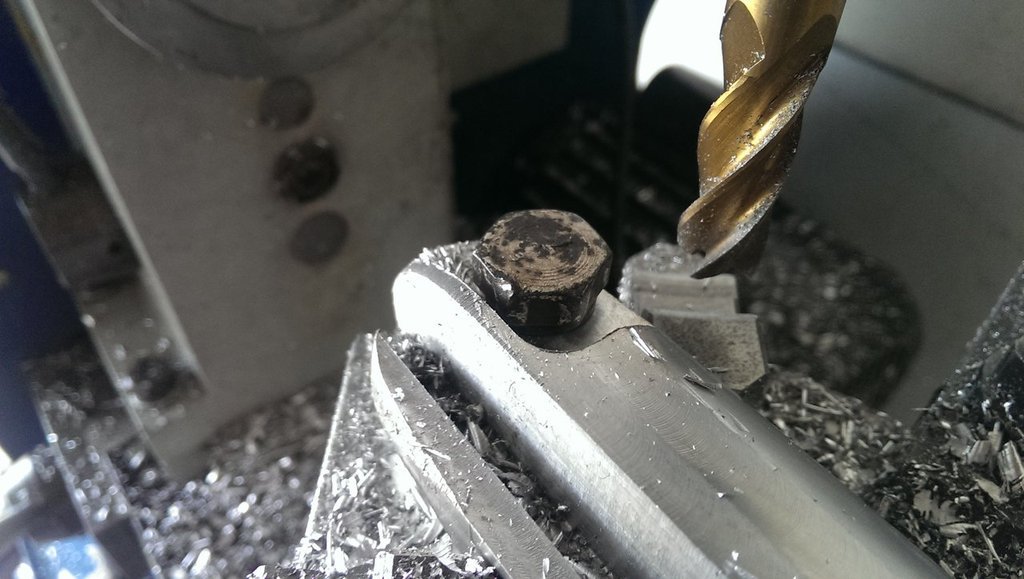
^Cleaned up the edges with an end mill. Used an end mill to do a bit on the corners but they are not concentric with the bolt holes so I just lined up how much of an angle it was on and adjusted the filing. Didn't turn out too bad and is even side to side.
Image
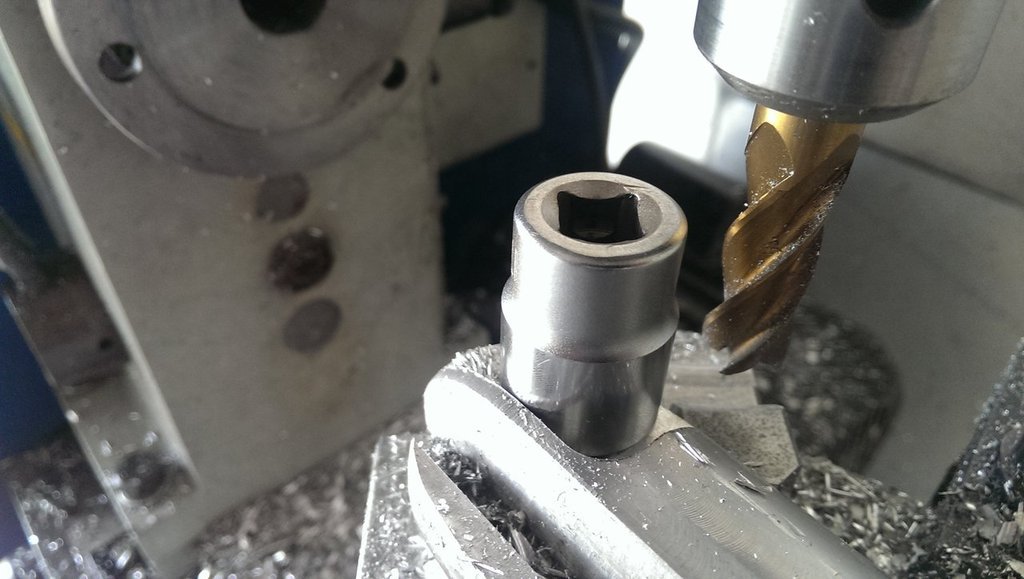
^Another view of the cut slot.
Image
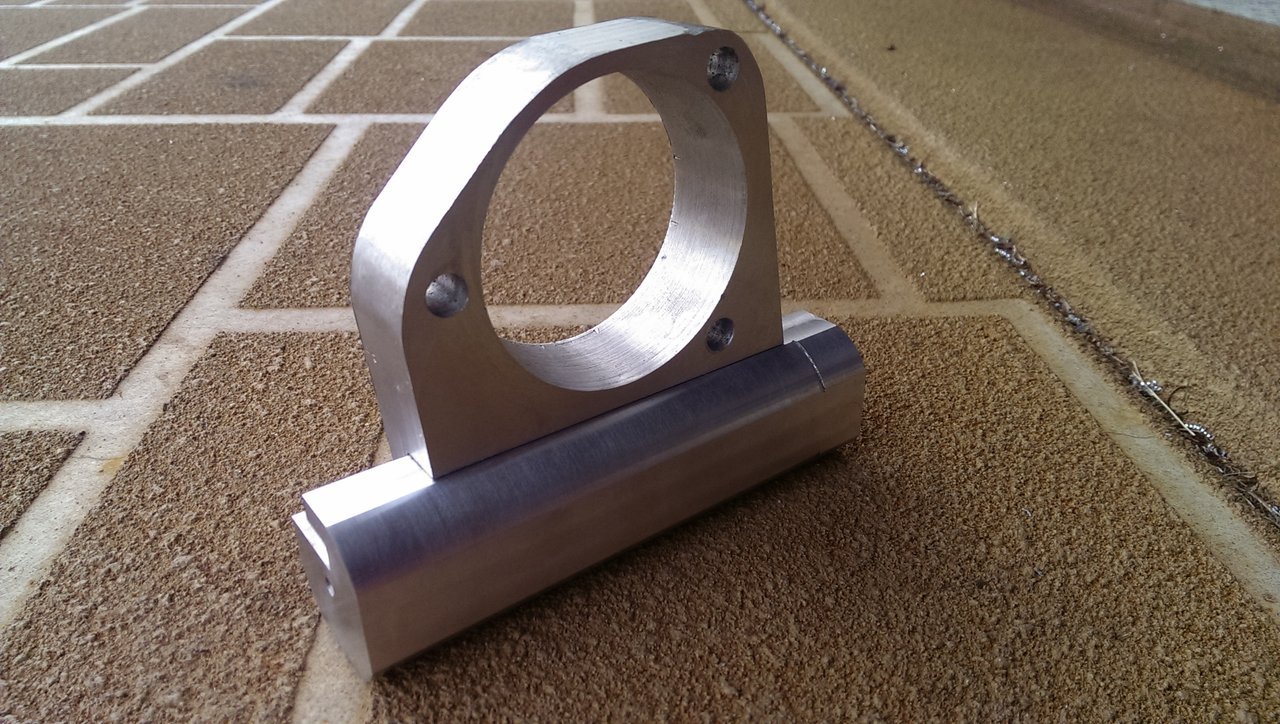
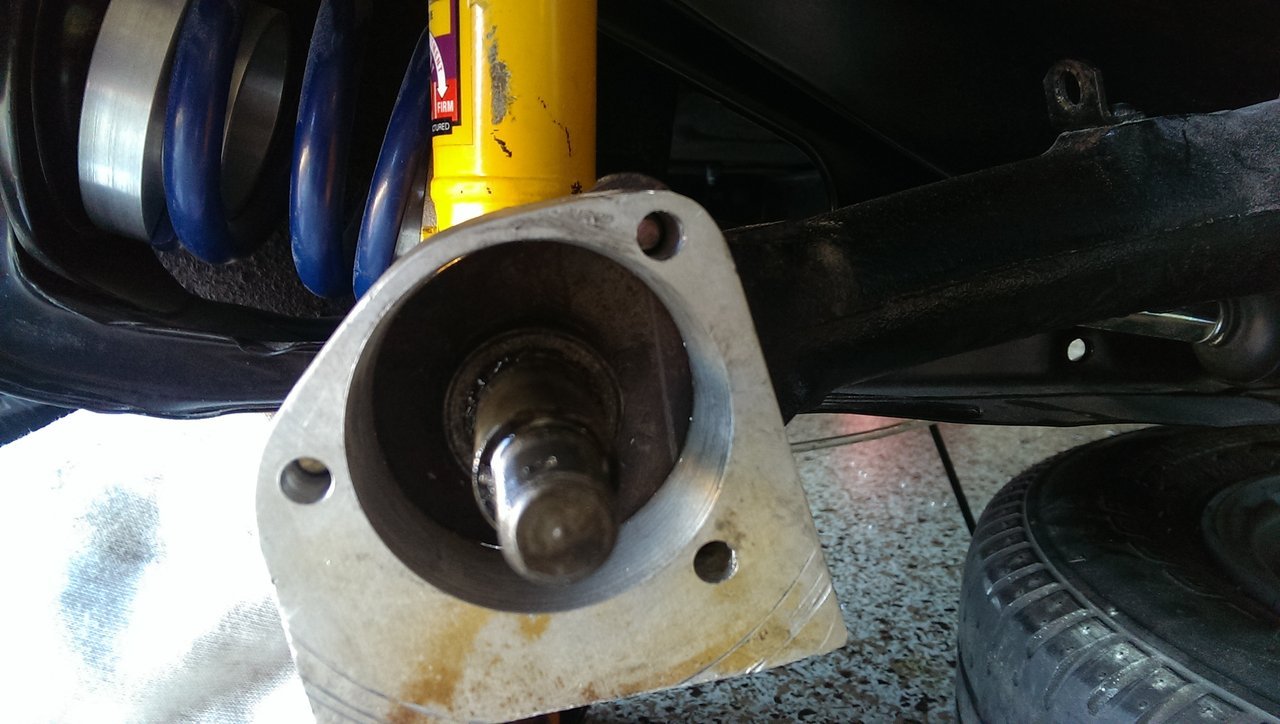
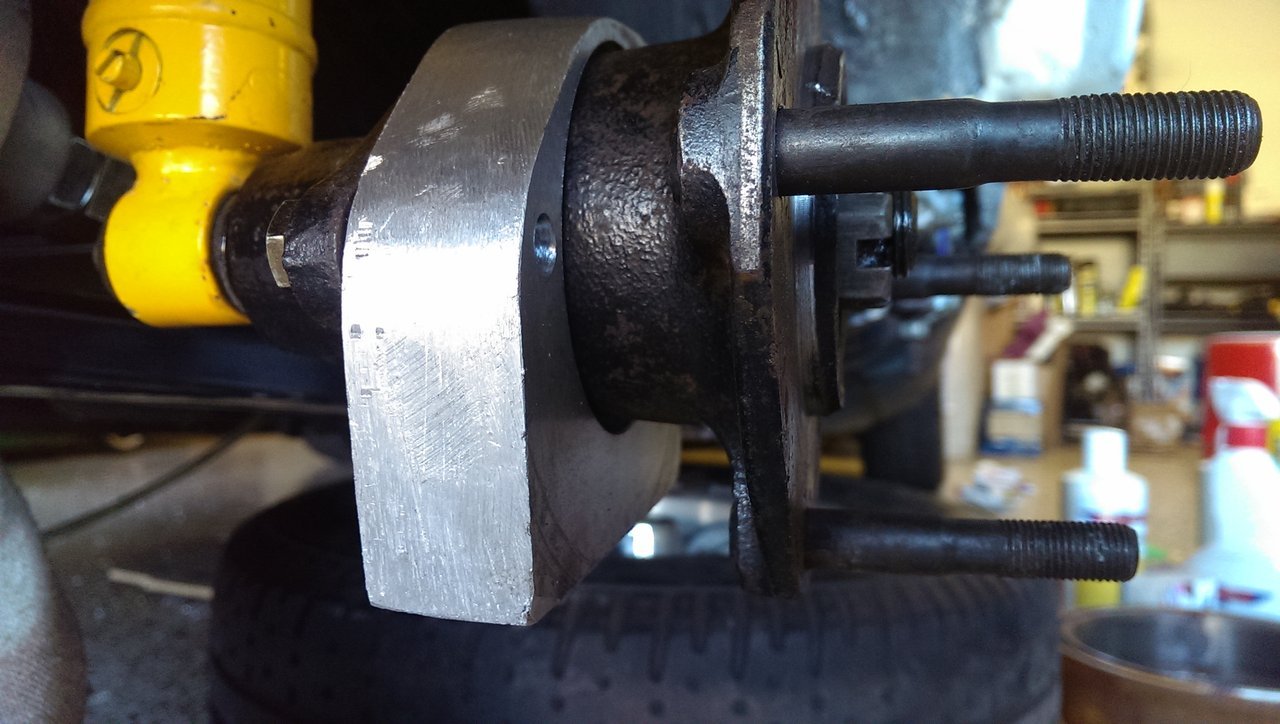
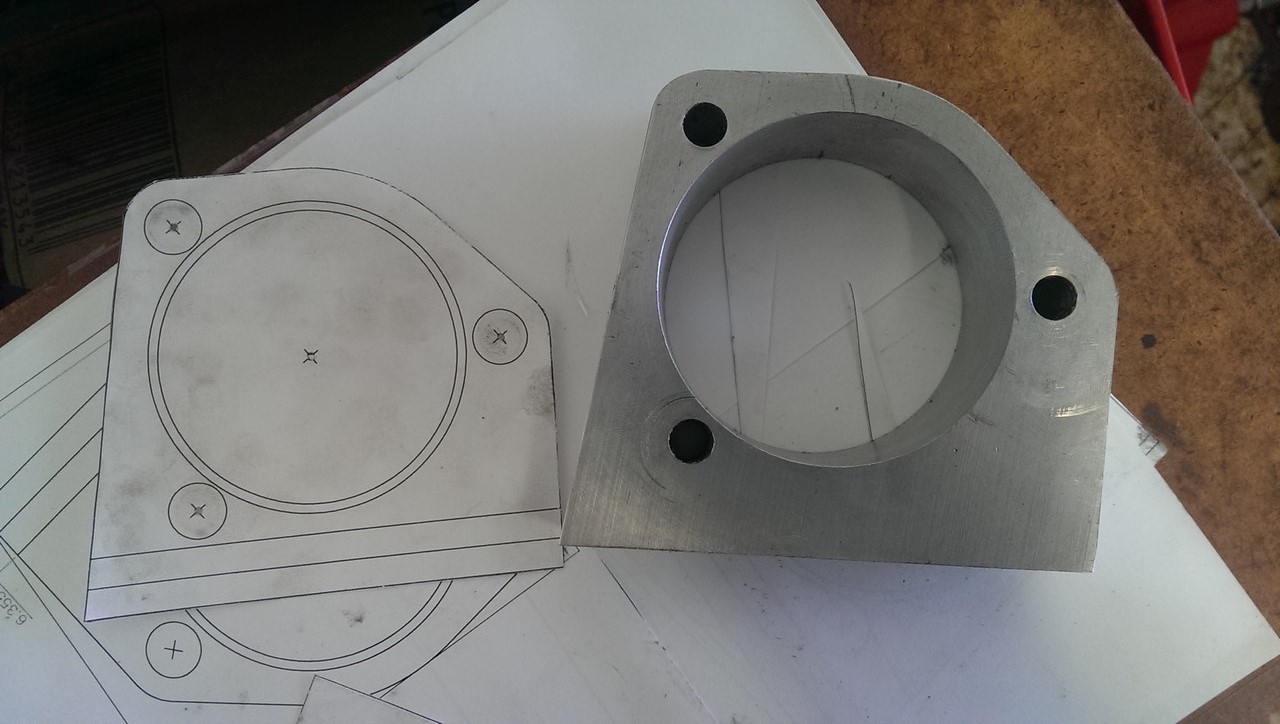
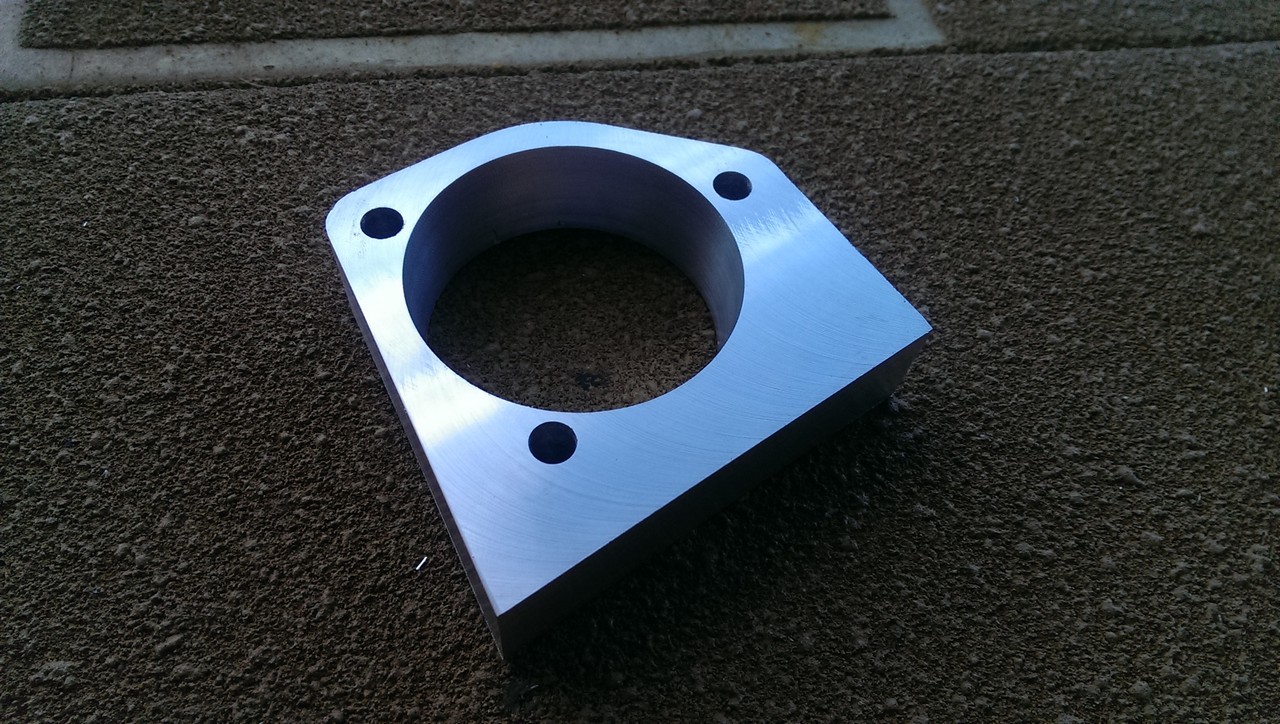
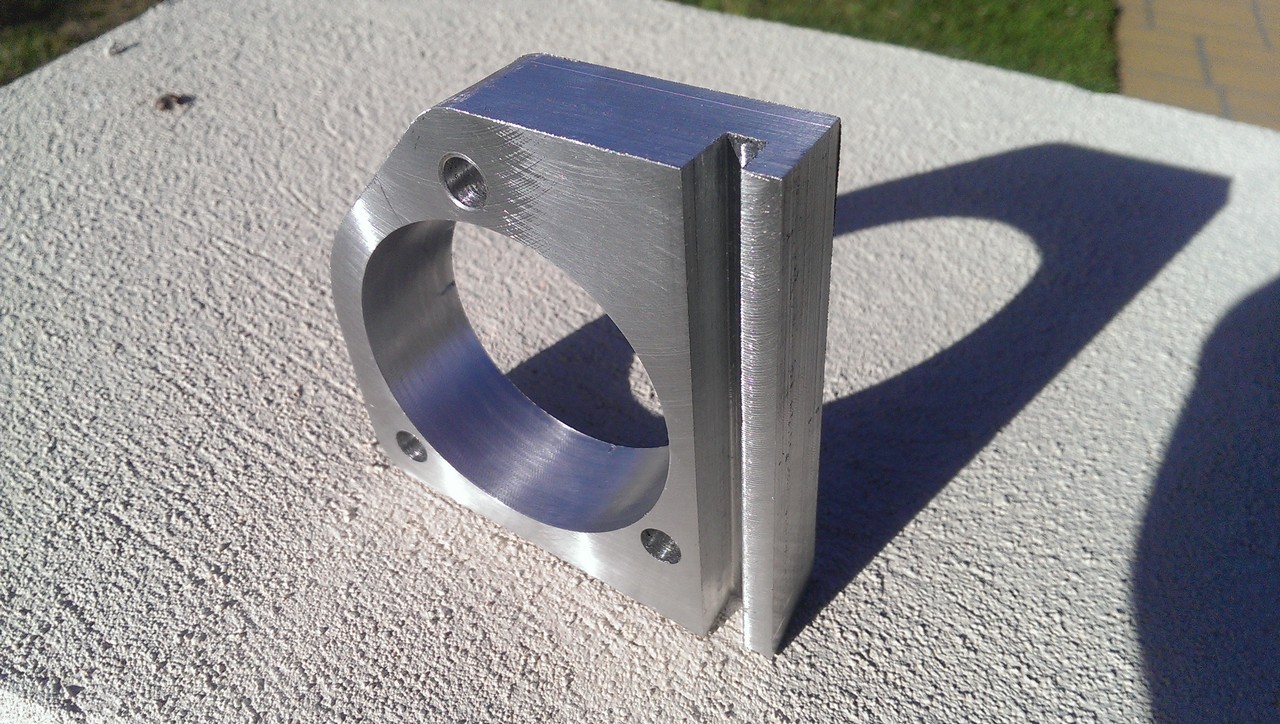
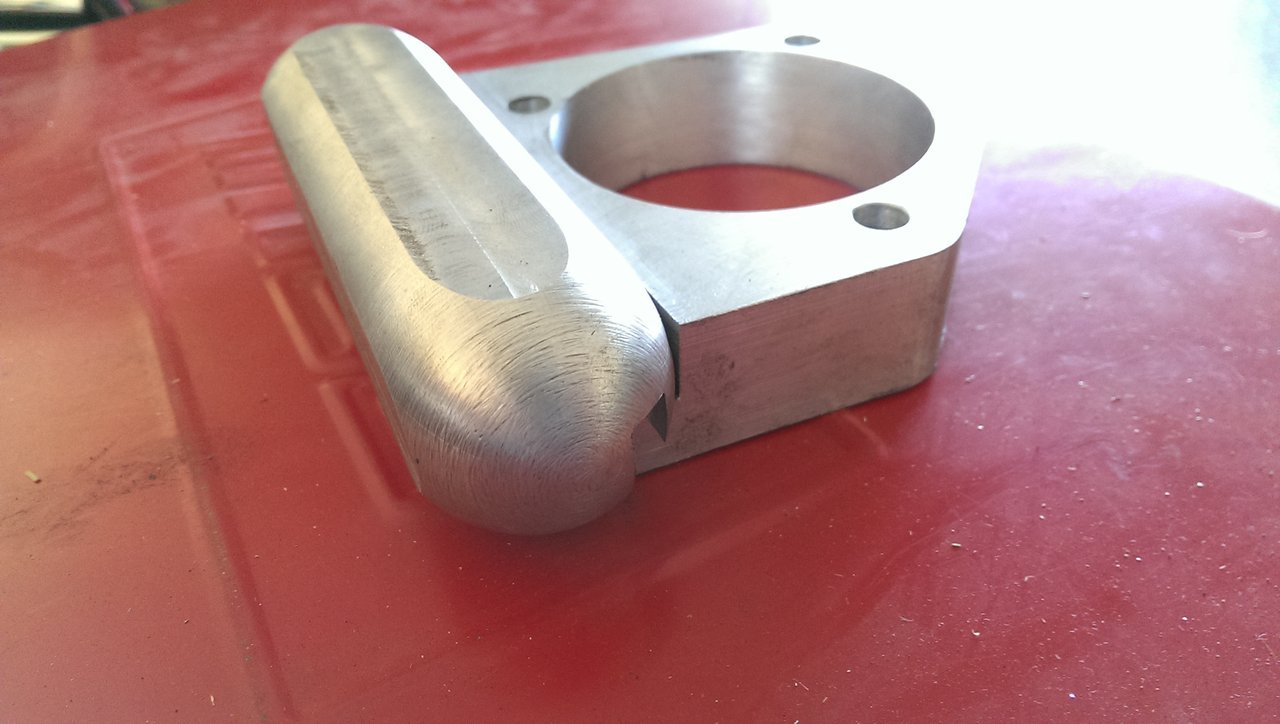
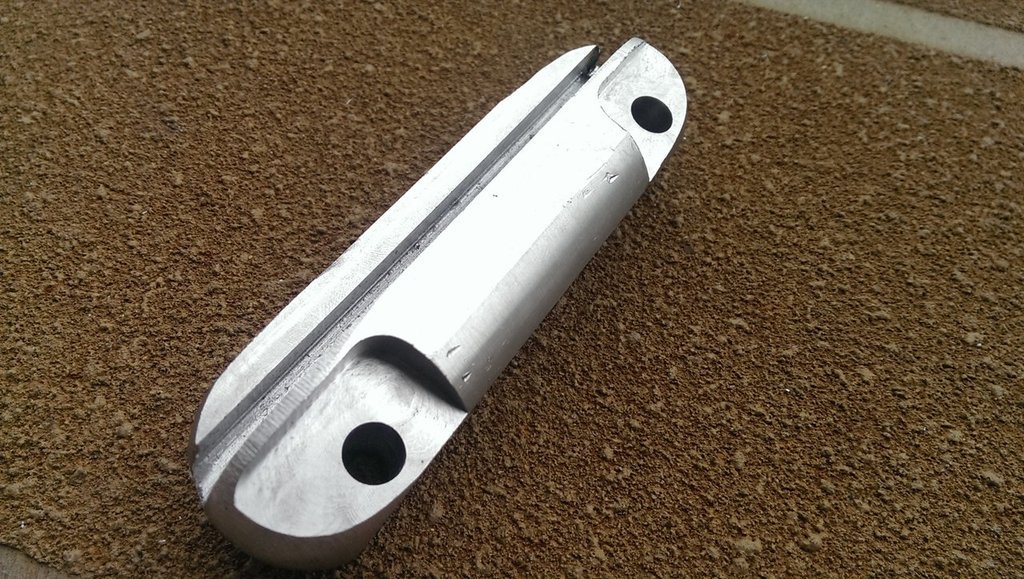
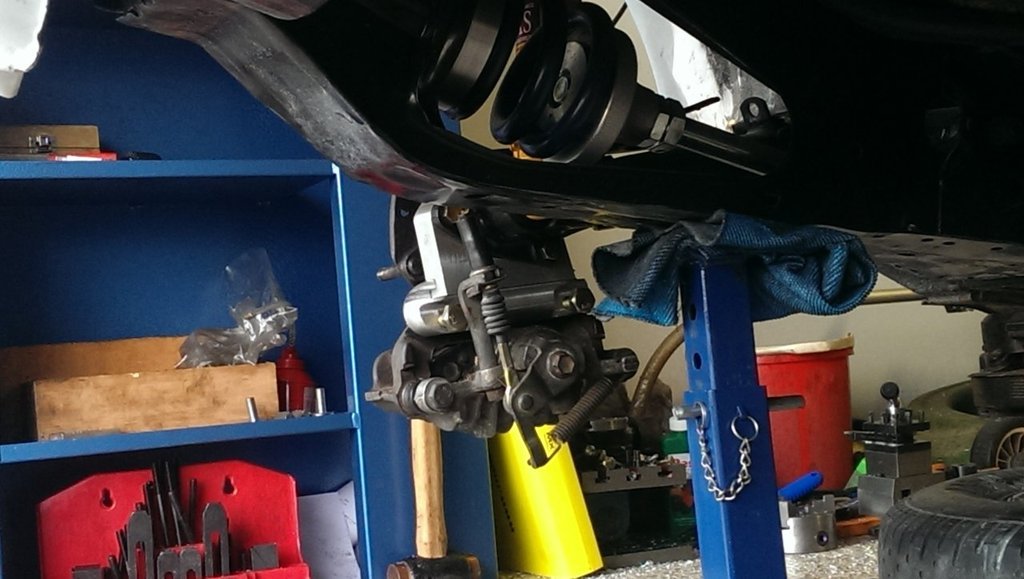
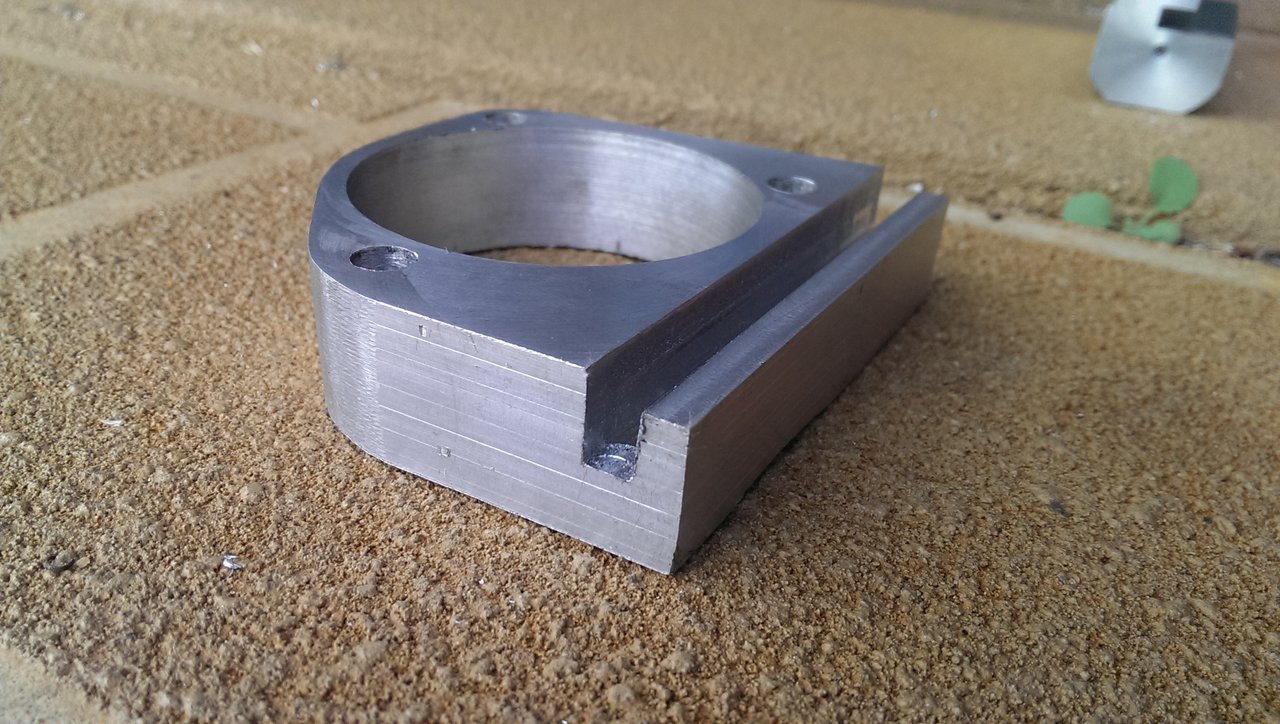
^Fitted together with the first piece I made. No slop in it either which is good!
Image
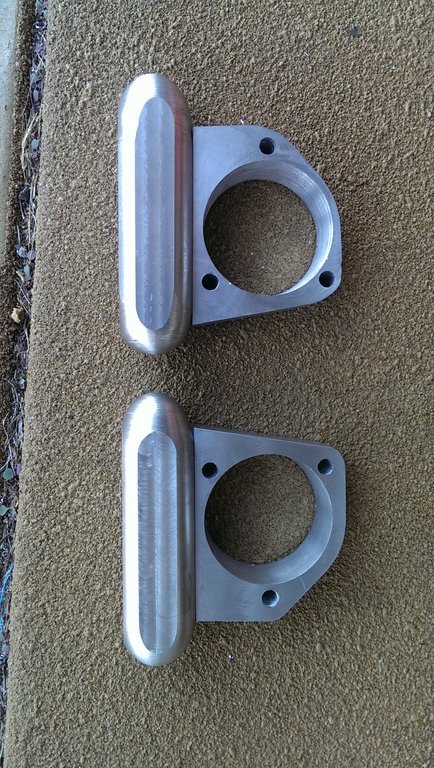
^Fits nice. Still have to work out what to do with the ends after I attach the caliper and drill bolt holes etc. I have been thinking of making a ball turning attachment for my lathe so this might be the project that it is made for. Thoughts on turning a 1/2 sphere on each end?
Image
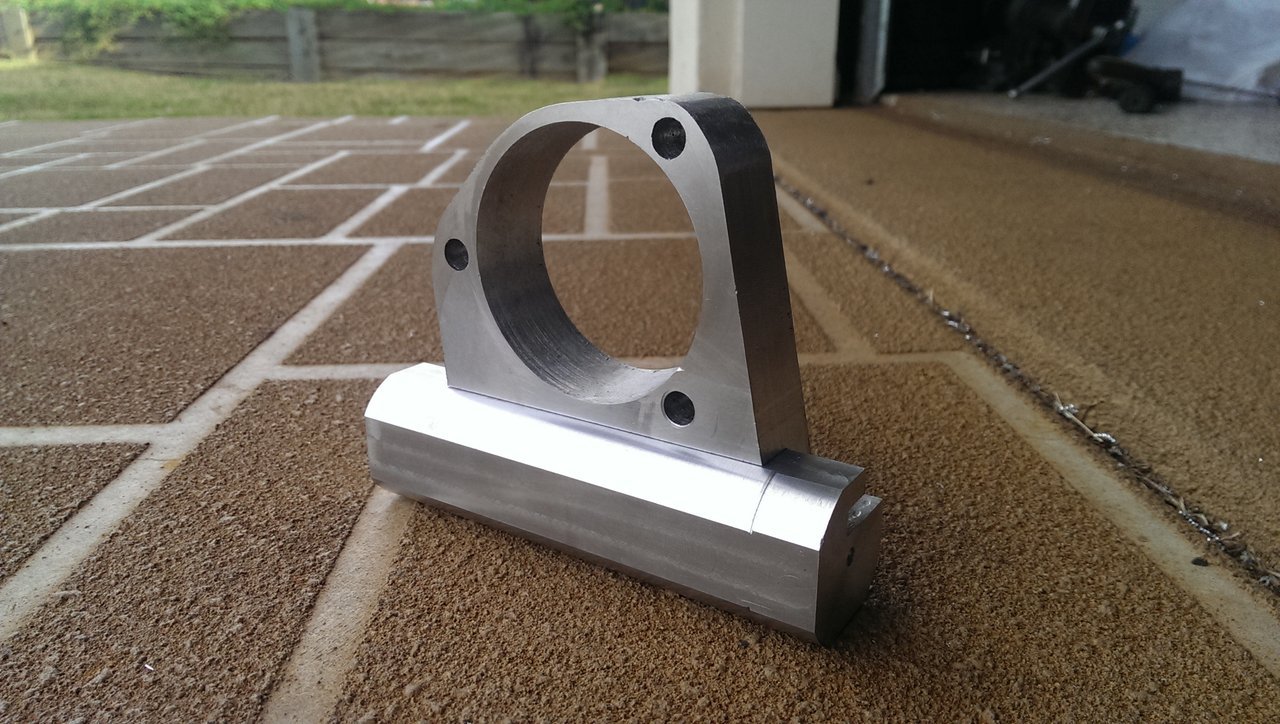
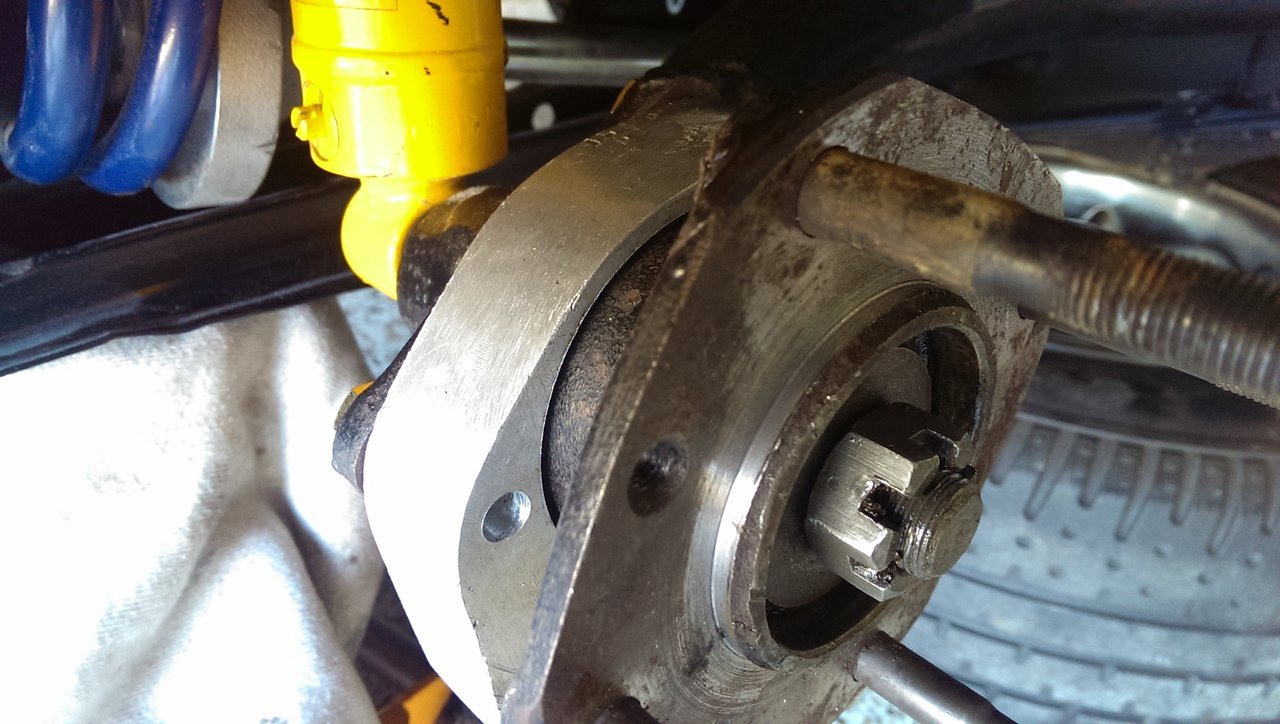
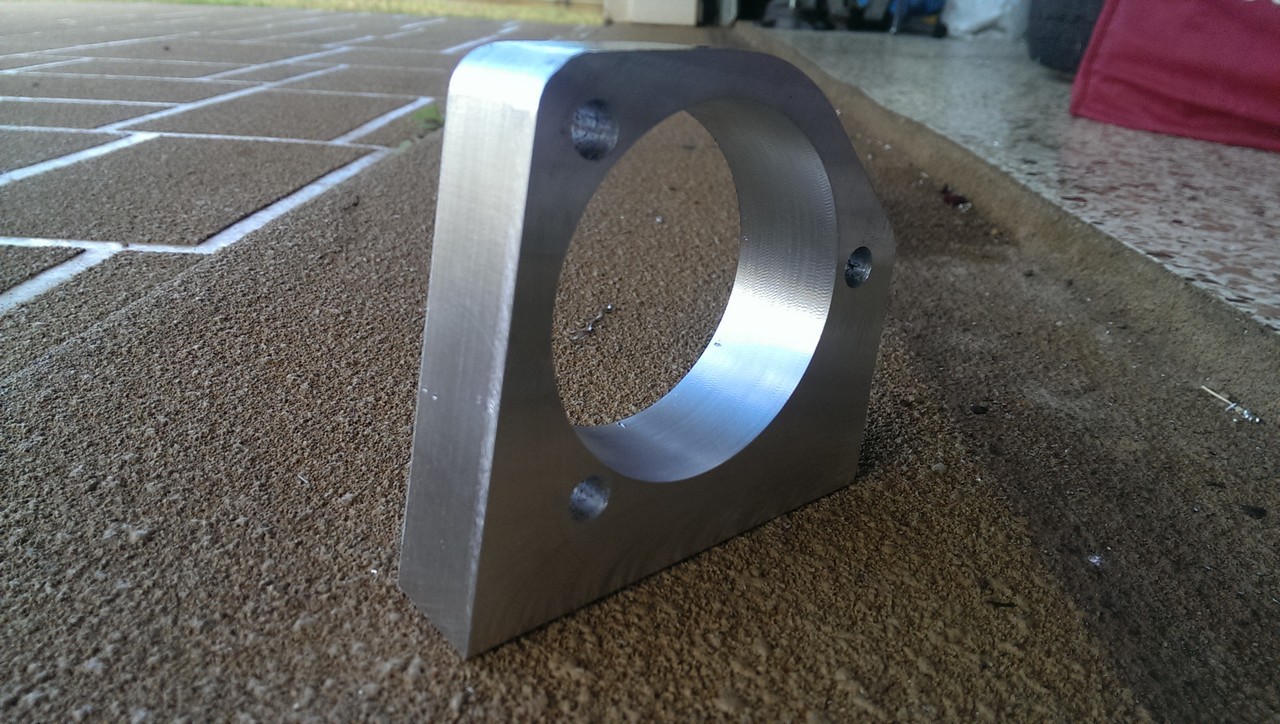
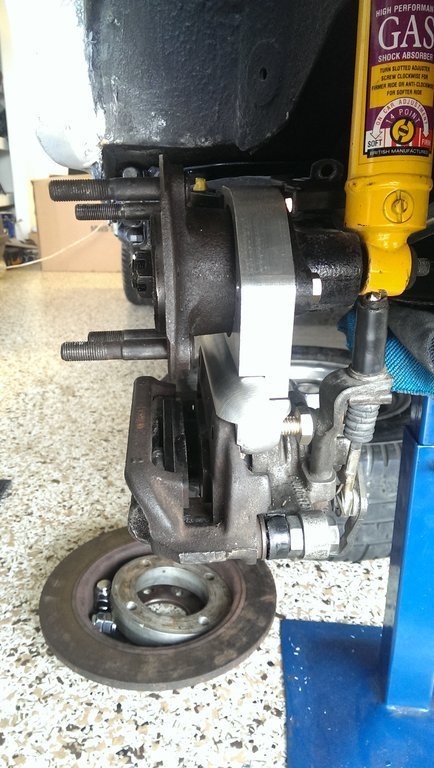
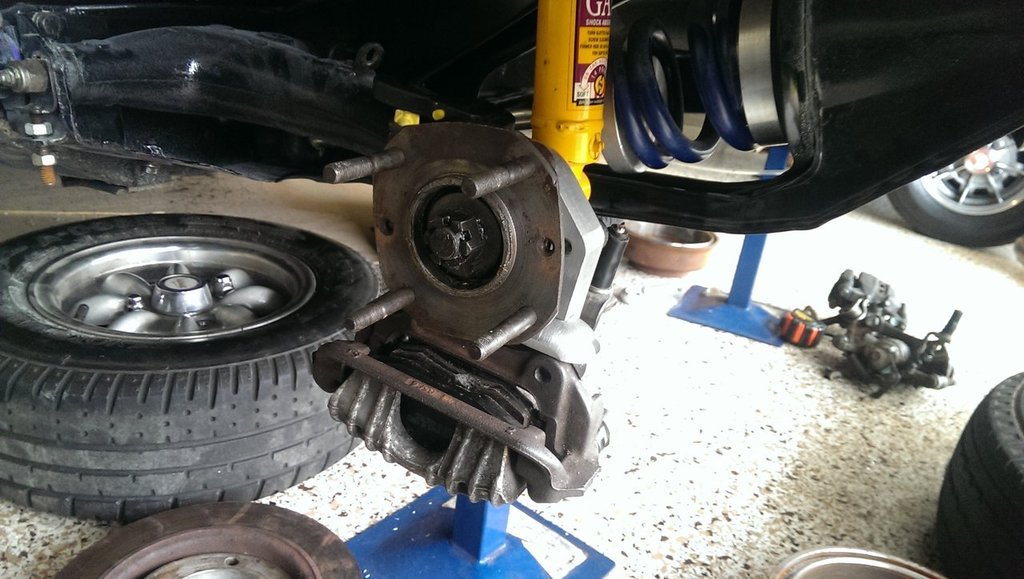
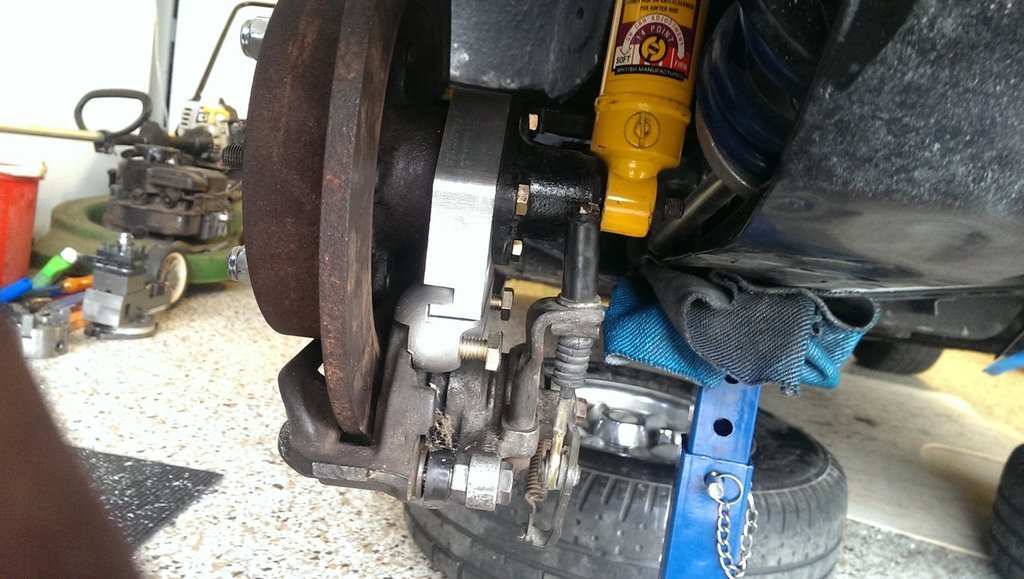
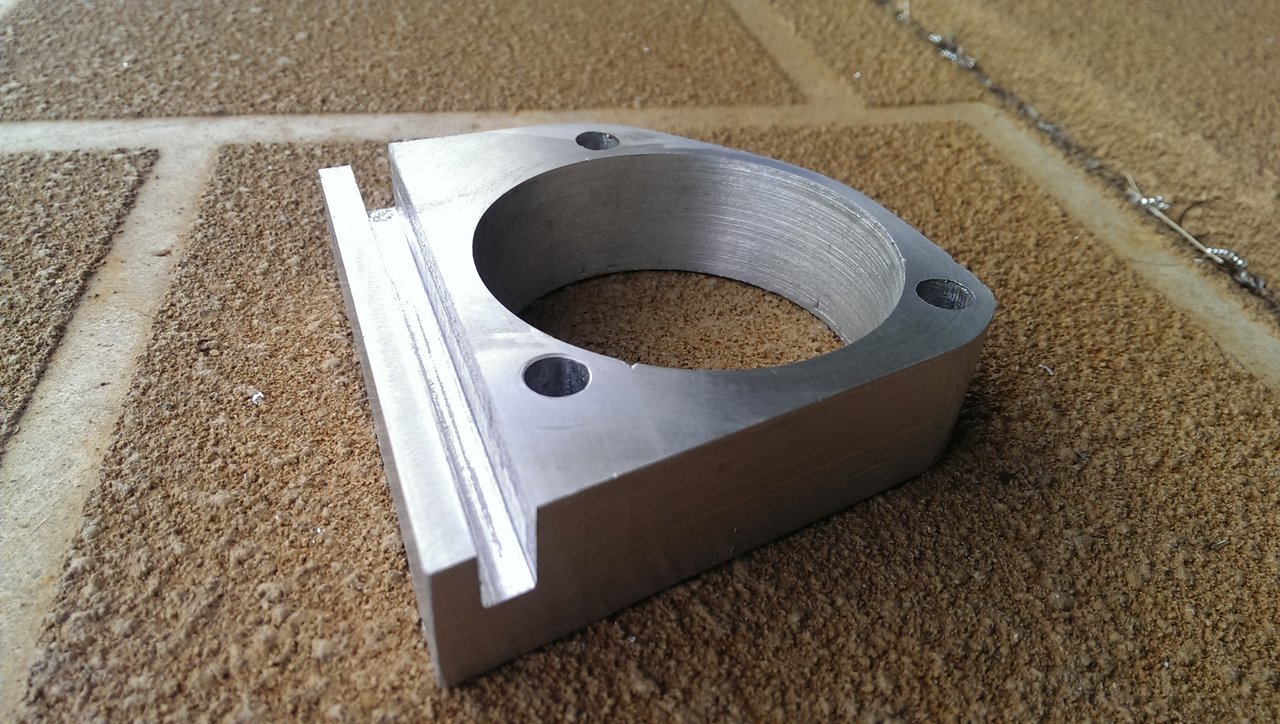
^Another shot assembled up.

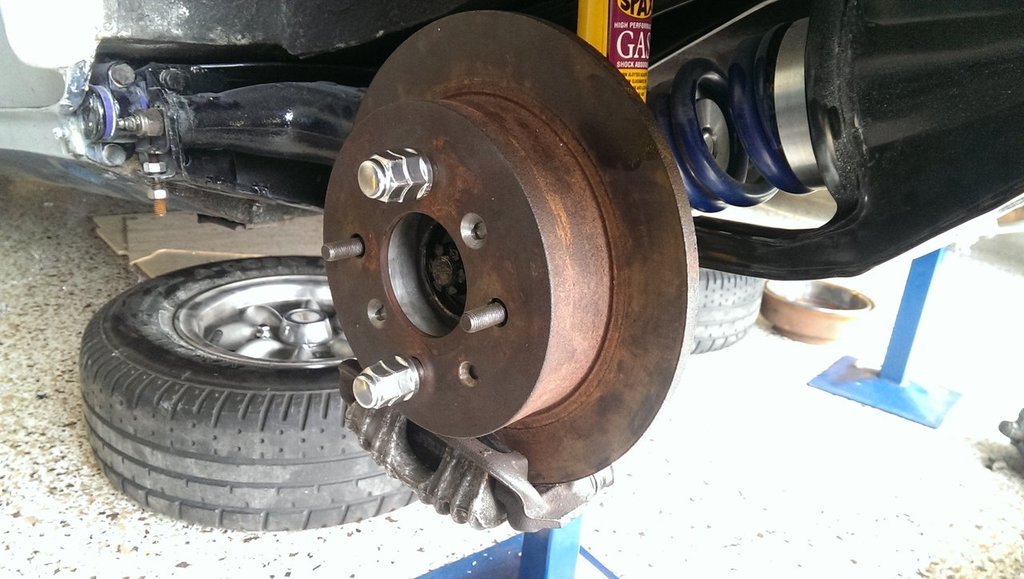
I am now at the point where I need to work out what to with the bolt holes and attaching the caliper to the bracket. Need to do some more measuring of everything assembled up to make sure I don't take too much material off. When the car was down at Tricky's, he found that one side had a different measurement from the other but he couldn't see where (no obvious shunt, or differenced between the arm mountings etc). Need to work out what side it is but I think I might continue with making the passenger side upper bracket tomorrow if I'm lucky.

_________________
"In two years time your car will be like a lady's clothes, out of date, my car will still be in fashion when I am dead" - Sir Alec speaking to Pininfarina


Top
 Profile  
 
PostPosted: Mon May 19, 2014 3:55 pm 
Offline
Give Ash some flowers Nick .
User avatar

Joined: Wed Aug 09, 2006 1:22 pm
Posts: 10149
Location: Toowoomba Region, QLD
Managed to finish off the top part of the bracket on the other side today. I attacked this one in a slightly different way and I think it turned out very professional looking. Much better than the first one too.

Image
^Started with the center hole this time;
Image
^Ended up cutting it out on the mill - turned out much neater and is spot on dimensions wise. This is the drawing over the top of the part;
Image
^Dimensions are good;
Image
^Ended up doing the large radius with the file again;
Image
^Managed to do the smaller radii with the rotary table on the mill;
Image
^Fly cut and ready for slotting;
Image
^Fly cut and ready for slotting;
Image
^After slotting, all done and I think it looks nicer than the other one by a long way.
Image
^All done - another view.

I hope you all liked the pictures.

_________________
"In two years time your car will be like a lady's clothes, out of date, my car will still be in fashion when I am dead" - Sir Alec speaking to Pininfarina


Top
 Profile  
 
PostPosted: Tue May 20, 2014 2:22 pm 
Offline
1275cc
1275cc
User avatar

Joined: Mon Apr 26, 2004 6:31 pm
Posts: 4663
Location: Sydney - strangely, I am glad of the sight of hills!!
Nice work Nick. Exactly the reason i bought the lathe myself. Is yours a combination lathe/mill/drill?

cheers
michael

_________________
the world is a book, and those who do not travel read only a page
66 Mini Minor sponsored by http://www.lifeonthehedge.com.au/ The Dog Harness Specialists
It was a pleasure ausmini. I'll miss all you misfits and reprobates ;-)


Top
 Profile  
 
PostPosted: Tue May 20, 2014 2:30 pm 
Offline
Give Ash some flowers Nick .
User avatar

Joined: Wed Aug 09, 2006 1:22 pm
Posts: 10149
Location: Toowoomba Region, QLD
Hey Michael,

Thanks for the kind words. Mine is a combo lathe/mill/drill. Didn't have the space for separate machines unfortunately but despite the additional / clean up and set up from lathe to drill etc, it seems to be handling my work quite well. I picked this one because the lathe had a huge swing on it.

I don't know how I lived without a lathe before I bought one! I'm sure you understand. Everyone should have one at their disposal.

_________________
"In two years time your car will be like a lady's clothes, out of date, my car will still be in fashion when I am dead" - Sir Alec speaking to Pininfarina


Top
 Profile  
 
PostPosted: Tue May 20, 2014 2:39 pm 
Offline
Milatsmadmini
User avatar

Joined: Mon Nov 12, 2007 6:57 pm
Posts: 6273
Location: the inner west of sydeney!
yah! updates! :)

_________________
Here am I sitting in my tin can far above the Moon
Planet Earth is blue and there's nothing I can do...


“A turbo: exhaust gasses go into the turbocharger and spin it, witchcraft happens and you go faster.” - Jeremy Clarkson


Top
 Profile  
 
PostPosted: Tue May 20, 2014 5:09 pm 
Offline
1098cc
1098cc
User avatar

Joined: Thu Sep 30, 2004 3:12 pm
Posts: 1461
Location: Brisbane
What are the lathe/ mill/ drill worth?

_________________
If you want more inches, stroke it
Life's a garden.... Dig It!
http://www.ausmini.com/forums/viewtopic.php?t=20746


Top
 Profile  
 
PostPosted: Tue May 20, 2014 5:25 pm 
Offline
Give Ash some flowers Nick .
User avatar

Joined: Wed Aug 09, 2006 1:22 pm
Posts: 10149
Location: Toowoomba Region, QLD
I think I paid around $1500 for the unit itself, then add some shipping but I'd hate to think what I've spent on tooling for it - I'd guess in the order of another $1k on tools alone - stuff like end/slot mills, lathe tools, carbide replacement tips, a rotary table, tailstock chuck and arbor etc etc etc.

_________________
"In two years time your car will be like a lady's clothes, out of date, my car will still be in fashion when I am dead" - Sir Alec speaking to Pininfarina


Top
 Profile  
 
PostPosted: Tue May 20, 2014 6:50 pm 
Offline
1098cc
1098cc
User avatar

Joined: Thu Sep 30, 2004 3:12 pm
Posts: 1461
Location: Brisbane
hhhmmmm... I'd also need more room in my shed

_________________
If you want more inches, stroke it
Life's a garden.... Dig It!
http://www.ausmini.com/forums/viewtopic.php?t=20746


Top
 Profile  
 
PostPosted: Wed May 21, 2014 8:14 pm 
Offline
Give Ash some flowers Nick .
User avatar

Joined: Wed Aug 09, 2006 1:22 pm
Posts: 10149
Location: Toowoomba Region, QLD
Had a bit more time in the garage over the last couple of days. I made another lower portion and then I worked out the chamfer lengths and angles to cut an approximate sphere on the end. Didn't turn out too bad but definitely not as good as having a proper ball cutter.

Image
Image

Hopefully get at least one measured up for the caliper to suit tomorrow with some luck.

_________________
"In two years time your car will be like a lady's clothes, out of date, my car will still be in fashion when I am dead" - Sir Alec speaking to Pininfarina


Top
 Profile  
 
PostPosted: Wed May 21, 2014 9:11 pm 
Offline
1275cc
1275cc
User avatar

Joined: Mon Apr 26, 2004 6:31 pm
Posts: 4663
Location: Sydney - strangely, I am glad of the sight of hills!!
1018cc wrote:
Hey Michael,

Thanks for the kind words. Mine is a combo lathe/mill/drill. Didn't have the space for separate machines unfortunately but despite the additional / clean up and set up from lathe to drill etc, it seems to be handling my work quite well. I picked this one because the lathe had a huge swing on it.

I don't know how I lived without a lathe before I bought one! I'm sure you understand. Everyone should have one at their disposal.


Mine is not wired up yet, and won't be until we rebuild the garage. I will need to get a separate mill eventually, but will make do with the table i bought from Kev (drmini in aust) on a pedestal drill. I have been researching small workshops that fit a lot in by good organisation because i too am space limited.

Check out Home Machine Shop Hall of Fame. We should start a separate thread.

I thought about getting a combo, but the 1960's vintage lathe seemed too good to pass up for the money. I will need to spend another $1500 or so on tools and DRO fitout etc. I had to cringe last week when i saw a bunch of cutters and shaft measuring jig being chucked out at work because the building that used to house the workshop is being demolished. At least there were a couple of guys scavenging in the skip and rescuing the good stuff.

Those brackets are a work of art and if the engineer does not like them, then at least you can polish them and hang them on the wall.

cheers
michael

_________________
the world is a book, and those who do not travel read only a page
66 Mini Minor sponsored by http://www.lifeonthehedge.com.au/ The Dog Harness Specialists
It was a pleasure ausmini. I'll miss all you misfits and reprobates ;-)


Top
 Profile  
 
PostPosted: Thu May 22, 2014 5:46 pm 
Offline
Give Ash some flowers Nick .
User avatar

Joined: Wed Aug 09, 2006 1:22 pm
Posts: 10149
Location: Toowoomba Region, QLD
So I almost finished the brackets today. I'll let the pictures show what I'm talking about.

I ended up stopping this afternoon because I found another set of calipers. I have no idea where they have come from but I don't think they'll fit under the 12's destined for this car. Unfortunately I don't have the wheels to test this. I have almost finished making the caliper brackets for my now discovered larger calipers. Anyway, I'm trying to get onto Tricky to see which one is right before I finish these off (I literally just have to drill the holes to hold the bracket together now!


Image

Image

Image

Image

Image

Image

Image

Image

Image

Image

Image

Image

And then I found another set of calipers.........and the other set is smaller.........
Image

I've pretty much decided at this point if Tricky tells me I've made brackets for the wrong calipers I'm going to ditch this setup and use some smaller discs so that it is more likely I could fit a set inside the 10's of my other mini (if I make another set).

_________________
"In two years time your car will be like a lady's clothes, out of date, my car will still be in fashion when I am dead" - Sir Alec speaking to Pininfarina


Top
 Profile  
 
PostPosted: Thu May 22, 2014 5:58 pm 
Offline
1275cc
1275cc
User avatar

Joined: Thu May 24, 2007 7:19 pm
Posts: 5370
Location: Yandina,Sunshine Coast,QLD
I can't remember if you covered this already but, why are you going for this style/type of rear disc brakes?
Why not copy a design someone else has done on a mini? (Tried and tested).
Also what are the parts from?

_________________
Respect mine and I'll respect yours.


Top
 Profile  
 
Display posts from previous:  Sort by  
Post new topic Reply to topic  [ 89 posts ]  Go to page Previous  1, 2, 3, 4, 5, 6  Next

All times are UTC + 10 hours


Who is online

Users browsing this forum: No registered users and 11 guests


You cannot post new topics in this forum
You cannot reply to topics in this forum
You cannot edit your posts in this forum
You cannot delete your posts in this forum
You cannot post attachments in this forum

Jump to:  

© 2016 Ausmini. All garage work involves equal measures of enthusiasm, ingenuity and a fair degree of irresponsibility.