Rebuilding a carb is a relatively easy affair, and has the benefits of improving economy, improving power and holding a state of tune for years at a stretch instead of weeks. I've always liked to rebuild my carbs before doing anything else. It baselines the carb and removes any complicating factors from finding the car's best tune.
This how-to includes a section of bushing the carb. This is where the throttle butterfly shaft (spindle) wears out the ally body of the carb, such that air sucks through the sides of the carb along the shafts instead of around the butterfly. I am including this because it is often overlooked as too hard, or too expensive to have done. However, the air leaks affect the tuning at idle (which is when we tune our mixtures) which leads to a lean mixture being set without knowing you are doing so.
I'm going to show you that it is quite simple to do at home, even if you don't have any machine tools.
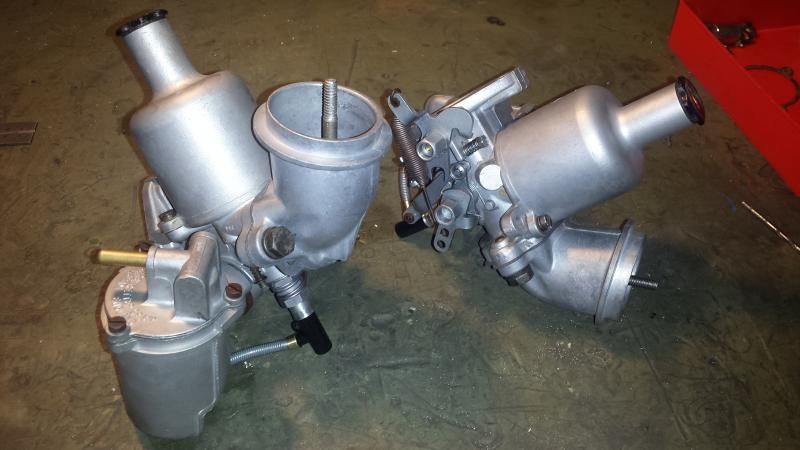
We're dealing specifically with a 1.25" carb for this piece, but a 1.5 is nearly the same for the purposes of a rebuild description. The carb I am rebuilding here is also one of a set of twins, so has a few detail differences. A vibration rubber on the float bowl, and a slightly different throttle cable linkage design will be evident. Nothing that will concern us here however as it is still pretty well the same as any 1.25" SU otherwise.
You will need the CRK104 kit for a 1.25" HS2 SU http://www.minispares.com/product/Class ... |Back%20to .
As a 1.5 is nearly identical, you could use this thread as a guide.
For a 1.5" HS4 SU (non waxstat) you will need a CRK219 rebuild kit http://www.minispares.com/product/Class ... |Back%20to
or CRK 227 if you have the anti run on thingy in the butterfly. http://www.minispares.com/product/Class ... |Back%20to
Also a bottle of Loctite, and a drill set with incremental drills between 1/4 inch and 5/16ths (about 3 in between) along with the normal light workshop tools. Nothing special is required.
Stripping the Carb Down
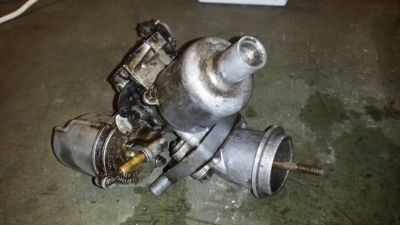
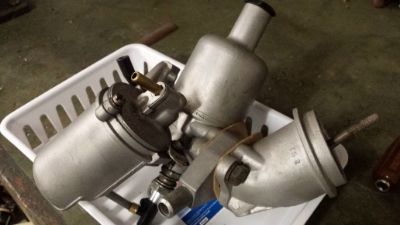
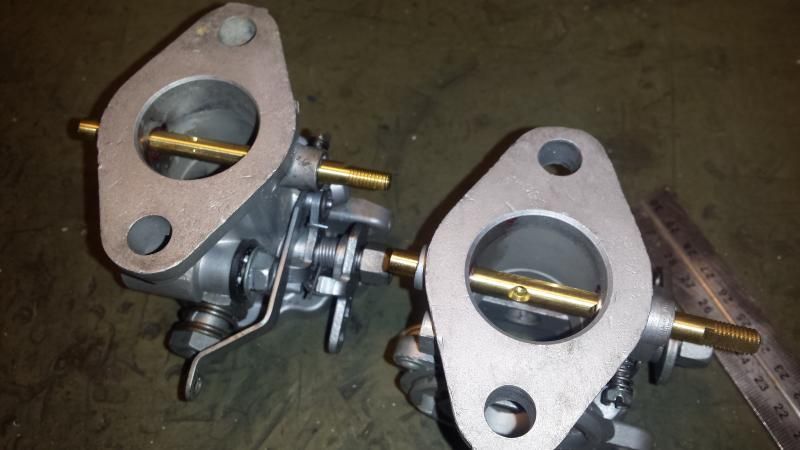
The goal is to start with a carb which looks like the one on the top, and end with a carb which looks like one on the bottom.
Before:
After:
The first trick is to pull your carb down to basic parts. Keep all the small bits! You may just lose a screw, or an important bit you need to use in the rebuild, so don't throw anything out yet! I use a small Tupperware tray or similar. Apparently Tupperware can also be used to keep food in. Interesting, but not important for your use of Tupperware.
If you intend on using the carb as soon as possible, I do not recommend pulling the choke mechanism off. There is no gain in taking it apart if it works, and will give you some grief as you try to work out how the clock springs and gubbins go back together. It doesn't need to come apart.
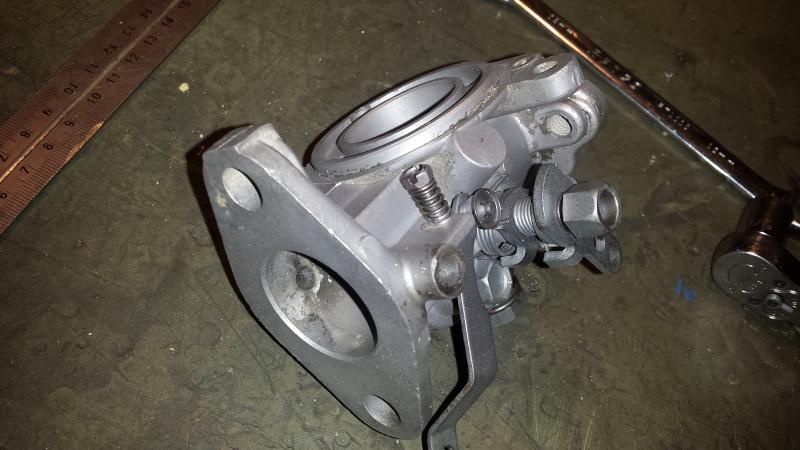
Take off the float lid, float bowl, damper and piston. Also remove the throttle butterfly screws, pull out the butterfly and withdraw the spindle shaft. You should be left with a carb body like this one. You will note I have left the float bowl bolt in place. Its a little hard to remove without pulling off the choke mechanism, so leave it where it is if the rubber beneath the bolt is in good shape. Otherwise there is one in the kit.
Unless your intention is to change out the needle, keep it attached to the damper piston. Inspect it for damage, of course, but store it carefully. You can't bend that needle or it will be wrecked. Luckily they're pretty cheap if you do need to replace them. Check the side of the needle for any flat spots. This would mean the needle has been rubbing the side of the old jet, and has polished metal away. The result will be that the mixture when tuned at idle, will be too lean at other throttle settings. You will need to replace the needle. Otherwise, store the needle and piston carefully.
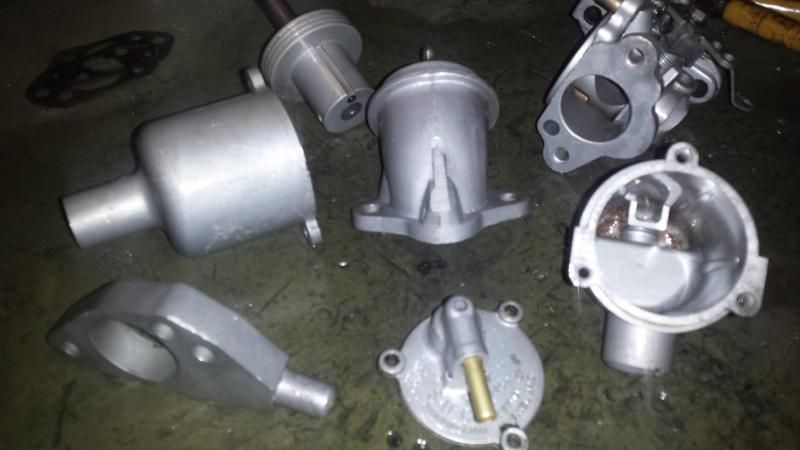
I'm lucky at my house. I have a glass bead blaster, and a compressor big enough to run it. I'll iterate that this is a nice to have, but isn't essential. There's a number of ways of cleaning carbs, from soaking in WD40 and other cleaners, to manually brushing them down and decreasing them. Apart from a basic level of cleanliness (you don't want any foreign matter in the carb to go through the engine, or stiffen its workings up) the outward polish of the carb has nothing to do with the operation, and will not alter the outcome of the rebuild....but it does make them look great...
Don't clean to aggressively the SU damper piston or the interior of the damper pot. it may change the seal between the two. Clean as much as you like the exterior however using your preferred method of choice.
Bushing the Butterfly Spindle
The first job after the pull down is the most important. That is the bushing. This job may be skipped, but if there is sideways movement in the shafts, then air will be sucked through the gaps at idle, and ruin the tune you set at idle for the rest of the throttle range. There's about -21 psi on the manifold side, so the suction is significant through the gaps.
The original spindle shaft is 1/4 inch in diameter, so the holes through the carb body are also 1/4". To fit the bushes, the holes will need to be drilled to 5/16". We do this by drilling the body out in increments very carefully.
This is a delicate job. You want the bushes to fit with a slight press fit into the carb body, and you also want the spindle to be able to rotate smoothly within the bushes. So tell everyone to leave you alone for an hour while you get this job done right. If you are certain you are not comfortable with the drilling, drop me a line. Buy an Ausmini Sticker or two, pay for post and I will drill the carb bodies on your behalf.
I have the benefit of a small bench drill press, and recently picked up a slide vice. The slide vice allows me to move the carb sideways to align it under the drill press. I align the carb vertically by putting a 1/4" bar into the drill press, and through the carb body at the same time. Only then do I allow the vice to clamp the carb for the drilling operation. The slide vice helps to align the jaws of the vice precisely to provide horizontal alignment. Once clamped, I withdraw the 1/4" bar from the drill and carb, and start to drill. Ideally, the trick would be to drill to the size below 5/16ths, and use a ream capable of 5/16ths to bring up to size. I haven't found this as needed this over the years as the bushes have fitted just fine, so I have never felt the need to buy one.
Machine shops with the benefits of specialist machines are able to machine the bores only enough into each side to fit the bushes. This makes they're job a little simpler as they don't need to blend the bushes to the bore. However it does provide a bit of a gap for air to remain bypassing the butterflies. I choose to bore clear through, as the only downside is an extra step in blending the bush to the bore of the carb. It also allows me to align the bushes to each other easily.
Hand Drilling
For many, many years, for dozens of carbs and until only recently I have simply drilled these out carefully by hand. I use a cordless drill and step the drill bits up as little as possible between 1/4 and 5/16ths. This helps keep the drill aligned through the original holes to minimise the chance of distortion. You need to ensure the drill does not drift off at any angle, and do both holes from the one side to maintain the hole alignment. Do this for each drill size as you work your way up.
As you withdraw the drill, do not allow the drill bit to chew out the body of the carb if it becomes difficult, so go gently on the withdraw. Take it out by hand and don't revers the drill if you can. Do not do the 5/16 drillings in one go, use every drill bit size between 1/4 and 5/16. Do not give the drill the chance to full off to the side by being to aggressive with the drill. Go carefully and be comfortable at your bench. That is all.
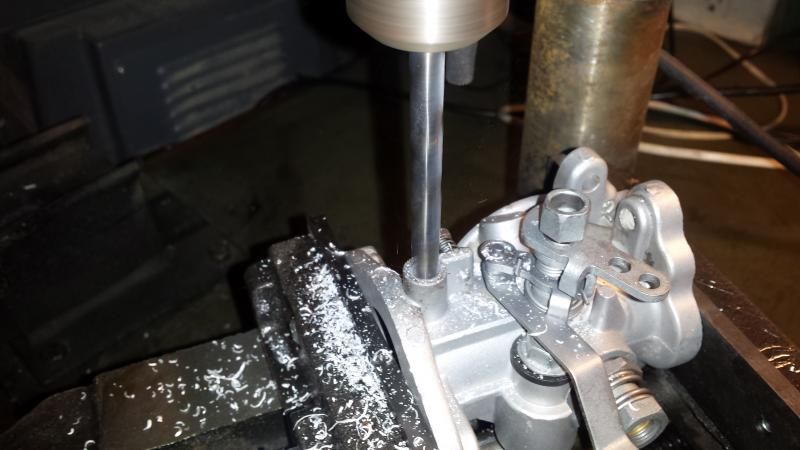
So whichever way you have managed to do it, you will now have 5/16ths holes in the carb body. Now is the time to insert the bushes. You may need to pick up a bottle of Loctite red thread locker, particularly if you have drilled the carb bodies out by hand. I would recommend using Loctite anyway. It certainly won't harm.
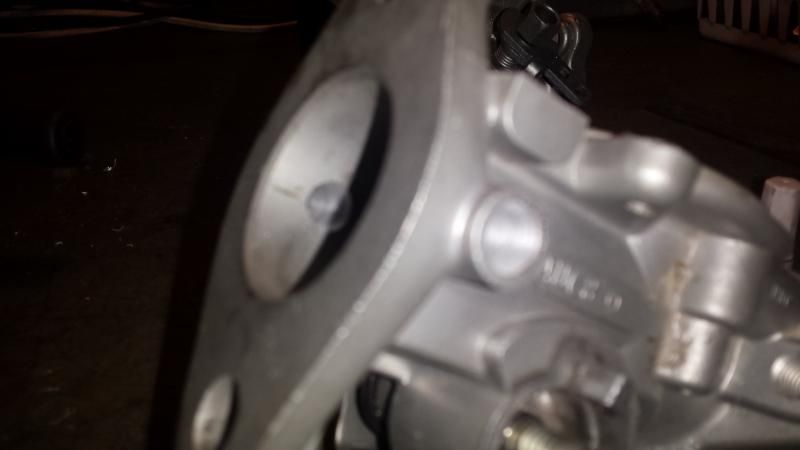
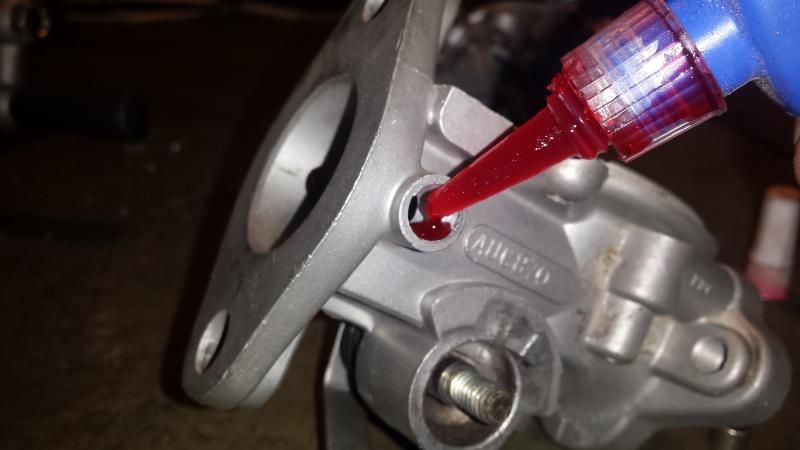
Insert a little Loctite into the hole, and make sure it covers the circumference. Insert the bush and push through until it makes the inside of the carb, just a little, so it is proud or at least flush of the bore all the way around. It is VERY IMPORTANT that the bush goes through into the carb such that there is no part of the hole showing. We must file this back smooth, or air will bleed around the butterfly and it will not idle. Only push it through just enough to ensure no part of the hole is showing, don't waste any more bush than you need to though by pushing it through further. Repeat for the other side of the carb.
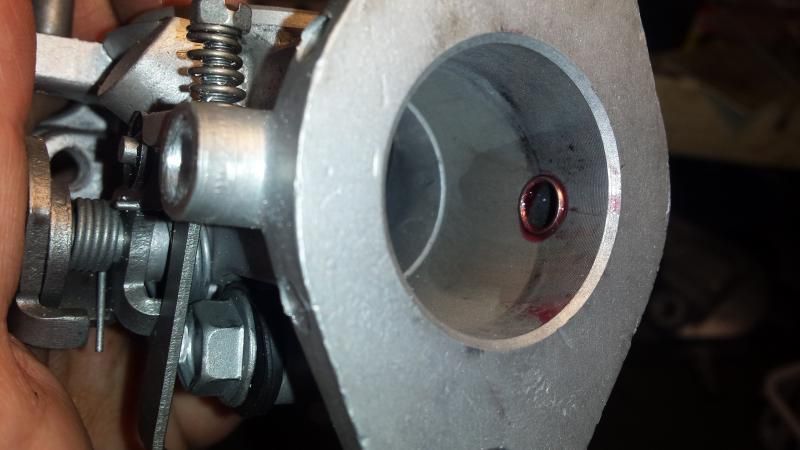
At this point, you can push the spindle through for the first time to test its fit. If you have drilled carefully, it will move relatively easily with your fingers or with a little bit of effort from a tool. It can be a little stiff, but not too much. The throttle spring and the leverage of the throttle arm will do the work for you, and it will bed in over time. if it is too stiff, then the throttle spring will not be able to bring the butterfly back to idle. A symptom would be you need to snap the throttle shut to get the engine to idle. We don't want that.
If you find you aren't a perfect man-machine and the shaft is now a little too stiff, then don't get worried. This can be sorted out easily enough.There will be a high spot on one of the bushes which needs to be worked out before the spindle will turn with your fingers. The bushes are white metal and are relatively soft in comparison with the alloy body and the brass shaft.
Take a 1/4" drill, and using your fingers, pass it through the carb body with your fingers only. Spin it with your fingers to gently align the holes and remove the high spot(s). This won't ruin the gap in the bushes because you are doing it with your fingers, and you aren't being too aggressive. Test the fit of the spindle frequently and repeat as necessary until you can move the spindle without much effort. If you have this, then you have finished the best part of the rebuild.
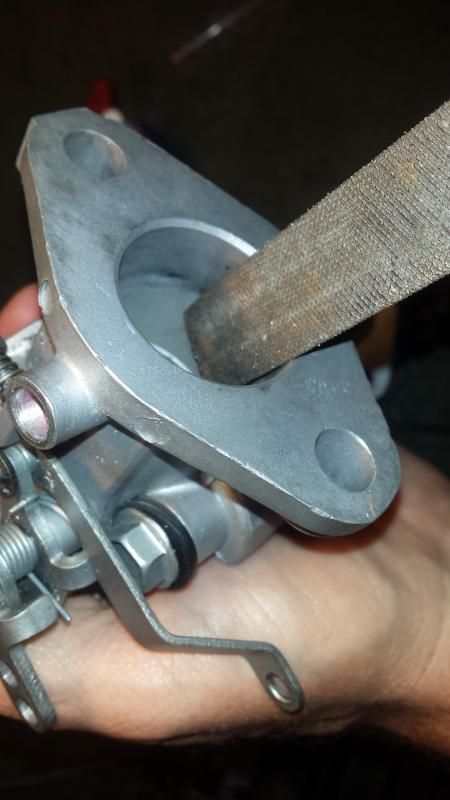
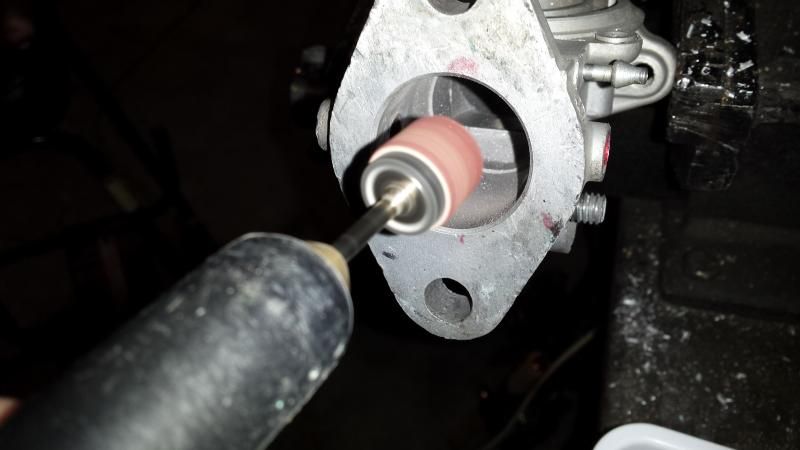
The next part is to take care of the bushes which pass through into the bore of the carb body. We pushed them through a little to ensure there was no way the air could get around the butterfly via the holes. Now we need to file them back to match the curve of the throttle body. I do this either with a half-moon file, or if I am a little bit impatient I will go at it carefully with a rotary tool like a dremel.
Go at it softly. The idea is to remove the bush material without scratching the bore of the carb. its easier than it looks as the bush is quite soft. Don't damage the bore however as it will affect the idle setting.
Done
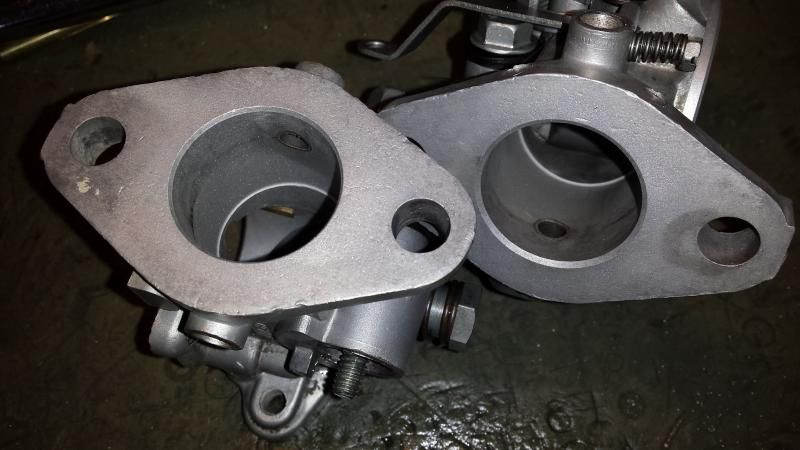
Give the carb a wash, as its time to assemble and you need to get rid of the little bits of alloy left over.
Assembly
Re-insert the new spindle, with the countersunk side facing toward the top of the carb. The butterfly rotates towards the front of the carb at the top. You will need to look carefully at the butterfly, the edges are cut at an angle, and the way you insert it will decide if it seals or not. You will see that it is the wrong way pretty easily if you do get it wrong, so just turn it around the other way. Use the screws to secure in place temporarily, and test that the butterfly moves with only a little resistance from fully open to closed. It will free up progressively as you move it if it is a little stiff at first. Make sure the idle screw isn't partially open if its not closing fully.
Once you have the butterfly direction decided, insert it and then insert the screws for a final time. I like to use a little Loctite on the screws, however it isn't actually required as the screws are split at their ends. Once they're in, open the screws out to lock them in place, or if you are a fan of a little more flow, trim them away and rely on the Loctite on its own to keep them tight. I wouldn't want them to come away for my own purposes and expectations, so I leave them as is.
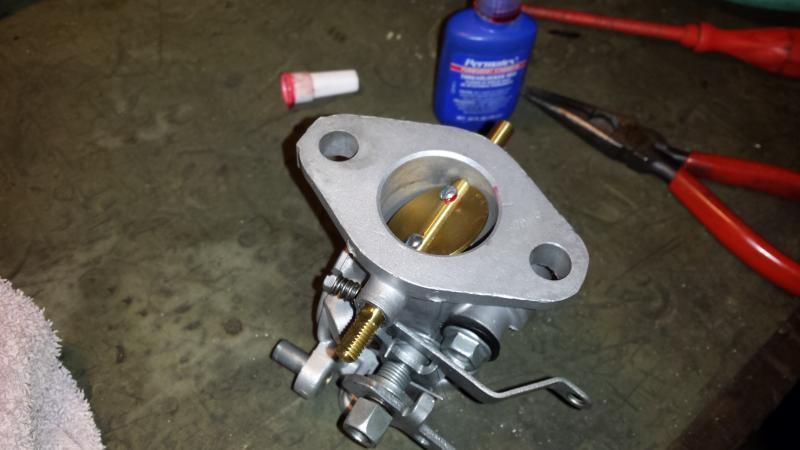
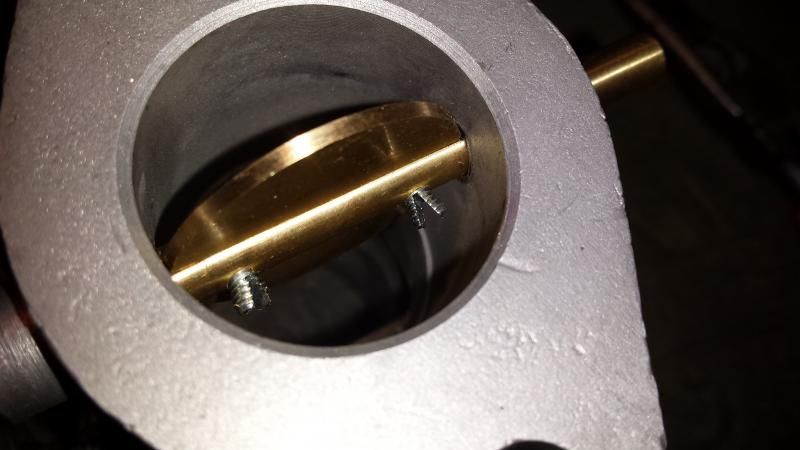
Bolt the SU fuel bowl back on if you haven't already. It will be difficult if you leave it till later. Reassemble the throttle butterfly cable linkages onto the spindle. Remember that there will have been a lock washer on the nuts as it came apart.
Jet and Needle Centering
An important adjustment now is the jet and needle centering. If we don't perform this adjustment, the needle will rub on the side of the jet and wear a groove in both. The wear will occur at the idle/low-load end of the needle, and will mean the idle is rich and the high-end is leaner than it should be. So spend a little bit of time getting this correct.
The jet bearing is made up of four parts. The Jet bearing (made of brass), the Jet Bearing Retention Nut, and the Mixture Adjustment Nut and Spring. The jet bearing allows the jet to move around a little when you turn it. For the moment, just insert the jet bearing with its retention nut. Add a little bit of oil to the bearing so it moves around easily while you do the adjustments. Mark the brass jet bearing threads where you can see it with a spot of white paint pen to provide a visible reference point. Don't over tighten the retention nut just yet.
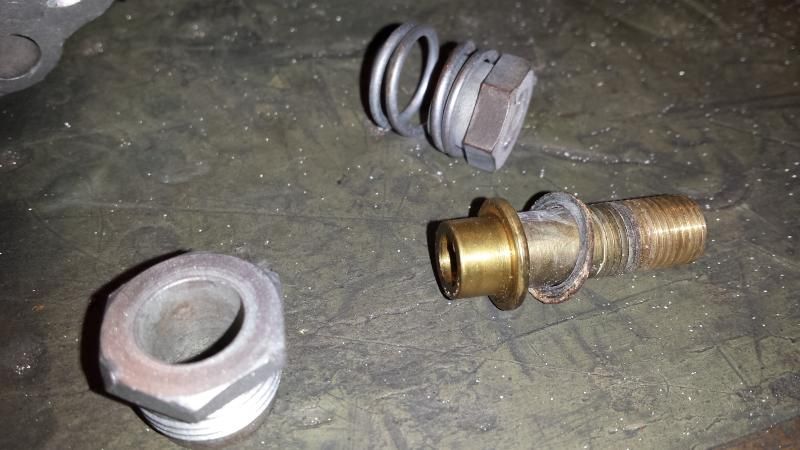
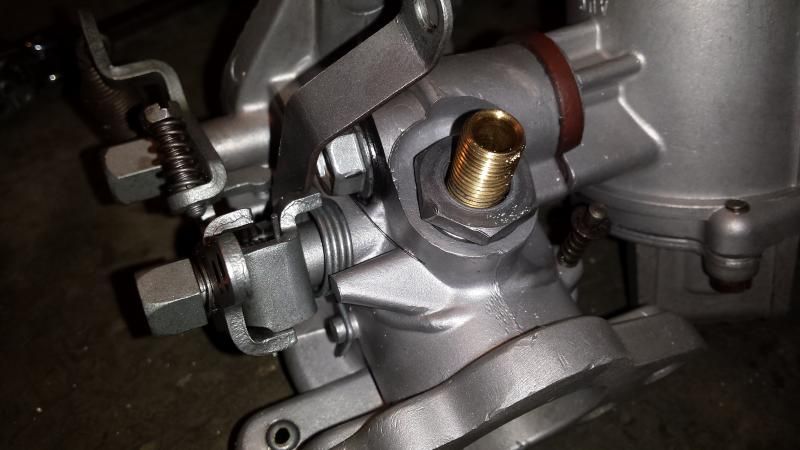
Reassemble the SU damper pot and piston and piston spring onto the carb body. Then insert the new jet into the bottom of the carb and screw the supply hose lightly (for now) into the bottom of the float bowl to hold it in place. Don't tighten it yet.
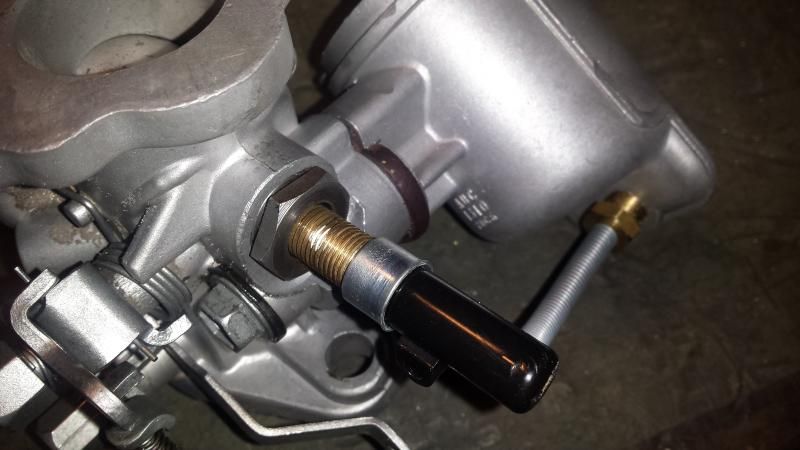
Without oil in the damper pot, the piston should move smartly up and down when you move the piston with your finger inside the carb. It should drop back down and make a nice neat "click" as it stops. This means the jet is near centered perfectly. If it does not click, or if it jams before it gets all the way down (as in the image below), then the jet bearing needs to be adjusted. Undo the retention nut, rotate the brass jet bearing a little and re tighten the retention nut. It may nearly make it, but not click. Work away until you get this click.
This may take a little while, so be patient as it will improve you tuning and carb longevity massively.
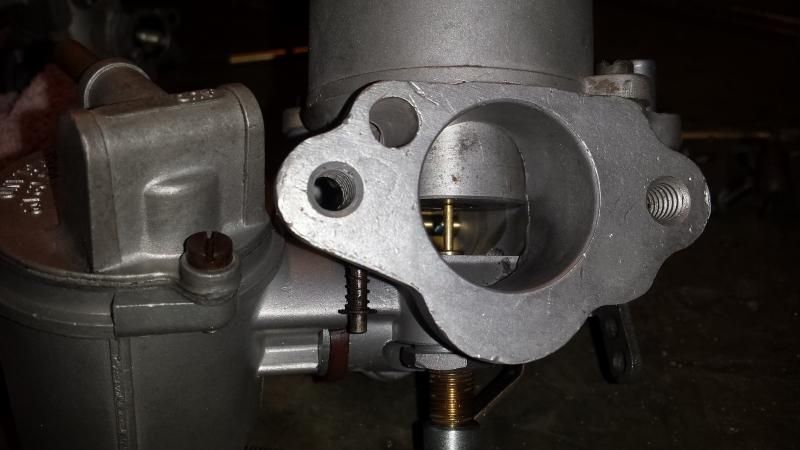
Once you have finished the jet centering, remove the jet and reassemble the mixture adjustment screw and spring back onto the jet bearing. Replace the jet and fuel supply hose. Do not over tighten the jet supply hose where it screws into the float bowl! Do it up enough to hold it in place, but not too much. Use about as much as you would tighten up a screw.
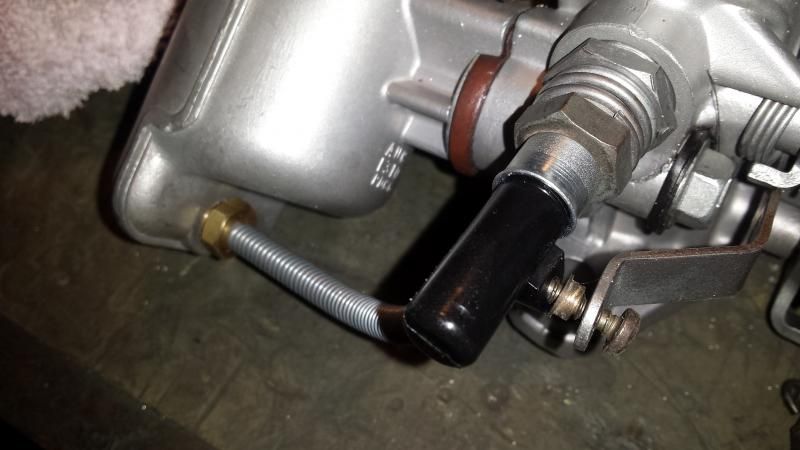
When connecting the jet control push rod from the choke lever back onto the jet, remember there is a top hat shaped washer that goes between the jet and the push rod. The washer can be seen in the image below.
Float Bowl
Once you have that, you're nearly there. All we need to do is reassemble the float bowl.
Insert the new fuel metering valve
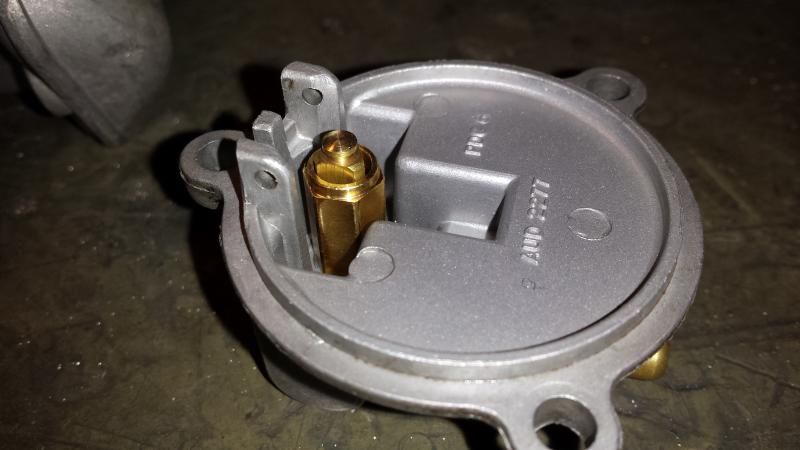
Reassemble the float onto the float bowl top. Use a 1/8th drill bit (or tube, or wire or whatever you have) to set the spacing between the lid and the float bowl. With the float above, its possible to bend it slightly to get the right height. You should be able to slide the drill bit and just touch the underside.
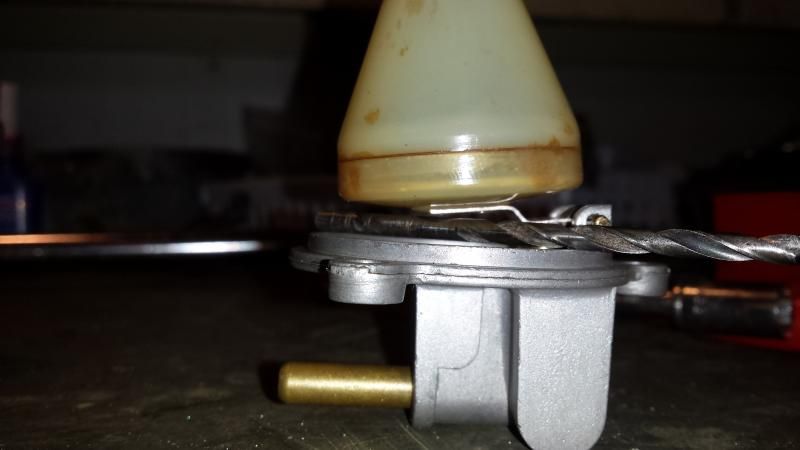
Once that is done, screw the lid back onto the carburetor and perform a final check on the jet centering. The carb will be ready to bolt back onto the manifold. Make your life a little easier by setting the jet out 8 or twelve turns. Check the adjustment of the choke idle up screw, and adjust the idle screw on the butterfly to 2 turns from closed.
There will be a couple of parts left in the kit you haven't used, the single use clips for the choke linkage. We haven't disassembled the choke linkage here, so they were not needed.
I hope this rebuild is of use to you. If I have confused anybody, let me know and I will simplify my comments in the thread. The same goes if I have left anything out, please let me know.
Cheers.
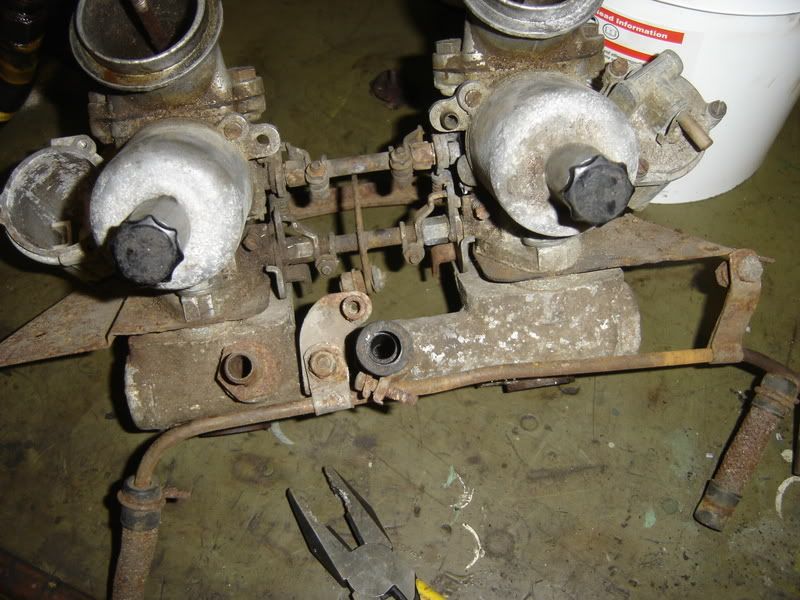
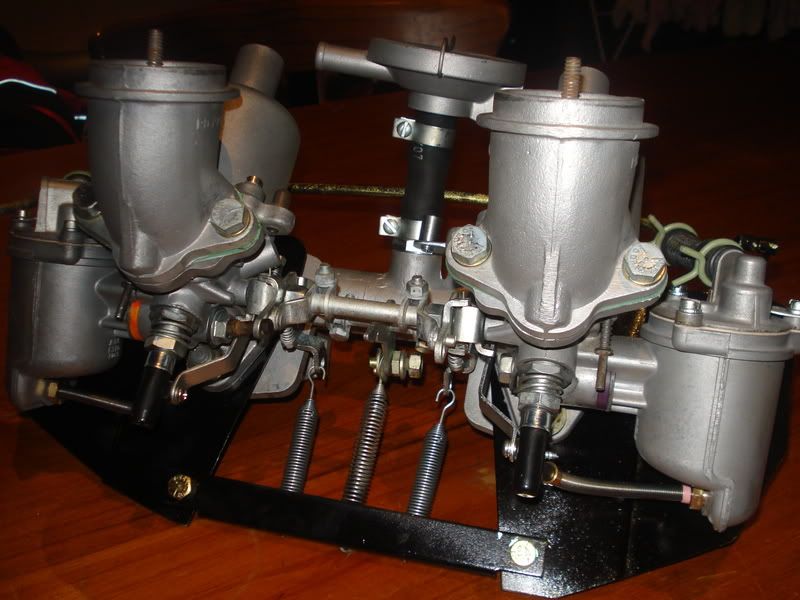
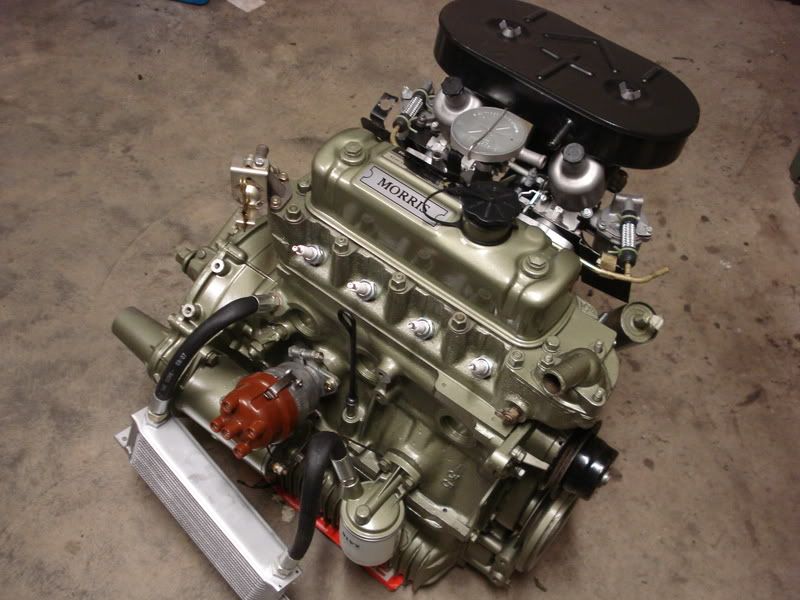
Carb Rebuild Motivation Pictures
