So I finally finished up the rear end, which is a longer story than I'd like it to be. But here goes...
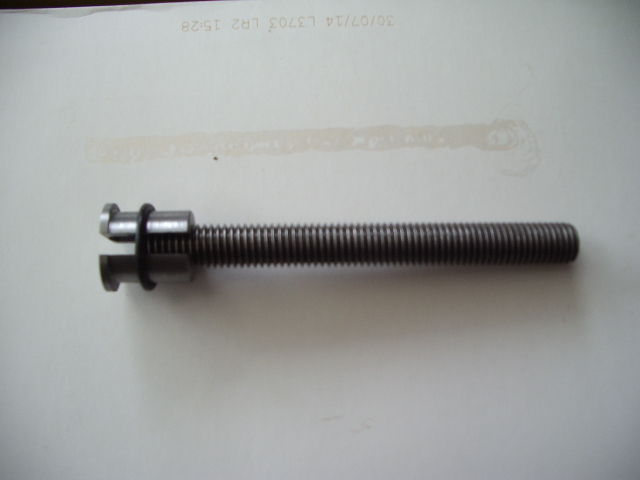
The drivers side was the horror story with the the ground away bearing. I checked the hole on the arm, and though it wasn't ovalized it did have some wavy marks left behind from where the needles were digging in for who knows how long. I made the decision to push on and continue using it, because it really didn't seem that bad. I took my time with my first ever reaming job on the passenger side, and it sure is hard work! Sitting on the floor of my garage with the arm between my legs didn't much help. Overall I am quite pleased with the job. There is the slightest bit of play in the bush side (maybe 1/4mm), but I reckon with some grease in there it will be perfect. The pin is a bit tight when I push it in, I imagine they aren't lined up quite as perfectly as I'd like. I can't turn the pin by hand, but throw two nuts on one side and it all spins relatively easy. I think 50km will wear it in nicely and it'll be good as it ever was.
The drivers side however, well the reaming went to plan and I was satisfied with the job. But trying to push the pin through proved more challenging. I removed the pin and decided to push it through from the bearing end, just to see if I had alignment issues. As soon as it got to the rear of the journal I heard a 'pop' - one of the needles had escaped. I grabbed a hacksaw blade and patiently removed the bearing, hoping to save my reaming job and just replace the bearing. Once removed I took the arm down to MinisPlus for an expert opinion - and whilst Lindsay agreed it didn't look too bad, he sorted me out with 1/2 a Rover subframe for $60 and I was on my way.
I got home and removed the new arm from the subframe, and upon investigation the used arm, pin and bush all looked to be in excellent condition. I was staring at a brand new rear arm rebuild kit, but decided I'd better cut my losses, clean and lube the new arm, and move on with my merry life.
Quite the adventure! As it sits right now the entire rear end is back together. New drivers rear arm, new pin, bush and bearing on the passenger side, two new SS brake lines, and of course, fresh rubber donuts and shiny shockers.
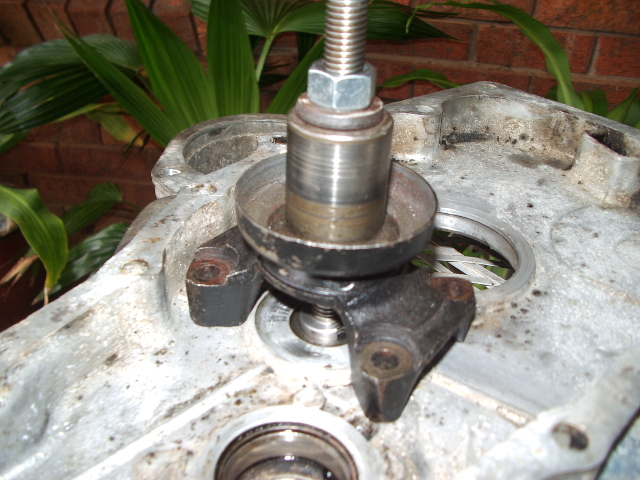
Starting tonight it's onto the front. I've got all 4 of my new balljoints lightly lapped in. Tonight I remove the passenger hub and balljoints and start putting it all back together. Oh yeah, and I decided to buy rebuild kits for the front upper arms as well. Because, well, I've replaced everything else...
So! Install and adjust balljoints, install new donut, install upper arm with new pin/bearings, install new adjustable lower arm, install hub, connect upper arm, lower arm, shocker, tie bar. Repeat. Install new radiator hoses, new thermostat gasket. Install radiator and shroud. Replace engine mount bolts. Bleed brakes, bleed cooling system, adjust height (leaving it all a little higher than I'd like), do alignment with a string and ruler. Easy peezy - should be done by dinner.

_________________
1998 Rover Mk VII
2001 Honda CBR 929RR (street)
2014 BMW S1000RR (track)


