ausmini
https://www.ausmini.com/forums/

how to make your own door trims *dial up unfriendly*
https://www.ausmini.com/forums/viewtopic.php?f=5&t=24904
Page 1 of 2

Author:  dove grey 64 [ Wed Nov 15, 2006 8:09 am ]
Post subject:  how to make your own door trims *dial up unfriendly*

a couple of people have pm'ed me asking how to make door trims. i'll try my best to explain and if anybody has questions just ask

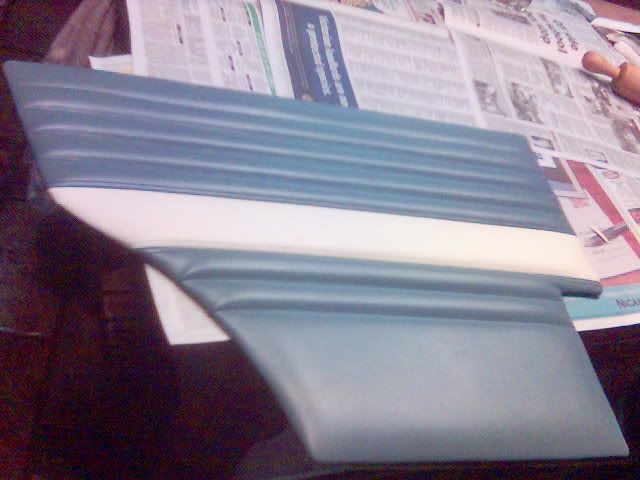
step 1 : is to design how you'd like your trim to be, i've always been a fan of classic style interiors and im a big fan of newton commercials trims but they cost a fortune to get over here. also i like two tone in the cooper style door trim

step 2. grab your vinyl (no real need for leather on door trims) and cut out what size you need leaving around 50mm-100mm excess around the edges (keeping in mind as you stich the lines the trim will shorten quite a bit)
also at this stage cut out some foam (from clark rubber, either 5mm or 10mm thick depending on how plush you want them to be) to the same size. also repeat that with some calico or bed sheet as backing for the foam
Image

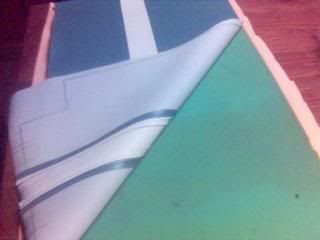
stepstep 3. get some foam fast adhesive 3M, its a really good quality product but costs upto $38 a can, and spray the bed sheet and foam lightly and stick them together. the reason why we do this is because your sewning machine's walking foot cant actually grip foam and also if you didnt have the sheet underneath the stiches would pull straight thru the foam. now once you've done that lay the vinyl ontop of the foam and pin around the edges. do not attempt to stick the vinyl to the foam as it just puckers badly.
Image

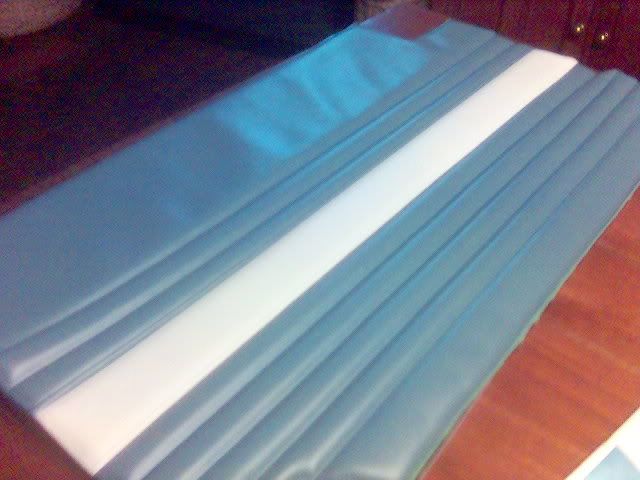
step 4. mark out your lines with a straight edge and pencil. you can use pen (easier to see but you have to make sure your good at straight lines) and trace your lines with your sewning machine. i start from the inside 2 lines and work my way out .
Image

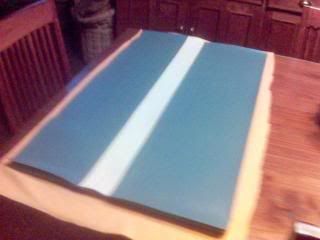
step 5. once you've done all that sew around the edges
Image

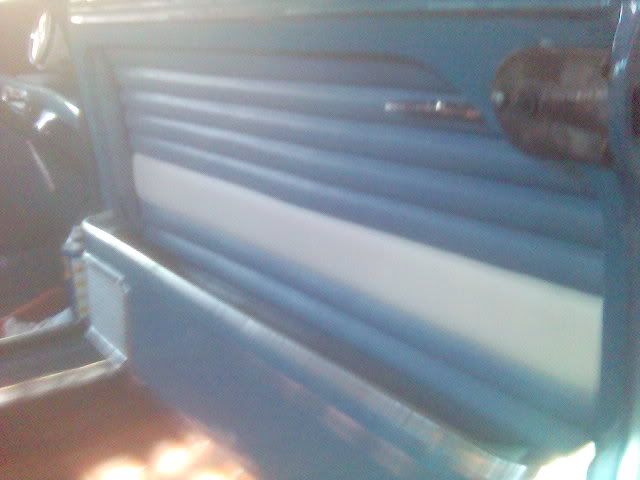
step 6. presto, you've got a nice door trim fitting them is easy because its not like other more solid ones, i also use aero grade sound deadening behind the trims :D
Image

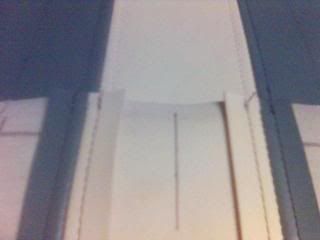
step 7.when making rear door trims use your old one as a template and cut out a new one with a jigsaw or bansaw if you have one and make it out of 3mm ply wood. it wont warp and you'll get a nice press fit when fitting. to make up the cover is the same as with door trims.although in this case when you have your cover and ply wood spray your glue around the edges of the timber and vinyl and let it tac off, then start pulling and sticking the vinyl and glue together, and when you reach curves start cutting out triangles so that the vinyl doesnt gather up to much.
Image

tell me if i missed anything

Author:  dove grey 64 [ Wed Nov 15, 2006 8:09 am ]
Post subject: 

damn those first couple of pics turned out bad.....sorry guys

Author:  sports850 [ Wed Nov 15, 2006 8:11 am ]
Post subject: 

They look brilliant , can you reduce the size of the first few pics (should improve their quality too ) and we'll put it in the how-to section .

Author:  Matt68 [ Wed Nov 15, 2006 9:05 am ]
Post subject: 

Now that is brilliant - Thank you for going to the trouble!

Although, I'd end up sewing my hand to the door trim, and that's not a good look!

How much to redo the door cards for a 68 Deluxe, front and rear?

Failing that, how different is it than these ones?

PM me if you like?

Cheers
Matt

Author:  dove grey 64 [ Wed Nov 15, 2006 9:12 am ]
Post subject: 

sports im trying to resize them but its not working. how do i do it?

Author:  dove grey 64 [ Wed Nov 15, 2006 9:21 am ]
Post subject: 

cheers matt, they arnt much differnt then 850 trims apart from the fact that they sit on the face of the door as opposed to inside the door. you just have to use a thinner foam backing.
price is around $400 for a set of four door trims, but its different for everything eg. im always happy to get some mini stuff im after in exchange :D

Author:  sports850 [ Wed Nov 15, 2006 11:37 am ]
Post subject: 

Open the photo with paint or windows picture and fax viewer or similar and resize (for windows pic viewer) or if you're using paint it will be "image" , then "stretch/skew..." then change it to 50% and 50% or 60% and 60% . Save it as that and then reload it to photobucket .

Author:  Matt68 [ Wed Nov 15, 2006 11:46 am ]
Post subject: 

1970 mini K wrote:
cheers matt, they arnt much differnt then 850 trims apart from the fact that they sit on the face of the door as opposed to inside the door. you just have to use a thinner foam backing.
price is around $400 for a set of four door trims, but its different for everything eg. im always happy to get some mini stuff im after in exchange :D


Hmmm... I'll have to start thinking of colour schemes! A simple two-tone like you have pictured looks stunning, just got to come up with the right one for the car!

So, what mini bits you chasing? :wink: :wink:

Author:  hbr [ Wed Nov 15, 2006 12:16 pm ]
Post subject: 

Thats really handy. Thanks.

Could you post dimensions for the cutouts please.

Adding the door and rear insert dimensions would also be handy for the How-To.

I tried using the template for the rear insert in another post....but without a centre line and appropriate measurements from it, it is a little difficult.

If I find my parcel shelf template I'll measure it and post the details/photo.

Author:  Matt68 [ Wed Nov 15, 2006 12:37 pm ]
Post subject: 

The other things I'll need are the parcel shelf (standard, no speakers etc) liner, and the bits of vinyl to go over the rear wheel arches next to the back seats.

Can you help with these too?

Cheers
Matt

Author:  MiniMe87 [ Wed Nov 15, 2006 5:27 pm ]
Post subject: 

that turned out heaps good mini k,

How did the rear bin go wid bending because i did the same as you and made my own door cards (sewing and everything :lol: ) but i re-used the old rear bin because i was unsure of whether the wood would flexiable enough?? was it just standard MDF?? did u have to mould the wood at all before putting it in? any chance of a picture of the rear bin??

thanks

Author:  Lillee [ Wed Nov 15, 2006 7:44 pm ]
Post subject: 

That's great! well done! should be a sticky!

Author:  ziff [ Wed Nov 15, 2006 7:51 pm ]
Post subject: 

You could just buy the trimming foam that already has the backing material on it. Then there is no need for adhesive.
Ziff

Author:  ziff [ Wed Nov 15, 2006 7:53 pm ]
Post subject: 

Nice sewing job by the way :)
Ziff

Author:  YoungMiniac [ Wed Nov 15, 2006 7:53 pm ]
Post subject: 

Great work mate

Page 1 of 2 All times are UTC + 10 hours
Powered by phpBB® Forum Software © phpBB Group
http://www.phpbb.com/