Ausmini
It is currently Sat Jun 21, 2025 5:55 pm

All times are UTC + 10 hours


Post new topic Reply to topic  [ 342 posts ]  Go to page 1, 2, 3, 4, 5 ... 23  Next
Author Message
PostPosted: Sun Aug 13, 2006 9:15 pm 
Offline
1360cc
1360cc
User avatar

Joined: Tue Jun 01, 2004 3:41 pm
Posts: 6858
Location: Special Tuning Sydney
Hi all!

I am about to embark on rebuilding an A series engine for Lillee. Since I am a relative newbie at this (frist engine rebuild) I thought I might start a thread as it may be interesting for you all who wondered what a rebuild involves and maybe get some value off my own experiences.

HISTORY: Before I bought Lillee 3 years ago, I literally knew nothing about cars beyond doing an oilchange. It has been my dream to learn to fool around with cars and I've always wanted a mini! So if you know nothing at all, have no fear! just bight the bullet, read books and ask questions! If I can do it, so can you :P . Well I have also had the luck of tapping into Dr Mini's endless knowledge. The guy truly has forgotten more than I will ever learn about Minis!

I do have a relatively limitted budget as I have to conform to the increasingly popular Marriage Budget :wink: (All those who are married would understand! :lol: )

AIM: Around 100bhp big bore motor with lots of torque and reliability on a remote box. It will be road car first and foremost but since I have a second, more mundane car to drive around I can afford to go abit on the silly side :wink: . Fuel consumption is not a concern, neither is noise, so I will be building mainly for performance and power without compromising on reliability.

The big thing is I want to do as much of it myself as possible. Of course I am extremely lucky to have the very generous help of Dr Mini and will be taking alot of advice from the good Doctor. I also will be doing alot of work under the watchful eye and guidance of none other than Graham Russel. I am hoping between Graham and Kevin I can learn all I need to know to put together a highly modified, well built engine!

Image
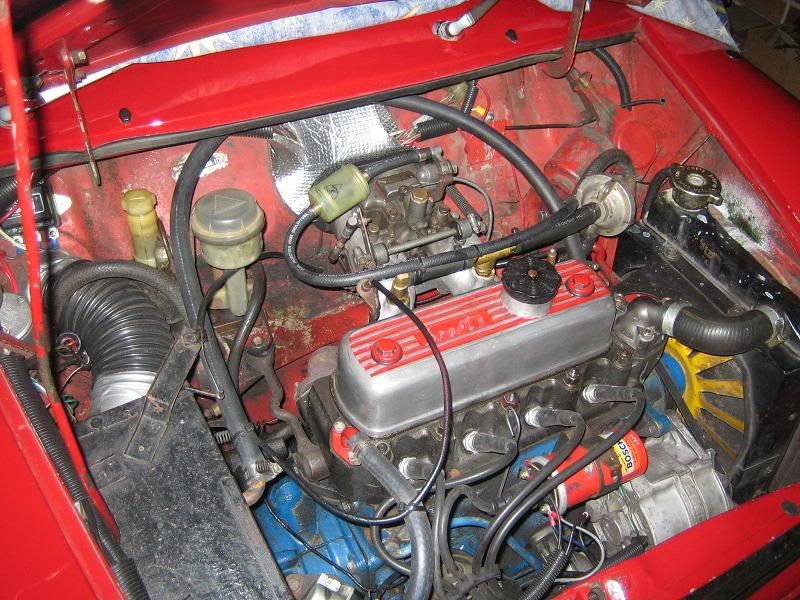
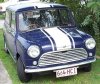
The current 1152cc in Lillee. Aint she a beauty :wink:

Image
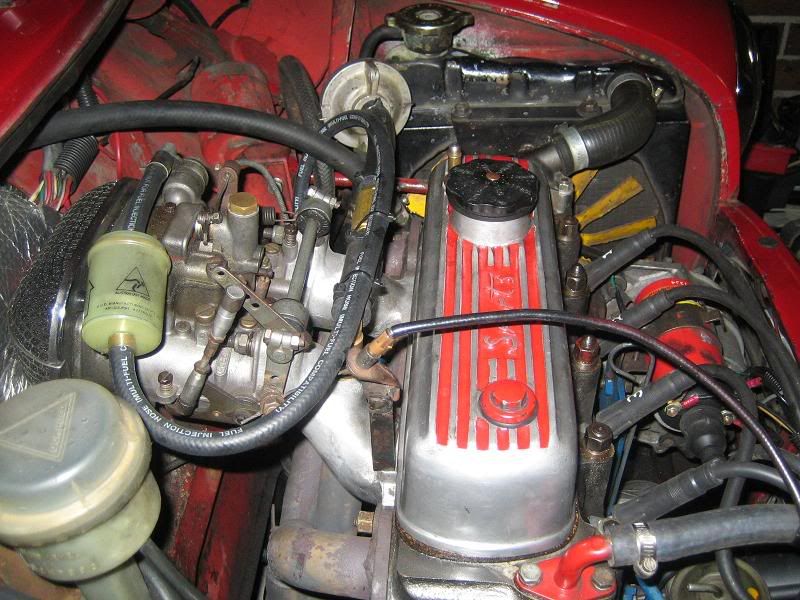
That there's a 45 Dellorto. Once you've gone sidedraft you can never turn back!

THE STORY SO FAR: I have collected many parts over the past 3 years and have in my posession 2 1100S motors to draw parts from. 1 Metro head, 1 normal 12G940. I will be using a late 1100S block that is currently 1275 (one with a hole between 2 and 3). Most of the parts will be from the 1100S with the exception of a Trigger belt drive kit, some special tuning nissan parts and a few other Toyota goodies.

Kev and I have built a 12G1128 remote box from the ground up. It now has Mk 2 S ratios as I purchases a Mk2 S first motion and laygear from Minispares when I was there last year. Just touching on the gearbox: a whole kit has been through the box with all new bearings, a DR MINI Special Tuning rebushed mainshaft, MG heritage layshaft and a centre oil pickup. The diff has new heavy duty pin and new planet gears. The diff has also had DR MINI Special Tuning mods to accept an A+ diff thrust washers (with that little tab so the planet gear doesn't grab it and spin it). All new gaskets have been put in and it is now painted in silver engine enamel and sitting on my bench in a dust free wrap :wink:

Image
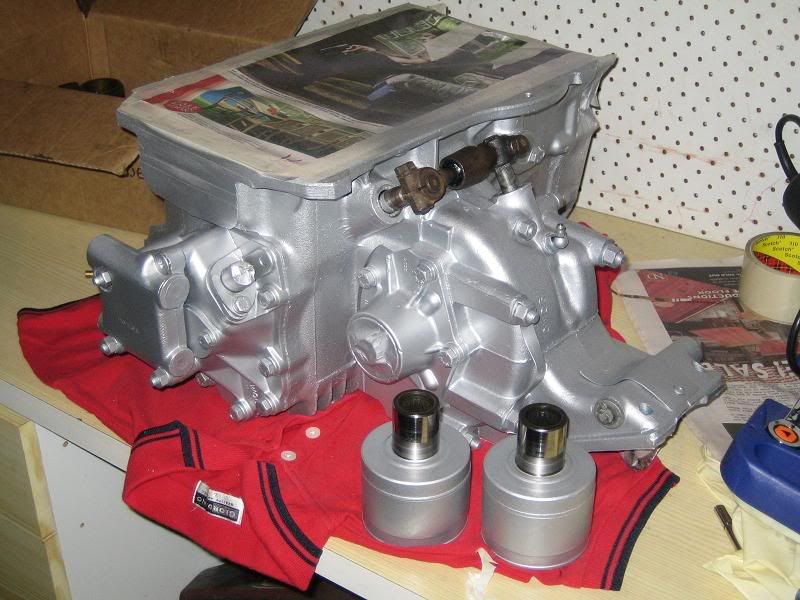
Picture of my Mk2 S box with pot joints

Image
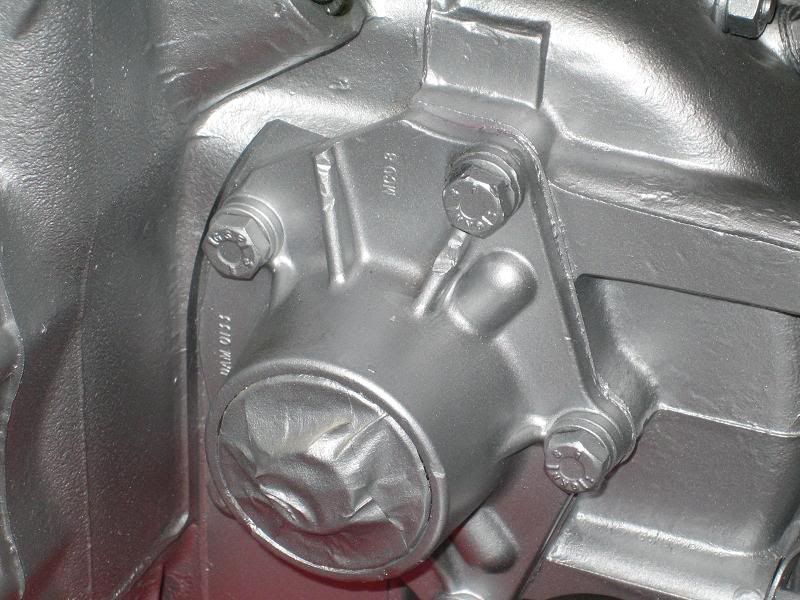
Dr Mini Special Tuning modified pot joint side covers :wink: (hint chunk off the top)

YESTERDAY: After procrastinating for several months I have finally started on the rebuild. The original plan was to bore my virgin 1275 block to 1330. This way it will have 1360 and 1380 left go and still have CC's under my belt. Graham wants me to go 1360 straight for more power (no substitute for CCs!) but he has conceded that it is a waste of a perfectly good block. I have purchased a set of Hypertech Pistons +060" (1330) from Minisport SA and they come with a new set of Hastings Rings.

I took the block, spider drive cam, crank, pistons, S rods and flywheel with backplate to Graham today. The block has been totally dismantled including the oil gallery plugs tapped out. Kev has drilled and tapped 10th and 11th head studs and decked the block to clean it up and make sure it is flat. Graham threw it into the hot tank for a few minutes and it came out sparkling. Well almost. I hit it with air and rust flakes flew out of the water jacket! :( . I think we may need to send it to get it chemically stripped... Graham says that stuff will just clog up my radiator.

I would also like to file down the burrs of the hole in between 2 and 3. Apparently cracks can develop here as per Vizard. Graham says "meh you can do that if you want" so I will :lol:

Graham found that the bore on Number 3 cylinder has big chunks out of the side wall! It's had some big bang at some stage apparently. Gaham hopes that .060" rebore is enough to clean up the cylinders. If not I will have to go to 73mm pistons (1360) and use a set of Graham's very sexy looking pistons 8)

I used this cool hydraulic press to push each pin out of the old pistons to disconnect the rods from the old stock pistons. Way cool 8)
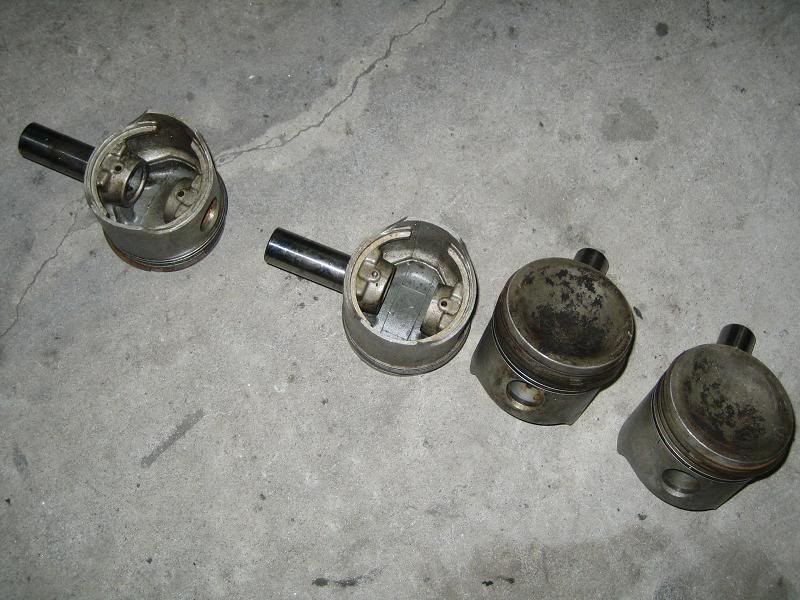
Image
Old pistons

Image
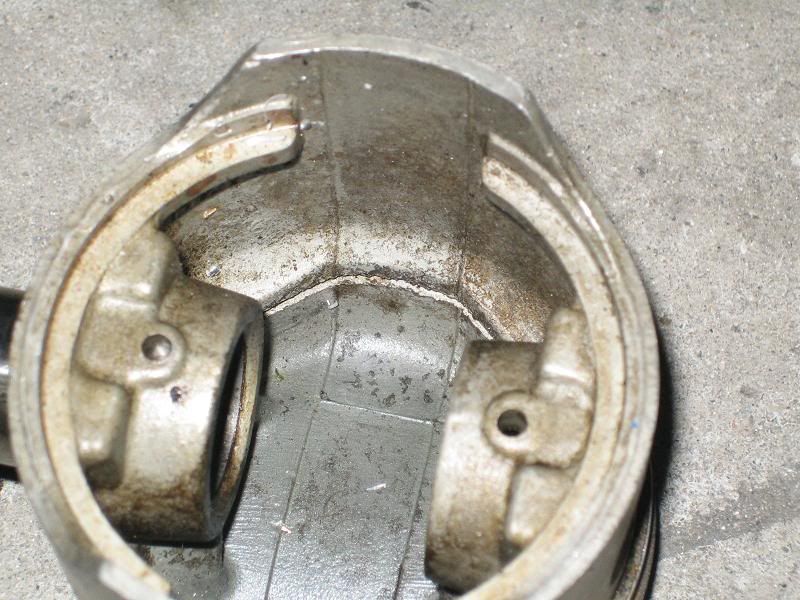
See the slot that runs horizontally? Graham says this is why they break when revved hard. The slot is HUGE, like half the diameter of the piston on both sides :shock:

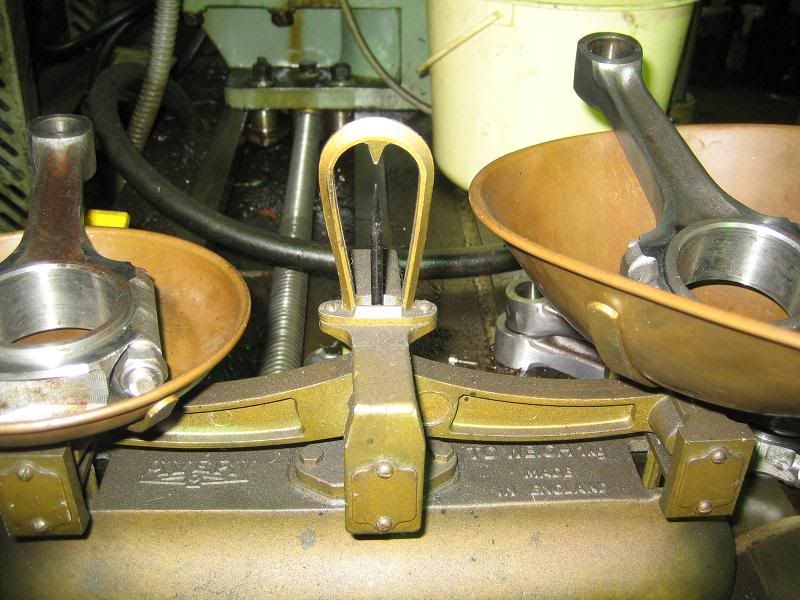
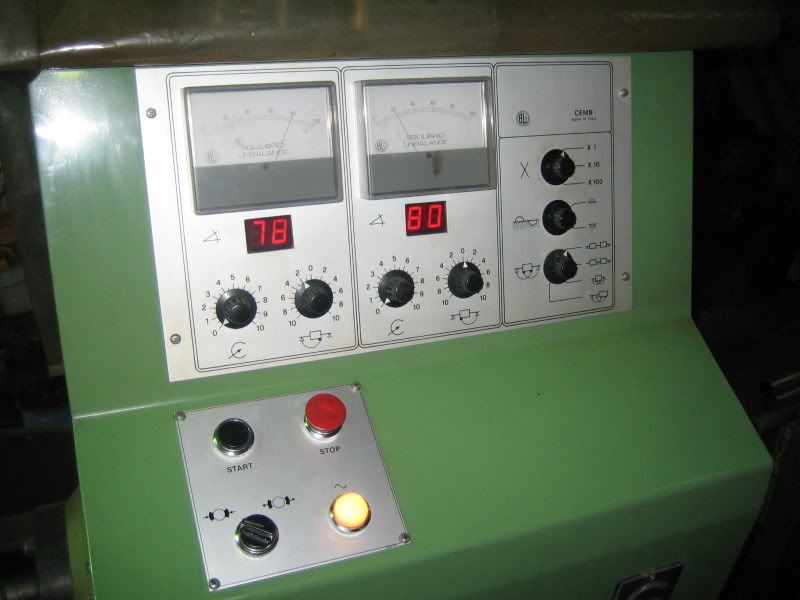
I then started balancing my S rods myself (under the guidance of Graham) on the belt sander. I've never done this before so it was quite fun! He gave me some pointers and off I went! After about 2 hours I now know how much effort goes into this type of work!!! I compare my 2 hours of work to what Graham has done for a Nb racer and I am shocked! :lol: The aim is to make them all the same weight. The theory is if engine internals are light, the engine can spin more freely and there is less load. Vizard talks about this in his book :wink:

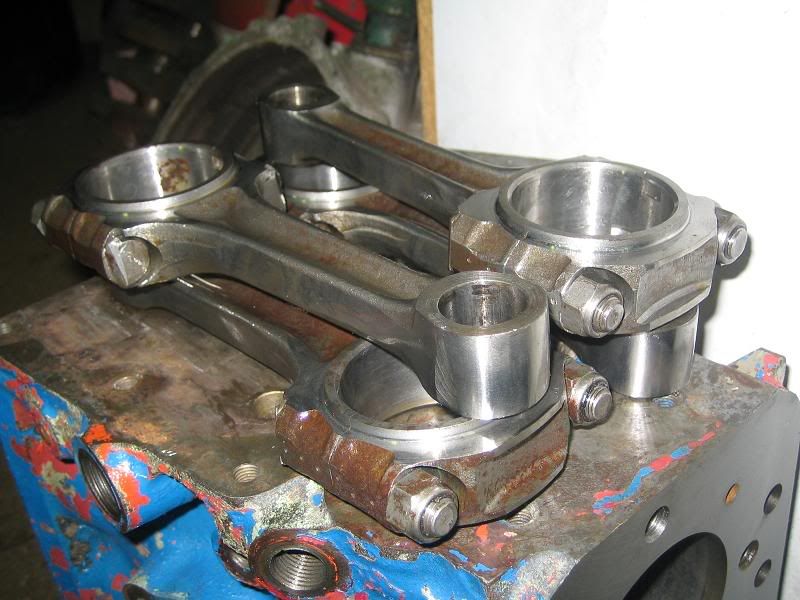
Graham also took alot off the sides of the big ends and I have rounded off the small end and taken most off the sides of the rod. They have come up quite bling even if I do say so myself 8) On these I will use Ford rod bolts that will require mofication. Kev says this is a good mod as the Ford bolts are 16 for about the same price (or less!) as 8 S ones and are very good. Hey if they can hold a Ford V8 200+hp engine together why not a mini with 100hp :wink:

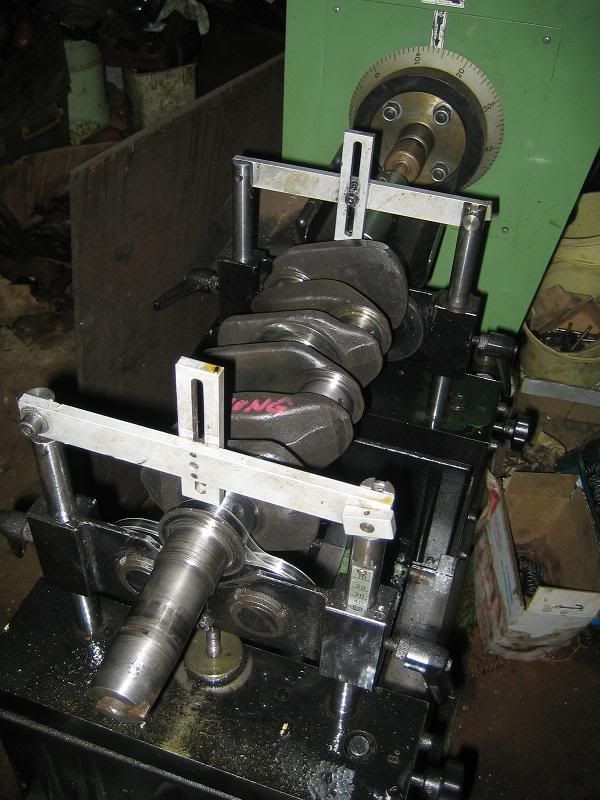
During the week Graham will have a look at my 1100S small journal EN16 cross drilled crank. It is currently .010" under on both the big ends and mains, but does look good enough to use. Graham will just balance the crank, I won't be doing any fancy wedging work which Kev feels is not necessary for a road car (although a nice to have). Maybe next time...

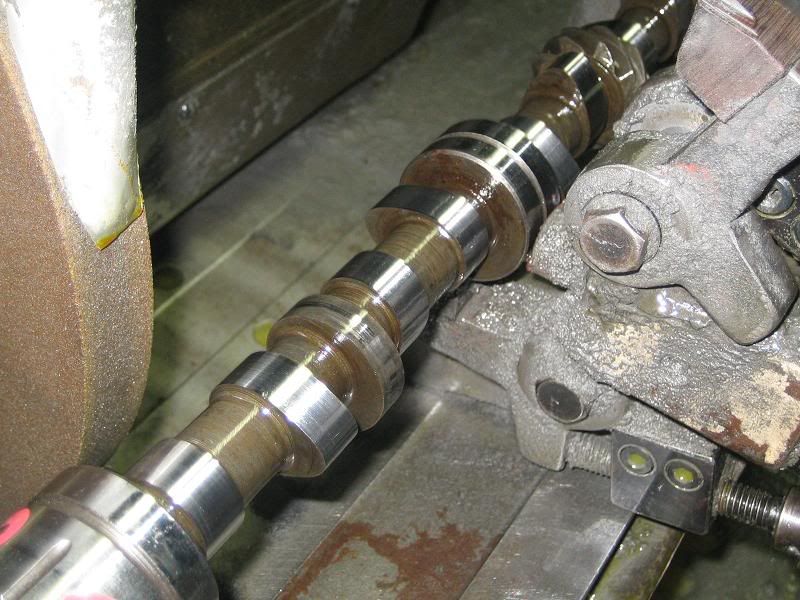
He will also grind my spider drive cam into the popular RE13 cam grind. I have been in many cars with this cam and I am sold. It will be a good power producing cam and will pull from usuably low rev ranges.

THE NEXT EPISODE: Will have to look into the block cleaning. If the bore turns out ok, then Graham will fit the pistons and I will buy parts such as Isky style cam followers, ACL Duraglide bearings for the crank, and Hopefully I can just reuse the cam bearings already in the block. If crank turns out ok then I can start putting it together!

Tune in next time! Thanks for reading! Hope it didn't bore you to death. I will add more pics next week of the progress.

_________________
Lillee - 1969 Morris Mini K


Last edited by Lillee on Fri Sep 10, 2010 4:38 pm, edited 17 times in total.

Top
 Profile  
 
 Post subject:
PostPosted: Sun Aug 13, 2006 9:27 pm 
Offline
1360cc
1360cc
User avatar

Joined: Mon Aug 23, 2004 10:07 pm
Posts: 10653
Location: SE Melbourne
Sounds like a good plan so far, do you mind if I ask if you have a budget for the project
100 hp, or will you just deal with that at the end (like I would)?
:D :D


Top
 Profile  
 
 Post subject:
PostPosted: Sun Aug 13, 2006 9:58 pm 
Offline
1360cc
1360cc
User avatar

Joined: Tue Jun 01, 2004 3:41 pm
Posts: 6858
Location: Special Tuning Sydney
Hey Harley,

Please don't bring up the issue of money! :lol: :oops: :P Surprisingly not much :lol: I think the consensus is $1500 to rebuild an engine? this is excluding all the parts that I already have like blocks, cranks, heads, and parts that I have already bought like the pistons and gearbox rebuild. MSN me and I will tell you what I've spent so far :oops: :( :lol:

_________________
Lillee - 1969 Morris Mini K


Top
 Profile  
 
 Post subject:
PostPosted: Sun Aug 13, 2006 10:32 pm 
Offline
1360cc
1360cc
User avatar

Joined: Mon Aug 23, 2004 10:07 pm
Posts: 10653
Location: SE Melbourne
Doesn't sound too bad, I know its easy to spend a fortune on an engine....I'm not looking forward to when my newly acquired runner will need a rebuild, it could be a week or a few years! :lol:
Most of the money in a rebuild comes from paying somebody to do it...the more you do yourself the more you can spend on go-faster bits. 8)
Good luck with it all.
:D


Top
 Profile  
 
 Post subject:
PostPosted: Sun Aug 13, 2006 10:36 pm 
Offline
1360cc
1360cc

Joined: Mon May 03, 2004 6:46 pm
Posts: 13688
Location: ADL
I can say now that i've probably spent close to $5000 (inc purchase of complete motor in the first place) on my rebuild, and its not together yet :lol:
Its going to be meaty when its done tho.


Top
 Profile  
 
 Post subject:
PostPosted: Sun Aug 13, 2006 10:49 pm 
Offline
1098cc
1098cc
User avatar

Joined: Fri Nov 26, 2004 7:07 pm
Posts: 1647
Location: New York City
Sounds good Chong, amolst worthy of an article in TME. :D

_________________
"Life is not like a box of chocolates... it's more like a jar of jalapenos. Whatever you do today, may burn your arse tomorrow."


Top
 Profile  
 
 Post subject:
PostPosted: Mon Aug 14, 2006 10:19 am 
Offline
1360cc
1360cc
User avatar

Joined: Tue Jun 01, 2004 3:41 pm
Posts: 6858
Location: Special Tuning Sydney
willy: Yes I can match that or better it :oops: :P

Zizzle: haha thanks. I really just want to keep a log of what I am doing. It will be a good read when it's all done and dusted :lol:

_________________
Lillee - 1969 Morris Mini K


Top
 Profile  
 
 Post subject:
PostPosted: Mon Aug 14, 2006 11:16 am 
Offline
1275cc
1275cc

Joined: Mon Mar 22, 2004 7:41 pm
Posts: 4319
Location: Plumpton, NSW
Whats the timeframe Chong?

Bring on the next dyno day hey? - sounds like yours and mine will be pretty close unless you go 1360.
You've got a 45 dellorto haven't you?

KB


Top
 Profile  
 
 Post subject:
PostPosted: Mon Aug 14, 2006 11:33 am 
Offline
1360cc
1360cc
User avatar

Joined: Tue Jun 01, 2004 3:41 pm
Posts: 6858
Location: Special Tuning Sydney
Hey Kev,

Time frame is next few weeks? once I have all the parts from UK and the boring is done I will put it together.

Yes 45 Dellorto and I will most likely run 36mm chokes.

My head has Mk 2 S inlets and exhausts though, is that the same as yours? This time around I will be skipping on the full porting job to run in the engine. I also have some other fancy go faster mods Kev so Bring it on! :P

PS. I am about to make a big order from the UK. Does anyone want anything?

_________________
Lillee - 1969 Morris Mini K


Top
 Profile  
 
 Post subject:
PostPosted: Mon Aug 14, 2006 11:50 am 
Offline
THIS SPACE FOR RENT
User avatar

Joined: Wed Jun 09, 2004 3:35 pm
Posts: 11847
willy wrote:
I can say now that i've probably spent close to $5000 (inc purchase of complete motor in the first place) on my rebuild, and its not together yet :lol:
Its going to be meaty when its done tho.


yeah, but yours it what you'd call a chequebook restoration... :lol:

_________________
Image


Top
 Profile  
 
 Post subject:
PostPosted: Mon Aug 14, 2006 12:21 pm 
Offline
1275cc
1275cc

Joined: Mon Mar 22, 2004 7:41 pm
Posts: 4319
Location: Plumpton, NSW
68Delux wrote:
My head has Mk 2 S inlets and exhausts though, is that the same as yours?


My head has MK2 valves as well.

Last time was with a 40DCOE and std redline manifold.
I also have some go faster bits planned ready for the next dyno day chongly :D
KB


Top
 Profile  
 
 Post subject:
PostPosted: Mon Aug 14, 2006 6:57 pm 
Offline
Slow-Po
User avatar

Joined: Fri Jul 08, 2005 8:56 pm
Posts: 9979
Can someone please e-mail the URL of this thread to Chong's wife? :D

Looking forward to hearing more about this Chong, love the look of that gearbox. 8)

_________________
One should never skimp on the zip ties.

Image


Top
 Profile  
 
 Post subject:
PostPosted: Mon Aug 14, 2006 8:53 pm 
Offline
1360cc
1360cc
User avatar

Joined: Tue Jun 01, 2004 3:41 pm
Posts: 6858
Location: Special Tuning Sydney
Shhh! don 't tell the wife! what are you mad? :P

Game on Kev B! I have some pretty tricky stuff so we can compare notes :wink:

_________________
Lillee - 1969 Morris Mini K


Top
 Profile  
 
 Post subject:
PostPosted: Sat Aug 19, 2006 5:20 pm 
Offline
1360cc
1360cc
User avatar

Joined: Tue Jun 01, 2004 3:41 pm
Posts: 6858
Location: Special Tuning Sydney
WEEK 2 OF LILEE'S ENGINE BUILD

The week at work has been busy as usual but I have managed to steal away to the garage enough to continue progress. Mainly to gather, clean and paint parts.

I actually had a question from someone this week as to what I did to prepare the gearbox in the previous post. Well all I can say is a lot of hard work :lol: To get 35yrs of gunk off your parts, diesel is your friend! I have a diesel bath set up and dipped the gearbox and other parts in there for a long time (say about 2-3 weeks). Once that was out of the bath I used a combination of Supercheap Auto $2 degreaser, water, wire brushes and compressed air. There was alot of sludge in the smaller places so do look for that.

To paint it, i just rubbed it over with metho to, used white knight enamel metal etch as the first 2 coats. Note that there are more than 1 type of metal etch, some will say aluminium and some won't so read the label. Top coat was just white knight engine enamel silver, 2 coats.

The block
If you remember from last week, after hot tanking the block rust started flaking out of the water jacket. Well during the week I plugged up the water jacket holes and poured in extra strength molassas. Graham gave me a great tip, use hot water and add as little as possible. The hot water makes the molassas runny without diluting it too much. After one night I went to check on the block and it was ALL over my garage floor!!! :lol: :oops: one of the plasticine plugs had just popped off and the rest can be explained as gravity :x :P

So tip number 1: plug them properly and/or put it into a tub! Also hot water is the best stuff to clean molassas off :lol:

After replugging and and remixing molassas I let it sit for 2 nights and the results are pretty good. Before it was orange in the water jacket and now it is black/dark brown. Hot water to rinse and compressed air. I drove it over to Grahams today and he started boring the block.

Now remember how I said there were problems with one of the cylinders and it had deepish score marks on the bore? well the issue was that if .060" did not clean it up then i would have to go 1360cc and ditch my Hypertech pistons in favour of Graham's new 1360 dished pistons. Now secretly I was hoping that this would be the case, however the bore has cleaned up at .060". D'oh, i mean woohoo! :lol: . Pics of the block will be posted in next week's edition...

Rods
This week I also spent more time on the rods. This time i spent time cleaning them down so that they are all balanced right down to within a gram using Grahams very accurate scales. I also spent some time filing down the sharp edges near the head of the bolt on the rod as this is apparently where cracks start. All in all I am very happy with the outcome and I suppose if they break I only have myself to blame!!! :wink:

Image
Can't get more balanced than balanced!

Image
This is the final product

Cam
Graham also has been quite busy grinding my spider drive cam into an RE13. This should give my build the right amount of power and pickup mid range. I am very looking forward to putting it in now that I have seen the final product!

Image
A very bling virgin grind RE13 spider drive cam

Image
Check out that finish! Bling you can't see! :wink:

Crank
Graham also completed the balancing of the crank. Graham noted that the crank has had quite a fair bit taken off one of the lobes from the factory. This was due to perhaps casting faults at the factory and back then they didn't care where they took metal off, just so long as it was balanced. Well according to Graham's machine it was way off.

Image
Those two dials at the top should be near zero

Image
Crank on the balancing machine. Actually it is spinning here in the picture but the flash on the camera makes it look like it's still! you can even read my name on it!

After a fair bit of work, as alot had to be taken off to balance it, it was reading zero on the machine on the finest setting. Masterful work Graham!

Next episode: So hopefully Graham can get the block honed during the week. I have asked Graham to round off that whole in the block in between 2nd and 3rd cylinder (early 1100S block). Hopefully the pistons will be fitted to the rods and the Ford rod bolts modified. The flywheel will need to be balanced with the backplate and all the straps, screws, washers and spacers. Once all that is done, Graham will linish the crank and check the mains and big ends and let me know if I can go buy .010" ACL 780 Duraglide bearings for the crank and big ends, or need to grind to .020". Then next week we might start building the engine!!! I have to book the good doctor in for that one :wink:

I am getting pretty excited!!

_________________
Lillee - 1969 Morris Mini K


Top
 Profile  
 
 Post subject:
PostPosted: Sat Aug 19, 2006 5:38 pm 
Offline
1275cc
1275cc

Joined: Mon Mar 22, 2004 7:41 pm
Posts: 4319
Location: Plumpton, NSW
Excellent work Chong.
Look forward to the progress shots.
Also good to see some of the "magic" that goes on behind the scenes at GR's.

KB


Top
 Profile  
 
Display posts from previous:  Sort by  
Post new topic Reply to topic  [ 342 posts ]  Go to page 1, 2, 3, 4, 5 ... 23  Next

All times are UTC + 10 hours


Who is online

Users browsing this forum: No registered users and 2 guests


You cannot post new topics in this forum
You cannot reply to topics in this forum
You cannot edit your posts in this forum
You cannot delete your posts in this forum
You cannot post attachments in this forum

Jump to:  

© 2016 Ausmini. All garage work involves equal measures of enthusiasm, ingenuity and a fair degree of irresponsibility.