Ausmini
It is currently Sun Jun 22, 2025 1:16 am

All times are UTC + 10 hours


Post new topic Reply to topic  [ 342 posts ]  Go to page Previous  1, 2, 3, 4, 5, 6, 7 ... 23  Next
Author Message
 Post subject:
PostPosted: Sat Sep 02, 2006 10:22 pm 
Offline
1360cc
1360cc
User avatar

Joined: Tue Jun 01, 2004 3:41 pm
Posts: 6858
Location: Special Tuning Sydney
Did lots of work today on the 1330, too tired to write up a review. Will report back tomorrow. Sorry to all those who were eagerly awaiting this week's update :oops: :lol:

_________________
Lillee - 1969 Morris Mini K


Top
 Profile  
 
 Post subject:
PostPosted: Sat Sep 02, 2006 10:44 pm 
Offline
1275cc
1275cc
User avatar

Joined: Fri Aug 13, 2004 3:45 am
Posts: 2360
Location: SE QLD
Lillee wrote:
Gotcha. Hey Ebay has some! what calibre should I buy? :lol:


I use a .50 cal kit(dont ask where I got it!!)to do the oil galleries as it fits just perfectly.

The journals either a .223 or even a .17 spitzer cleaning brush will be gooders. I have both and just make sure you dont jam it in too hard as they can jam in the journal.

Another trick for the unwary is dont do them up tight - leave about 2-3 threads undone and brush wont jam.

Hooroo

_________________
Rob Forsyth
Miniot!!


Top
 Profile  
 
 Post subject:
PostPosted: Sat Sep 02, 2006 11:19 pm 
Offline
1360cc
1360cc
User avatar

Joined: Tue Jun 01, 2004 3:41 pm
Posts: 6858
Location: Special Tuning Sydney
.50 Desert eagle! :P (Dun ask me how I know that :lol: ) Cheers Rob, will look into it although at this stage i think I will just use earplugs and a coathanger...

_________________
Lillee - 1969 Morris Mini K


Top
 Profile  
 
 Post subject:
PostPosted: Sat Sep 02, 2006 11:32 pm 
Offline
1275cc
1275cc
User avatar

Joined: Fri Aug 13, 2004 3:45 am
Posts: 2360
Location: SE QLD
Lillee wrote:
.50 Desert eagle! :P (Dun ask me how I know that :lol: ) Cheers Rob, will look into it although at this stage i think I will just use earplugs and a coathanger...


Ummm no - a wee bit bigger than a desert eagle(link fed machine gun)

its copper too so wont scratch up the block too much - grab some "break Free" cleaner too - it gets all the carbon off.

Hooroo

_________________
Rob Forsyth
Miniot!!


Top
 Profile  
 
 Post subject:
PostPosted: Sun Sep 03, 2006 7:38 am 
Offline
religious status
religious status
User avatar

Joined: Fri Mar 19, 2004 6:19 pm
Posts: 39750
Location: near Baulkham Hills, NSW
I spray Supercrap's degreaser inside, leave for 5 mins, drag some foam earplugs thru it, then degrease again.
Then I hose it (watch out for the water police), then blow dry with compressed air.
The big gallery is easy to see if clean- shine a torch in the other end and look inside... :wink:

BTW it's getting hard to buy brass plugs for these galleries now, the last 3 motors I had to turn some from brass bar..
The little steel cup type ones available lately from Repco etc I find just don't seal as well. Must be made in China or something.... :lol:

_________________
DrMini- 1970 wasaMatic 1360, Mk1S crank, 86.6HP (ATW) =~125 @ crank, 45 Dellorto (38 chokes), RE282 sprint cam, 1.5 rockers, 11.0:1 C/R. :mrgreen:


Top
 Profile  
 
 Post subject:
PostPosted: Sun Sep 03, 2006 6:14 pm 
Offline
1360cc
1360cc
User avatar

Joined: Tue Jun 01, 2004 3:41 pm
Posts: 6858
Location: Special Tuning Sydney
The past week at work has been horrific... I wanted to spend some time checking and cleaning bits for the rebuild this week but alass, got nothing done :(

Clutch
I did manage to drop in at Karcraft on Friday morning to buy clutch parts and brake parts. I just wanted to touch briefly on clutch parts. I purchased a regular Borg Beck clutch plate which will be mated to a blue diaphram and my lightweight flywheel/backplate assembly.

Image
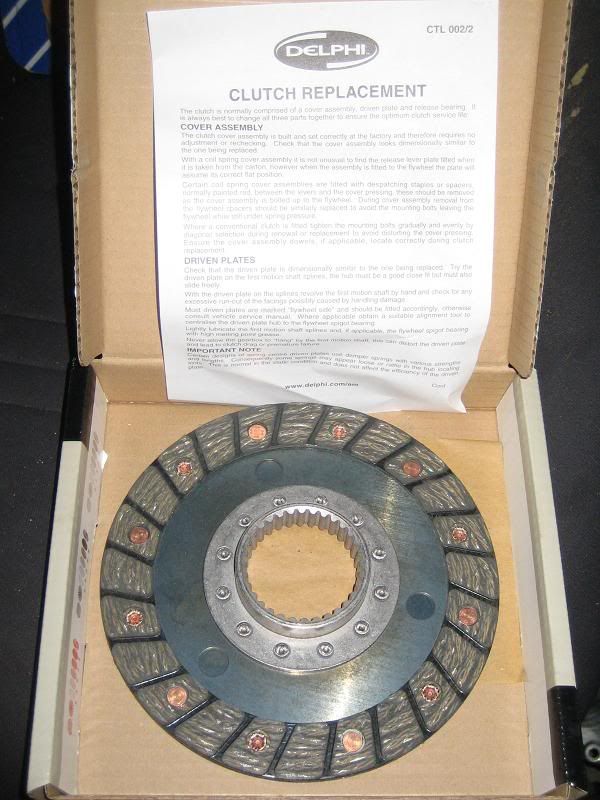
Regular Borg Beck plate

When I went to purchase the thrust bearings (sometimes known as a clutch release bearings) I discovered that there are 2 types. One being around the $25 mark and the other being $50 mark. Now logic says the more expensive unit has got to be better and it is no different in this case. How much better/different the $50 is compared to the $25 one is very surprising! The $50 is a Timkin brand "orginal design flat face" bearing and the other is well... thicker and does not have a big surface on the sides of the bearing.

Needless to say I purchased the Timkin brand. Both Graham and Kev agreed that this was the correct one to buy and the other one is well... not the right one :shock:

Image
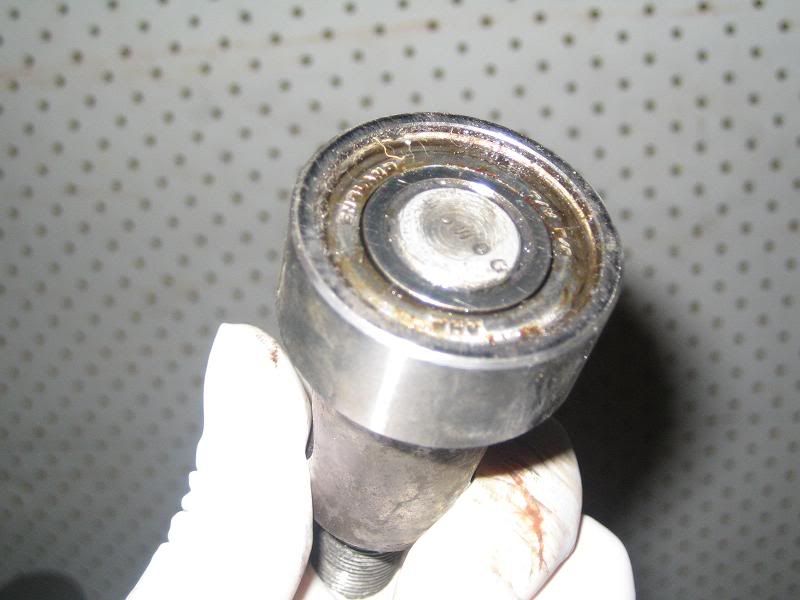
This is what was in the 1100S engine prior to strip down. Notice the thickness...

Image
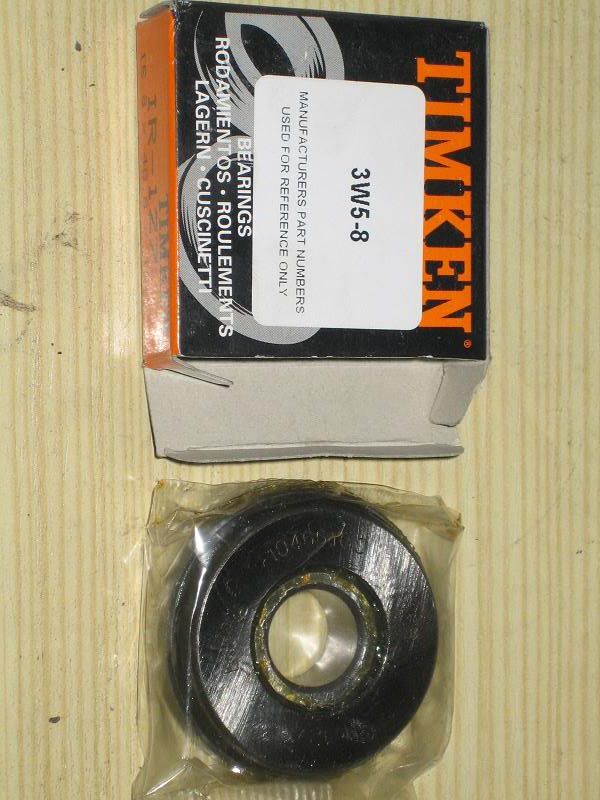
This is the Timkin one and the one I purchased. Although it's a bad shot, notice that it is considerably thinner than the above design, plus the there is more flat surface for the bearing/clutch to sit on.

Does someone who knows anything about this want to elaborate further?? :wink:

Ford Rod Bolts
This week our own Dr Mini managed to get my ford Rod Bolts machined down to fit the S conrods. They turned out great. This is what Matt (aka theminiman) uses on his 1400 strokers.
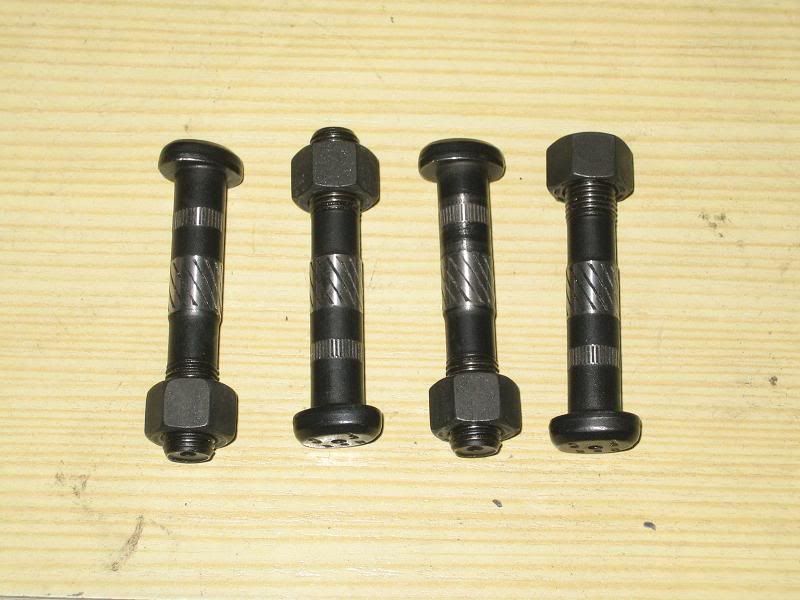
Image
Ford rod bolts

THIS WEEK AT GRAHAM'S

Although Graham was busy doing a few things for other customer's, he did manage to help me out with a few things this weekend.

Image
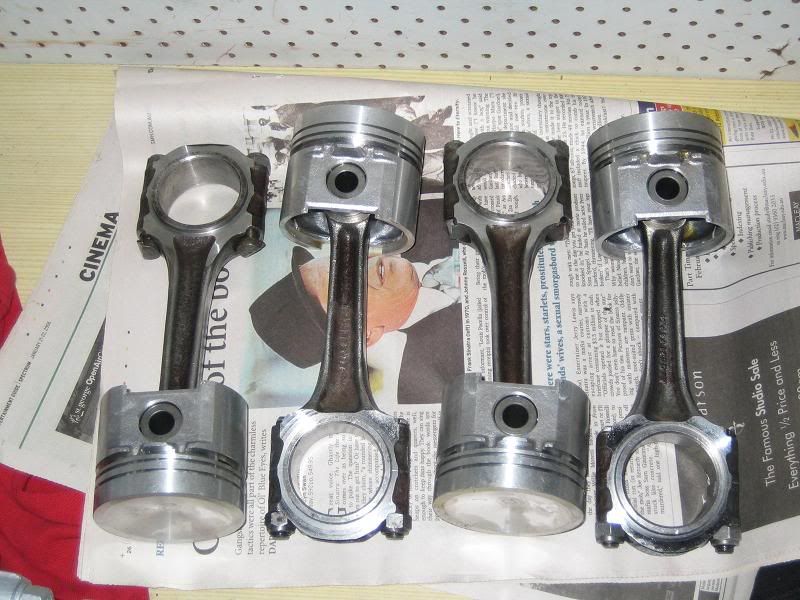
Here is are the finished pistons fitted

If you remember from last week, my crank, head and block was given a good bath by Graham's hot tank machine thingy.

The Head
Graham set up the mill to shave a few thou to clean up the gasket surface so that it was flat.

Image
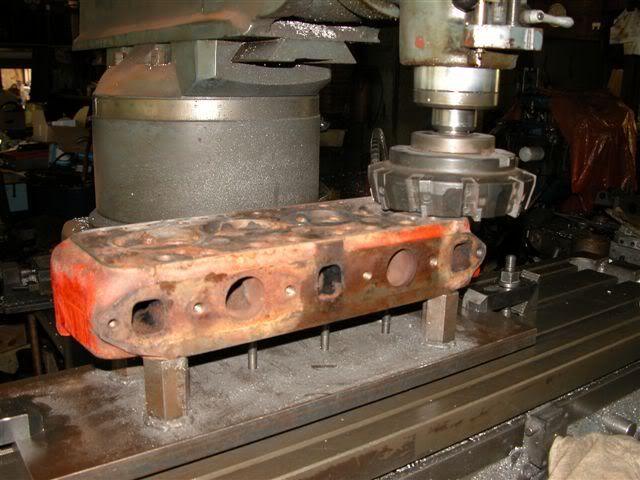
Head being decked to clean and make sure the gasket surface is flat

The first pass did not clean up the bit between 2 and 3 as there had been a groove worn into that part of the head. So we had to do a second pass.

The block: Dry assembly

The block came out of the washer looking great and we proceeded to do a dry assembly to check the deck height of the pistons. Essentially it should either be flush or a few though below the deck. You then have insurance of the head gasket before the piston hits the head :shock: which is not a good look.

Dry assembly was done on the bench using the old bearings which were kept in good order. The crank was mounted onto the block and the caps tightenned down with the bolts.

Image
Dry assembly was done just using plain engine oil as we did not torque down the bolts beyond hand tightness, and only for the center main.

Mains cap bolts
Graham wanted me to talk abit about bolts, in particular main cap bolts and rod bolts.

Now if you remember from my Mini Update 2 post (pg3) i purchased new Rover main cap bolts from Minispares to replace the old bolts that came out of the old engine. These bolts have the 6 slots in them to signify that they are Grade 8 bolts which you would expect them to be 35-40 Rockwell hardness. Well out of curiousity Graham threw a few bolts and studs onto the his hardness testing machine. The results are as follows:

Old standard mains bolt: 22 RH
New Rover standard mains bolt: 20 RH :shock:
Standard "S" mains stud: 22 RH
Standard 998 mains bolt: 26 RH :shock: :?

Graham called me this afternoon to tell me that he has discovered that most of the BMC standard bolts he has tested were all around the 20-26 RH range. This is no better than a Grade 5 bolt!!! Graham's theory is that during the hardness process when the bolts are taken out of the furnace and dipped into oil to flash cool them down, the bolts in the middle cool more slowly that the bolts on the outside of the strainer (remember we are talking about a strainer that contains thousands of bolts) and therefor that could explain the variance. That or all the bolts are 20RH :shock:

Image
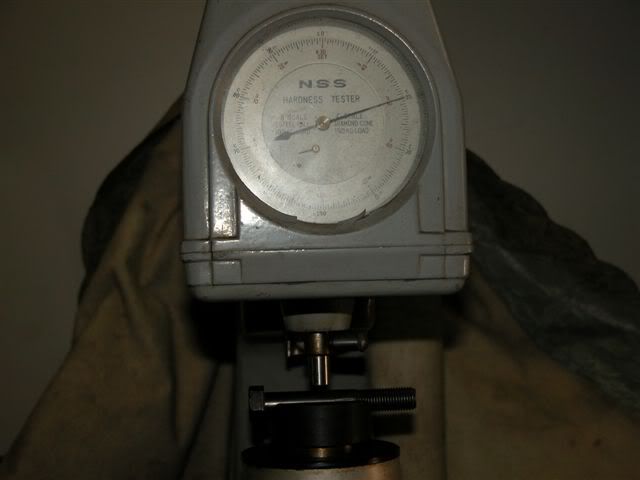
Rover bolt on Graham's hardness testing machine

Anyway this is all accademic apprently as Graham says it won't matter and just to use my new rover bolts...

Correctly tightenning bolts
Graham also made me take notes on what do to when properly torquing down bolts for hgih torque applications such as mains cap bolts. Most importantly is NOT to use Loctite as the friction generated from high torque can set the Loctite and therefor give you wrong readings. The torque and bolt stetch is what holds the bolt down and Loctite is not necessary for high torque applications such as this.

The best thing to do is place abit of LMM grease on the thread...

Image

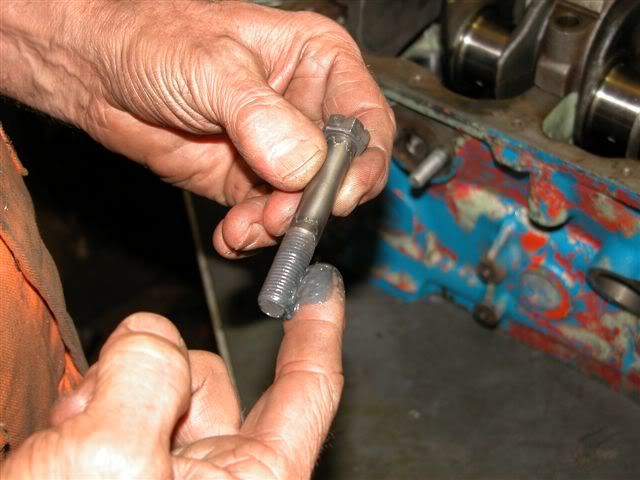
And a little on under the head...

Image

This ensures that there is enough lubrication to allow the bolts to torque down properly. This goes the same for rod bolts. ARP says to use grease on the thread to torque down conrod bolts.

Checking deck height and Crank problem

Graham gently fit my rods connected to the hypertechs into the block and tightened the rod bolts onto the crank using the old big end bearings. We turned the crank so that the pistons was at top dead centre to measure the clearance.

Image
This is how it is done with a dial gauge

Image
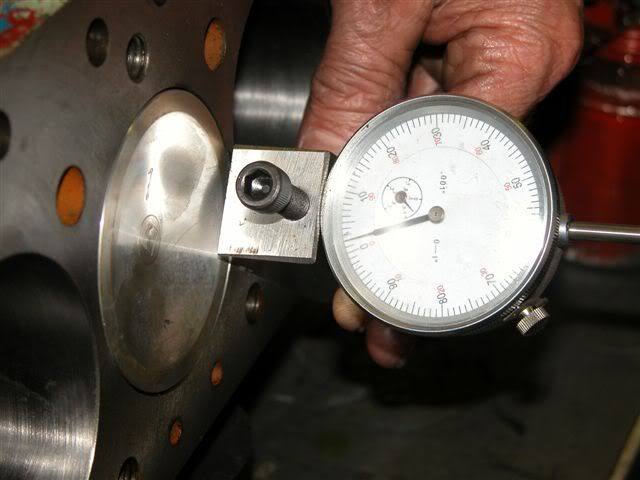
2 thou below the deck!!! phew! 8)

It was at this point that we discovered that the crank was not turning properly. Every 180 degrees it would get hard to turn :shock: :( . Graham was like "uh oh" and at this stage I was near tears :lol:

Anyway it turns out the crank was 1) 0.005" thou total bent at the middle main bearing and 2) the middle main was several thou out of round :shock: Masterfully, Graham took to work using the hydraulic press to try to straighten the crank. Luckily this was an 1100S tufrided crank and this could be done with relative safety. Graham said if it had been a EN40B S crank it would simply break if we tried to use a press :shock:

Sure enough after a few tries, we Graham managed to straighten it to dead true. What a legend :lol: Else it would have been "find a new crank" for me as 5 thou is too much to even grind back to true.

The crank needs to be sent away to Spiro at Seven Hills to be ground to +020 on the mains. Dr Mini has taken it away... More updates on this next week.

TODAY AT CHONG'S MINI GARAGE :lol:

I ordered EBC Blackstuff pads from the UK as part of the parts package I got this week. I managed to pick up a pair of new 7.5 inch Cooper S discs from Karcraft as well on Friday as my discs are down to their thinnest and cannot be machined anymore. Today I proceeded to install it all.

It wasn't all joy, i found that my drive flanges just would not seat properly on the new discs. The vernier was telling me it was off by up to 1mm on different ends on the flange :shock: This means when putting the discs on, the hub nut doesn't torque up properly, and secondly the disc is mounted at an angle and therefor will rub against the hub/steering arm.

So Tip number 2 from Chong: (only 2 so far! :oops: ) use the wheel nuts to pull the flange down onto the disc. Use verniers to check that the flange is indeed sitting properly on the disc, leave the nuts on and torque down the hub nut to be 100% sure that it is correctly mounted. The ultimate check is to turn the disc to make sure that the disc spins freely.

[EDIT] Doc has told me that the ultimate way to test if the flange is indeed flat is to use a dial guage with a magnetic mounting block. Sit the block on the hub somewhere and put the gauge onto the disc. Spin the disc and there should be no more than 1-2 thou whobble in the disc. If there is then try turning the flange 90 or 180 degrees and see if that fixes the problem. If not the flange may need machining or a new flange is in order. I will goto Hare and Forbes at North Parramatta this weekend (near Graham's actually :) ) and buy myself a dial gauge and magnetic base set 8) About time I invested in one :oops:

Took her for a spin after that and BOY what a difference! the black stuffs do grab better, although they are not bedded in yet, I am sure when they are they will be even better! I have not tried it but they will definately lock up if I push hard enough. The brake feel is great! I LOVE "S" DISCS :lol:

Next week
Well depending on how the crank goes, I will work further on the head as it requires a few things done such as heater hole, bypass hole and 10th 11th hole drilled. Being done by MDU seems unlikely by the day :( But I am not in a rush as I said. Lillee runs fine now! :D

Thanks for reading! Boy this update has been a big one! :P

_________________
Lillee - 1969 Morris Mini K


Last edited by Lillee on Mon Sep 04, 2006 12:39 pm, edited 3 times in total.

Top
 Profile  
 
 Post subject:
PostPosted: Sun Sep 03, 2006 8:40 pm 
Offline
1275cc
1275cc
User avatar

Joined: Fri Oct 15, 2004 2:46 pm
Posts: 5281
good work mate! keep thje update and pics comming
!


Top
 Profile  
 
 Post subject:
PostPosted: Mon Sep 04, 2006 8:42 am 
Offline
998cc
998cc

Joined: Tue Apr 06, 2004 4:30 pm
Posts: 871
Location: welington new zealand
No wonder i cant get any parts form graham as he is playing with your motor all the time.
It looks good tho, i must admit doing it and doing it right are 2 totally different things and if you can learn as you go you will come out of it a better man.
now leave him alone so i can get my stuff done please.lol

_________________
www.minicranks.com add me to your watch list and come back again soon, under construction.


Top
 Profile  
 
 Post subject:
PostPosted: Mon Sep 04, 2006 9:50 am 
Offline
1360cc
1360cc
User avatar

Joined: Tue Jun 01, 2004 3:41 pm
Posts: 6858
Location: Special Tuning Sydney
Hahaha I was wondering when I would get my first complaint about me hogging Graham's time :lol:

But seriously, I don't take up much of his time :oops: He's been very busy doing race engines for this weekend's historic meet at Wakefield Park. I am the least of your worries :lol:

_________________
Lillee - 1969 Morris Mini K


Top
 Profile  
 
 Post subject:
PostPosted: Mon Sep 04, 2006 3:12 pm 
Offline
998cc
998cc

Joined: Tue Apr 06, 2004 4:30 pm
Posts: 871
Location: welington new zealand
I actually threatened him with me coming over to kick his butt if he kept helping you.
he said thats it i wont help chong anymore, so haha. he is mine now and cos i live so far away he will imediately drop everything he is doing to cater for my every need.
yeah rite.
ITs ok i have had a quick chat with him on the phone to find out whats happening and tried to convince him im need the parts ai have customers waiting for them to arrive.
he was very understanding.

So what about your old 1098 motor chong is that still running sweet?

_________________
www.minicranks.com add me to your watch list and come back again soon, under construction.


Top
 Profile  
 
 Post subject:
PostPosted: Mon Sep 04, 2006 6:36 pm 
Offline
1360cc
1360cc
User avatar

Joined: Tue Jun 01, 2004 3:41 pm
Posts: 6858
Location: Special Tuning Sydney
Ahh my 1152 monster :wink: Yes it is still running sweet. The head is, as you know, brand new and the gearbox is actually in very good nick other than the sloppy gearchange. All it would need is perhaps new rings and a hone, bearings all round and a RE13 and it's ready to do again for another 100,000 miles.

I will be keeping it along with the head for future "projects" :wink: The head is a pearler :D

_________________
Lillee - 1969 Morris Mini K


Top
 Profile  
 
 Post subject:
PostPosted: Mon Sep 04, 2006 7:05 pm 
Offline
ausmini mod
ausmini mod
User avatar

Joined: Tue Jun 06, 2006 8:47 am
Posts: 1938
Location: Kellyville, NSW
Chong, you have had 'un-official' complaints from me about GR's time already :lol:

Actually, I was there today, and put your parts on the highest shelf in the shed... GR cant reach them and you dont know where they are MUHAHAHA

Im kidding mate, I hope you finish ASAP... and learn as much as you can.
I love the updates. Keep em coming.

GR did mention the hardness of your bolts... I may stick to the stock ones :shock:

Cheers,
Peter.

_________________
Image
Click here for the Turbo Conversion Thread!


Top
 Profile  
 
 Post subject:
PostPosted: Mon Sep 04, 2006 7:17 pm 
Offline
1275cc
1275cc
User avatar

Joined: Fri Aug 13, 2004 3:45 am
Posts: 2360
Location: SE QLD
You cruel buggers...lmao

Hooroo

_________________
Rob Forsyth
Miniot!!


Top
 Profile  
 
 Post subject:
PostPosted: Mon Sep 04, 2006 8:19 pm 
Offline
1360cc
1360cc
User avatar

Joined: Tue Jun 01, 2004 3:41 pm
Posts: 6858
Location: Special Tuning Sydney
:lol:

No worries, all my parts are in my garage at home so nerrr :P

Cooincidently Graham has informed me that ARP rod bolts and studs are 32RH :shock: That's heaps in comparison to 18-20RH :?

_________________
Lillee - 1969 Morris Mini K


Top
 Profile  
 
 Post subject:
PostPosted: Mon Sep 04, 2006 9:15 pm 
Offline
ausmini mod
ausmini mod
User avatar

Joined: Tue Jun 06, 2006 8:47 am
Posts: 1938
Location: Kellyville, NSW
Lillee wrote:
:lol:

No worries, all my parts are in my garage at home so nerrr :P


Crap! hmmm. OK Fella's I must have hidden someone elses parts. Sorry... :lol:

_________________
Image
Click here for the Turbo Conversion Thread!


Top
 Profile  
 
Display posts from previous:  Sort by  
Post new topic Reply to topic  [ 342 posts ]  Go to page Previous  1, 2, 3, 4, 5, 6, 7 ... 23  Next

All times are UTC + 10 hours


Who is online

Users browsing this forum: No registered users and 25 guests


You cannot post new topics in this forum
You cannot reply to topics in this forum
You cannot edit your posts in this forum
You cannot delete your posts in this forum
You cannot post attachments in this forum

Jump to:  

© 2016 Ausmini. All garage work involves equal measures of enthusiasm, ingenuity and a fair degree of irresponsibility.