Ausmini
It is currently Sun Jun 22, 2025 12:00 am

All times are UTC + 10 hours


Post new topic Reply to topic  [ 1864 posts ]  Go to page Previous  1 ... 4, 5, 6, 7, 8, 9, 10 ... 125  Next
Author Message
 Post subject:
PostPosted: Fri Oct 13, 2006 9:31 am 
Offline
THIS SPACE FOR RENT
User avatar

Joined: Wed Jun 09, 2004 3:35 pm
Posts: 11847
Betty wrote:
She only needs one hole...

Do you have two things to insert into the two holes at the one time ? :?:


you're just not creative enough... :)

_________________
Image


Top
 Profile  
 
 Post subject:
PostPosted: Sat Oct 14, 2006 9:14 pm 
Offline
1275cc
1275cc
User avatar

Joined: Fri Jun 17, 2005 10:31 am
Posts: 3183
Location: Burpengary, Queensland - Home of Tricky Performance Engineering
Siclad wrote:
i want flares like are on the zeemax kit... are they similar to sportspacks? :?


Siclad,

I would not hesitate to say that they are almost identical with the Sportspack arches.

Cheers,
Tricky

_________________
"Not Speeding Officer..........Qualifying"


Top
 Profile  
 
 Post subject:
PostPosted: Sat Oct 21, 2006 7:19 am 
Offline
1275cc
1275cc
User avatar

Joined: Fri Jun 17, 2005 10:31 am
Posts: 3183
Location: Burpengary, Queensland - Home of Tricky Performance Engineering
Chapter 10 - Wheels, tyres and other stuff.

Evening viewers. I must apologise for the lengthy delay in updating this thread, family and work must come first, and not to mention a new position with the local P&C.

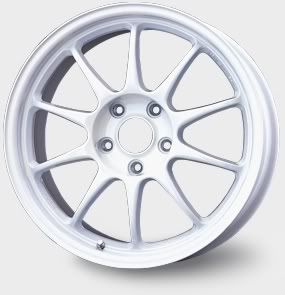
It was at this time that I turned my attention to purchasing some new wheels for El Gato ('The Pussy' as some of you have decided to call it - bah, its all good fun!). The simple fact that we went to 8.4" brakes, dictated that the standard 10'' Contessa rims would not do. At the time of looking for new wheels, I honestly thought that there was not a lot of choice available for 13" rims in Australia - how wrong I was.

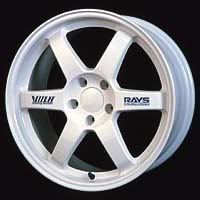
If I had taken a bit more time and done a bit more research, there was a whole array available to me - instead I rushed in. Even so, the Performance Superlites (super heavies in my book - ouch!) look fine, but unfortunately are quite common now. Since then, I realised I could have bought a set of Volk TE37's in 13" from Japan, that weigh an incredible 4.5lbs each!!!

When I bought my set of 13 x 7 Superlites in May last year, there were not that many around, so I decided to purchase them. The colour I chose was the platinum centre, with the standard polished outer rim. They did look nice. Next, I turned my attention to tyres. Man, did I do some research on this or what! There are not a huge (or even big!) range of tyres available for 13" rims. But, I wanted the best tyre I could buy, irrespective of the price (its the only thing between you and the road!). I finally found out that Dunlop make a 195/45 ZR13 in their SP9000 range. This tyre is regarded as one of the best performing tyres on the market, and fitted to a lot of high-performance cars standard. The problem was, they were made in Japan (yay!) but were not exported to Australia (crap!).

Read up on the Dunlop SP 9000 here, and discover why I chose it:
http://www.dunloptyres.com.au/

John (?) from Stuckey Tyre Services in Victoria was contacted to see if they could get the rims for me - all good. So, why did I contact a Victorian dealer when I am in Queensland, it is simply because Stuckey's were the only Dunlop agent who said they could get Dunlop SP9000 tyres in 13" for me. And they did. I ended up paying all up $1,650 for all four tyres and wheels, landed at my door. The tyres each were $220.

Contact Stuckey's yourself for a great deal:
http://www.stuckey.com.au/

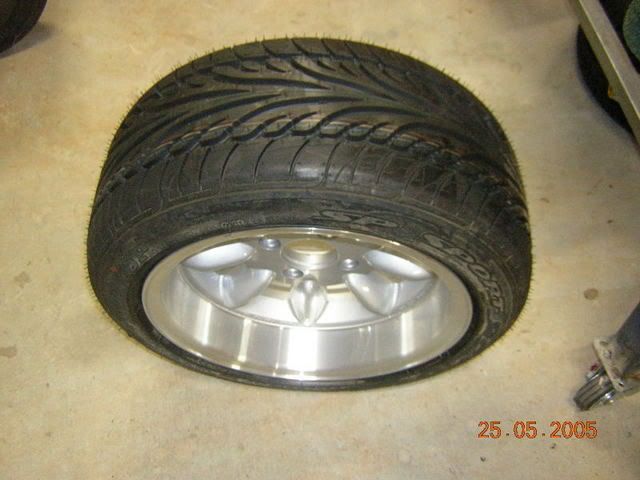
The wheel and tyre combo:
Image

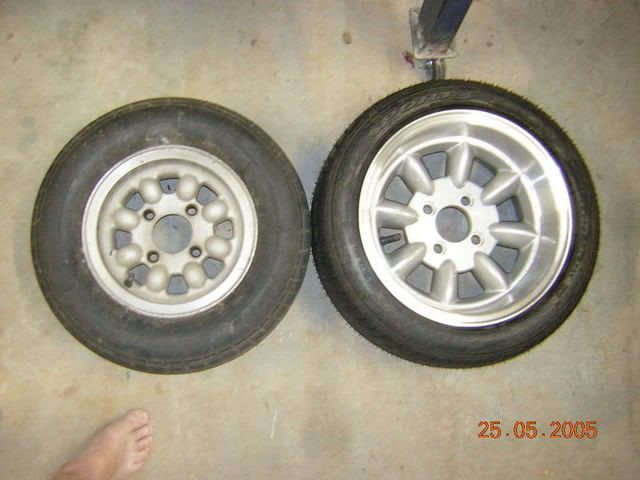
Compared to the 10" Contessa and 165/70 R10:
Image

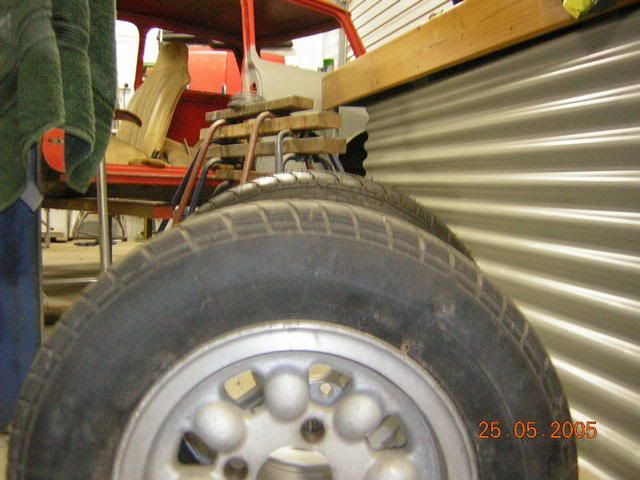
In side profile, not a lot of height difference:
Image

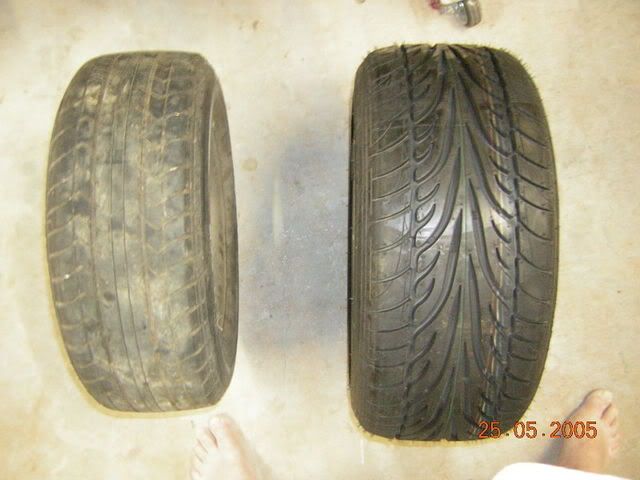
And finally, tyre widths - 195mm vs 165mm:
Image

Since then I have sold my Contessa's for $200, so the new wheel and tyre combo in fact cost me $1450 all up. Would I buy a set of Superlites again?? - definately not!! For what they are they are an extremely heavy rim. I am going to paint the inner rim white though, to compliment the paint scheme I have chosen, and leave the outer rim polished.

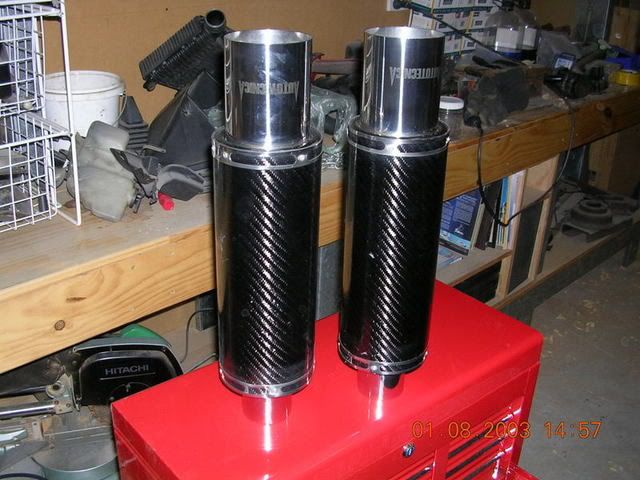
Now that the wheels and tyres had been sorted, it was time to turn my attention to the exhaust. This required a new dump pipe, and entire exhaust system, because there was no way I was keeping the super restrictive dump/cat combo of the standard Starlet. So, I went shopping for the rear exhausts for the Mini, the only part that would be seen when the car was on the road. I purchased off eBay, 2 x Autotechnica carbon cannons. Man they looked good and light, holy cow these things weighed sweet FA! Price, and incredible $170 for both of them - hell yes! (Cant wait to hear the raucous snarl that will eminate from these twin beauties).
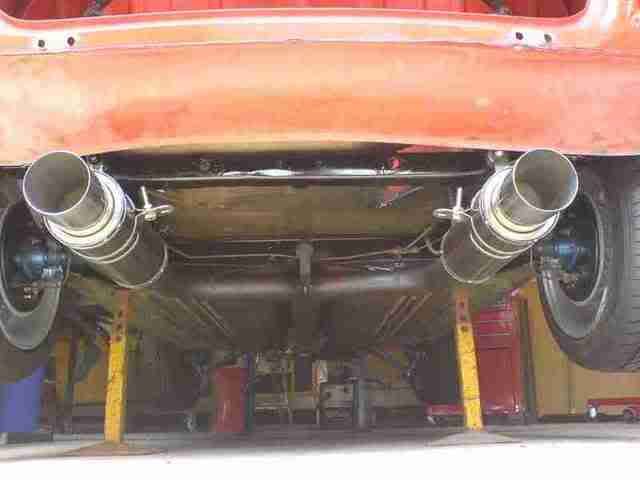
The cannons:
Image

Now that the rear cannons had been taken care of, it was time to sort out the rest of the system. Because the rear boot, and whole car for that matter, has been masterplanned, I knew that a rear alloy drop tank was always to go in, so the rear part of the exhaust has to be a split system to go around it (hence twin cannons). The job was given to Les from Phat Pipes, who came highly recommended and is heavily involved in the custom rod scene.

Les' mandate was as follows:
1. The exhaust has to flow very high volumes and not be restrictive
2. The twin system at the back had to be 2 1/2" diameter (throat diameter of the cannons)
3. The twin system at the back had to leave enough room for the drop tank (we already knew exactly how wide it was going to be)
4. The whole system had to sit up high under the car to give as much under car clearance as possible
5. The dump pipe was to be engineered as to be cut-off when the new, bigger turbo was to go on (part of Stage II, and always included in the master plan)

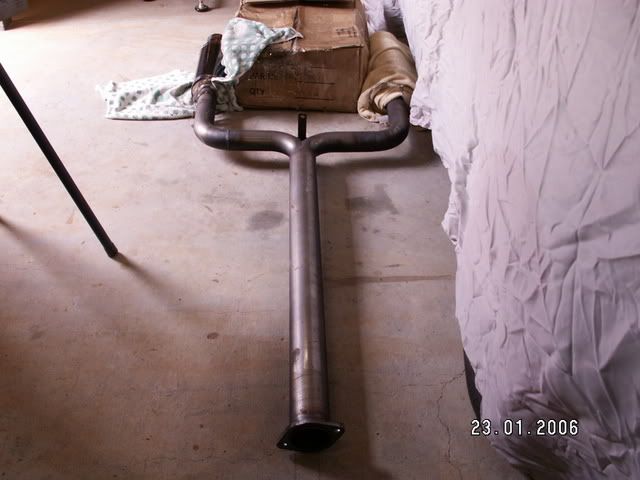
So Les went to work, two days later and $450 saw me put El Gato back on the trailer and take it home. Man, was I impressed with Les' work. This guy is a master. The whole system is 3" from turbo right back to the beginning of the rear subframe, where it splits into twin 2 1/2" pipes and ends at the cannons. Les' engineering and workmanship is top class - I would recommend him to anyone.

The exhaust system from the cat back. 3" into twin 2 1/2":
Image

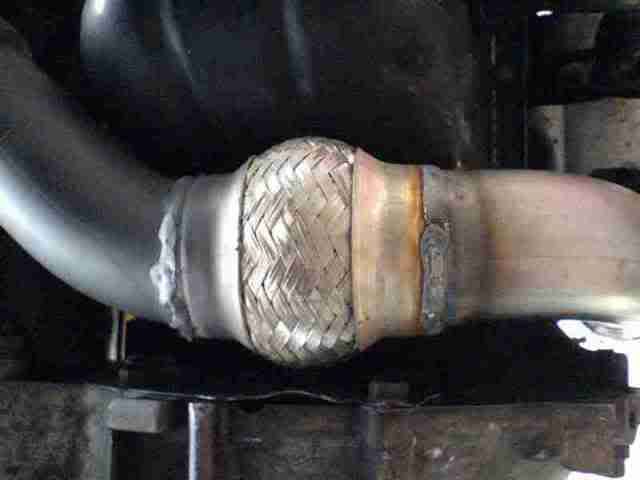
The 3" dump - to be replaced when the TD04L is installed:
Image

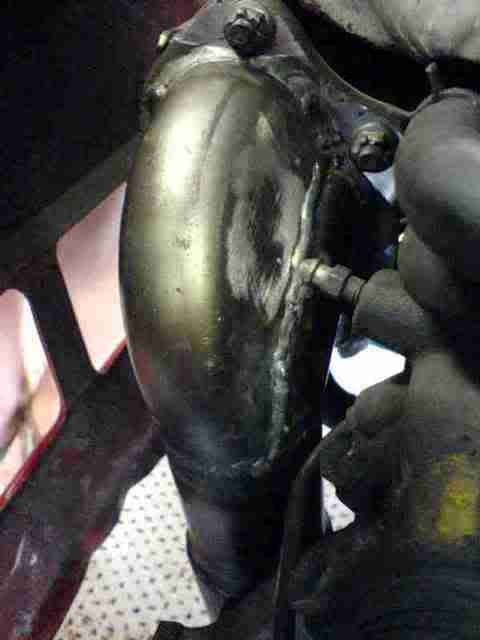
Les' handiwork is evident - 3" pipe bent around the rear mount so there is plenty of room to work on the mount even if the pipe is hot:
Image

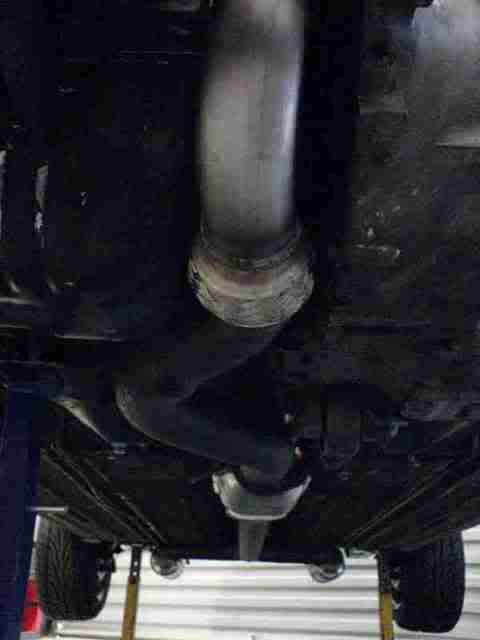
The flexible link so the pipe wont crack when the engine is under load and moving around:
Image

The view from the back. There will be absolutely no restrictions with this system, guaranteed!
Image

Next time in Chapter 11 - We engineer the boot space like no other!!

_________________
"Not Speeding Officer..........Qualifying"


Top
 Profile  
 
 Post subject:
PostPosted: Sat Oct 21, 2006 10:08 am 
Offline
1360cc
1360cc
User avatar

Joined: Thu Feb 03, 2005 1:41 pm
Posts: 12311
Location: Rockingham - Collie WA
Awesome exhaust.

Got me thinking about changing mine now - curse you! :lol:

_________________
Too many cars, and too little time.


Top
 Profile  
 
 Post subject:
PostPosted: Sat Oct 21, 2006 10:48 am 
Offline
1275cc
1275cc
User avatar

Joined: Sat Mar 05, 2005 11:00 am
Posts: 2271
Location: coffs harbour
Archangel007 wrote:
Siclad wrote:
i want flares like are on the zeemax kit... are they similar to sportspacks? :?


Siclad,

I would not hesitate to say that they are almost identical with the Sportspack arches.

Cheers,
Tricky


thanks tricky 8)


Top
 Profile  
 
 Post subject:
PostPosted: Sat Oct 21, 2006 8:50 pm 
Offline
998cc
998cc
User avatar

Joined: Sun Jun 11, 2006 2:15 pm
Posts: 604
Location: caboolture qld
Archangel007 is there any more modifications needed to fit 195/45/r13 tyres paired to fitting the standard 175/50/r13 tyres. if you know what i mean.

sweet exhaust to.
cheers

_________________
Cheers Dan

FIRST COMES THE MONEY, THEN COMES THE POWER, THEN COMES THE WOMEN.!!


Top
 Profile  
 
 Post subject:
PostPosted: Sun Oct 22, 2006 9:12 pm 
Offline
1275cc
1275cc
User avatar

Joined: Fri Jun 17, 2005 10:31 am
Posts: 3183
Location: Burpengary, Queensland - Home of Tricky Performance Engineering
Hi Badass,

I found with my setup that on full lock, the tyres srubbed the outer guards.

This is not due to the tyre width, but more to do with the massive offset of the rims.

I trimmed about 15mm off the edge of my guards, then rolled a new 5mm lip onto the edge. So in reality, I trimmed about 20mm all round.

Since then, not a problem on full lock or full compression/rebound.

Cheers,
Tricky

_________________
"Not Speeding Officer..........Qualifying"


Top
 Profile  
 
 Post subject:
PostPosted: Sun Oct 22, 2006 9:13 pm 
Offline
1275cc
1275cc
User avatar

Joined: Fri Jun 17, 2005 10:31 am
Posts: 3183
Location: Burpengary, Queensland - Home of Tricky Performance Engineering
Hi Badass,

I found with my setup that on full lock, the tyres srubbed the outer guards.

This is not due to the tyre width, but more to do with the massive offset of the rims.

I trimmed about 15mm off the edge of my guards, then rolled a new 5mm lip onto the edge. So in reality, I trimmed about 20mm all round.

Since then, not a problem on full lock or full compression/rebound.

Cheers,
Tricky

_________________
"Not Speeding Officer..........Qualifying"


Top
 Profile  
 
 Post subject:
PostPosted: Sun Oct 22, 2006 9:31 pm 
Offline
998cc
998cc
User avatar

Joined: Sun Jun 11, 2006 2:15 pm
Posts: 604
Location: caboolture qld
Archangel007

is that 20mm off the standard guards
do you have any pictures of your guards after you cut them wihout the arches and with the wheels on.

cheers

_________________
Cheers Dan

FIRST COMES THE MONEY, THEN COMES THE POWER, THEN COMES THE WOMEN.!!


Top
 Profile  
 
 Post subject:
PostPosted: Sun Oct 22, 2006 10:09 pm 
Offline
1275cc
1275cc
User avatar

Joined: Fri Jun 17, 2005 10:31 am
Posts: 3183
Location: Burpengary, Queensland - Home of Tricky Performance Engineering
Hi badass,

I traced a line around the original guard, but +30mm (I used the guard as the profile, and just used a 30mm spacer).

Then, I cut about 20mm inside this line, but followed it.

Then, I bent up a new lip (actually now that I measure it, it is about 10mm wide), so I stayed about 10mm away from the line.

So, all in all, I took off 20mm in total from the guard - 10mm in cut-off material and 10mm in a new lip.

Here is the guard before I started:
Image

And afterwards:
Image

Image

Sorry, no pics yet with wheels back on. BTW - I will cover all this in Chapter 12 (or 13)

Cheers,
Tricky

_________________
"Not Speeding Officer..........Qualifying"


Top
 Profile  
 
 Post subject:
PostPosted: Mon Oct 23, 2006 3:38 pm 
Offline
1098cc
1098cc
User avatar

Joined: Thu Sep 30, 2004 3:12 pm
Posts: 1461
Location: Brisbane
Tricky mate do you have to cut any more of the guards to fit the kit?

_________________
If you want more inches, stroke it
Life's a garden.... Dig It!
http://www.ausmini.com/forums/viewtopic.php?t=20746


Top
 Profile  
 
 Post subject:
PostPosted: Mon Oct 23, 2006 7:42 pm 
Offline
Yay For Hay!
User avatar

Joined: Wed Sep 08, 2004 9:27 pm
Posts: 15912
Location: Wodonga - Vic/NSW border
it will be a snarling growling little pussy!!

won't it be louder than the law permits?

I found even the 10" superlites to be super-heavy as well - the same as the standard S steelies... with those thick sidewall tyres they must weigh crap loads

_________________
did I tell you that I won a trophy?


Top
 Profile  
 
 Post subject:
PostPosted: Mon Oct 23, 2006 8:44 pm 
Offline
1275cc
1275cc
User avatar

Joined: Fri Jun 17, 2005 10:31 am
Posts: 3183
Location: Burpengary, Queensland - Home of Tricky Performance Engineering
Gordo wrote:
Tricky mate do you have to cut any more of the guards to fit the kit?


Hey Gordo, how you doing?

No cutting of the guards required to fit the kits (just a bit of drilling and screwing)

You do however, have to notch the front arches where the lower door hinge is because the arches are made for internally-hinged rover doors.

Hope this helps.....

Tricky

_________________
"Not Speeding Officer..........Qualifying"


Top
 Profile  
 
 Post subject:
PostPosted: Mon Oct 23, 2006 9:05 pm 
Offline
1275cc
1275cc
User avatar

Joined: Fri Jun 17, 2005 10:31 am
Posts: 3183
Location: Burpengary, Queensland - Home of Tricky Performance Engineering
skssgn wrote:
it will be a snarling growling little pussy!!

won't it be louder than the law permits?

I found even the 10" superlites to be super-heavy as well - the same as the standard S steelies... with those thick sidewall tyres they must weigh crap loads


Hi Simon (my fellow collaborator),

The note I would really like is that raucous snarl you get from a Ferrari or Maserati (now thats music!)

I am hoping that it wont be too load - I am allowed 95dB at 1 metre from the rear of the car - so fingers crossed I will be alright. In QLD the cat converter is regarded as a muffler as well, so I am within the law there.

Ah yes the wheels. Not meaning to slag the Superlites, but they are incredibley heavy (too heavy). At the moment, each wheel/tyre combo weighs exactly 12.4 kg (balanced, but no nuts. I had to know this for my unsprung weight calculations). Thats massive!!! I will not be using the Superlites again until they can halve their rim weight.

I have already chosen the rims for our next conversion - either Enkei Sport ES-Tarmac (preferred) or Volk TE-37 (second choice). The Enkei's weigh in at 4.8lbs each and the Volks at 4.5lbs each. In comparison the Superheavies are over 12lbs each.

Here is the Enkei's - standard fitment on McLaren F1 by the way:
Image

And the Volk's:
Image

Bloody nice rims, but I must admit they arent cheap. Mind you, you pay for what you get!

Cheers Bud,
Tricky

_________________
"Not Speeding Officer..........Qualifying"


Top
 Profile  
 
 Post subject:
PostPosted: Wed Oct 25, 2006 8:57 pm 
Offline
ET 13.457 seconds , OH YEAH !!!!
User avatar

Joined: Sun Sep 19, 2004 8:35 am
Posts: 7826
Location: Somewhere Around Sydney
Volk wont do them in a 4x101.6mm PCD i believe only 4x100?

_________________
Image
Starlet Conversion:
http://www.ausmini.com/forums/viewtopic.php?t=15484


Top
 Profile  
 
Display posts from previous:  Sort by  
Post new topic Reply to topic  [ 1864 posts ]  Go to page Previous  1 ... 4, 5, 6, 7, 8, 9, 10 ... 125  Next

All times are UTC + 10 hours


Who is online

Users browsing this forum: No registered users and 15 guests


You cannot post new topics in this forum
You cannot reply to topics in this forum
You cannot edit your posts in this forum
You cannot delete your posts in this forum
You cannot post attachments in this forum

Jump to:  

© 2016 Ausmini. All garage work involves equal measures of enthusiasm, ingenuity and a fair degree of irresponsibility.