CHAPTER 13 - THE BODY
Hi Guys,
Sorry about not providing regular updates, but life kind of has a habit of getting in the way - you know what I mean!
Anyway, enough of that. I was intending to finish the section on the boot, and have all the boot stuff in and finished to show those who are interested what I have done in that area and why. Well two things have happened that stopped me doing this:-
1. Started work in earnest on the body to try and get it finished,
2. Camera no longer available to to take updated shots and waiting for insurance to buy me a new one.
So, if you will indulge me here, I would like to deviate (once again!) to the bodywork of El Gato, and what I have done here. I wanted to have a Mini that was slightly different to everybody else's, with a touch on uniqueness. The best way to do this of course is with the external picture, its what everyone sees first before they ask you whats under the hood (after you have lapped them!).
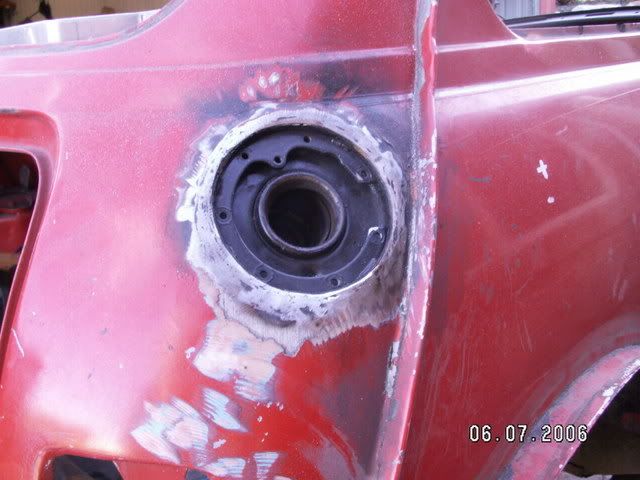
The first idea I wanted to achieve was to try and streamline the body somewhat. I always knew that I would be putting a Zeemax kit (or similar) onto the clubman, and this would have induced extra drag, as well as extra downforce (its a direct trade-off). So, to limit the amount of external drag as much as possible. I looked at what I could sreamline with the body. The first thing was the fuel filler neck. I decided that with the internal alloy tank, that the filler could go and be replaced by something a bit smoother. I went to the local bike wreckers and grabbed a fuel filler out of a Kawasaki ZXR750 and fabricated that in where the existing filler location is:
Then I decided that I really like symmetry, and the fact that I didint care which side of the bowser i pulled up on. Back to the bike wreckers and another matching ZXR750 fuel filler. This time on the drivers side.
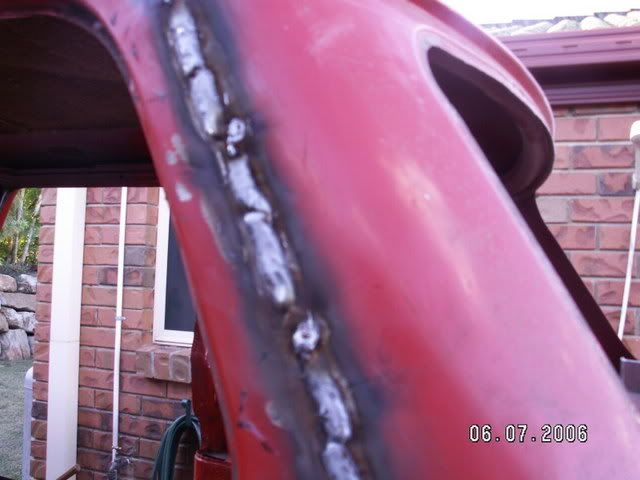
Next to get my attention was the fact that I could save 45 square inches of frontal area by deseaming the body. Now this little exercise is not to be undertaken lightly, and it took me several weekends of welding grinding, welding then more grinding to get the job done. And I have to tell you, I dont ever want to do it again - ever!!!
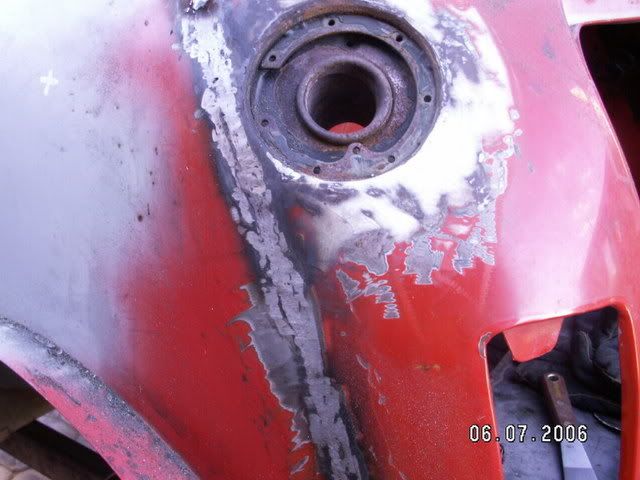
Here is a pic of the rear passenger side seam - welded in small (about 1.5 inches) sections. Its a matter of grind a bit off, weld a bit, then move along about 12 inches, grind a bit off, weld a bit etc.
Once it was all done, I lightly peined the seam in abit to allow a skim coat of bog to cover the ground off area. It came out OK, but it was a lot of mucking around!! You can see in the first picture of the fuel filler where the weld has been ground back.
The next bit of the body to get my attention was the front guards. Because I have chosen to go with 13x7 Superlites (should be called Superheavies!), the front wheels at full lock scrub on the corners of the guards. To remedy this, I cut about 15mm, then rolled a 10mm lip to enable to tyres to clear. This has been covered previously in this thread but I just might mention it again here along with some different pics, so you can see whats been done.
Passenger side:
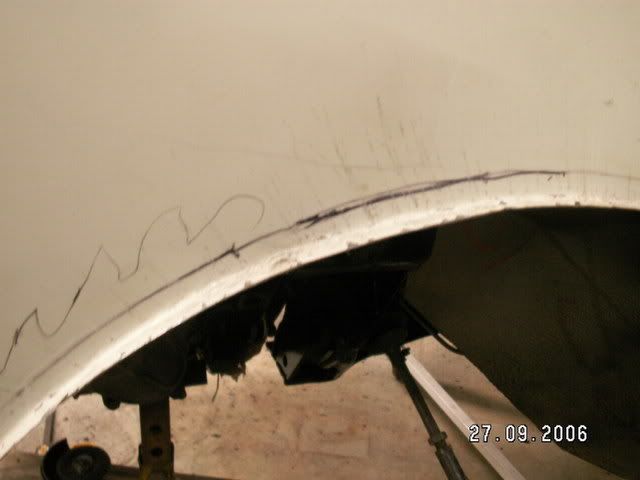
And drivers side arch.

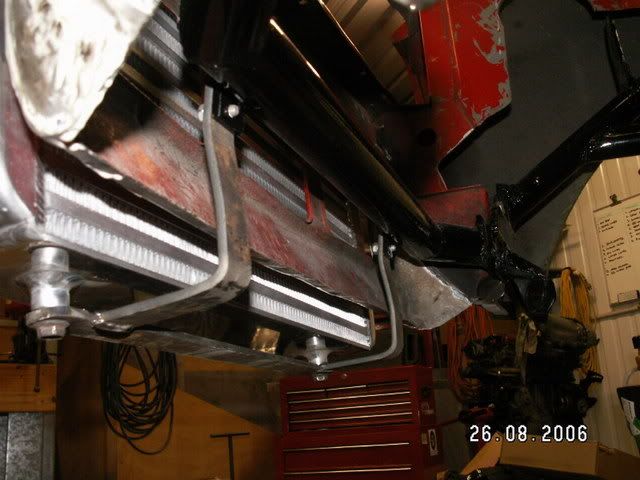
Now, another area to get my attention, which has also been mentioned elsewhere, was the body mods done at the front of the car to accomodate the front-mount intercooler (FMIC). With the intercooler now mounted at the front, and increased in size for efficiency as well, there had to be a way of mounting it. The only way I saw to do this effectively was to alter to front lower apron of the clubman. This would allow the link bar for the subframe to pass through ininhibited, and to have a place to attach the FMIC lower support bracket. This is how it turned out. View from the side so you get an idea of the profile.
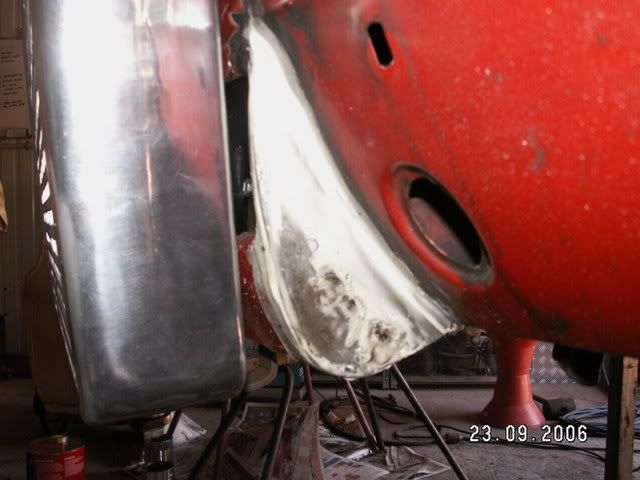
Profile from other side.
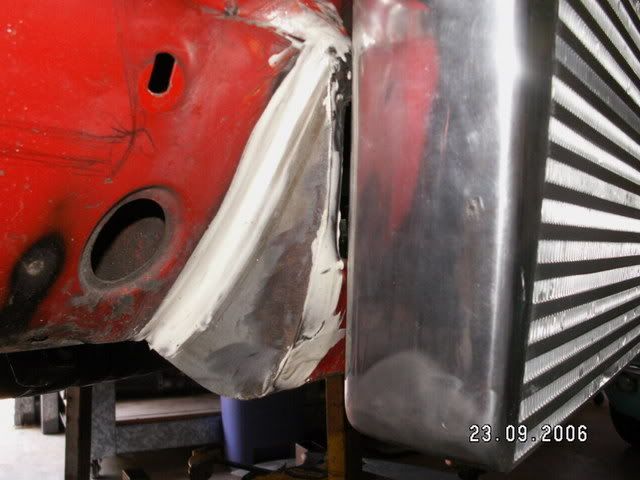
And this shot is from behind. You can see how the bottom FMIC mount bracket bolts to two tabs welded onto the subframe link bar. It worked out incredibly well - and its all hidden thanks to the front spoiler!
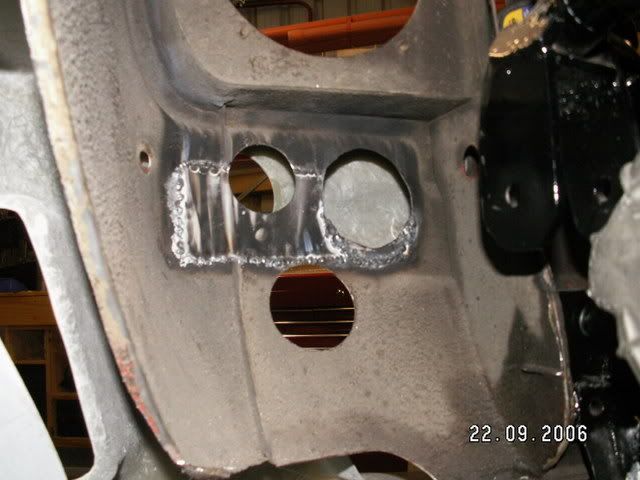
While we are at the front of the car, I also decided to fill in where the original front indicator/park lights went. The idea behind this was to have the front indicators set into the fibreglass Zeemax front spolier, and the park lights would be taken care of by angel-eye headlights. So, I welded in cover plates to these two areas, then proceeded to hole-saw 1 x 3 inch hole for the intercooler pipes, and 1 x 2 inch hole for the back of the indicator per side (the indicator is the same round ones you see on Landrover 110 County's etc). Also the passenger side will have 1 extra hole (1 x 2 1/2 inch) for the cold-air intake that feeds the air-box. This will operate like a ram-air effect seen on high-perfomance sports cars and bikes. This is the passenger side area viewed from inside the guard. The drivers side only has the two holes.
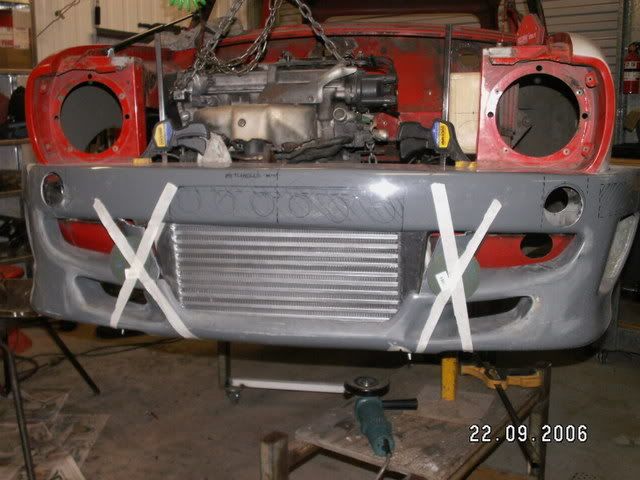
The FMIC pipes will be hidden behind the spoiler, and you can see from this front-on shot where the cold-air intake is to go, and also the round indicators. The taped in sanding discs indicate where the 100mm driving lights will be set-in to the spoiler. The spoiler is yet to be finished. This will be done by shaping with foam and then fibreglassing a plug, then a mould from the plug, then the spoiler itself.
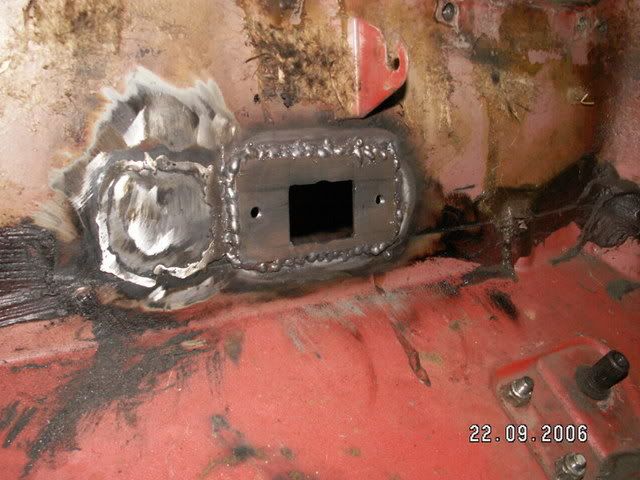
Now, what was next on the list - oh yeah, the penetration through the firewall for the shift cables. This was basically very easy, I just cut a square penetration through the firewall, made up a small square piece of 3mm plate, drilled and tapped two holes in it for the cover plate, then welded it to the firewall - simple (well not really - the filled in spot next to it was where I first had the penetration - dead centre above the tunnel, only to realise that the cables where on too much of a radius to work properly and they were binding, so I had to move it over about 120mm). Lucky it will all be hidden by carpet!
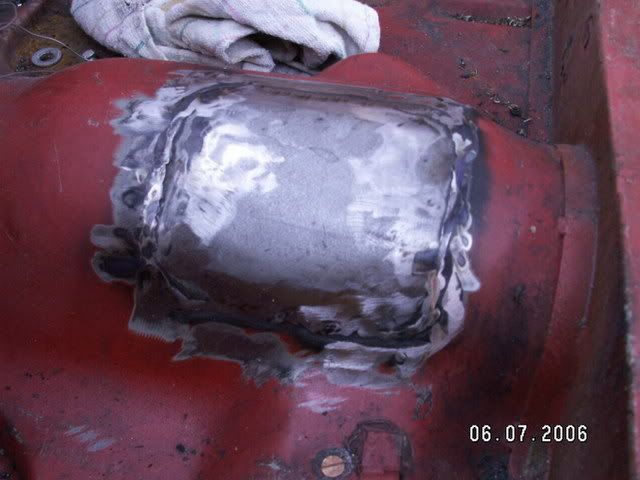
Next item on the list was to fill-in the hole in the tunnel where the rod-change for the A-series used to come through the floor. Seeing as how the Starlet linkage and shift cradle is all mounted inside the cab, this penetration was no longer needed. A piece of 1.2mm sheet rolled to suit the tunnel then welded in.
Next Chapter - Finishing the Body (I promise!!)