Ausmini
It is currently Mon Jul 21, 2025 9:22 pm

All times are UTC + 10 hours


Post new topic Reply to topic  [ 13 posts ] 
Author Message
PostPosted: Sun Feb 25, 2007 5:15 pm 
Offline
998cc
998cc
User avatar

Joined: Thu Aug 03, 2006 9:00 pm
Posts: 536
Location: Sydney
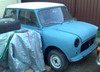
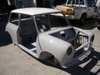
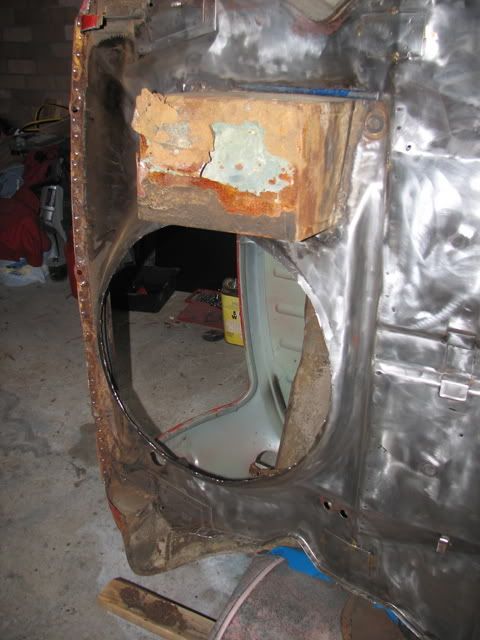
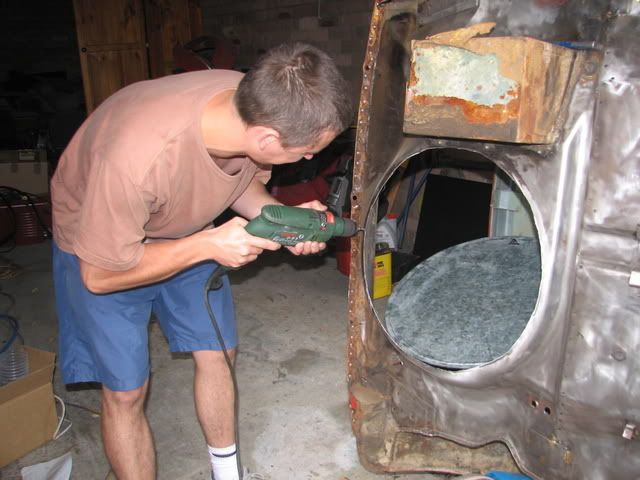
This is what we have. Rather then patch up each individual rust hole it is far easier to cut the whole lot out and start over. Replaceing one hole is faster then doing ten. Im using some 1mm galvanised sheet metal. Rust now you basterd.
Image

Step 1
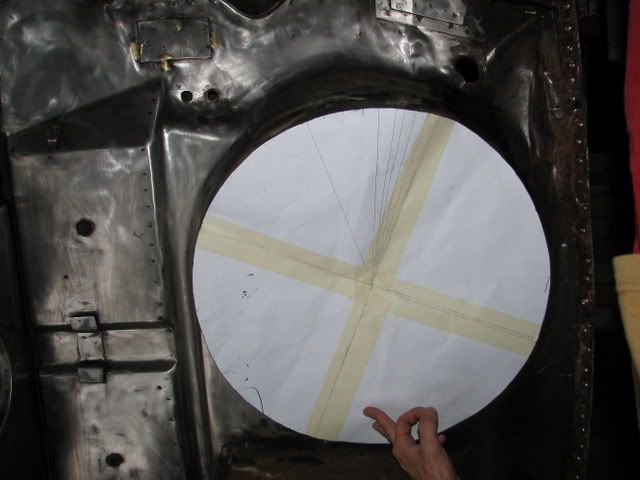
Measure the old wheel well to find out how large your patch will have to be. The spare wheel well in minis from edge to edge is 49cm round.

Step 2
Now cut out a templet onto some cardboard and place it onto the wheel well to check that your metal one will fit. (it does)
Image

Step 3
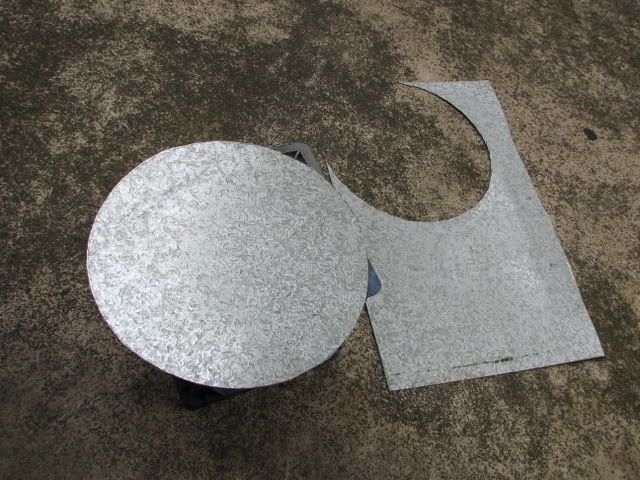
Place your cardboard template onto your sheet of metal and trace around.
Image

Step 4
Cut your wheel well out of the sheet metal using a angle grinder fitted with some cutting disks. (dont use grinding disks as they arent meant for cutting they are for ginding) Cut 1-3 mm outside the line to allow for trimming and for any slips you make with the grinder. Now place your ginding disk on the grinder and round off any sharp edges and trim or grind down to your line you marked.
Image

Step 5
Now place your shiney new bit of sheet up to your wheel well to check that it will fit. When you are satisfied you can cut out the old one.

Step 6
Now cut out your old wheel well but leave a 10mm edge. What I mean is your new wheel well is 49cm across, you cut the one out of the car at 47cm with the angle grinder and a cutting disk. When you have it cut out, grind down the edges with the grinding disk on the angle grinder not a cuttiing disk.
Image

Step 7
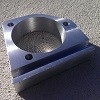
Now I put a 10mm step in the patch using a sepping machine. You dont have to do it but I like to as it allows the patch to recess into the hole and sit a little more flusher on the underside of the car. If you cant get access to a stepper you can skip this step.
Image
Image

Step 8
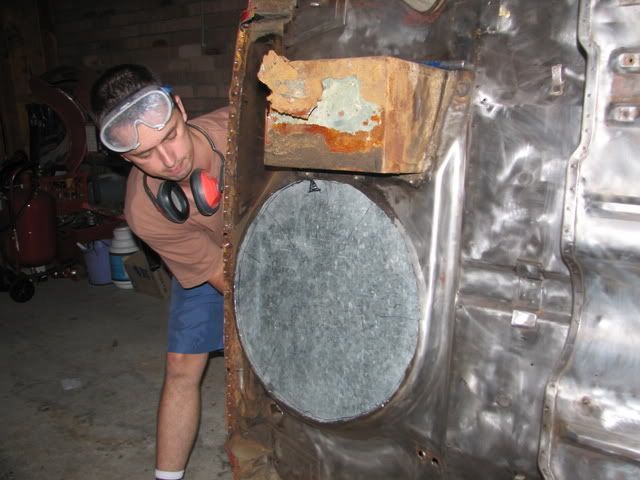
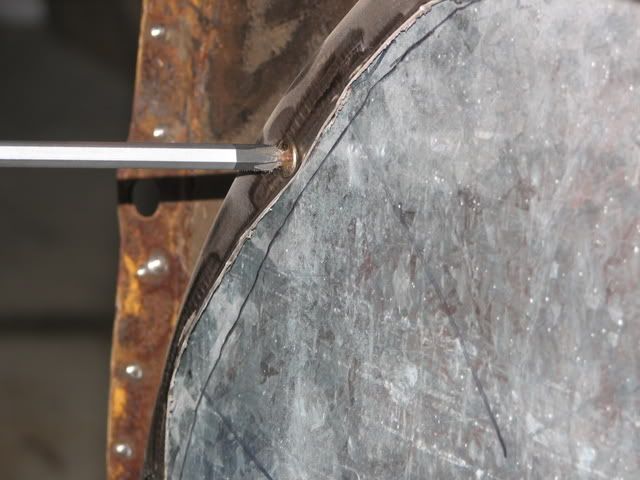
Place the patch back into the car make sure it sits flush with the bottom. It should be close all around if you place preasure you should be able to close the gaps.
Image

Step 9
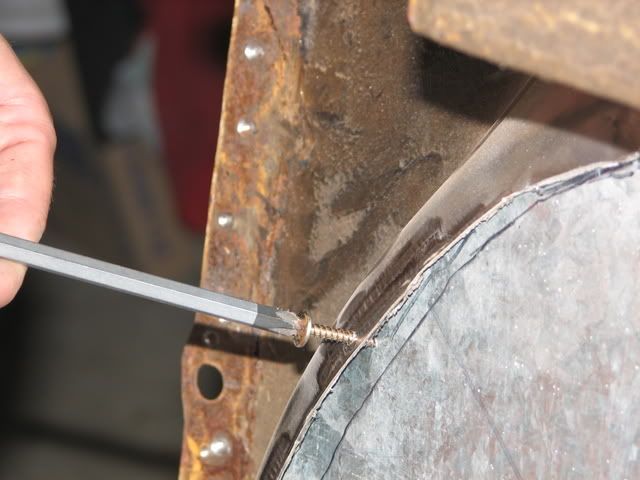
Drill a hole through the car into your new panel with a 1/8th drill bit and place a self tapper in it this should hold the new panel in place. Do this all the way around and as you do it it should bring the 2 panels together and close any gaps (most of them anyway)
Image
Image
Image

Step 10
Now any other gaps you have you can plannish closed using a plannishing hammer and a suitable dolly.
Image

Step 11
Now when you have closed the two panels together you can give some tacks all the way around.
Image

Step 12 (still to come)
You are going to have to do a bit of planishing and a bit of tacking until you have no gaps. When you have achieved this weld all the way around makeing sure you have now holes and gaps. Remove the self tappers and weld up the holes too.

Step 13 (still to come)
Grind it all down relatively smooth It dont have to be purfect just flat.

Step 14 (still to come)
Give it a good clean with some prepsol and key the surface with some sandpaper. Now etch prime it and use a good qualitiy sealer to make sure its all water tight and to protect the weld.

Step 15 (still to come)
Give it a good stone gaurd and it will be tip top.

Step 16 (still to come)
Repeat steps 13-15 on the inside.

Step 17 (still to come)
Step back and admire your work.

More how too's to come includeing rear valance replacement. battery box replacement welding up rust holes. floor pan replacment and whatever else i stumble on along the way.

Thanks to my girlfriend for takeing some photos and my mum for helping me hold some panels in place.

I hope this helps all of you guys and show you that its not to hard... Lets get some more minis back on the road.

Mike

_________________
If it cant be fixed with a hammer it cant be FIXED!!


Top
 Profile  
 
 Post subject:
PostPosted: Sun Feb 25, 2007 5:40 pm 
Offline
Give Ash some flowers Nick .
User avatar

Joined: Wed Aug 09, 2006 1:22 pm
Posts: 10149
Location: Toowoomba Region, QLD
Mini Mike - what can I say - this how to is turning out really well. Thanks for putting in the effort for all of us.

_________________
"In two years time your car will be like a lady's clothes, out of date, my car will still be in fashion when I am dead" - Sir Alec speaking to Pininfarina


Top
 Profile  
 
PostPosted: Sun Feb 25, 2007 5:58 pm 
Offline
1098cc
1098cc
User avatar

Joined: Thu Aug 03, 2006 11:47 am
Posts: 1212
Location: In Transit, Sydney
Mini Mike wrote:
Rust now you basterd.Mike


lol :lol: , Mike your a champion, well done!


Top
 Profile  
 
 Post subject:
PostPosted: Sun Feb 25, 2007 6:15 pm 
Offline
1098cc
1098cc

Joined: Thu Aug 17, 2006 10:23 am
Posts: 1621
ooohhhh I like that last pic!! :D nice work mate.


Top
 Profile  
 
 Post subject: mmmmm
PostPosted: Sun Feb 25, 2007 8:04 pm 
Offline
848cc
848cc

Joined: Thu Mar 16, 2006 5:53 pm
Posts: 162
Location: Sydney Campbelltown
Nice wor, we had to replace the whole boot in mine what a ******** job that was lol.

_________________
Hellooo from OODLES my mini. Is being restored to be revealed in all her glory one day in the future she looks forward to meeting you all.


Top
 Profile  
 
 Post subject: Clampit
PostPosted: Sun Feb 25, 2007 8:35 pm 
Offline
1360cc
1360cc
User avatar

Joined: Sun Apr 11, 2004 11:32 am
Posts: 12390
Location: Sthrn HiLoLands, NSW, Australia
Great how to...should be in a section on repairs....one suggestion, while you had the replacement panel out maybe tack a big nut on the inside dead centre...that way you can make a spare wheel clamp.

_________________
"Show me the Mini!"


Top
 Profile  
 
 Post subject:
PostPosted: Mon Feb 26, 2007 8:23 am 
Offline
1098cc
1098cc
User avatar

Joined: Fri Sep 09, 2005 3:36 pm
Posts: 1581
Location: melbourne
hhhmmmm i wonder how much the steel will stretch when you weld around it. dont forget the shrinking section. also when you weld galvanised steel people make sure your in a well ventilated area because zinc aint good for you. when you weld gal, you burn off the zinc so that area could rust if it isnt sealed off properly.
good work mike

_________________
real men race downhill - keiichi tsuchiya


Top
 Profile  
 
 Post subject:
PostPosted: Mon Feb 26, 2007 10:28 am 
Offline
religious status
religious status
User avatar

Joined: Fri Mar 19, 2004 6:19 pm
Posts: 39755
Location: near Baulkham Hills, NSW
It won't move much, due to the shape.
My last one, I used an PC cabinet- it was zinc coated too. 8)

_________________
DrMini- 1970 wasaMatic 1360, Mk1S crank, 86.6HP (ATW) =~125 @ crank, 45 Dellorto (38 chokes), RE282 sprint cam, 1.5 rockers, 11.0:1 C/R. :mrgreen:


Top
 Profile  
 
 Post subject:
PostPosted: Mon Feb 26, 2007 12:03 pm 
Offline
998cc
998cc
User avatar

Joined: Wed Jul 20, 2005 8:23 pm
Posts: 776
Location: Concord West, NSW
Cover up when you do the full welding. I learnt the hard way.

Tacking is no real drama, but when you spend an extend amount of time welding you should wear the apropriate gear.

When i started to learn to weld i was wearing a pair of footy shorts sitting on a crate and welding a 10mm piece of steel on another crate. Did well managed to weld the 10mm steel and was happy with the effort. That night my inner thighs hurt, the next day they killed and this went on for over a week and a half. I had a bad case of burn ( similar to sun burn) which seemed to keep cooking as the days went on, not a pleasent feeling.

My 2c worth.

And as usual your post is fantastic as it shows haow a professional does it, i know ive just picked up a number of new tricks.

Dan


Top
 Profile  
 
 Post subject: finished product
PostPosted: Mon Feb 26, 2007 12:07 pm 
Offline
1275cc
1275cc
User avatar

Joined: Thu Jun 08, 2006 9:34 pm
Posts: 2372
Location: Adelaide
cant wait to see the finished job

_________________
blokeinamoke wrote:
Yep Mokes are ugly - but Moke owners know that. Its like ugly women - she may be a dog but you know your going to get some :wink:


Top
 Profile  
 
 Post subject:
PostPosted: Mon Feb 26, 2007 3:00 pm 
Offline
THIS SPACE FOR RENT
User avatar

Joined: Mon Aug 08, 2005 8:50 pm
Posts: 4112
Location: barossa valley sa
thats basically bow i fitted my new floorpan on the mk1 but i used pop rivets rather than screws

_________________
-jamie-
1963morris 850
1965 solid side van
1994 rover racecar


Top
 Profile  
 
 Post subject:
PostPosted: Mon Feb 26, 2007 3:16 pm 
Offline
1360cc
1360cc
User avatar

Joined: Tue Jun 01, 2004 3:41 pm
Posts: 6858
Location: Special Tuning Sydney
Nice work mike! i see it's coming along nicely :)

_________________
Lillee - 1969 Morris Mini K


Top
 Profile  
 
 Post subject:
PostPosted: Mon Feb 26, 2007 4:09 pm 
Offline
998cc
998cc
User avatar

Joined: Thu Aug 03, 2006 9:00 pm
Posts: 536
Location: Sydney
1970 Mini K.

Yeah good point I should add to it about welding with too much heat and how it makes distortion .

1971 Mini K & Minimitoy.

I think thats a good Idea. I will add some saftey warnings to it about welding Galvanised steel and how that it should only be done in a ventilated area to avoid zink poisoning.

Also that you should be covered up to prevent sunburn.. Also all the saftey gear that is required, aswell as all the tools you need to complete the job.

Thanks for the positive comments guys.

Mike

_________________
If it cant be fixed with a hammer it cant be FIXED!!


Top
 Profile  
 
Display posts from previous:  Sort by  
Post new topic Reply to topic  [ 13 posts ] 

All times are UTC + 10 hours


Who is online

Users browsing this forum: timmy201 and 83 guests


You cannot post new topics in this forum
You cannot reply to topics in this forum
You cannot edit your posts in this forum
You cannot delete your posts in this forum
You cannot post attachments in this forum

Jump to:  

© 2016 Ausmini. All garage work involves equal measures of enthusiasm, ingenuity and a fair degree of irresponsibility.