Okay you buggers (said as a term of endearment usually only reserved for 'mates'), time for an update.
Well, not a lot has happened in the time that I have been away, much to my disappointment! The owner of the Panel Beating/Spray Painting company (Phil) that has The Cat at the moment had his head panel beater resign due to ill health, and the guy lined up to do all the fibreglassing work turned out to be more of a liability than an asset, so Phil cut him loose. So the car had been sitting for some three weeks with piss all done to it (and yes, I still am extremely angry!).
I had a meeting with Phil on Friday and explained the urgency of getting the thing finished, so we have agreed that the car will be subbied out to a local guy that handles all Phil's overflow work. The car will be moved there next week on Monday. I just hope the quality is OK.
I, myself have not been idle since I have been back (2 weeks). I sat down and had a think about what needed to be done to the car whilst it was in getting the body done - and I decided to turn my attention to the interior, and get all of that done. I was in a quandary regarding the installation of an ICE system, and decided finally that I like music so much that El Gato would have a fine ICE installation. What changd my mine was that 4 Paw will have no ICE, no back seats, no interior, no carpet etc and will be a bare bones track car, whilst The Cat will be more civilised daily driver, so this meant a sound system. Now I know a lot of you dont believe in ICE, and some purists say it adds too much weight anyway - that's fine, each to their own, but damn it, I wanted tunes, and crisp slear sounding ones too (classical always tests out the best car installations, so we shall see how this one delivers Handel and Bach!)
I had spent considerable hours designing what would go where, how it should sound and look, and the level if hi-fidelity that should try and be achieved. So, after long hard thought processes, I decided that The Cat would have a really neat, and individual install. And this is how I went about it:
The rear parcel shelf would contain two 5.25" 2-way speakers to give the rear seat passengers some ambience, and also fill in the rear sound stage. Under the rear seat would be 2 x 9" subs - should fill in the sub-bass just nicely. One thing I have noticed with a lot of sound installs, is the lack of mid-bass. Its either all doof-doof sub-bass and no treble, or all tinny treble and nothing else. I wanted mid-bass, and lots of it. So I decided to make a mid-bass enclosure specifically for this.
The idea was to get the rear seat, and split it down the middle and make two buckets out of it. Dissecting the two rear buckets would be a mid-bass enclosure to house 4 x 4" drivers. This would fill in those missing notes just nicely and create great linearity of sound. As well as the rear 5.25's and 4 x 4" mid-bass drivers, the front needed some emphasis as well. Each door will have a set of 6.5" splits with the tweeters mounted in the dash to lift the sound stage up to near ear level.
The chosen speakers would all be the Fusion brand from their PowerPlant range. Really nice speakers, and nice sounding - made by our brothers in NZ no less!
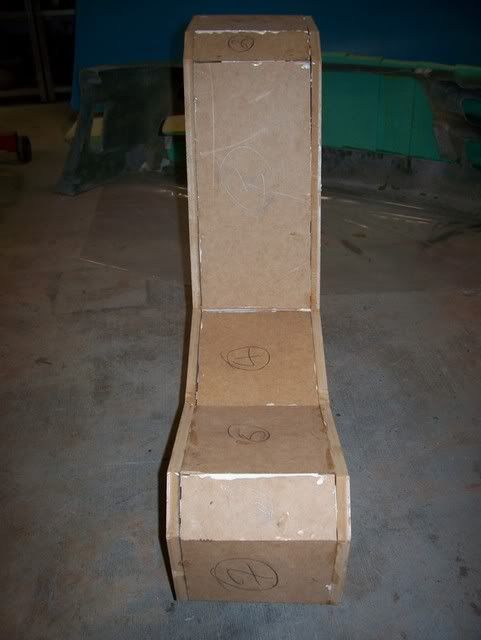
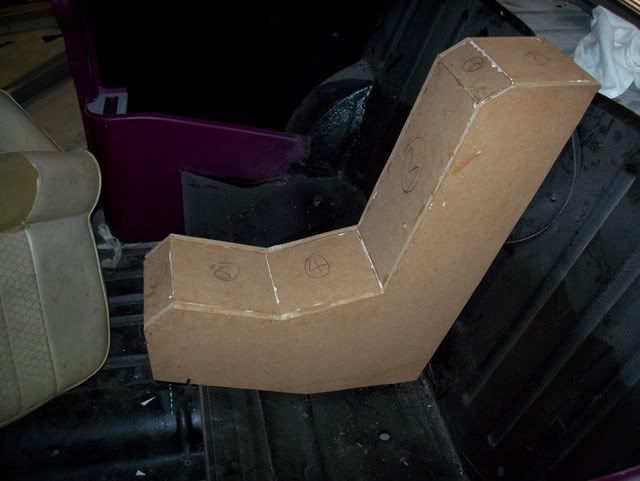
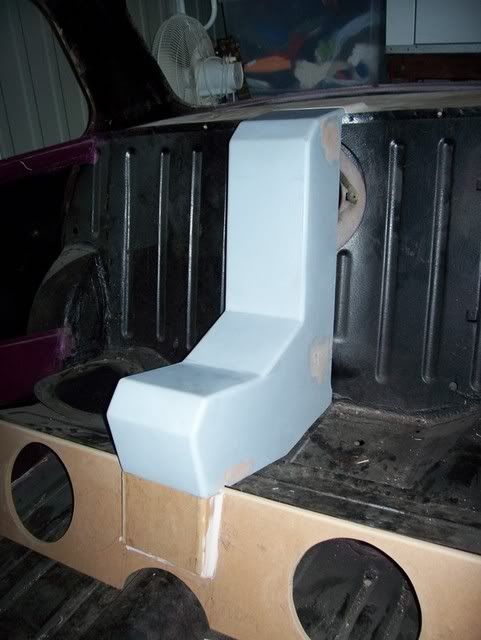
This is what the mid-bass enclosure looks like - it's made out of MDF (Naturally, its the sound installers friend!). It houses 4 x 4" mid-bass drivers, all on different faces to project the sound multi-directional (2 mid-bas drivers on panel 3, one on panel 4 and one on panel 5)
Once it had been cut out and glued together:
Test fit:
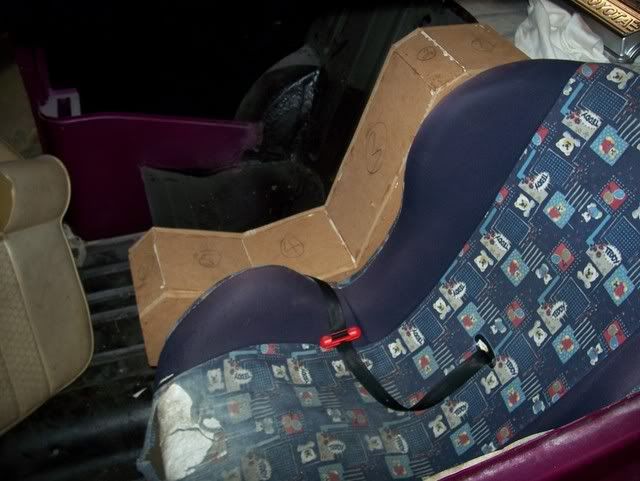
Test fit with the 'dummy' bucket seat in place (perfect fit BTW!):
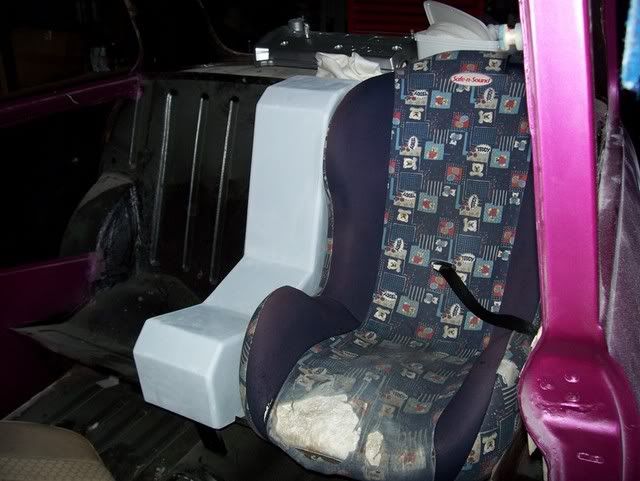
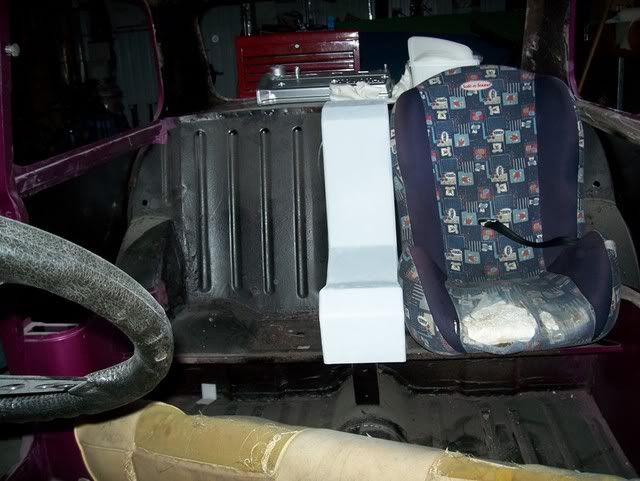
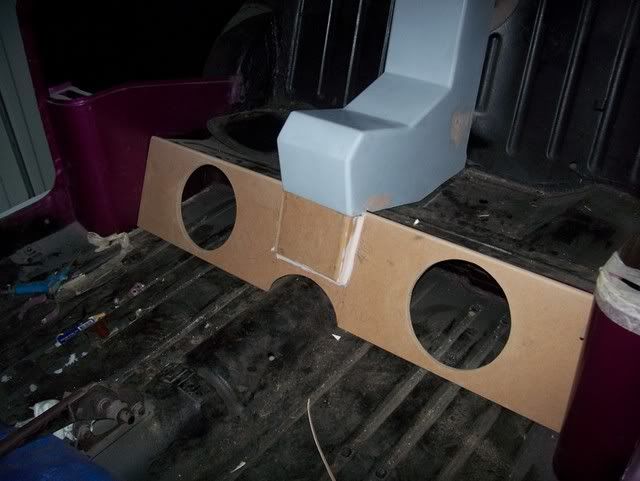
Now that the mid-bass enclosure fitted nicely, it was time to make it all nice and neat and undercoat it ready for the carbon-fibre covering:

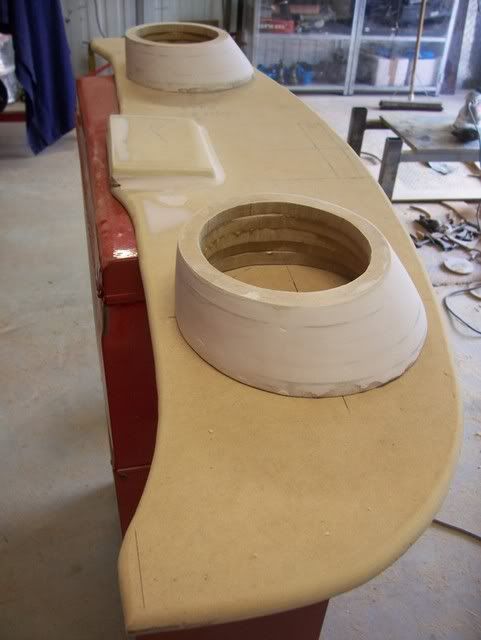
Now that the mid-bass enclosure was made, it was time to turn my attention to the rear parcel shelf. I had chosen to fill in the original speaker holes in the rear parcel shelf for two reasons. One, they looked like shite as one was a 4x6" oval hole and the other was a 5" round hole and both looked like they had been cut out by a blind epileptic with a chain-saw. And two, because I had deseamed the car and wanted to retain as much structural integrity in the car as I could.
So, this meant making up a rear parcel shelf board, and mounting the speakers to it. Firstly, a template of the rear parcel shelf was made, and the 12mm base MDF board was cut out. Then, once the fit was AOK, I then made a little ramped housing in the middle that allowed for the mid-bass enclosure to flow into it and make it all look like once piece, and also allows for the speaker cables to be run to the underside of the board - hard to picture? Here, try this out:
And test fit in place, I love the continuos lines look:

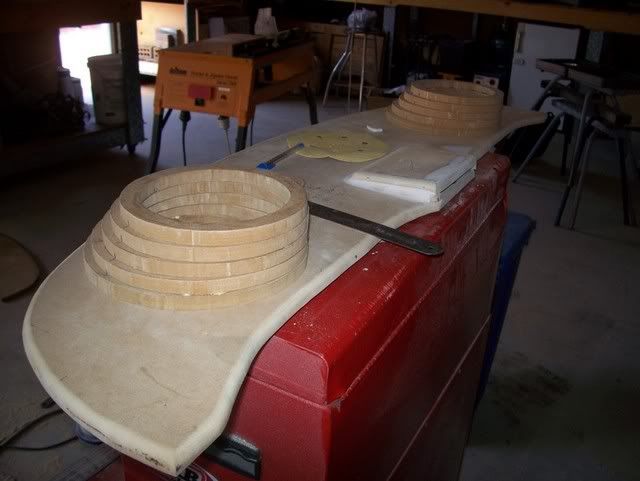
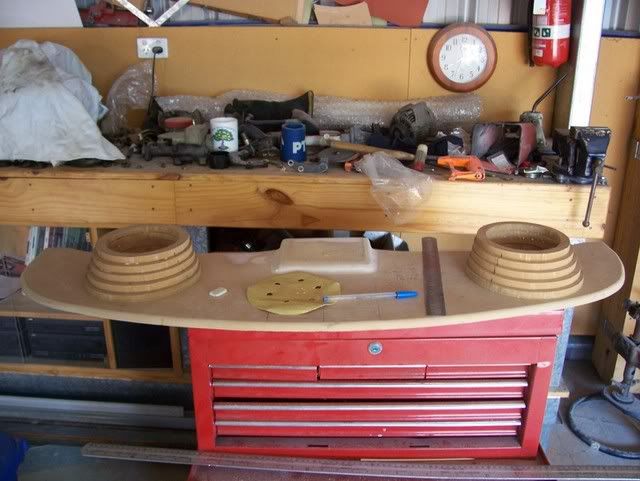
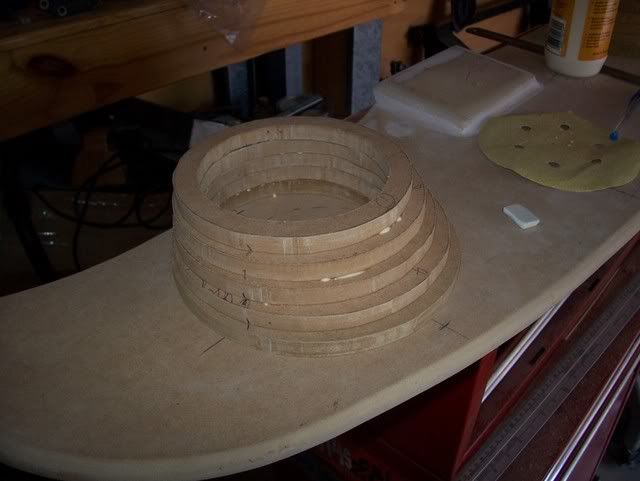
Now, it was time to make the speaker pods. Consecutively larger MDF rings were cut out (5 each side) and then glued together. Then they were bogged and faired, finally, they were glued to the base-board themselves with epoxy. I decided that I would incline (as opposed to tilt) the pods forward so that they followed the line of the rear windscreen. The 5.25" speakers from Fusion are very deep (66mm), so tilting them forward would have just meant that they would be taller to offset the angle. Anyway, the sound should bounce off the rear windscreen and be propelled forward anyway.
Mock up before glueing together:

And then glued together:
And then it was time to bog them and fair them ready for them to be affixed. Bogged only here:
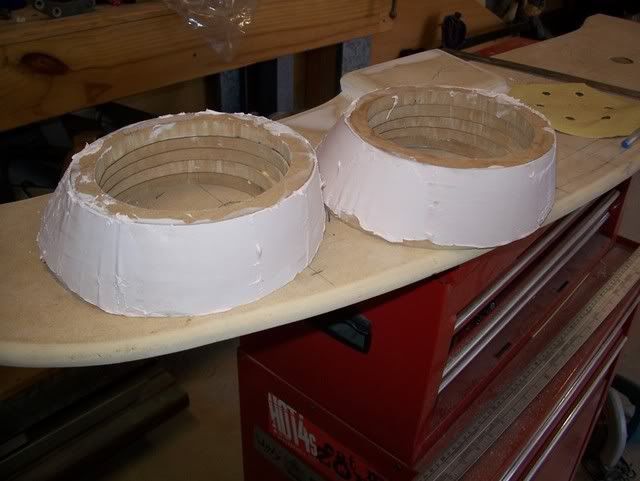
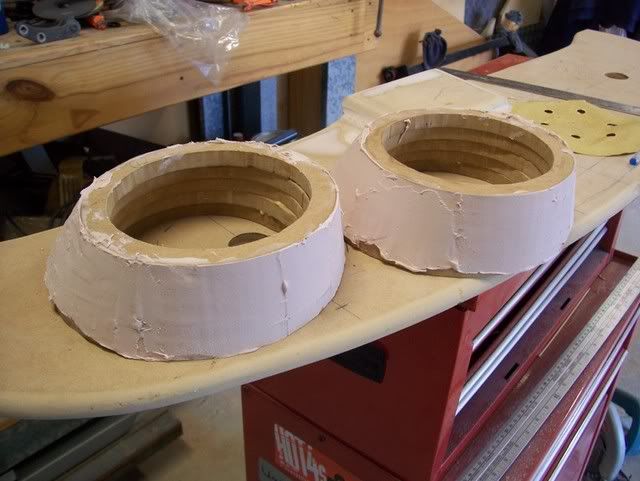
And then sanded:
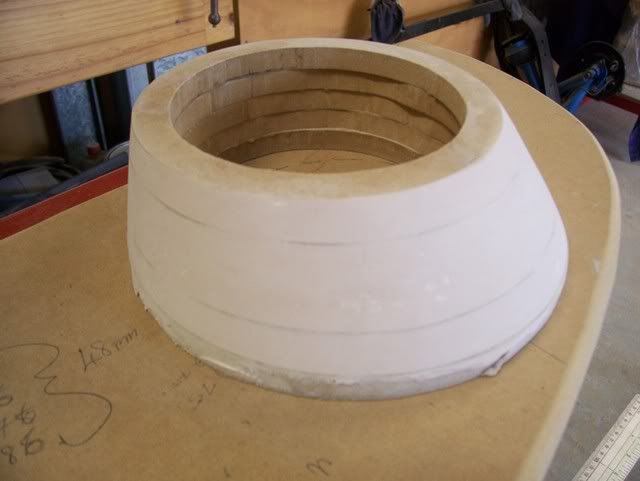
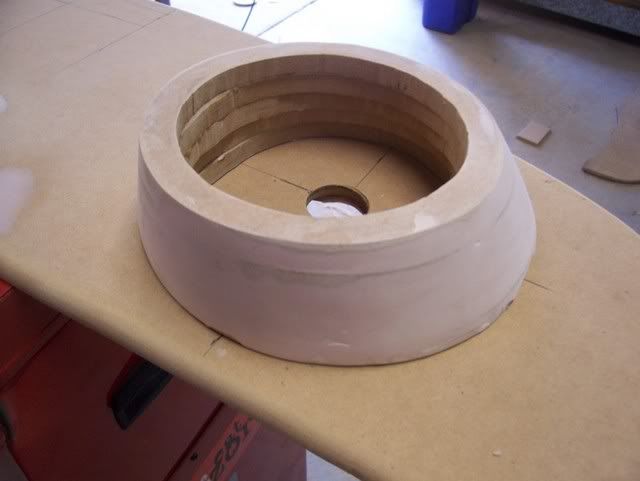
And then the pods were stuck down with a mixture of epoxy resin and microballoons - nothing will move these suckers. Finally, it was a case of a nice rounded fillet of bog around the base of the pods, to integrate them with the base-board.
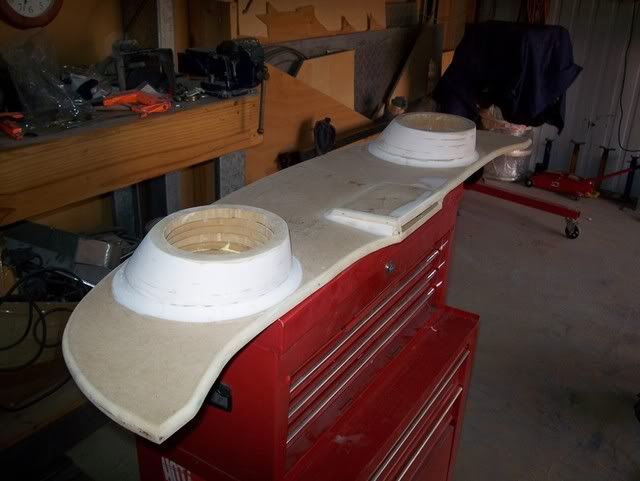
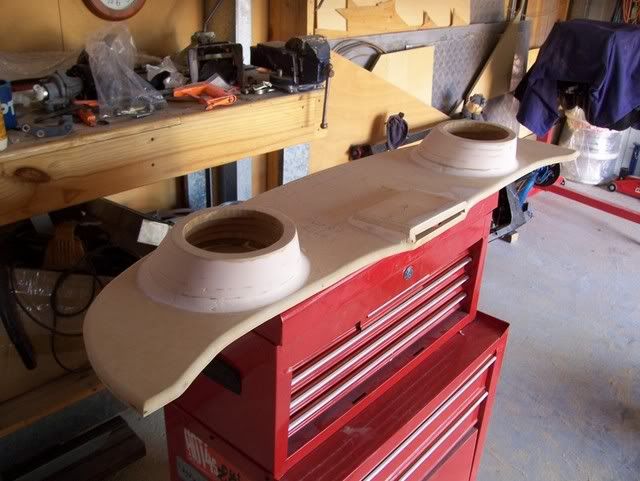
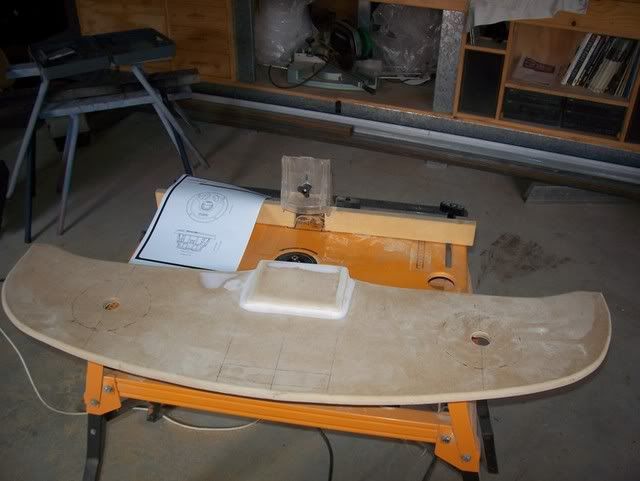
Ok, time to turn my attention to the sub-woofer board. This one was the easiest of the lot to do - no angles or built up pods, just a nice straight profiled board with a few rounded corners. But once again, I made up a little ramp piece in the centre of the board so the mid-bass enclosure flowed into it, and also to enable a hidden cable route:
The board had to be tilted forward slightly at the bottom to cater for the 9" subs - but not too much as to impinge on the foot space:
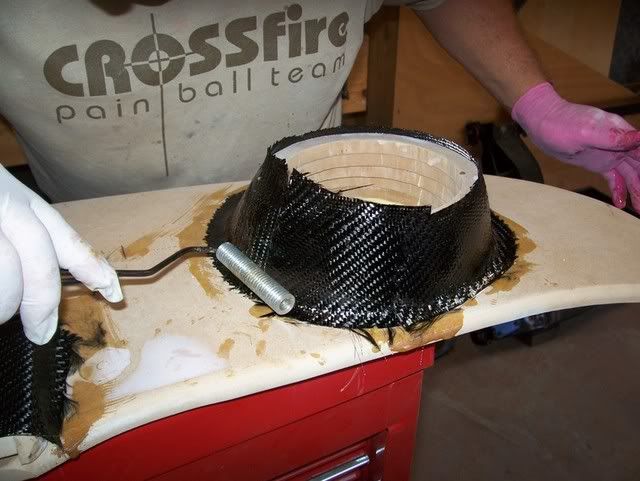
So, that's what happened last week. Today I finish sanded all the boards ready for the layer of carbon fibre that will go over the sub-woofer board, the rear parcel shelf board, and the mid-bass enclosure. Here are a couple of shots of me laying up some CF on the pods. The rear parcel shelf pods and ramp will have to be done in seperate pieces, then the base board can be done in one piece likewise with the sub-woofer board. The mid-bass enclosure will be done in three pieces, two sides and one top piece.
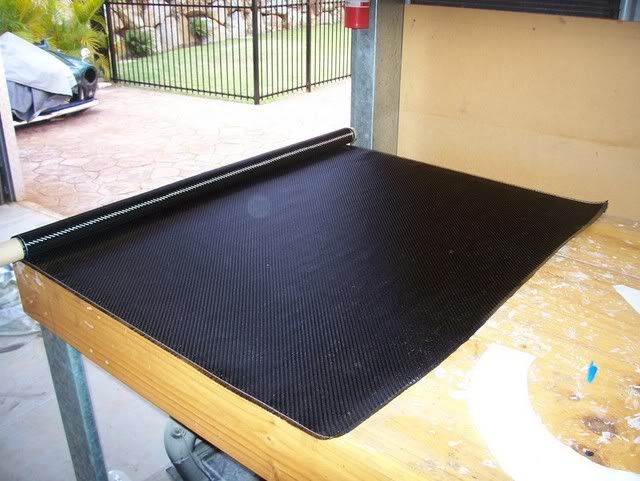
A roll of twill CF - nice, but bloody expensive (dont cock-up here Tricky!):
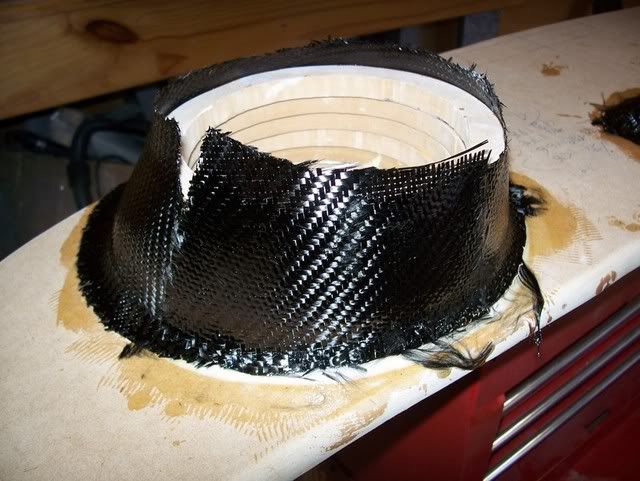
The pods had to have a specially profiled piece that was made from a template. Even though I made the template from paper, it wasnt accurate enough for the CF which wont 'kink' like chopped strand mat etc. This meant one more 'join'. Fibreglass cloth in general, and CF in particular dont like going around sharp corners, thats why everything must have a nice radiused edge to it. Here's me rolling a joint (you will of course notice the gloves and super-daggy clothes - epoxy just loves to stick to everything):
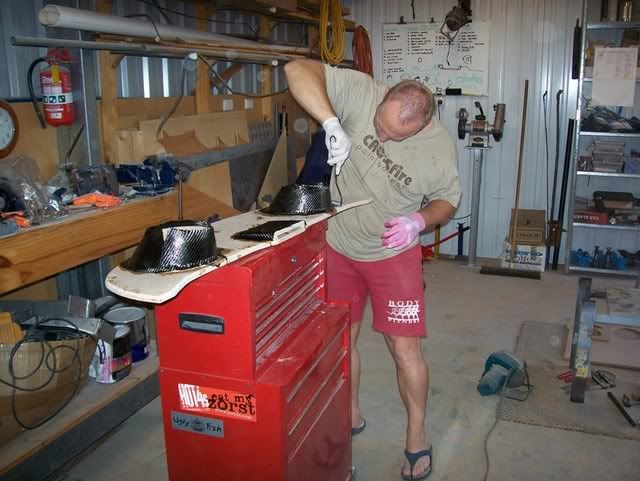

More joint rolling:
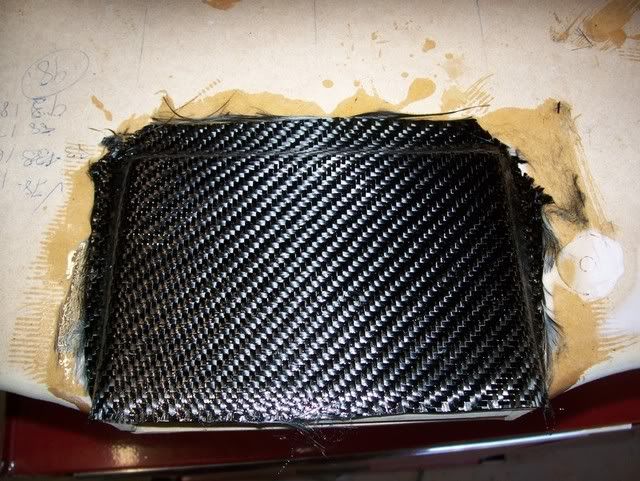
And this is the finsihed article. Once it has cured for 24 hours, the top layer of CF will go on and the whole thing will look schmick. Then, it will be trimmed to size and given a couple of coats of clear 2-pak. The whole parcel shelf board should weigh in at no more than 2 kg's:
So tomorrow, more epoxying and laying up the rest of the CF.
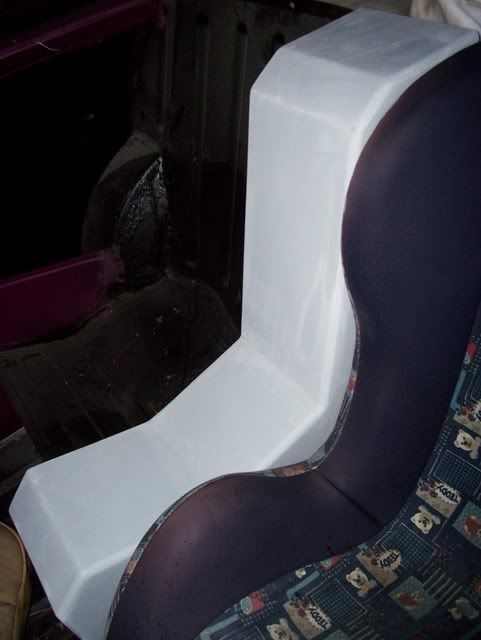
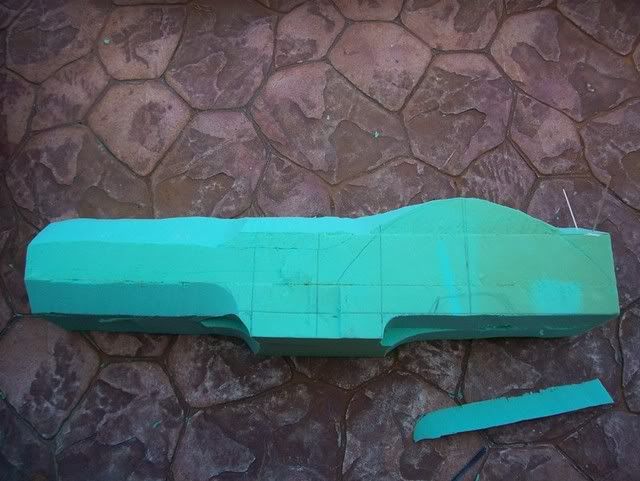
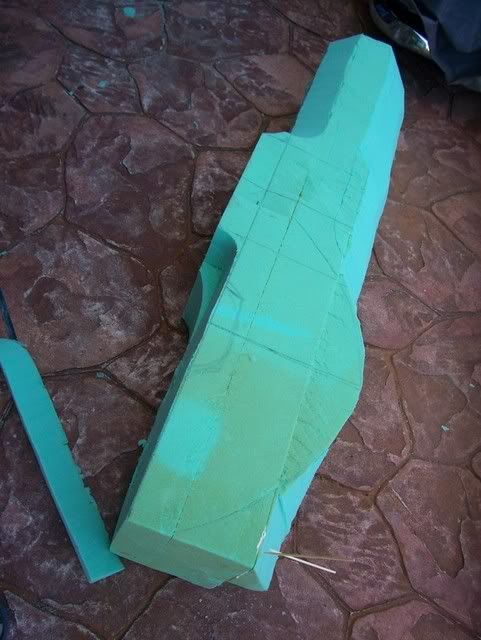
Whilst the CF was curing, I turned my attention to the dash, which will also be CF. However, this time this item will be made from a plug (similar to the front splitter). A foam plug will be made, and then a mould will be made of the plug, and then the mouldings can be made from the mould. I spent an hour or so today shaping the foam plug and test fitting where all instruments and controls should go.
Here it is roughly taking shape - a few more hours needed to get it right:
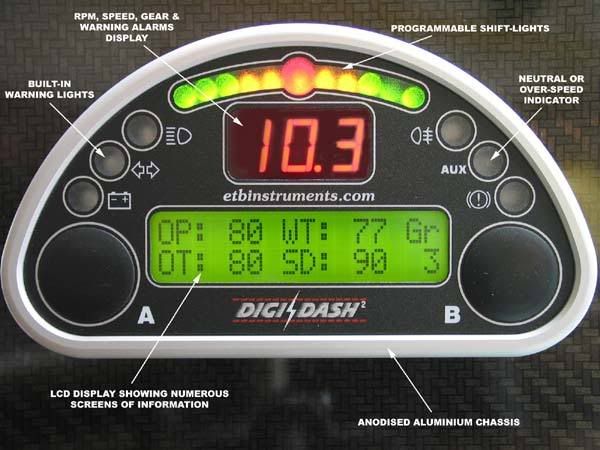
And here are a couple of shots test fitting the instruments and controls. The square piece of paper to the left of the Digidash is the FMIC water spray controller, which counts down how much water is left in the tank with a digital readout, and the piece of paper under the stereo is for the HVAC controls (bloody wind!). The only thing not shown is the Greddy turbo timer which sits under the Digidash.
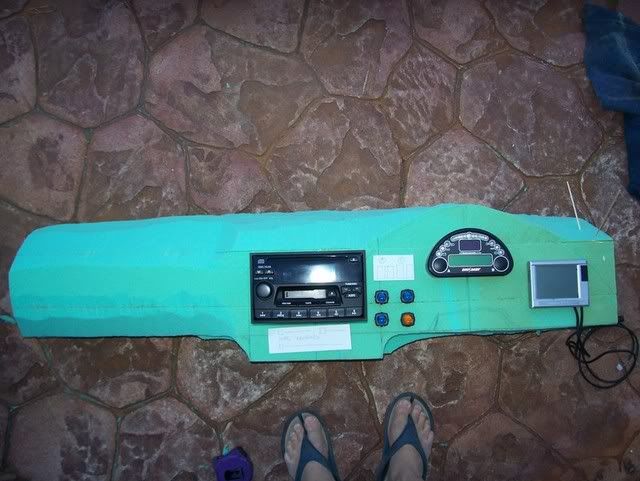
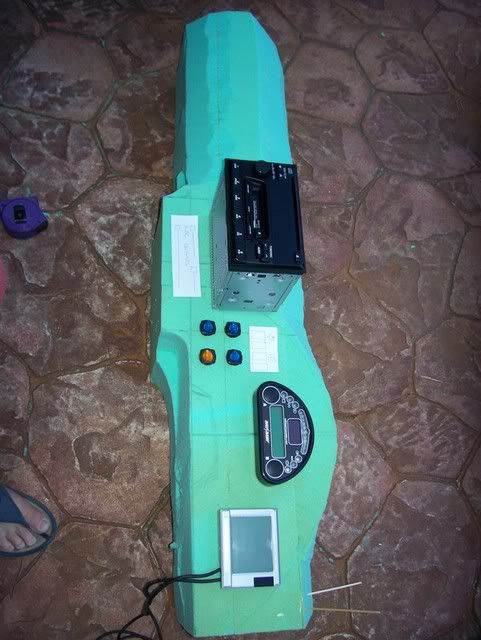
I dont need anymore instruments than that, as the Digidash displays everything from RPM, to gear position, and everything in between: