Ausmini
It is currently Sat Jun 21, 2025 8:36 pm

All times are UTC + 10 hours


Post new topic Reply to topic  [ 1864 posts ]  Go to page Previous  1 ... 100, 101, 102, 103, 104, 105, 106 ... 125  Next
Author Message
 Post subject:
PostPosted: Sat Jan 05, 2013 9:07 am 
Offline
1275cc
1275cc
User avatar

Joined: Fri Jun 17, 2005 10:31 am
Posts: 3183
Location: Burpengary, Queensland - Home of Tricky Performance Engineering
Gordo - can you really have too much progress??? Thanks for the kind words and back to work on the 14th, so hauling ass and making hay while the sun shines (as I am sure progress will slow when I am back to the grind)....

Ol' Sock - Thanks for the support and motivation bro!! Yes, the last time, but erotic?? I will keep plugging bro, no worries about that!!!

Cheers,
Tricky

_________________
"Not Speeding Officer..........Qualifying"


Top
 Profile  
 
 Post subject:
PostPosted: Sat Jan 05, 2013 7:51 pm 
Offline
1275cc
1275cc
User avatar

Joined: Fri Jun 17, 2005 10:31 am
Posts: 3183
Location: Burpengary, Queensland - Home of Tricky Performance Engineering
Hi Forumites,

Quick update...

Picked up where we left off yesterday on the speedo pickup. Happy to report that the little engineering exercise we undertook yesterday was a complete success. It works perfectly.

So, continuing on where we left off, time to make a bracket for the Hall effect sensor for the speedo. It was a very simple affair, and there was a locating bolt close by that helped affix the scatter shield - perfect. So, using some 1.2mm aluminium sheet, some simple measurements, and voila, its done. Its very rigid, and will have a consistent air-gap of <1.0mm:
Image

Next, was to install the heater hose through-bulkhead fittings - simple just had to paint the cover plate and install the fittinhgs:
Image

And underneath:
Image

And then installed the gearshift mechanism onto the gearbox, and then the shifter and linkages in the cab and onto the mechanism:
Image

And in the cab (it will come up again when the dynamat and carpet goes down). The brown stuff is Tectyl, a wax-based rust preventative:
Image

And finally, installed the radiator overflow and polished the bracket that holds it - its not mirror, but its not bad:
Image

Had a really nice surprise today, had a visit from JC and his family. Havent seen JC since before he left for the US, so it was a really nice surprise, he is a top bloke and I cant believe how much his kids have grown.

Anyway, might have a rest day tomorrow, then again, might not!!!

Cheers,
Tricky

_________________
"Not Speeding Officer..........Qualifying"


Top
 Profile  
 
 Post subject:
PostPosted: Sun Jan 06, 2013 7:47 am 
Offline
848cc
848cc
User avatar

Joined: Wed Mar 14, 2007 3:50 pm
Posts: 404
Location: MORNINGTON PENINSULA
Geez ol.sock looking awesome

Those heater fittings look familiar LOL

A day off ....... pffffft i dont think so get your arse out that shed

Do you think you.re on holidays or something :D :D :D

Cheers Hallsey


Top
 Profile  
 
 Post subject:
PostPosted: Sun Jan 06, 2013 9:58 am 
Offline
998cc
998cc
User avatar

Joined: Mon Oct 25, 2004 7:17 pm
Posts: 1121
Location: Bundaberg, QLD
:D So very happy to see all your hard work finally moving & coming together dude

_________________
Baracade
Relationships! The only time you get to sleep with the enemy!
1972 US Export Moke in Bundaberg QLD


Top
 Profile  
 
 Post subject:
PostPosted: Wed Jan 09, 2013 7:58 am 
Offline
848cc
848cc

Joined: Wed Oct 24, 2012 12:06 pm
Posts: 28
Loving the updates and pics.
Cant wait to see a vid of this beast in motion...


Top
 Profile  
 
 Post subject:
PostPosted: Wed Jan 09, 2013 8:33 pm 
Offline
1275cc
1275cc
User avatar

Joined: Fri Jun 17, 2005 10:31 am
Posts: 3183
Location: Burpengary, Queensland - Home of Tricky Performance Engineering
Hi Guys,

Thanks guys for all your kind words and messages of support - very well recieved let me tell you and very heartening!

For the last few days I have come to a bit of a standstill with regards to the rebuild, as earlier in the week I rang my Engineer to see if he wanted to come out and inspect the install while he can still see the subframe easily. He suggested it would be a good idea.

So today, my Engineer turned up and inspected The Cat whilst it was still half built. Not wishing to blow my own horn, but the words "really top job" and "very professionally done" were mentioned!!

So, in essence, he was impressed with the subframe, and the car as a whole, which is a big accolade - whilst he has seen the mini through just about every step, I still blew a sigh of relief. Hopefully, this might stop some of the members of this forum bagging the sh!t out of 4EFTE subframes as a whole and putting us all in the one basket!

So now, I can continue on with the rebuild at full steam - yay!!!

Cheers,
Tricky

_________________
"Not Speeding Officer..........Qualifying"


Top
 Profile  
 
 Post subject:
PostPosted: Wed Jan 09, 2013 9:36 pm 
Offline
1360cc
1360cc
User avatar

Joined: Mon Aug 23, 2004 10:07 pm
Posts: 10653
Location: SE Melbourne
Speaking of subframes, just went through each page in this thread looking for an answer to my own question but didn't see anything: at what point of the build did you make a new subframe?


Top
 Profile  
 
 Post subject:
PostPosted: Thu Jan 10, 2013 9:34 am 
Offline
1275cc
1275cc
User avatar

Joined: Fri Jun 17, 2005 10:31 am
Posts: 3183
Location: Burpengary, Queensland - Home of Tricky Performance Engineering
Hi Harley,

The first subframe I built (I call it the Mk I)which was the first the engineer expected, and which was drawn to great detail in the 65-page proposal I sent to the Engineer, ended up going into a clients car (a Clubman ute) because he had a very short window to have the car off the road.

The Cat then remained without one as I further refined the design in other peoples cars - Tony's Clubman was a Mk II as was Hallsey's (although Hallsey did the fabrication himself, and a bloody good job he did too, his frame took design impetus from mine and was primarily a MK II). The engineer signed off on the refinements and had input...

Still further refinements came about which were driven by fabrication issues (as in, I wanted to make the subframe as easy as possible for others to copy). Some changes to engine mount mounting locations were also incorporated. The Mk III was more evolutionary rather than revolutionary and the Engineer again had input at all times and provided good feedback. We worked very hard at addressing the four key design criteria, simply:
1. The subframe must locate the engine (really the engine mounts) rigidly in space under normal (and sometimes abnormal) operating conditions - tick...
2. The subframe must offer full frontal and 3/4 frontal impact absorption (design ideas were taken from the 500SL Mercedes where in an accident the engine which is on rails, travels back and down under the passenger compartment). FEA showed that with our design, this is exactly what happens, just not to the extent of the Mercedes design (this is where I have issues with people who have no idea, commenting that the frame isnt strong enough. It only needs to be strong enough to accomodate criteria one, and if it succeeds in doing that, then any further rigidity simply tranfers impact forces to the occupants rather than absorbing or deflecting them) - tick...
3. The subframe must be easy to mass-produce (for myself and for others who may wish to copy it). This means no CNC parts, exotic materials (like 4130 or 4340 CrMo etc) and using as much of the original subframe as possible (who wants to remanufacture mounting points for upper and lower control arms, work out Ackerman, scrub radius, caster and camber angles, KPI etc) - tick...
4. The subframe must be cost-effective to make. This goes hand-in-hand with criteria three above. But if it costs thousands to produce, what average-joe can afford one?? - tick...

I built the new frame for myself I think in 2009-2010, so the design Mk III has been with us for nearly three years now. Not sure if I documented fully on the forum what changes and when - but can I just say I am very happy with the latest design, as is the Engineer. As a matter-of-fact when we were having a chat last night, we were discussing in depth what criteria was the most important, the Engineer said two, as it was the hardest to accomplish. I had to agree, and when I said there were some detractors out there in the public who liked to voice their opinion as to its 'flimsiness', the Engineer simply said "So, they are certifying Engineers with degrees with years and years of automotive design and fabrication knowledge who know the ADR's and rules and regulations backwards do they". When I said no, he simply said "Thats why we dont listen to these idiots!!". He parting comment to me last night was not to rest on the current design, but to keep refining it once we have had it on the road for 12-months or more.

That is why I stay in contact with Steve Hall - he literally flogs his car unmercifully and has had not one issue with the front subframe - he gives me good feedback and that is invaluable. If any forumites are in any doubt whatsoever about the strength and durability of the subframe design, simply PM Steve - he is a brutally honest guy and will tell you exactly how it is!!

So, Harley, sorry for the long-winded reply - but 2009-2010 according to my records.

Cheers,
Tricky

_________________
"Not Speeding Officer..........Qualifying"


Top
 Profile  
 
 Post subject:
PostPosted: Thu Jan 10, 2013 11:55 am 
Offline
848cc
848cc
User avatar

Joined: Wed Mar 14, 2007 3:50 pm
Posts: 404
Location: MORNINGTON PENINSULA
Hee hee yeah dob me in

Na seriously if anyone has any issues PM me

Though i must say i dont thrash my car i drive it hard (there is a differance)

Cars been on the road for over a year driven fairly regularly with no issues

Also my engineer had no problems whatsoever with the subframe

Anyway my 2 bobs

Cheers Hallsey


Top
 Profile  
 
 Post subject:
PostPosted: Thu Jan 10, 2013 8:37 pm 
Offline
1275cc
1275cc
User avatar

Joined: Fri Jun 17, 2005 10:31 am
Posts: 3183
Location: Burpengary, Queensland - Home of Tricky Performance Engineering
Mate, sorry about the 'flogging unmercifully' bit - bt all I can say is driving with you aint like Driving Miss Daisy!! :D

_________________
"Not Speeding Officer..........Qualifying"


Top
 Profile  
 
 Post subject:
PostPosted: Sat Jan 12, 2013 7:51 am 
Offline
848cc
848cc
User avatar

Joined: Wed Mar 14, 2007 3:50 pm
Posts: 404
Location: MORNINGTON PENINSULA
Hey i resemble that remark :D :D :D

Cheers Hallsey


Top
 Profile  
 
 Post subject:
PostPosted: Sun Jan 27, 2013 2:41 pm 
Offline
1275cc
1275cc
User avatar

Joined: Fri Jun 17, 2005 10:31 am
Posts: 3183
Location: Burpengary, Queensland - Home of Tricky Performance Engineering
Well, fate can be cruel!!

I spent last weekend not working on The Cat to do the odd jobs and honey-do's around the house so I could have spent the Australia Day long weekend in the shed - yep, 72 hours in the man-cave. Was sure to get a truck-load of stuff done in that time. The list of "to-do's" on The Cat was long and extensive.

Anyway, as fate would have it, the remnants of TC Oswald has decided that the bush fires of 2 weeks ago should be well and truly extinguished, and decided to drop torrential, monsoonal rain and strong winds down the eastern seaboard of QLD, and on into NSW.

We have been inundated, to the point where the shed is now flooded (again, shades of this time last year) and work cannot continue. I got in there early Saturday morning before the main front came through. For the past week I have been sepnding a fair bit of time polishing the alloy bits that go into the engine bay. I must say, its a dirty, labour-intensive job and if you do this for a job, I take my hat off to you.

Finally finished polishing the airbox (after experimenting with sanding, polishing etc to get the best process) and I think it came out ok (I can easily see my reflection):
Image

Installed the K&N hi-flow filter:
Image

Then applied a rubber gasket seal to the outside face to which the cover plate attaches to:
Image

And then installed it into the engine bay - the clips that you see are to locate the 6mm overflow hose from the radiator to the overflow tank:
Image

Image

Before much else gets done in the engine bay, the heater hoses need to be run (waiting on some fittings from Earls), booster installed and the IM needs to come out to install the water-methanol injection nozzles

Then, did some work to the front end , after some parts arrived from the UK. Replaced the old worn out track rod ends with new long ones, installed the bump stops that went missing (I think I threw them out because they were knackered) and shortened the adjustable tie-rods so they wouldnt bottom out on adjustment:
Image

Then I turned my attention to the boot space. Installed the lock and latch mechanism (out of the old Honda Civic Shuttle) so that the boot has a push-button remote release feature:
Image

Then installed the gas strut for the boot lid:
Image

That was it before Oswald's fury was unleashed. Hopefully be Monday the rain wll have moved south (sorry you guys) and I can get back into the shed to dry it out. Have some stuff to do which requires getting under the car, like replacing the rear subframe polyurathane bushes which just disintegrated (they were from Pedders, anyone else have this problem??) with new ones from the UK.

So now, suffering a bit of cabin-fever waiting for the rain to stop. Lucky, there is some design stuff to do!!

Cheers,
Tricky

_________________
"Not Speeding Officer..........Qualifying"


Top
 Profile  
 
 Post subject:
PostPosted: Sun Jan 27, 2013 2:49 pm 
Offline
998cc
998cc
User avatar

Joined: Fri Feb 25, 2011 10:09 am
Posts: 1048
Location: Pot Roast.
I thought posting pornographic images on this site was prohibited? obviously not. :? :lol:

that's some sexy work there mate, will be good to see this thing in 'final product' mode.

Keep up the good work.

_________________
So what's the last thing you remember...

I'm pretty sure you were..

WRONG ANSWER!!!


Top
 Profile  
 
 Post subject:
PostPosted: Sun Jan 27, 2013 6:39 pm 
Offline
848cc
848cc

Joined: Wed Oct 24, 2012 12:06 pm
Posts: 28
Have been hanging out to see your latest update mate.
Not so good about the shed flooding but hope its all good now


Top
 Profile  
 
 Post subject:
PostPosted: Sat Feb 02, 2013 9:48 pm 
Offline
1275cc
1275cc
User avatar

Joined: Fri Jun 17, 2005 10:31 am
Posts: 3183
Location: Burpengary, Queensland - Home of Tricky Performance Engineering
El Gato Starring in THE CASE OF THE DISAPPEARING BUSHES!!

I just couldnt believe it!! There was these bits of red rubber everywhere, and when I mean everywhere, I mean everywhere!!

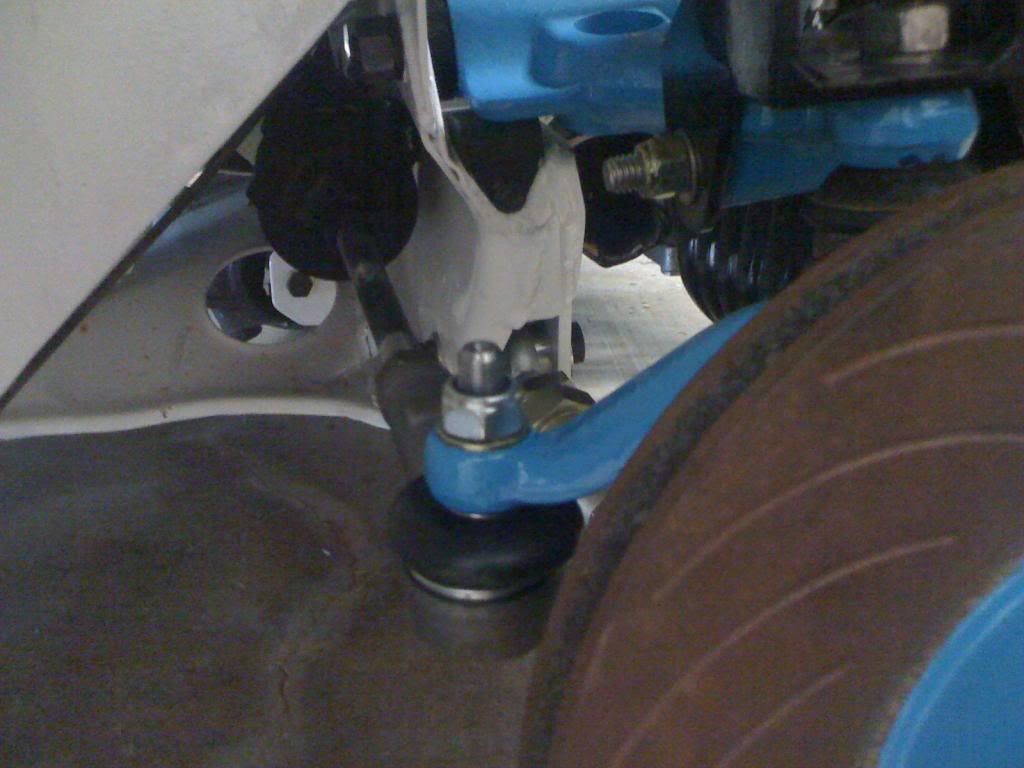
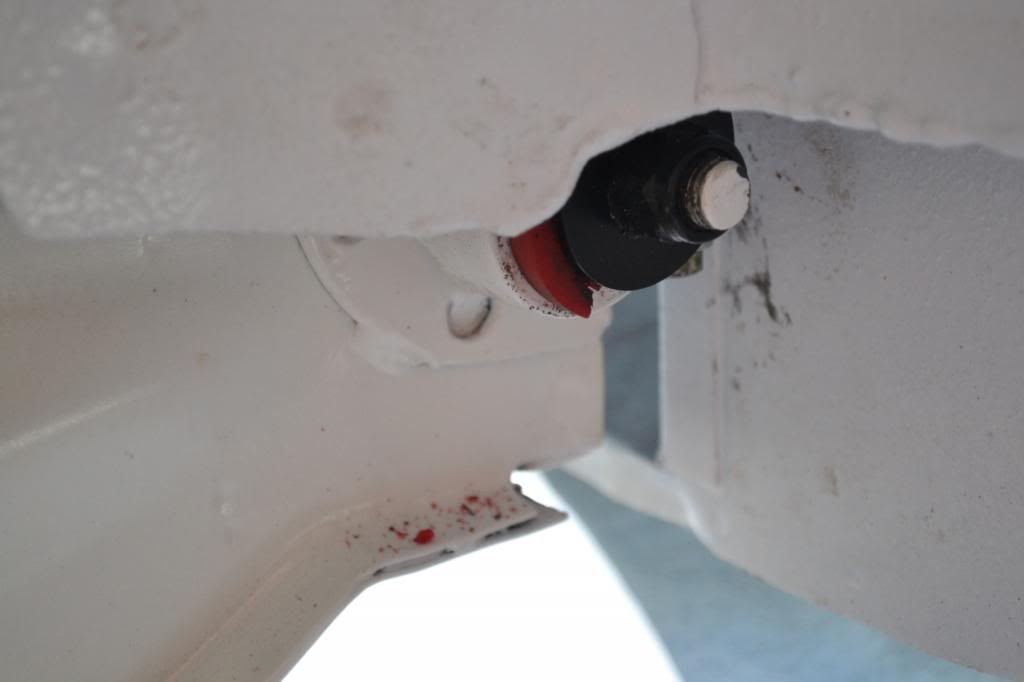
Pumping the rear of the car up and down produced a load knock, on both sides. And upon investigation I found the the rear subframe bushes had totally disintegrated. What really confused me was, they were new! They had been installed in the subframe about two years ago and never saw any road miles.

So this meant that they were ever exposed to the elements - no sun, rain, oil, fuel etc, but here they were, disappearing faster than sand through your fingers!! I ended up buying some new bushes from the UK, and installed them this weekend.

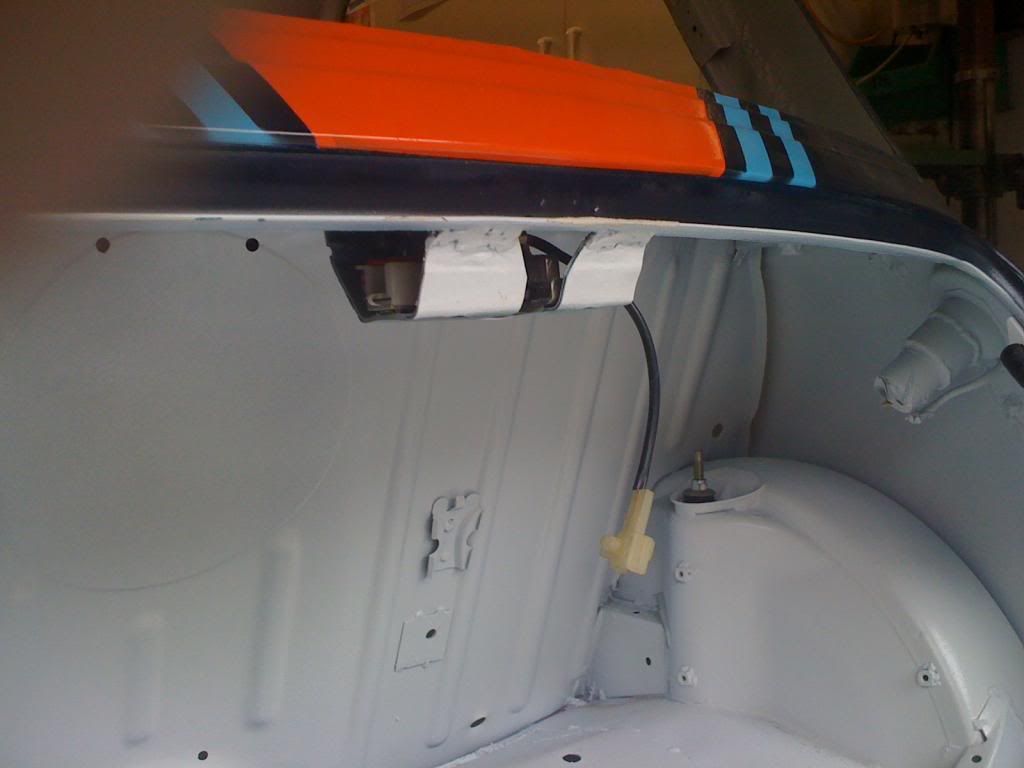
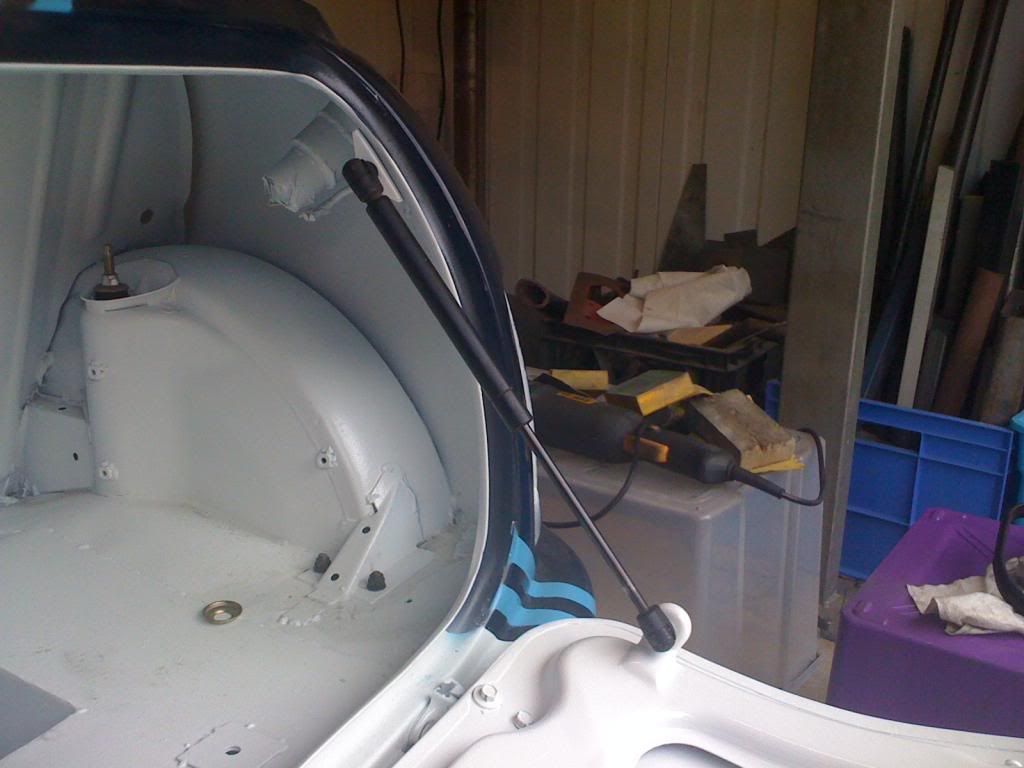
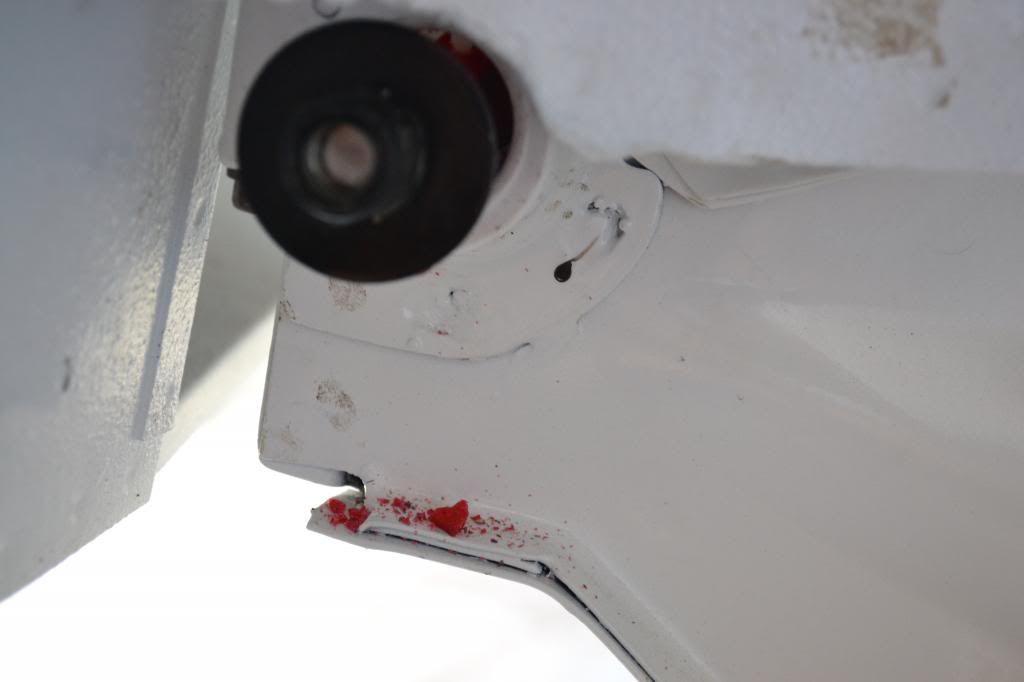
Here is a shot of the left hand rear, and the mess of red rubber inside the side skirt:
Image

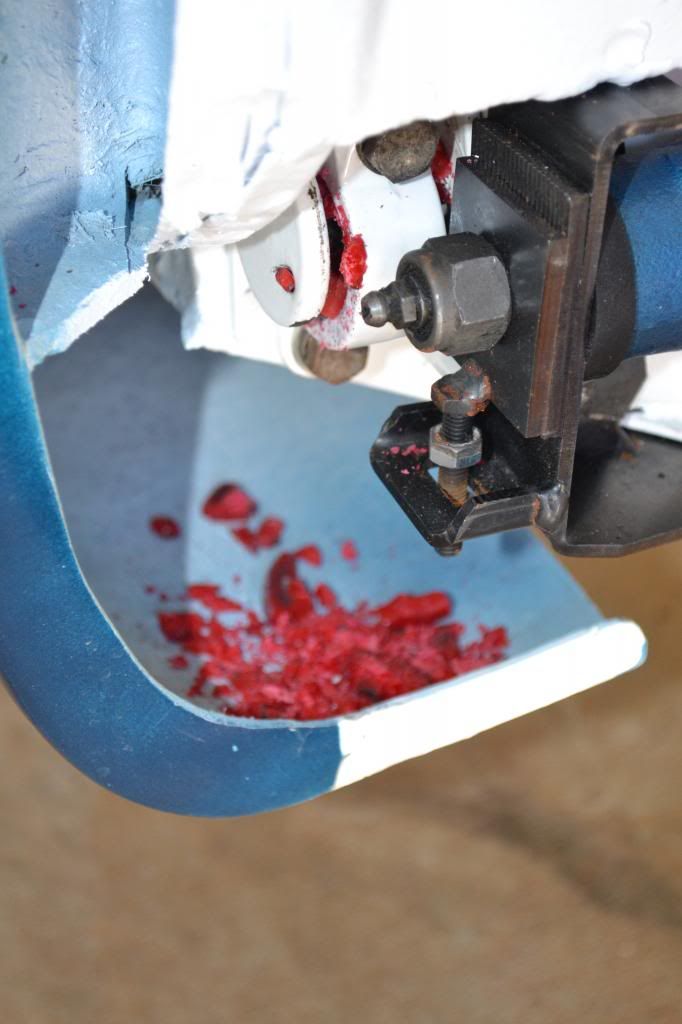
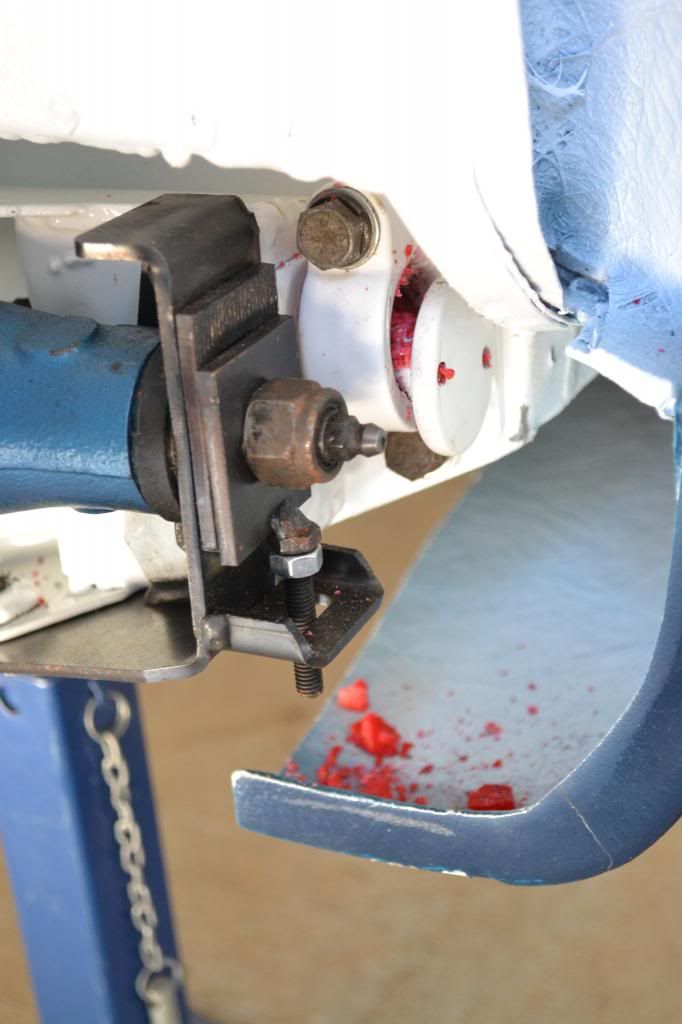
And the other corners were just s bad - wtf was going on?? It was like these bushes just disintegrated into nothing!!
Image

Image

Image

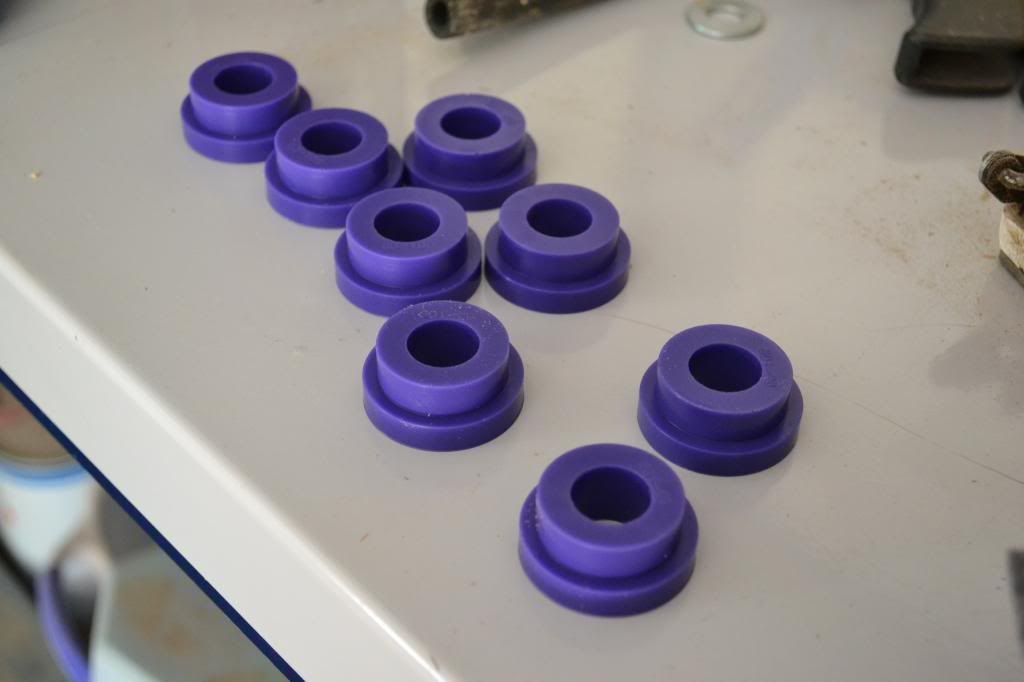
And these are the replacements, and yes, colour coded of course (hope they last longer than the last ones!):
Image

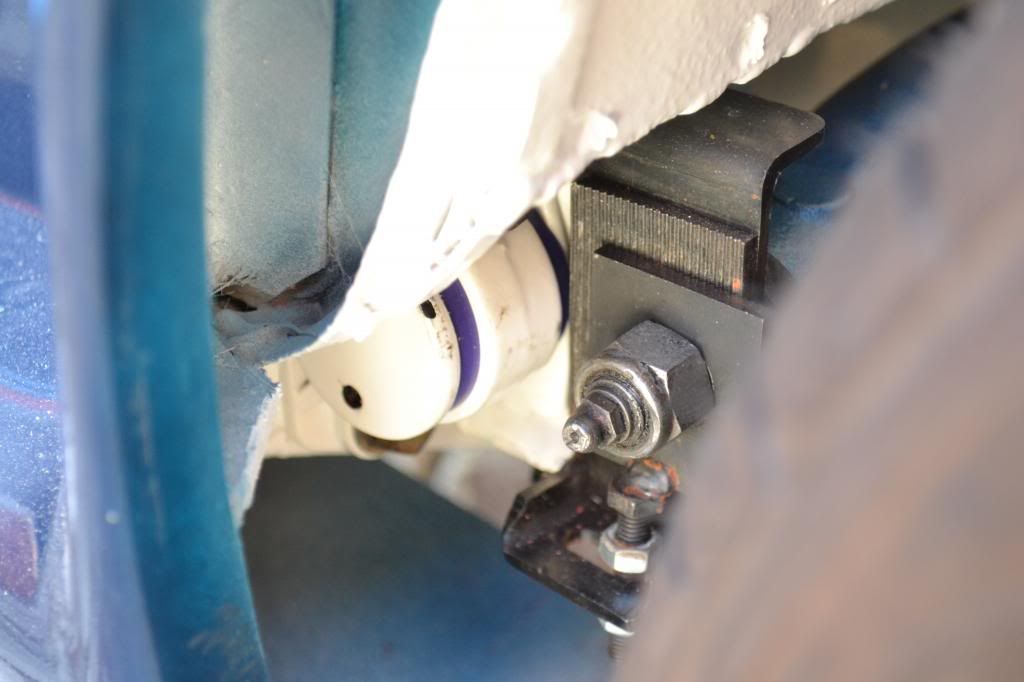
So, after a few hours of disassembly, then reassembly, the new bushes were in. Hopefully for good!
Image

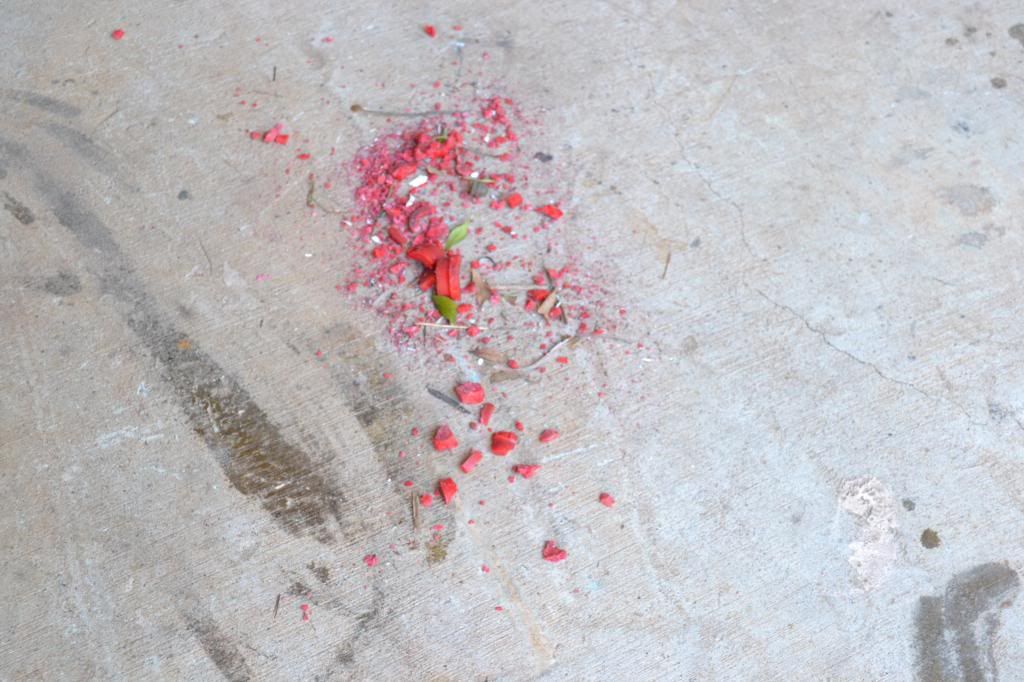
And this was all that was left of those red bastards (obviously bits of red rubber swept up before, over an extended period)!! Ok, just to get this out there, these items I sourced from Pedders. I am not sure why this happened, maybe it was a bad batch, but I would be very reluctant to order another set from Pedders again. Be warned!!
Image

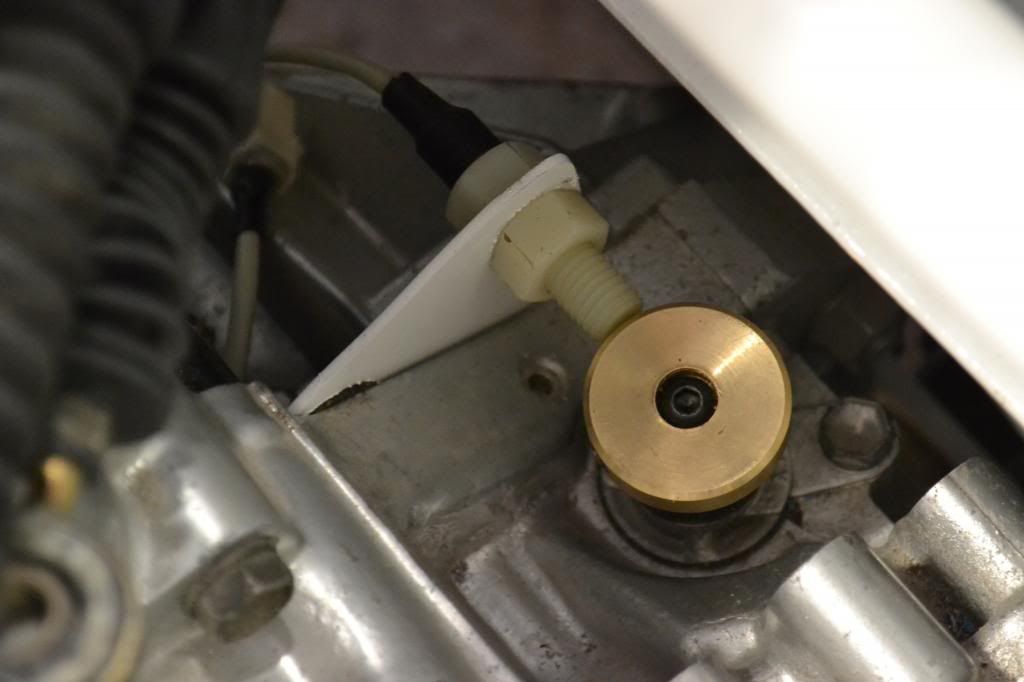
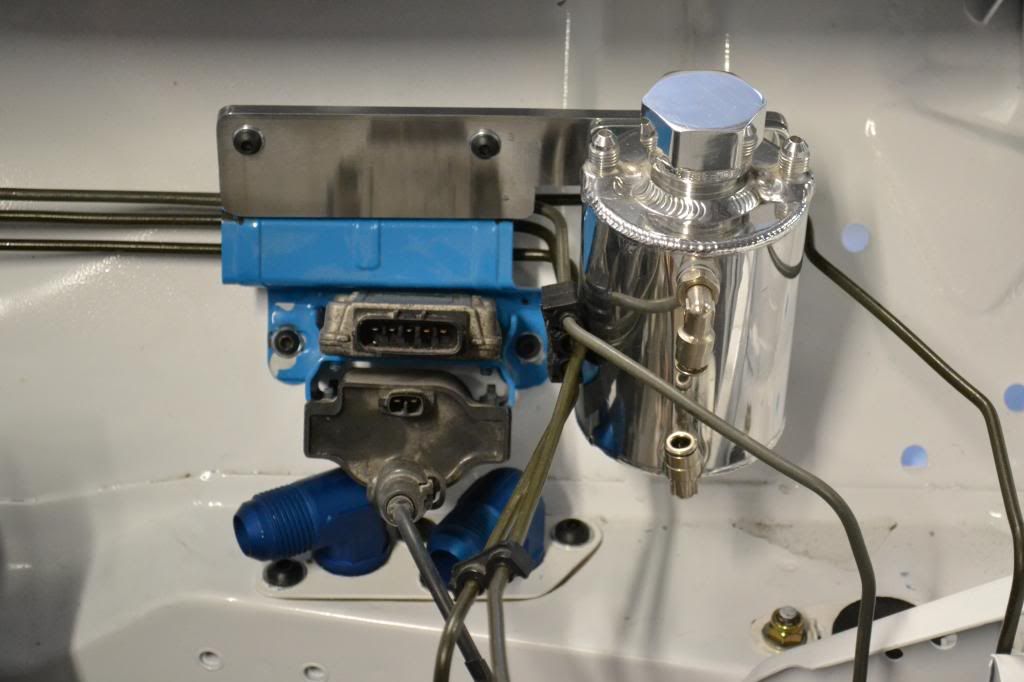
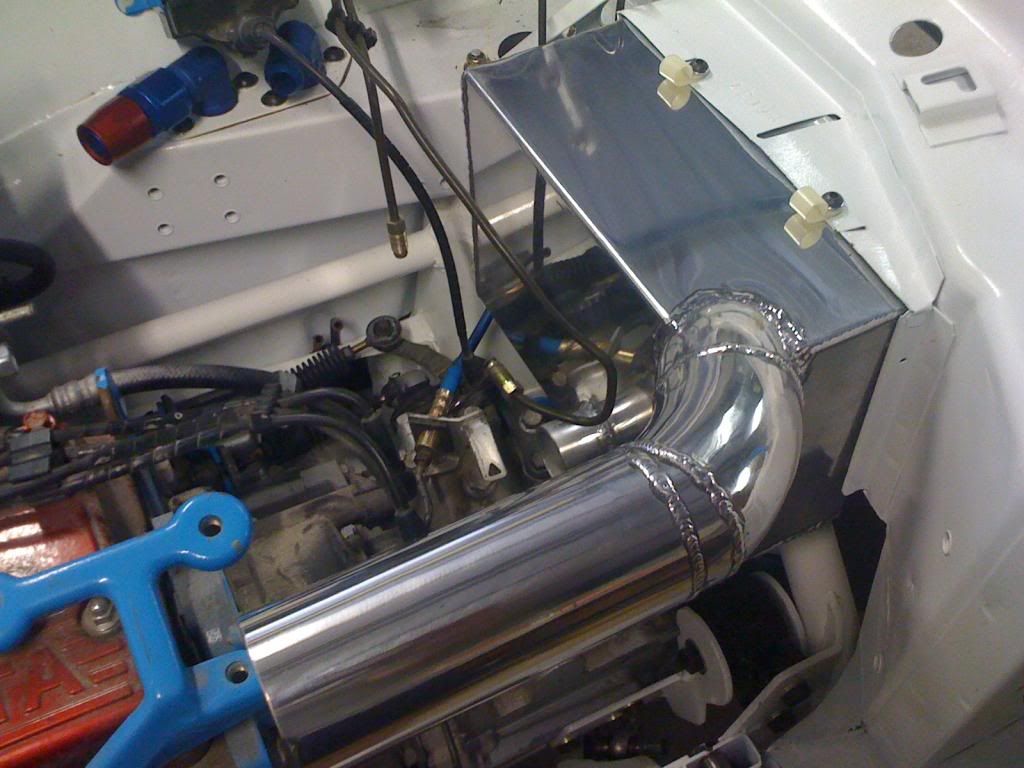
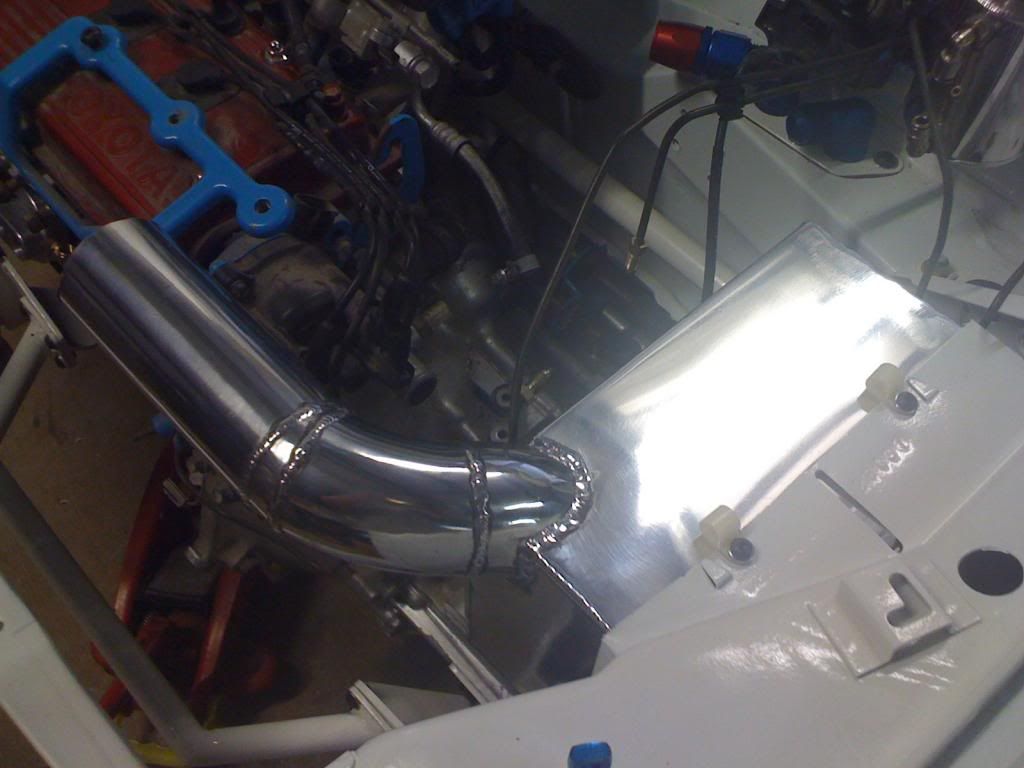
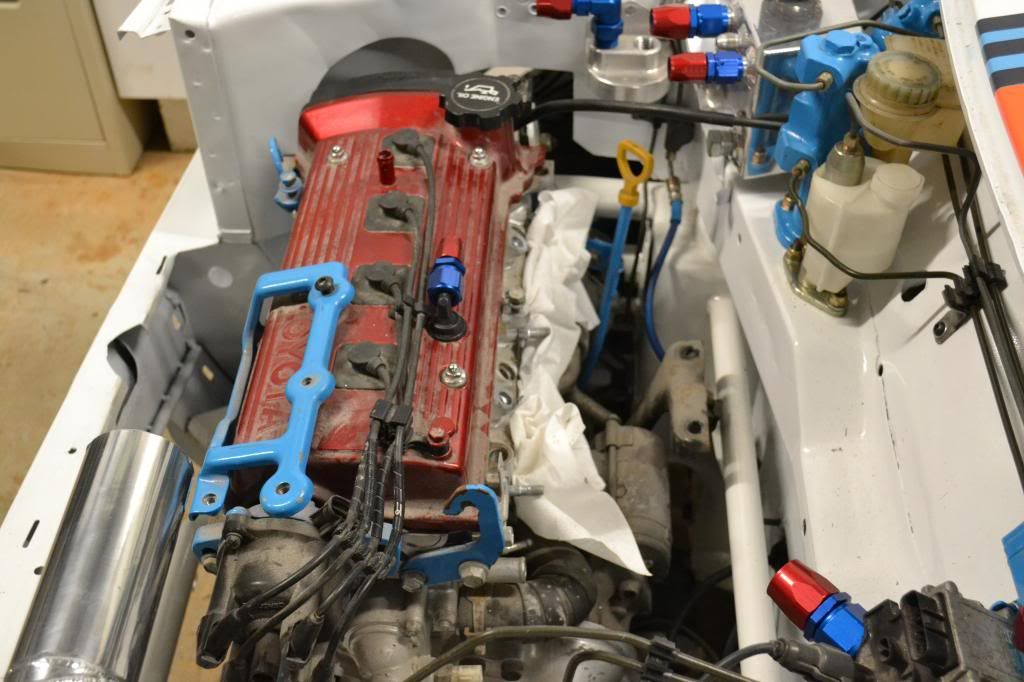
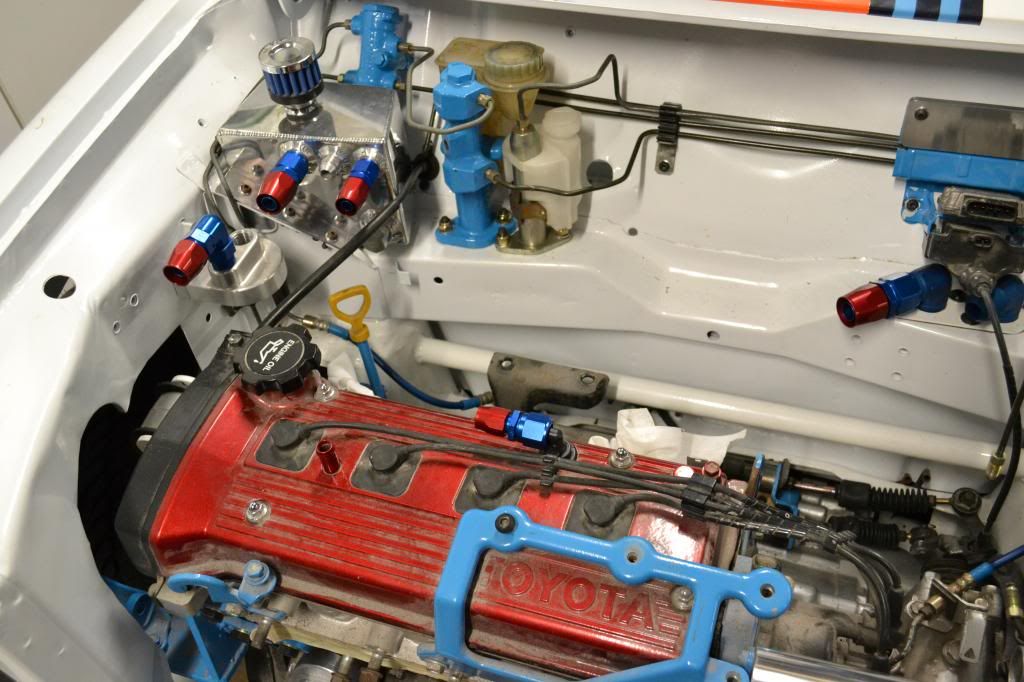
While I was in the mood, I decided to remove the IM, so I could install the water-methanol injection nozzles into the manifold, and also connect the heater hose at the back of the block. Once the IM is removed, there is a fair bit of space at the back there!!
Image

Image

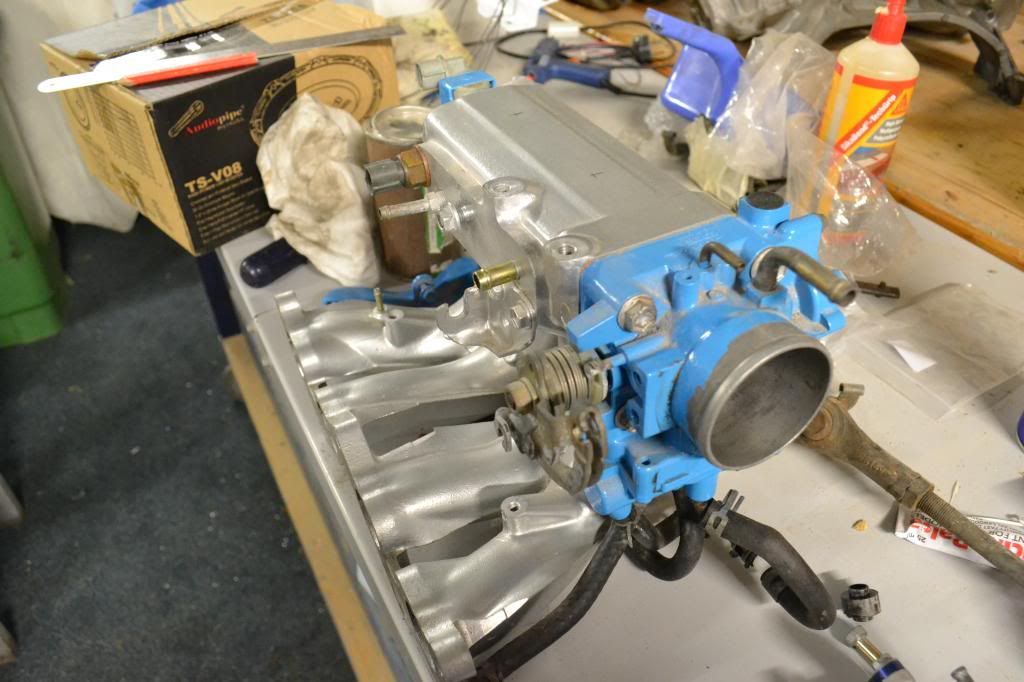
And here is the IM on the bench, notice the marks for the nozzles. These are super fine atomising nozzles that produce an ultra fine fog of water and methanol. The Toyota IM design bunches cylinders 1and 2, and also 3 and 4 together so one nozzle will feed each of the two runners, therefore, two nozzles in total. I will also plug some of the superfluous vacuum take-offs in the IM that arent being used now that I have it out.
Image

Thats it for now. Finally received my 1/8th NPT tap in the mail this week so I can drill and tap for the 1/8th NPT nozzles. Had to order the tap from the US, as to buy it here cost $25! Got a tap and die for the same price from the US including postage. Will do this tomorrow.

More later. Cheers,
Tricky

_________________
"Not Speeding Officer..........Qualifying"


Top
 Profile  
 
Display posts from previous:  Sort by  
Post new topic Reply to topic  [ 1864 posts ]  Go to page Previous  1 ... 100, 101, 102, 103, 104, 105, 106 ... 125  Next

All times are UTC + 10 hours


Who is online

Users browsing this forum: No registered users and 3 guests


You cannot post new topics in this forum
You cannot reply to topics in this forum
You cannot edit your posts in this forum
You cannot delete your posts in this forum
You cannot post attachments in this forum

Jump to:  

© 2016 Ausmini. All garage work involves equal measures of enthusiasm, ingenuity and a fair degree of irresponsibility.