Ausmini
It is currently Sun Jun 22, 2025 3:53 am

All times are UTC + 10 hours


Post new topic Reply to topic  [ 1864 posts ]  Go to page Previous  1 ... 109, 110, 111, 112, 113, 114, 115 ... 125  Next
Author Message
 Post subject:
PostPosted: Thu Jul 25, 2013 8:28 pm 
Offline
1275cc
1275cc
User avatar

Joined: Sat Nov 19, 2005 1:37 pm
Posts: 2495
Location: Vegus, Brisvegus
Nice work! We should have known it wouldn't just be functional but look tops too.

Where did you get the air fittings? I need to put a very much smaller version of that in my shed but don't know where to get a Nitto fitting that will screw into a 1/2" thread. You seem to have nitto to 1/2" without any adaptors between. That's exactly what I need.

M


Top
 Profile  
 
 Post subject:
PostPosted: Thu Jul 25, 2013 8:51 pm 
Offline
Die Die Die!!
User avatar

Joined: Sun Feb 12, 2006 6:29 pm
Posts: 2728
Location: Ad Delayed
thats a pretty impressive shed


Top
 Profile  
 
 Post subject:
PostPosted: Fri Jul 26, 2013 7:53 am 
Offline
848cc
848cc
User avatar

Joined: Wed Mar 14, 2007 3:50 pm
Posts: 404
Location: MORNINGTON PENINSULA
Holy gwokamoly bro looking awesome

i dont think i'd ever go up to the house if i had a shed like that LOL

good work

Cheers Hallsey


Top
 Profile  
 
 Post subject:
PostPosted: Fri Jul 26, 2013 8:13 am 
Offline
1098cc
1098cc
User avatar

Joined: Wed Jun 02, 2010 7:25 pm
Posts: 1335
Location: Brissy
Looking awesome!!!
But I'm not sure how effective that dryer/regulator will be getting the moisture out of the air straight from the compressor .
In all the paint shops i worked in, we only used those ones as an extra dryer on the end of the lines and as an individual line regulator.
To dry the air directly from the compressor we used either an electric dryer, or one that was a big upright cylinder filled with big tablets. I think they were made by "stork".
It might not matter so much for just running air tools, but you will almost certainly need something more effective for the air that will feed your booth otherwise you could get contamination in your spraying.

:wink:

_________________
Tim
Dusk Blue
1964 850


Top
 Profile  
 
 Post subject:
PostPosted: Fri Jul 26, 2013 10:20 am 
Offline
1098cc
1098cc
User avatar

Joined: Thu Sep 30, 2004 3:12 pm
Posts: 1461
Location: Brisbane
Like said above, a lot of panel shops run a basic refrigeration type unit to remove the moisture straight from the compressor. If try yours but depending on how much painting is going on it might be sufficient. Depending on the spray painters and how big the compressors are... The ones that usually have these refrigeration type units are compressors that air power a 400 square meter work shop and a few spray booths. It is mighty humid up here too

_________________
If you want more inches, stroke it
Life's a garden.... Dig It!
http://www.ausmini.com/forums/viewtopic.php?t=20746


Top
 Profile  
 
 Post subject:
PostPosted: Sun Jul 28, 2013 1:44 pm 
Offline
1275cc
1275cc
User avatar

Joined: Fri Jun 17, 2005 10:31 am
Posts: 3183
Location: Burpengary, Queensland - Home of Tricky Performance Engineering
Hi Guys,

Thanks very much for the kind words.

Mokesta - the fittings are MAXAIR fittings. I buy them through a company called Stream, which are located at Narangba which is close to me - their phone number 1300 070 090.
If you send me a PM with your email Ross I will send you back the fittings catalogue and the price list in PDF format.

MrFail - that regulator filter does not service the spray booth, it only services the shop air. The booth will be serviced by a dessicant dryer/filter/seperator/regulator unit (most likely a Devilbiss unit). So the booth air will be fully sanitised, filtered and dehumidified.

Anyway, a few more pics....

The hoist in in, bolted down and wired up. Man, what a job!! There are ten x 18mm dynabolts that hold both posts down. But, in fact, they arent 18mm,but larger. The installation instructions calls for drilling 10 x 18mm holes into the concrete for the anchors, but at first the anchors seemed way too large for the holes. I ended up getting a lump hammer and driving the bastards in, like thumping the unholy sh!t out of them. During the first one, whereby I had pounded on it for perhaps 10 strokes, and it had only gone in about 40mm, I was thinking to myself "If this all goes pear-shaped, there is no way I am going to get this dynabolt out. No Way!!" But in fact, that's how you install them apparently, you just drive the things in unmercifully. Needless to say, I was absolutely knackered after I had them in.

One post needed a slight packer underneath but that was about it, the floor was more or less level. Then, I ran a bead of silicone around the perimeter of the base plates to keep the dust, oil and crap from getting underneath and staining the floor. I ended up supplying my own junction box to do the electrical connection in - the hoist just comes with a fly-lead and thats all. You could put a plug top on if you wanted to, but I have mine hard wired. The junction box has another use too, in that there is an unterminated e-stop wired into the circuit. I ended up ordering one off flea-bay and I will install this into the front of the junction box when it arrives.
Image

The mezzanine floor is in, screwed down and virtually finished. At the front lip I willl end up folding up a bit of aluminium treadplate and put it along th edge to give it a bit of ding resistance. There may be some big, heavy items going up there so that edge could get a hard life. 12.5m2 of storage space - woot!!!
Image

I have installed a toe-rail along the sides of the mezzanine, and I will end up putting up some side walls along both sides to effectively 'box' the mezzanine in. That will save any chance of anything falling off the mezzanine into the machinery room or onto the roof of the spray booth:
Image

And this arrived mid-week - its my electric hoist for getting things up and down from the mezzanine. Its fitted with a 12VDC winch, and is capable of lifting 600kg (double-line pull)!! :shock: Not that there will be anything this heavy going up there, but the VTEC engine will live up there for a while and I'll be buggered if I will be putting that on my shoulder and climbing up the ladder with it. The boom folds, telescopes and it swivels 360 degrees. I will need to have a 12vdc battery up there and power to plug in a permanent battery conditioner but It will make life so much easier. I could even use it to pull cars up the driveway!! I will go and get a large steel base-plate cut to spread the load across several joists and the front bearer.
Image

Well that's about it for this week. Next week will be drawing in the sub-mains and powering the shed up, and hopefully the steel for the dividing walls will arrive - fingers crossed!! Also I will need to pick up some 12mm MDF for the mezzanine walls, and paint that white and install that. Also next week I need to start moving the machines and benches down, and get ready to open for business.

Cheers,
Tricky

_________________
"Not Speeding Officer..........Qualifying"


Top
 Profile  
 
 Post subject:
PostPosted: Sun Jul 28, 2013 2:38 pm 
Offline
Give Ash some flowers Nick .
User avatar

Joined: Wed Aug 09, 2006 1:22 pm
Posts: 10149
Location: Toowoomba Region, QLD
Coming together nicely Tricky. I for one can't wait to see the lathe and milling machine you get. I bet it will put mine to shame!

Looks like you've put a lot of thought into the placement of everything and how you will set it up. The silicone around the legs of the hoist is a nice touch!

_________________
"In two years time your car will be like a lady's clothes, out of date, my car will still be in fashion when I am dead" - Sir Alec speaking to Pininfarina


Top
 Profile  
 
 Post subject:
PostPosted: Sun Jul 28, 2013 10:59 pm 
Offline
1275cc
1275cc
User avatar

Joined: Sat Nov 19, 2005 1:37 pm
Posts: 2495
Location: Vegus, Brisvegus
Looking great! Got a guillotine and pan brake on the shopping list too?

I found the fittings I was after at Trade Tools so I am sorted thanks.

M


Top
 Profile  
 
 Post subject:
PostPosted: Mon Jul 29, 2013 8:12 am 
Offline
1275cc
1275cc
User avatar

Joined: Fri Jun 17, 2005 10:31 am
Posts: 3183
Location: Burpengary, Queensland - Home of Tricky Performance Engineering
Hi Guys,

Nick, thanks for the kind words mate. I have had both the Mill and Lathe for about 3 years now, here are some pics of when they arrived....
Image

Image

Ross - panbrake I got just before the other two machines above. Dont have a guillotine as I usually use shears to cut my sheets...
Image

Image

In reality, there is not much I need to get, I just need to have it in one place and easy to get to and use, which at the moment, it is not!!

Cheers,
Tricky

_________________
"Not Speeding Officer..........Qualifying"


Top
 Profile  
 
 Post subject:
PostPosted: Mon Jul 29, 2013 5:10 pm 
Offline
1098cc
1098cc
User avatar

Joined: Wed Jun 02, 2010 7:25 pm
Posts: 1335
Location: Brissy
Maybe your own dyno?? :wink: Now that would be 8)

_________________
Tim
Dusk Blue
1964 850


Top
 Profile  
 
 Post subject:
PostPosted: Mon Jul 29, 2013 6:18 pm 
Offline
1275cc
1275cc
User avatar

Joined: Fri Jun 17, 2005 10:31 am
Posts: 3183
Location: Burpengary, Queensland - Home of Tricky Performance Engineering
MrFail wrote:
Maybe your own dyno?? :wink: Now that would be 8)


I've never thought of that. Now that would be special!! 8)

_________________
"Not Speeding Officer..........Qualifying"


Top
 Profile  
 
 Post subject:
PostPosted: Mon Jul 29, 2013 9:26 pm 
Offline
848cc
848cc
User avatar

Joined: Sun Dec 25, 2011 10:45 pm
Posts: 416
Location: Brisbane, Australia
Archangel007 wrote:
MrFail wrote:
Maybe your own dyno?? :wink: Now that would be 8)


I've never thought of that. Now that would be special!! 8)


another shed

another thread

faster minis!

_________________
1978 Leyland Clubman


Top
 Profile  
 
 Post subject:
PostPosted: Mon Jul 29, 2013 10:04 pm 
Offline
848cc
848cc
User avatar

Joined: Thu Dec 06, 2012 8:56 pm
Posts: 437
Location: Sydney
you do realise that you are going to have to repaint that machinery in Martini livery if you're putting in that shed don't you Tricky? :P

_________________
1968 Mini-matic - 1340cc, 45 weber - 92hpatw, 14.5 @91mph, GrandmaSpec


Top
 Profile  
 
 Post subject:
PostPosted: Tue Aug 06, 2013 6:25 pm 
Offline
1275cc
1275cc

Joined: Wed Jan 05, 2005 4:50 pm
Posts: 2690
Location: Wollongong
Any updates?

_________________
Ryan Filippi
Minis In The Gong
[email protected]
www.minisinthegong.com.au


Top
 Profile  
 
 Post subject:
PostPosted: Wed Aug 07, 2013 9:00 am 
Offline
1275cc
1275cc
User avatar

Joined: Fri Jun 17, 2005 10:31 am
Posts: 3183
Location: Burpengary, Queensland - Home of Tricky Performance Engineering
Chux wrote:
you do realise that you are going to have to repaint that machinery in Martini livery if you're putting in that shed don't you Tricky? :P


Oh god, dont say that!! :shock:

Updates, why yes...

This is about five days old, but I thought it would be easier to just keep things in chronological order and bring you up to date. Had a huge week last week, and reached a few miletones - and I have to say a huge and heartfelt thanks to a few people for their help -->
>Mrs Treloar - my gorgeous, talented, hard working and suppremely supportive wife gave me a hand throughout the week when she could, and without her, I could not have come this far - thank you my love for everything!
>Cameron (Cazmo) - came to the rescue with a nice bit of 10mm steel plate for the crane, well done mate and thanks!!

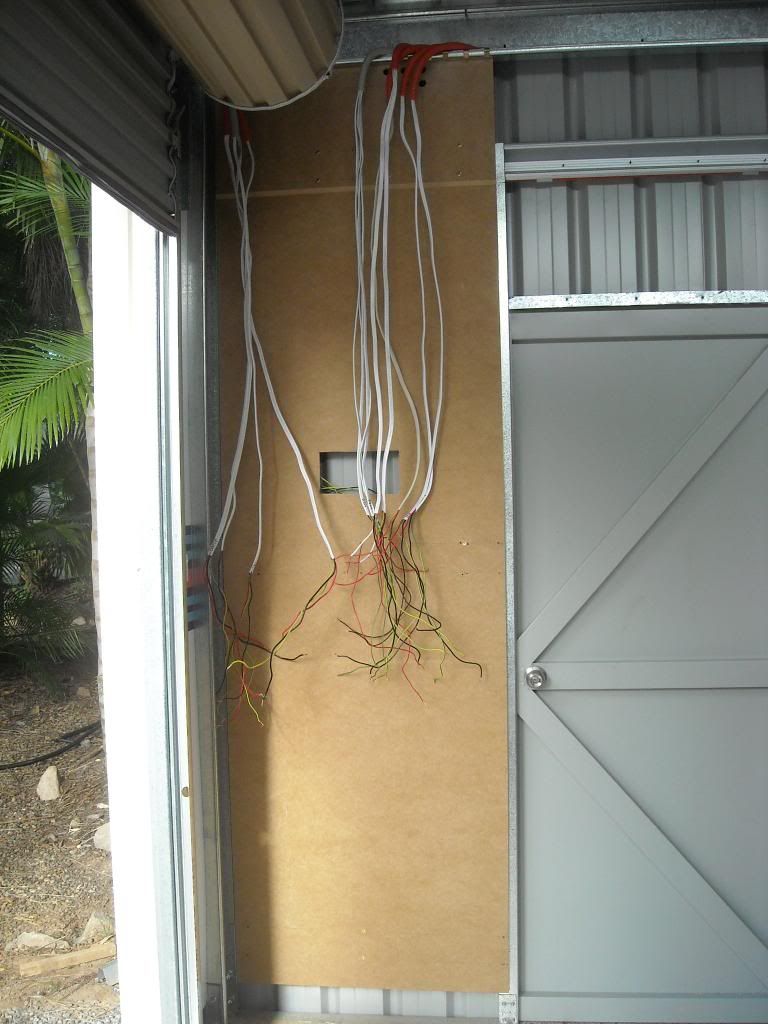
So milestones - the power finally went on Wednesday, and the wife was instrumental in helping me pull cabls through etc. No more leads!! But, I then decided that I didnt like the sheet metal panelling (old roller door sheet) that I had used to mount the sub-board (in reality, I did it prematurely so that Chris the floor guy could do his stuff). So, I decided that it had to match the rest of the shed. So, disconnected the board, pulled out all the cables, bought some more MDF sheet and cut it to size and fitted it up:
Image

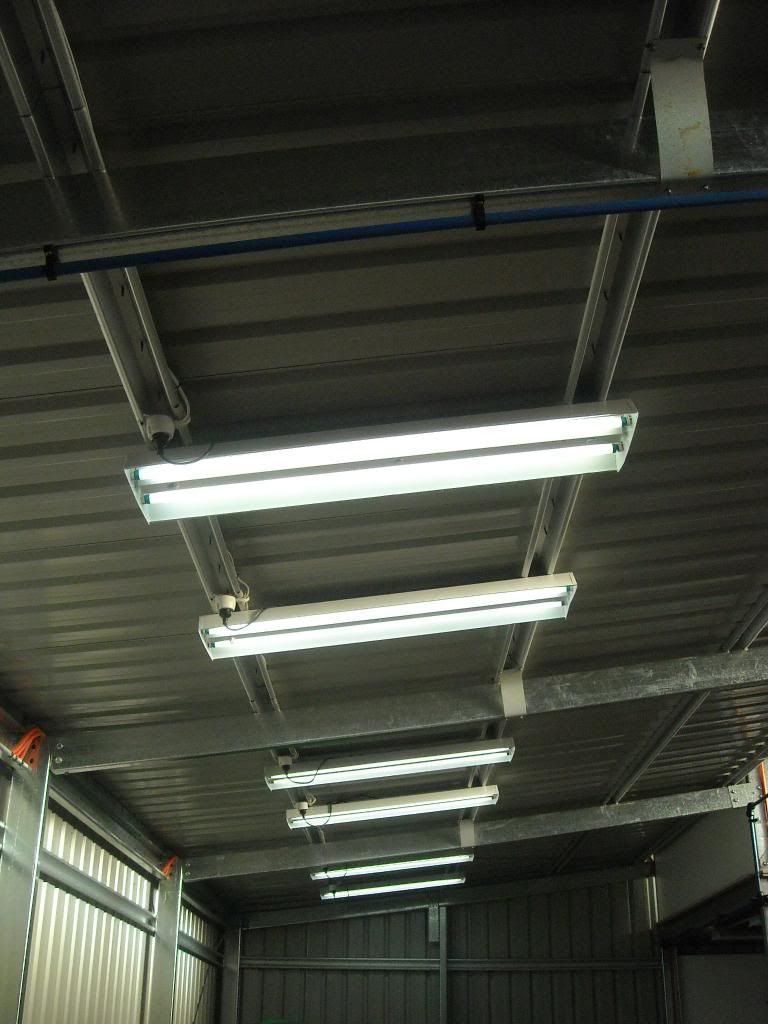
Then, fitted it off again, and voila, lights and power:
Image

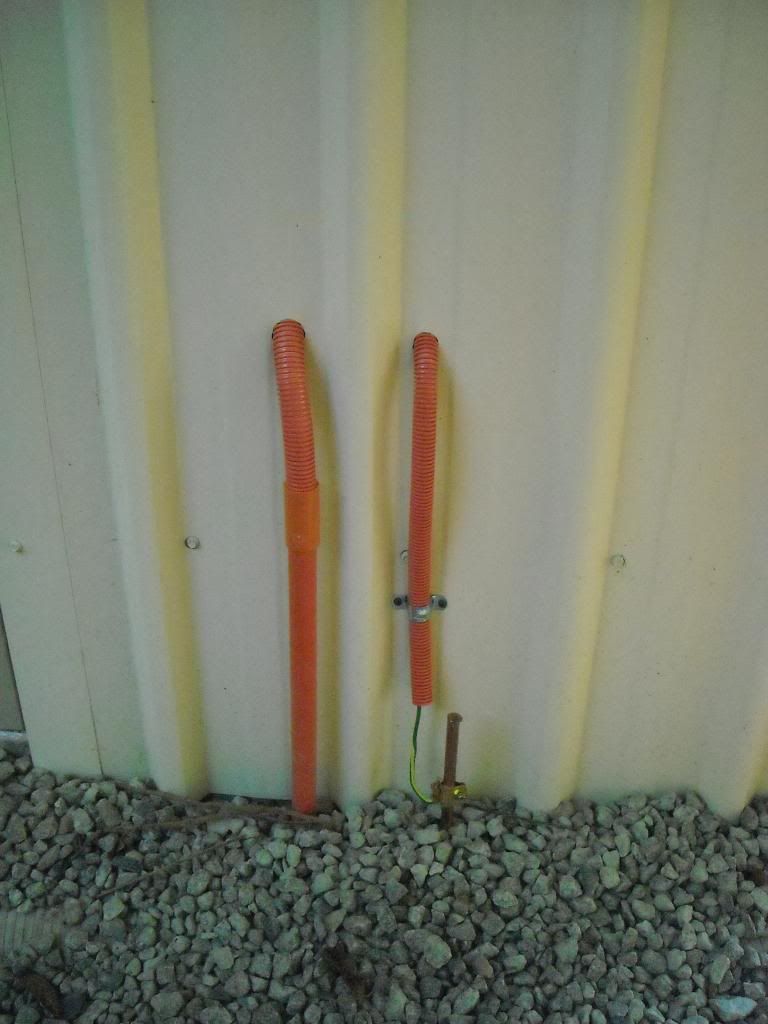
The cable entry points will end up having a cover over them from 2.5mm alloy treadplate just for a bit of mechanical protection:
Image

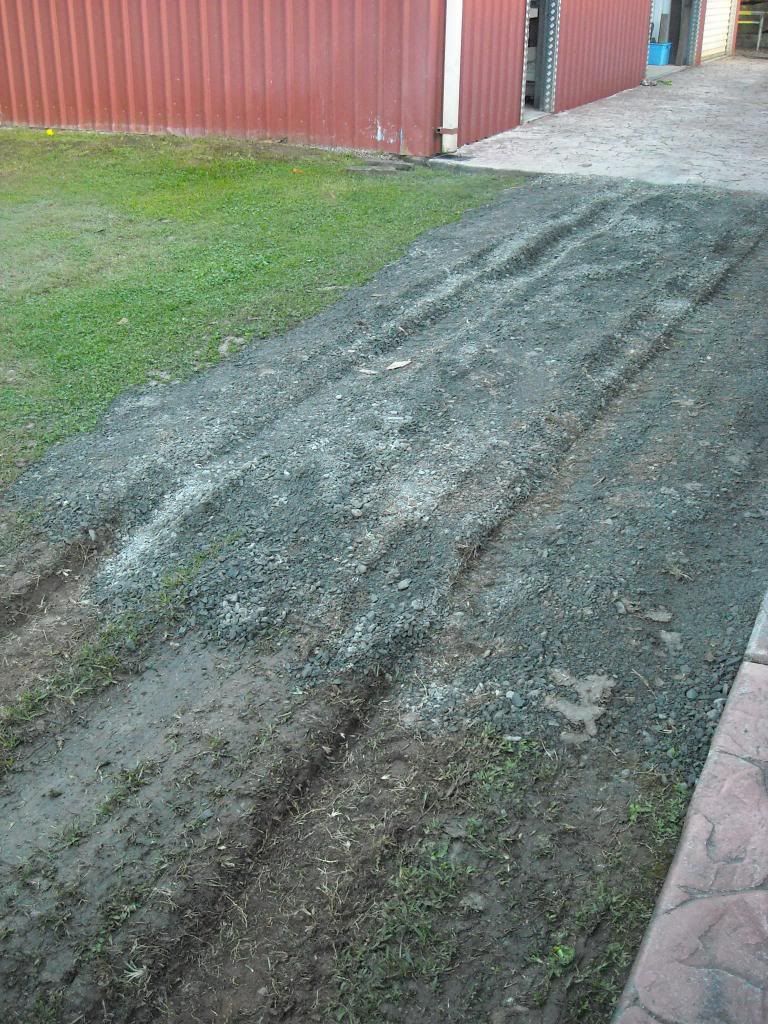
Friday the forklift showed up. Now I could move the machines from the top shed, down into the bottom shed. But, it turned out to be a comedy of errors. The forklift continually got bogged up behind the house. So, hook up the trailer, went up to the local landscape suppliers, and got a metre of roadbase. Then spent the next two hours shovelling the suff and levelling it out (broke the handle on the rake) to make a platform. The forklift still dug in so I put down all the spare sheet metal from the shed (roller door portector). This folded up like a tin can under the weight. Scrap MDF from the shed panelling worked as long as I kept the speed up. After every run I compacted it down with the X-Trail - it took all day!!
Image

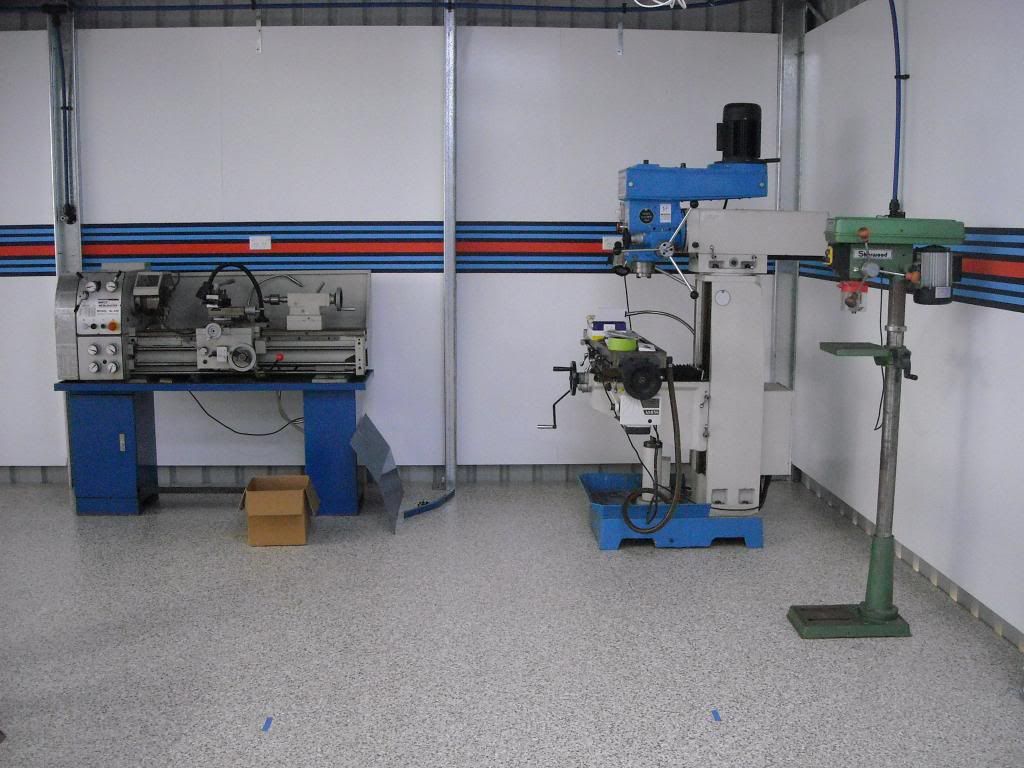
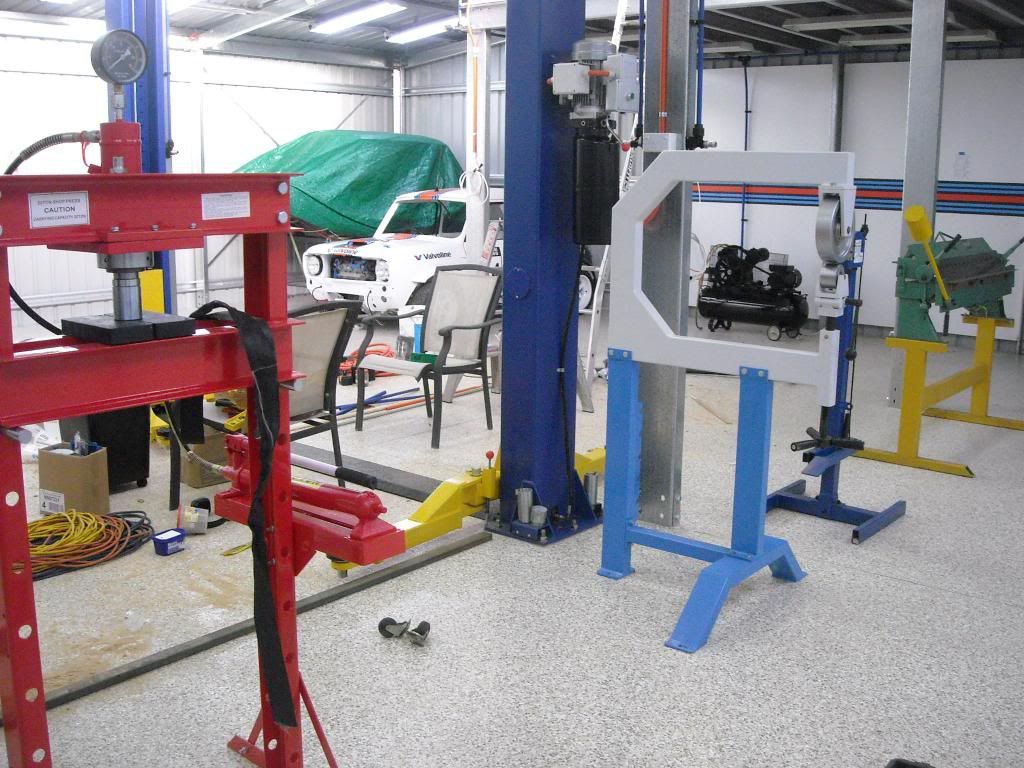
But finally, by days end, the machines were in their new home:
Image

At the end of the day though, with no load on it, went to turn it around behind the house and ran off the end of the concrete near the washing line - irrevocably bogged to the floorboards. I just left it there overnight and tackled it the next day. The X-Trail did not budge it, so had to get the neighbours front-end loader/tractor (lucky we live on acreage!) over to help lift it out. The ground was just water-logged clay, so no wonder - clean up in aisle 6!!
Image

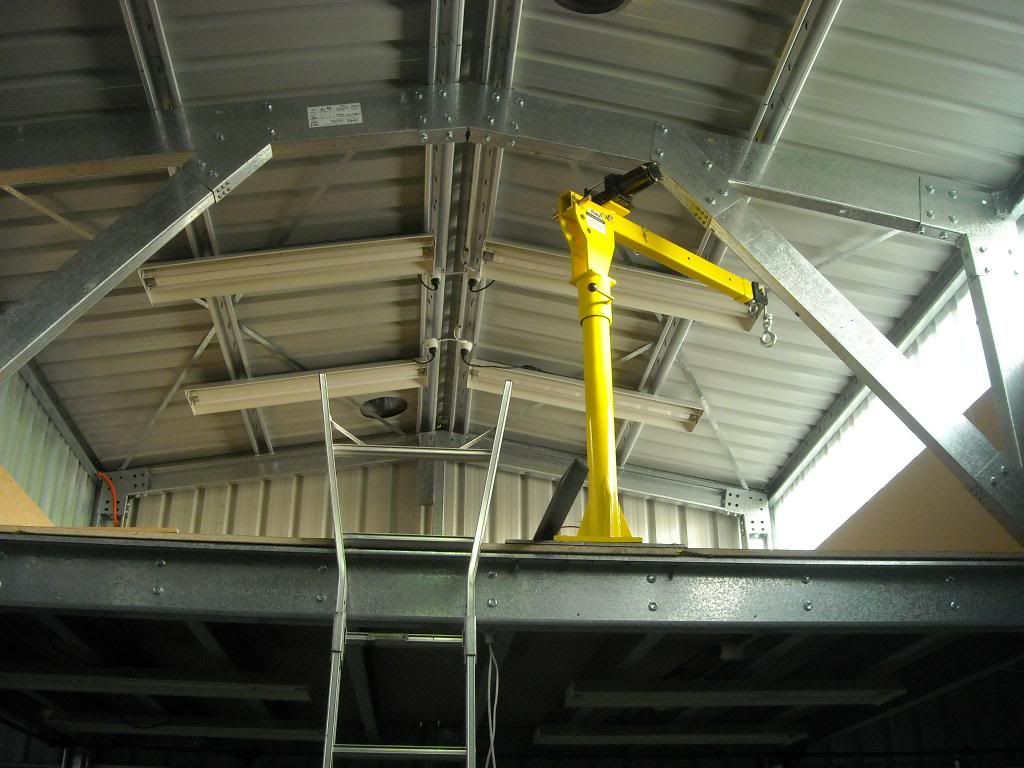
Installed the crane up on the mezzanine. Thanks to Cam for providing the base-plate for the crane. There are 10x 16mm bolts holding the base-plate and crane to the mezzanine joists. Once it was up and installed, I swung on it, not a creak or groan, solid!! Just need a battery up there now and power for the battery conditioner. Even though the photo doesnt show it, it is in the pefect location and can articulate up and down and rotate through 360 deg. without hitting anything:
Image

So now, I have lights and power, and could test the hoist etc. Painted the panelling to match the existing yesterday:
Image

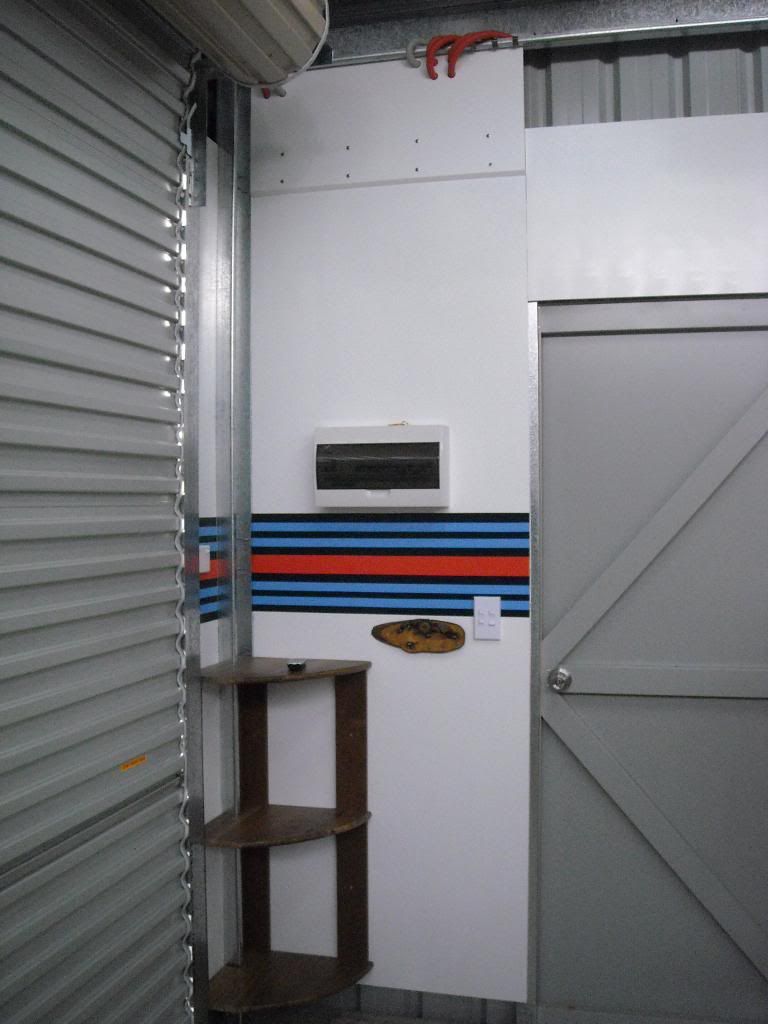
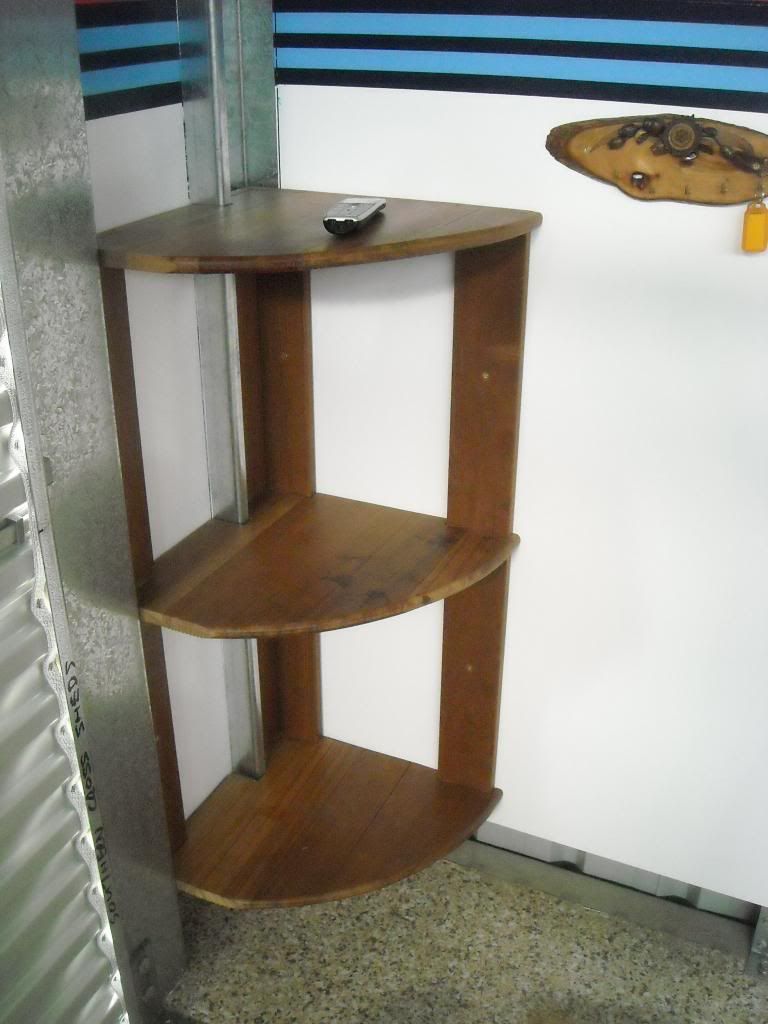
I knocked up and installed a little bit of joinery for somewhere to put the cordless phone, coffee/tea for clients and my mobile phone etc. Key hanger-up thingy for clients and shed keys:
Image

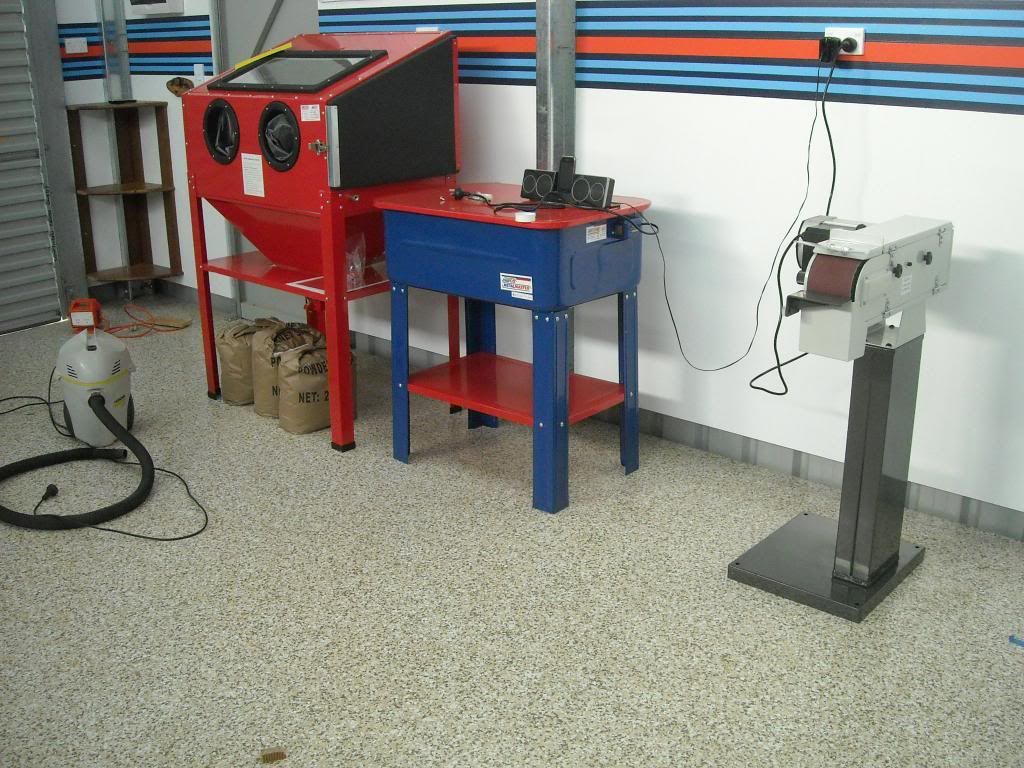
Moved all the rest of the gear into place - finally have enough room to use the english wheel and to use my stuff without interference:
Image

Image

Also, the first of the suppliers sent some promo material. The colours are almost made for each other:
Image

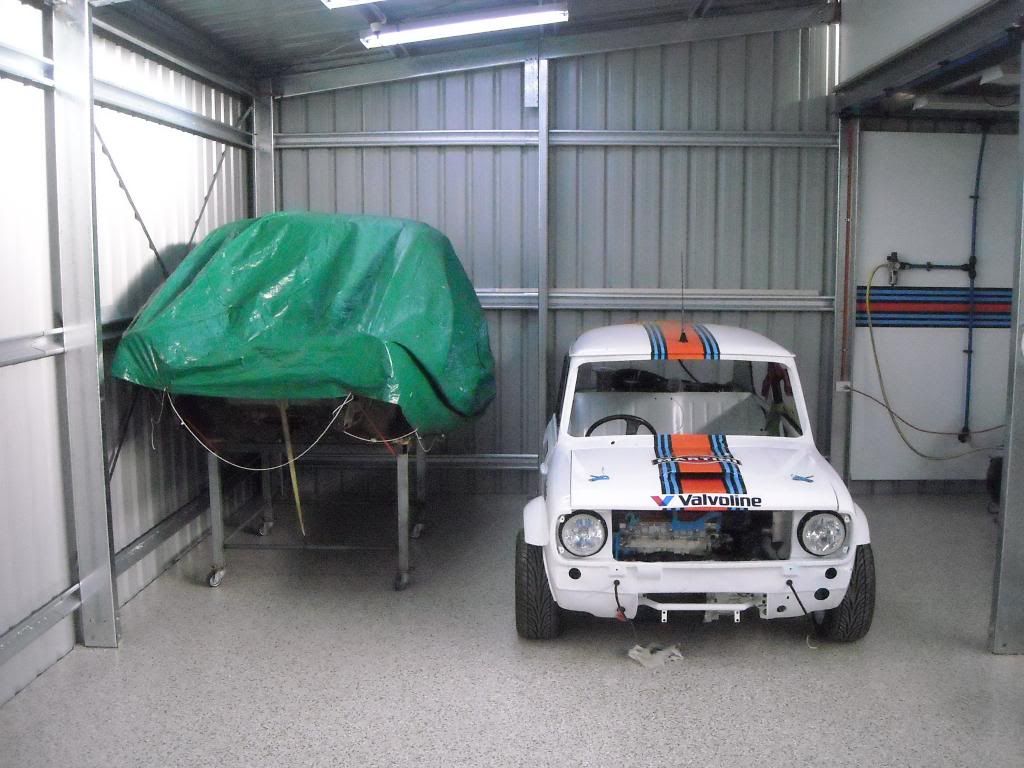
And finally, at the end of the day, moved in some tenants (of the non-permanent kind I hope!). Leonidas is still under the covers but El Gato is taking pride of place, and loving his new, airy, light and spacious home. Thanks once again to my lovely wife for helping me push him up the driveway and into his new home.
Image

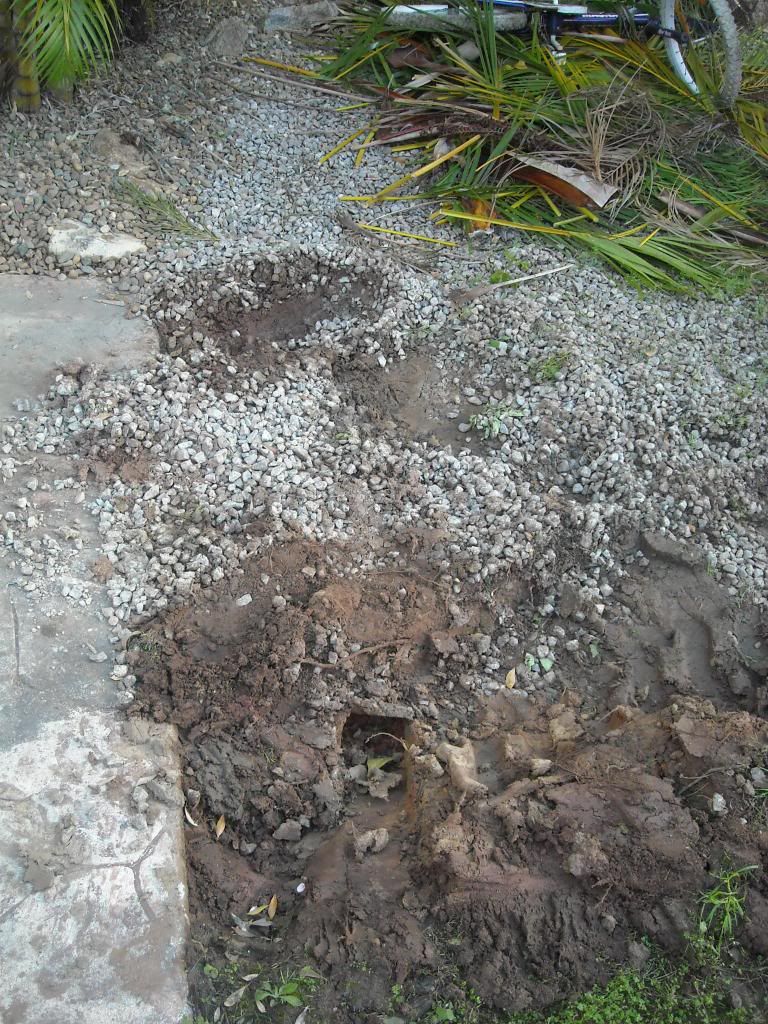
So today, its tackling the benches in the old shed. I did have designs of simply lifting them out with the forklift, however I built them in situ to suit each position and they will have to be fully disassembled, transported, modiied and then re-assemnbled in their new location. Time consuming, but its the only way!!

Also had a visitor last week, Cam came and had a sticky, thanks mate for taking the time to come over and say g'day. Thats three visitors so far - impressed!! More later and thanks guys for taking an interest.

Cheers,
Tricky

_________________
"Not Speeding Officer..........Qualifying"


Top
 Profile  
 
Display posts from previous:  Sort by  
Post new topic Reply to topic  [ 1864 posts ]  Go to page Previous  1 ... 109, 110, 111, 112, 113, 114, 115 ... 125  Next

All times are UTC + 10 hours


Who is online

Users browsing this forum: No registered users and 19 guests


You cannot post new topics in this forum
You cannot reply to topics in this forum
You cannot edit your posts in this forum
You cannot delete your posts in this forum
You cannot post attachments in this forum

Jump to:  

© 2016 Ausmini. All garage work involves equal measures of enthusiasm, ingenuity and a fair degree of irresponsibility.