Ausmini
It is currently Fri Jun 27, 2025 6:51 am

All times are UTC + 10 hours


Post new topic Reply to topic  [ 46 posts ]  Go to page Previous  1, 2, 3, 4  Next
Author Message
 Post subject: Re: Hydrolastosity
PostPosted: Wed Nov 27, 2013 9:11 pm 
Offline
1360cc
1360cc
User avatar

Joined: Wed Oct 03, 2007 9:04 pm
Posts: 6743
Location: Melbourne, VIC
Does anyone know what the Spring Element Specification abbreviated codes stand for in the table I posted - N.R., H.R. and E.H.R. ?

_________________
ex-NSW Police 1970 MK II Cooper S
VMCI #43


Top
 Profile  
 
 Post subject: Re: Hydrolastosity
PostPosted: Thu Nov 28, 2013 6:33 am 
Offline
848cc
848cc

Joined: Tue Jul 19, 2005 10:29 pm
Posts: 165
Welcome Don, great work you have done so far keep it up. Anything to help demystify and preserve/repair hydro units is a good thing.


Top
 Profile  
 
 Post subject: Re: Hydrolastosity
PostPosted: Thu Nov 28, 2013 7:38 am 
Offline
Hydrolastosity

Joined: Fri Sep 27, 2013 7:52 am
Posts: 25
Location: a Ville in the Forest, NSW
winabbey,

While searching for rubber compounds, the most common use of each letter was as fallows:
N Natural
R Rubber
H Hydrocarbon (the following R stood for Resin)
E Elastomer? didn't really find this alone, the P was always there...
EP Ethylene-propylene

At some point I would like to see if we can get any old records/info from Dunlop, patents do expire unless you keep paying for them, and the rubber technology on these parts was ahead of its time, but even that secret has to fade with time.


Last edited by Don Welch on Thu Nov 28, 2013 12:39 pm, edited 1 time in total.

Top
 Profile  
 
 Post subject: Re: Hydrolastosity
PostPosted: Thu Nov 28, 2013 12:35 pm 
Offline
Hydrolastosity

Joined: Fri Sep 27, 2013 7:52 am
Posts: 25
Location: a Ville in the Forest, NSW
Bubbacluby wrote:
winabbey wrote:
The Doc has also looked for a replacement hose supplier but without luck to date.


I believe the hose is commonly known as herringbone and a google search does bring some up. Im not sure of the diameter of the hose though (so cant check for sizing).

But it doesn't seem to be that rare.

Here is some (I assume it is just the same as hydraulic oil hose), but probably wrong size

http://www.ebay.com.au/itm/HERRINGBONE- ... 0867993856

if not the same its very similar and no one would pick the difference

Bubba


Thanks Bubba, nice find! That is the correct size hose both internal and external, however I highly doubt the pressure specifications of this hose are going to be even close to what we need (or what I would feel safe with installing). Searching Herringbone and Norton, this hose is to supply to and from the oil filter and/or tank, which I cannot see going above 150psi (most gauges sold for the bikes only go to 100psi). We need to double that number, then have a safety factor in my opinion no less than 500psi burst.

That exterior look of the hose in addition to the pressure specs is going to be rare... maybe we'll get lucky and someone at Dunlop has a spool of the stuff in a dark corner of the factory... wishful thinking. Stainless ferrules are what I'm using on my repaired bag and they seam to be doing the trick. I have found a high pressure line that is perfect for these bags, just doesn't have the herringbone look. Still waiting on a price too from my supplier...

Cheers, d


Top
 Profile  
 
 Post subject: Re: Hydrolastosity
PostPosted: Thu Nov 28, 2013 1:30 pm 
Offline
religious status
religious status
User avatar

Joined: Fri Mar 19, 2004 6:19 pm
Posts: 39752
Location: near Baulkham Hills, NSW
As said I had no joy finding the original hose.
The one bag I have repaired I used Pirtek MP-06 hose, this is textile braided, rated @ 500psi and is normally used for oil return lines with push-in barb fittings. However it crimped OK for me when Pirtek did it.
No it is not the right pattern, but if the Dunlop diamond stuff is NLA this stuff does work and it's readily available.

_________________
DrMini- 1970 wasaMatic 1360, Mk1S crank, 86.6HP (ATW) =~125 @ crank, 45 Dellorto (38 chokes), RE282 sprint cam, 1.5 rockers, 11.0:1 C/R. :mrgreen:


Top
 Profile  
 
 Post subject: Re: Hydrolastosity
PostPosted: Thu Nov 28, 2013 5:12 pm 
Offline
1275cc
1275cc
User avatar

Joined: Sat May 02, 2009 4:53 pm
Posts: 3135
Location: Port Stephens, a little north of Newcastle, Australia
Welcome Don. Guys like you make me feel ill.....with envy. :mrgreen:
Fantastic to have so many skills.


Top
 Profile  
 
 Post subject: Re: Hydrolastosity
PostPosted: Thu Nov 28, 2013 8:25 pm 
Offline
1098cc
1098cc

Joined: Sat Jul 23, 2011 8:17 am
Posts: 1964
Location: san remo nsw
Just read a bit of your stuff, you really are getting into this. Just a thought, the hoses are relatively short so what about making a mould from a good old hose then use modern hydraulic hose of smaller outer diameter and put it in the mould, supported by rod to keep it straight. Then use something like sicaflex to put pattern on outside of hose? Then fit hoses to bags. Is anything I've written making sense?


Top
 Profile  
 
 Post subject: Re: Hydrolastosity
PostPosted: Fri Nov 29, 2013 5:14 pm 
Offline
Give Ash some flowers Nick .
User avatar

Joined: Wed Aug 09, 2006 1:22 pm
Posts: 10149
Location: Toowoomba Region, QLD
Don, excellent posts. I will be keeping an eye on this. I too love hydrolastic cars and anything you can do to revamp hydro bags is great!

Keep up the great work.

_________________
"In two years time your car will be like a lady's clothes, out of date, my car will still be in fashion when I am dead" - Sir Alec speaking to Pininfarina


Top
 Profile  
 
 Post subject: Re: Hydrolastosity
PostPosted: Fri Nov 29, 2013 8:12 pm 
Offline
1275cc
1275cc
User avatar

Joined: Sat Jun 20, 2009 11:24 am
Posts: 2276
Location: Wollongong
How awesome is the hydro system. Great to get a better understanding of it's working principles. Those of us with cars still on hydro certainly appreciate how good it is and it's awesome to see such work being done to preserve the system.

How good is it also to see these old technical drawings and engineering specs come back to life for this sort of project. We all owe people like Doug (winabbey) a huge dept for sharing his archives.

I like peterbs suggestion for replicating the hoses, I've done similar with oil hoses, put shrink wrap insulation over braided steel oil cooler hose to make them look like the originals. Only problem might be a visible seam from the mould. I suppose there is no way of hiding a new hose within an old ones outer layers??

_________________
Image
68 Morris Cooper S Mk1 (*ex 78 1275 LS 4th last built, 70 Morris 1500 OHC & 70 MiniMatic)


Top
 Profile  
 
 Post subject: Re: Hydrolastosity
PostPosted: Sat Nov 30, 2013 2:47 pm 
Offline
Hydrolastosity

Joined: Fri Sep 27, 2013 7:52 am
Posts: 25
Location: a Ville in the Forest, NSW
Thanks guys for the kind words. peterb, I had a similar thought as well. Its going to be easier to make a mold to go over a pre existing hose than it is to get a good price of 1000ft of specifically made OE looking hose. I would look into the hose side if at some point we are making replica bags. For now, I'm going to focus on solving any repairing techniques of existing bags... that is, unless someone has the means to fund, say no less than 4000 units. 1000 cars odda fill the market quite quickly? I can draw them up (or even get them 3D scanned), rapid prototype bits, get quotes, and we go from there... Whats the demand? How many cars would you guess are still running hydro? And how accepting is the concourse community going to be toward replica bags? (we're talking gooooood replica, no half-ass stuff passing by me)

For example, here is some work a friend has done recently, working on making a supercharger kit for Austin Healeys...
ImageImage

cheers,d


Top
 Profile  
 
 Post subject: Re: Hydrolastosity
PostPosted: Tue Dec 03, 2013 7:57 am 
Offline
Hydrolastosity

Joined: Fri Sep 27, 2013 7:52 am
Posts: 25
Location: a Ville in the Forest, NSW
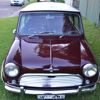
Hello again everyone, just wanted to post a recent bag cleaning I've done. Thanks to Matt (TheMiniMan), I have another chance to get my car on the road for the first time in 30 years… more excitedly, the first time for us to drive the car since acquiring it alittle over 8months ago.
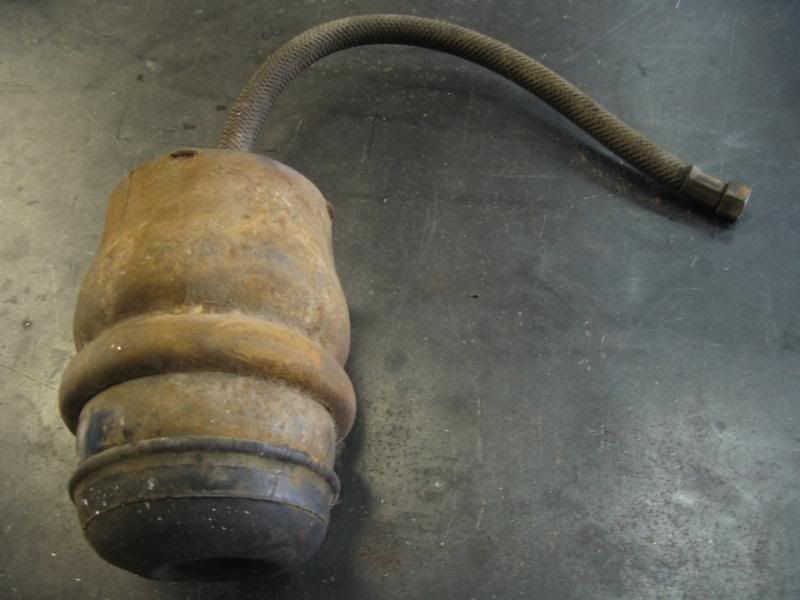
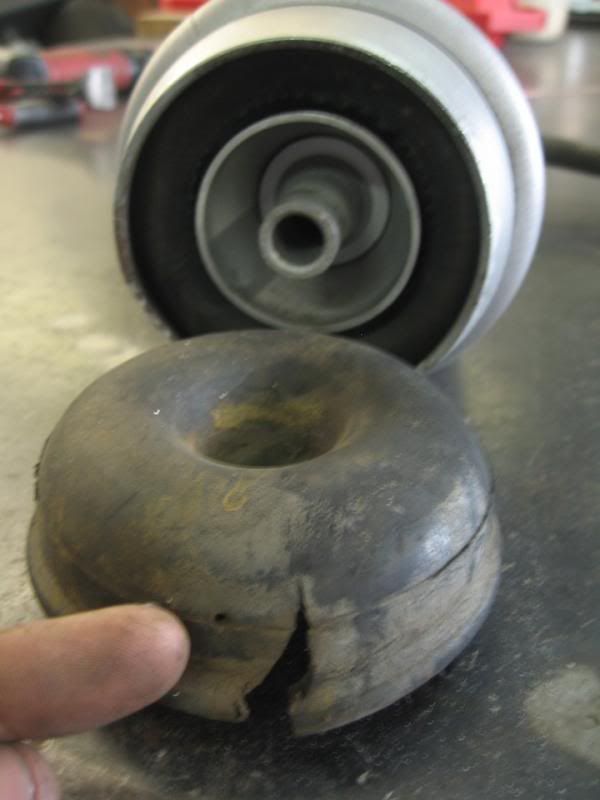
Second hand bag:
Image

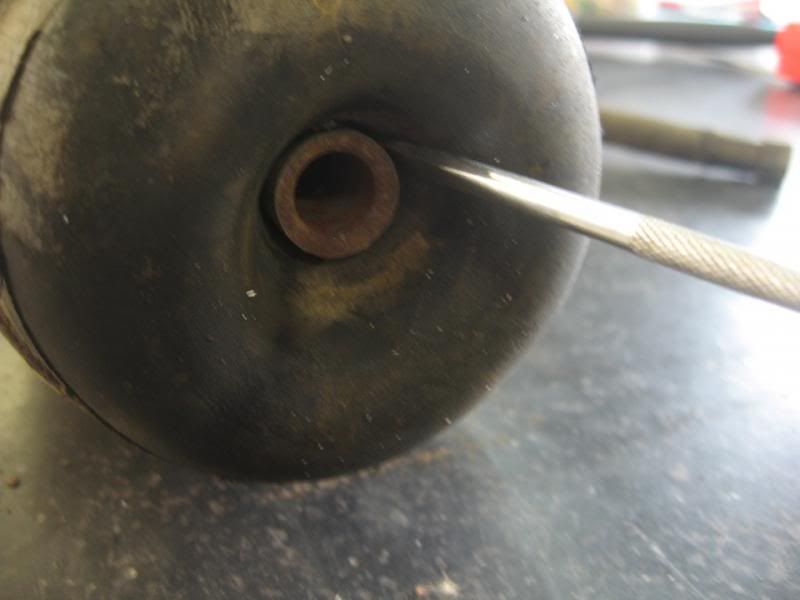
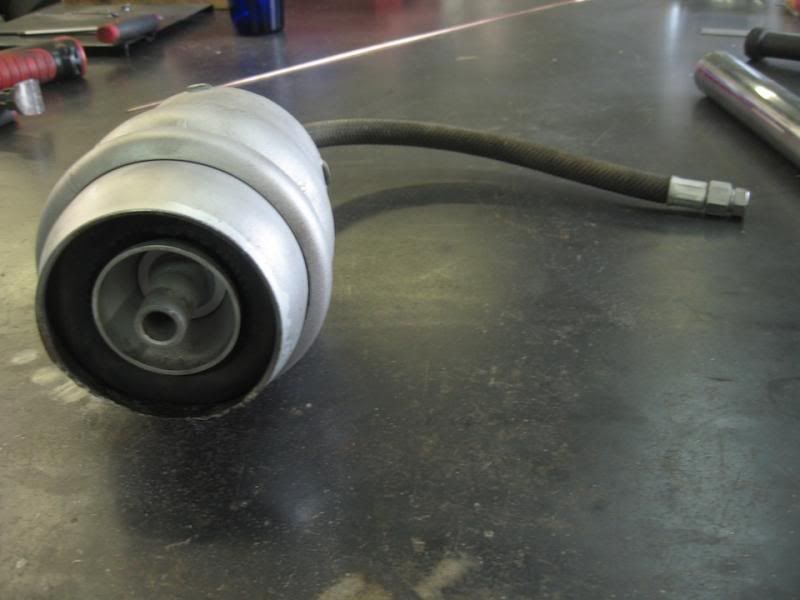
First thing I like to do is pull the skirt dust boot off if its still on. There is no use in keeping these on if the bag is in storage… They hide rust and new boots are cheap. I use a small flat blade screw driver and filet the rubber away from the lower piston shaft. Some of these almost feel glued on.
Image

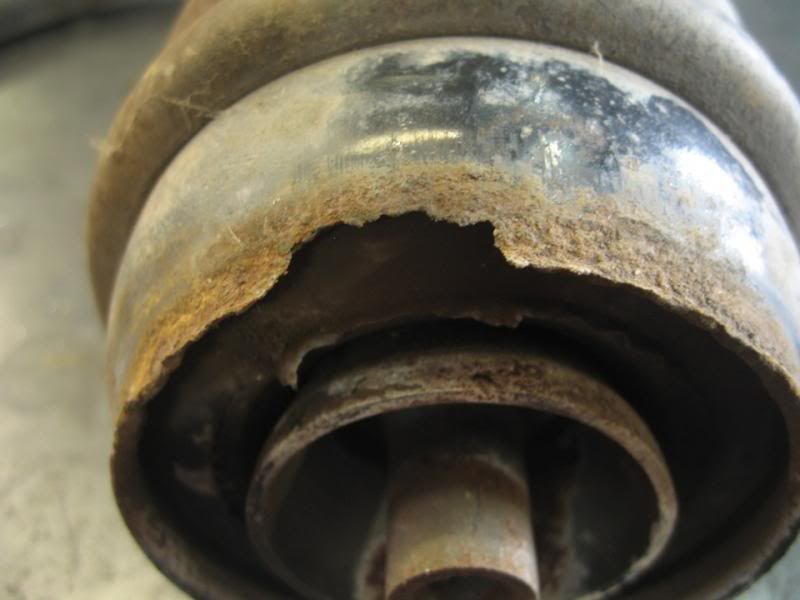
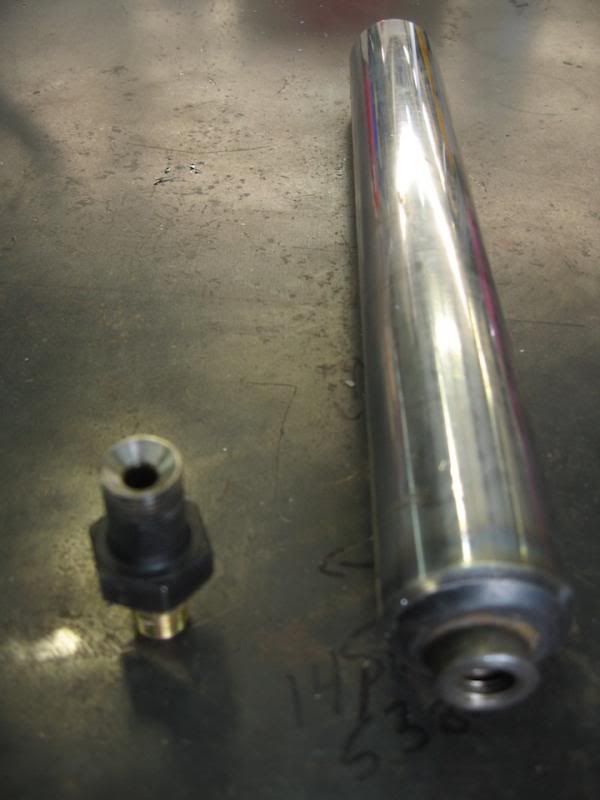
Rusted tapered cylinder… bummer! But not to fear, I don't believe this is will hinder performance or safety. I could eventually, but hopefully by then I will be able to repair or replace them.
Image

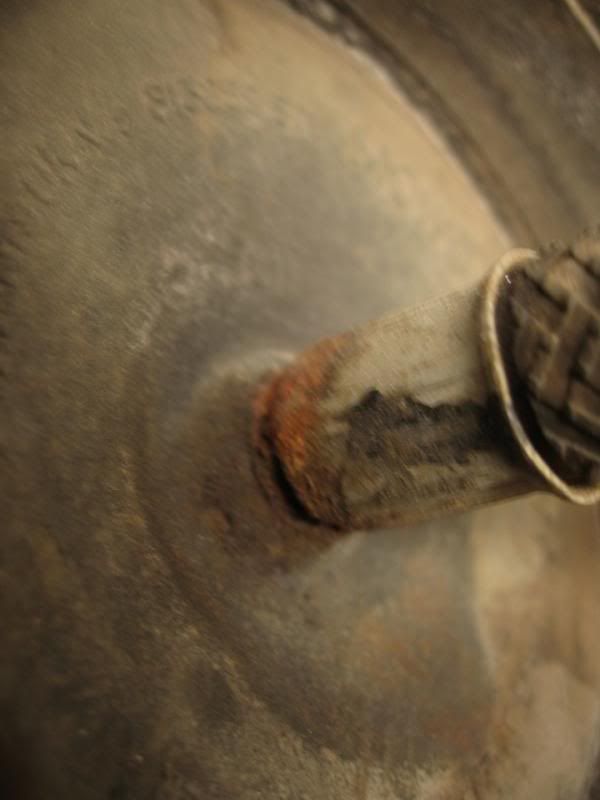
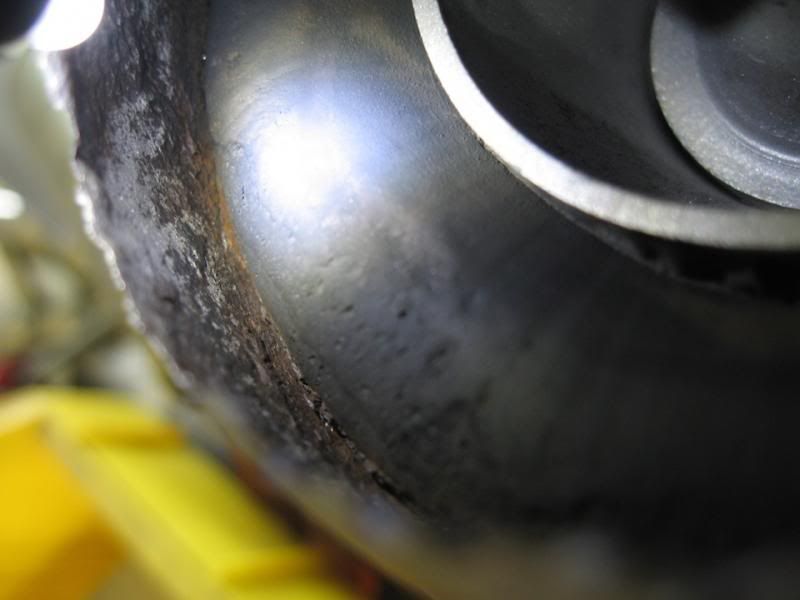
Inspect all over, here is some rust starting on the ferrule and inner cone neck:
Image

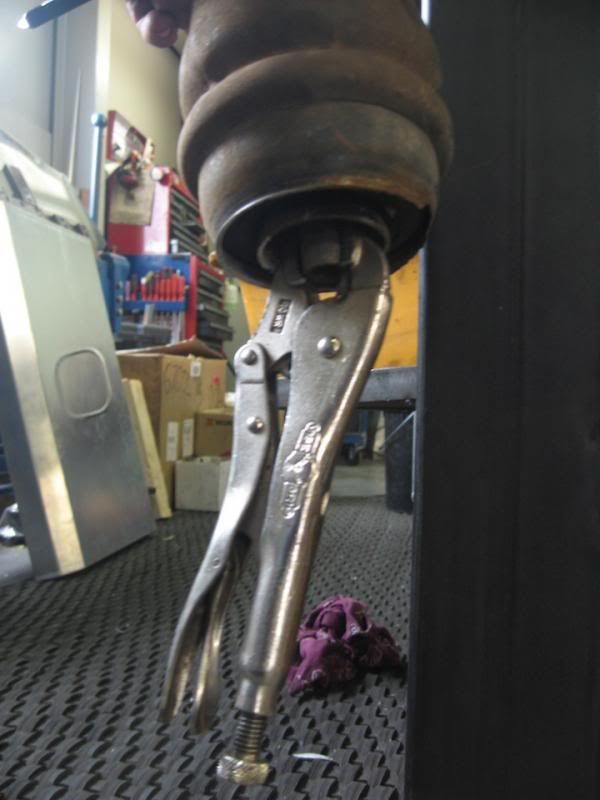
Don't forget, the drain hole should be at the bottom on the rear bags!
Image

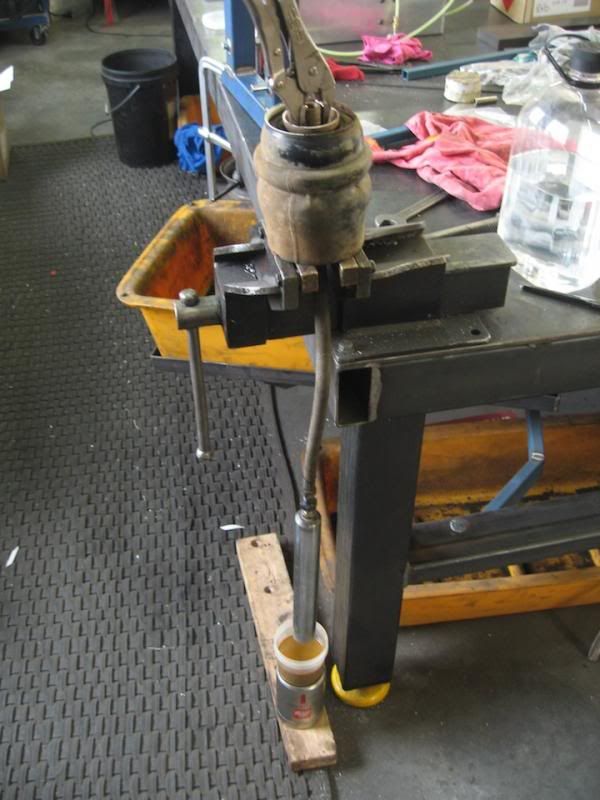
Cleaning the inside of the bags, I made these two items from an old shock body and a 5/8"UNF bolt. Nice to have a lathe, but you could do this with just a drill and vice. Drill the center of the bolt with a small drill first, 3mm, then 8mm. Use a deburring tool in the drill on the threaded side to make an angle seat for the bag connection to seal against. On the other side, drill and tap a 1/4BSP. For the beaker, you can use some PVC tubing and a cap from any hardware supply. 50mm (2") tube should work, 200mm long, glue a cap on, drill and tap 1/4BSP and join it to the bolt. I used about 250ml (1 cup) of methylated spirits each pour.

When I cleaned my first batch of bags, I recycled the fluid. From the first pour, I would drain the cloudy liquid into a bigger bucket and wipe the sediment in the trash. Leaving it to sit for a while, you can start to see the water and other fluids separate from the spirits. Pour or better to siphon the cleaner fluid for re-use.

Flushing tools
Image

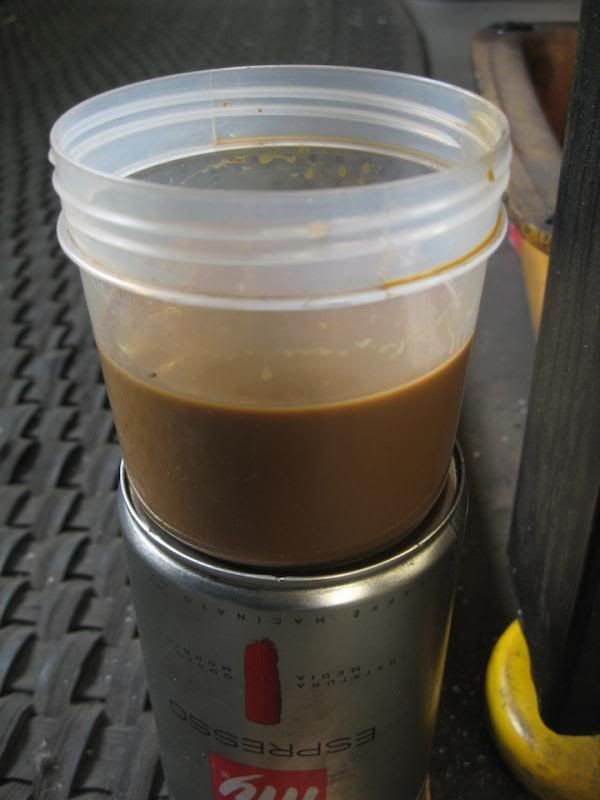
Fill it up buttercup!
Image

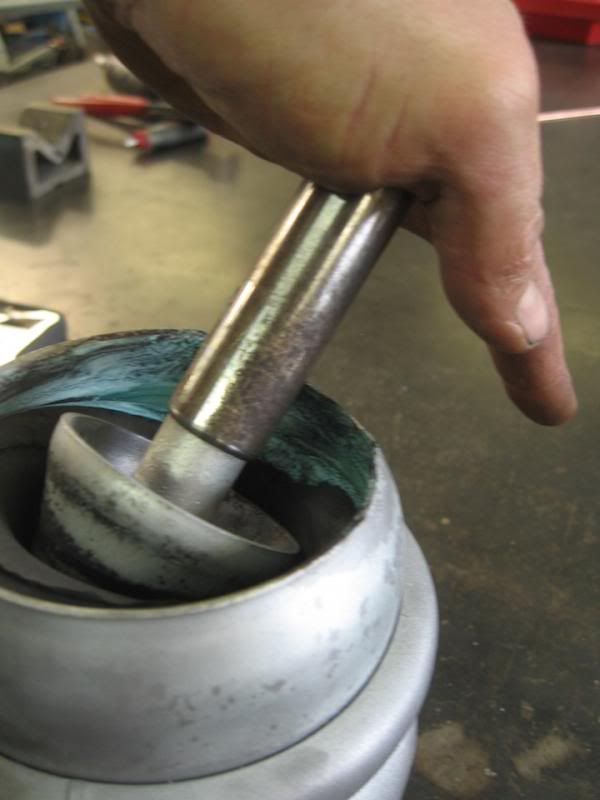
Grab piston and move it around… I like to push and pull up down and sideways to get as much of the spirits in and flushing around to help brake up the gunk.
Image

Drain:
Image

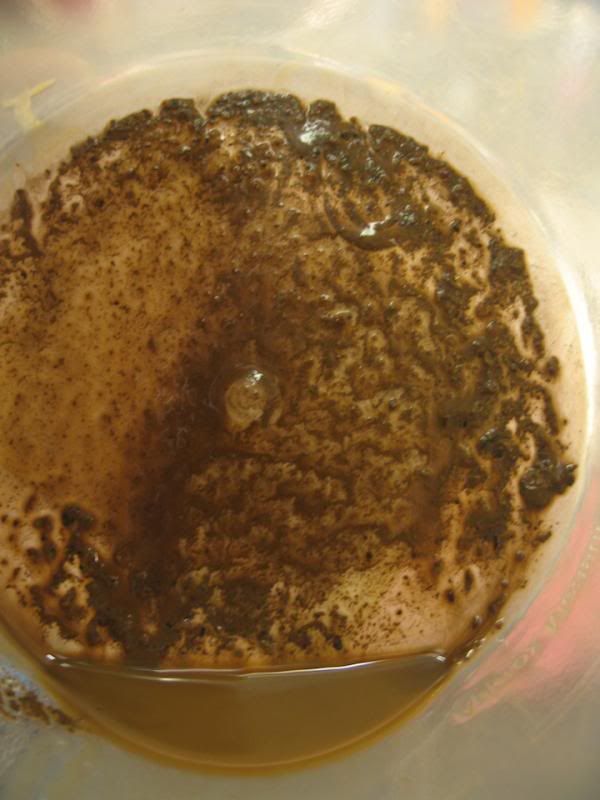
First drain close up:
Image

First drain spirits starting to separate from gunk:
Image

First drain sediment:
Image

Forth drain:
Image

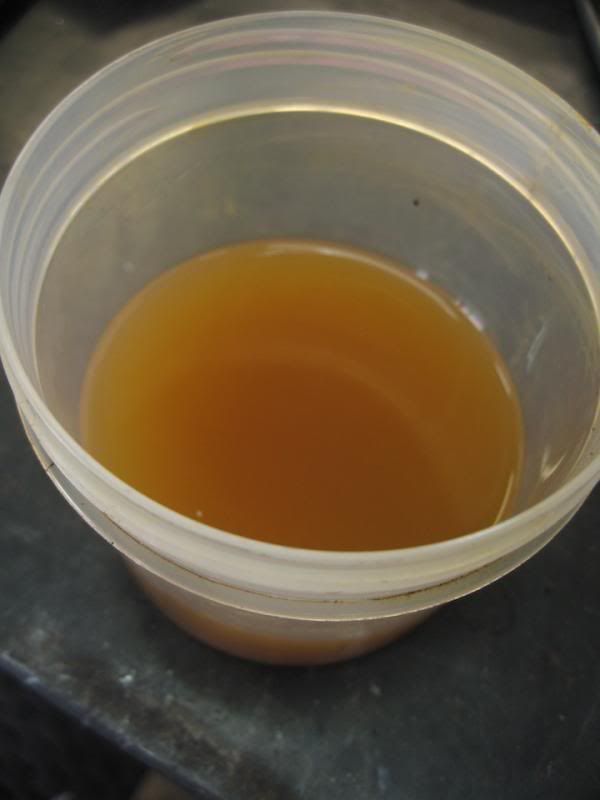
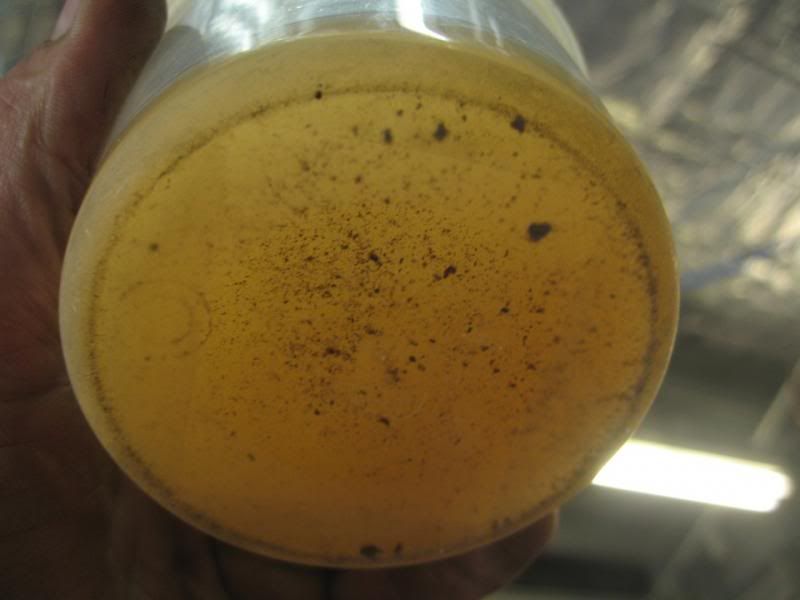
Last flush, fluid much clearer with less sediment:
Image

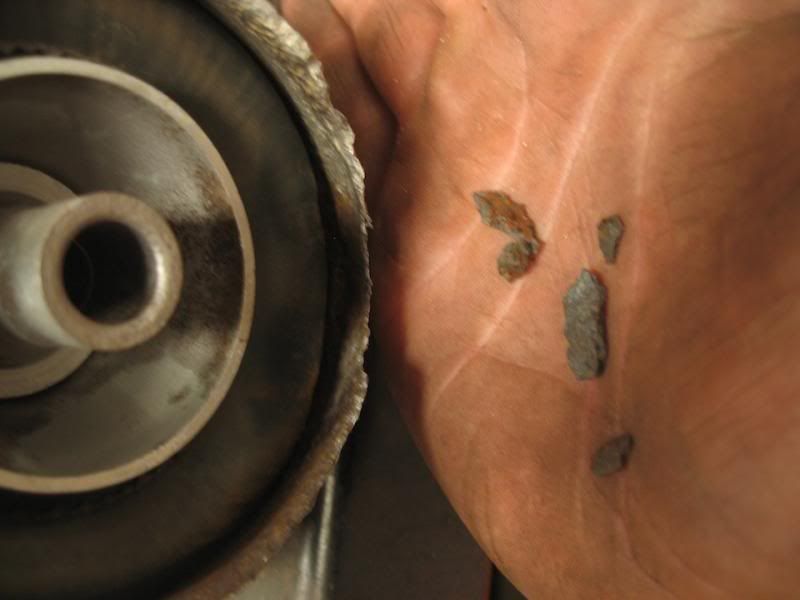
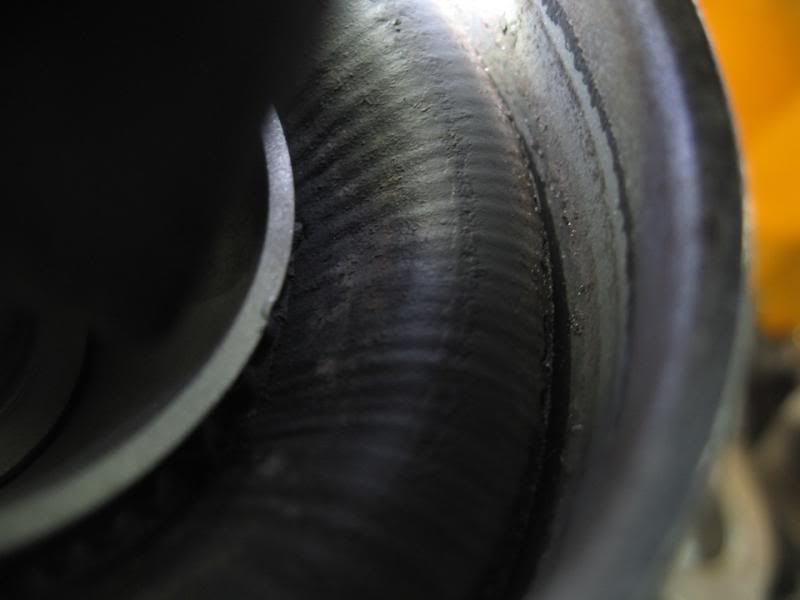
Now we inspect the inside of the tapered cylinder. It was obvious that there was rust from the edge, and looking deeper we see nice chunks of layered rust.
Image

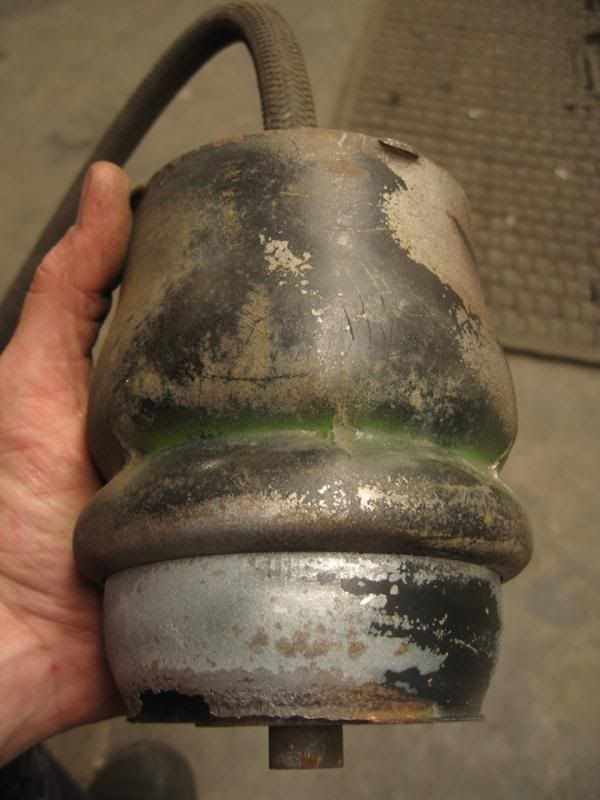
I glass bead blast the bodies, I start with a light blast to reveal any color markings to help identify previous bag types… This has a green band, which confirms makes this a later "normal" 21A1477/21A1804. This will probably be the softer type bag with larger bleed hole.

Green band:
Image

Blasted bag:
Image

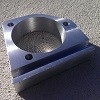
Rusted inside of tapered cylinder:
Image

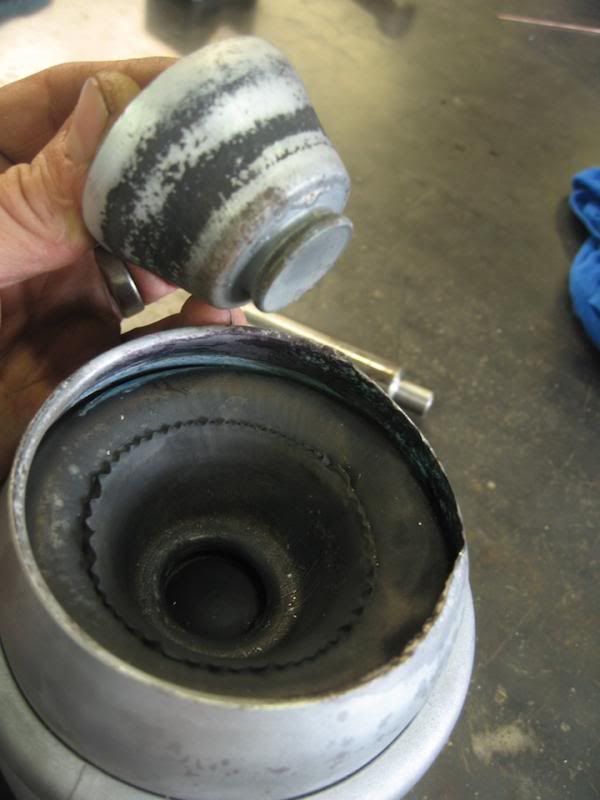
Clean inside of tapered cylinder:
Image

While being most careful to not damage the skirt, I've sanded down some of the thin rusted metal and die grind the sharp edges to a blunt edge. I like Galmet ionize rust converter, with an acid brush, try to get down in the side of the bladder and tapered cylinder.

Pushing piston/skirt with tool, or any 1/2" diameter (12.7mm) shaft, you can use a long M12 bolt if you don't have anything else.
Image

Galmet
Image


Whoops, I've popped piston out! First time this has happened, but I'm sure it won't be the last...
Image

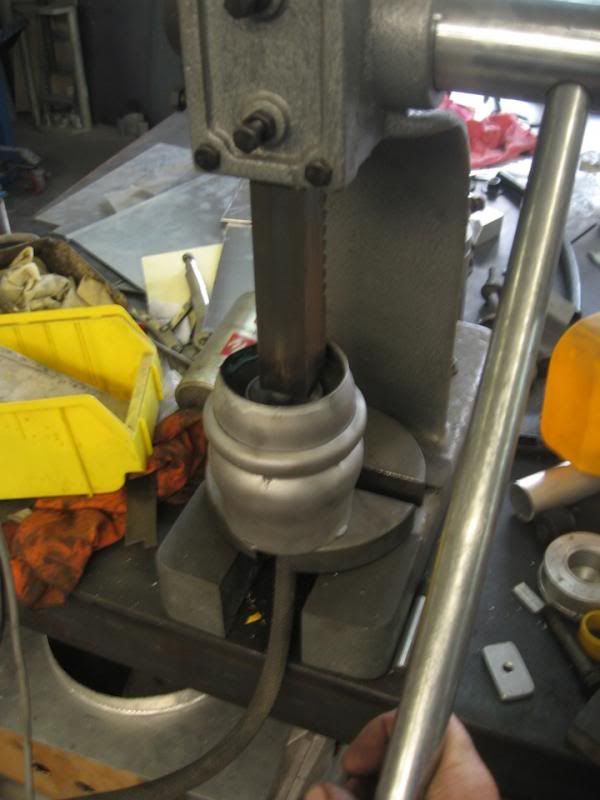
Pushing piston back in with an arbor press. Not much pressure was needed, standing on it probably would have worked.
Image

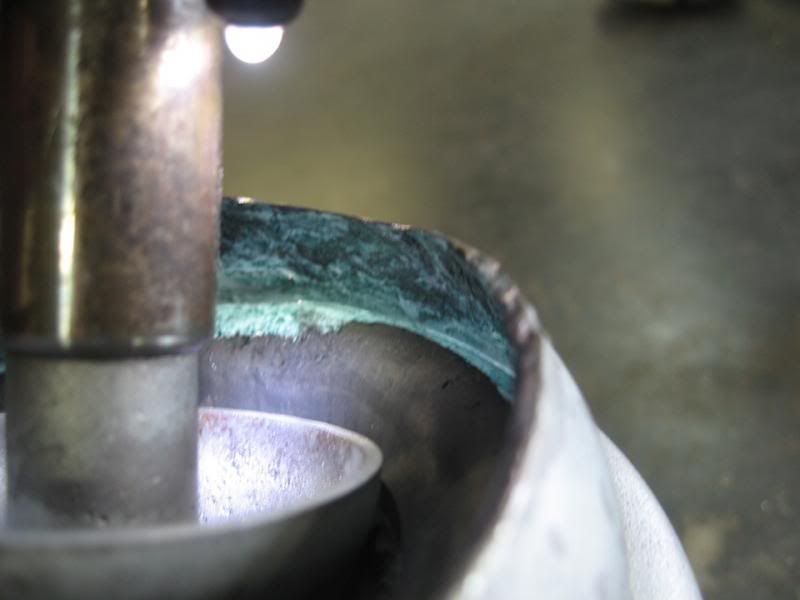
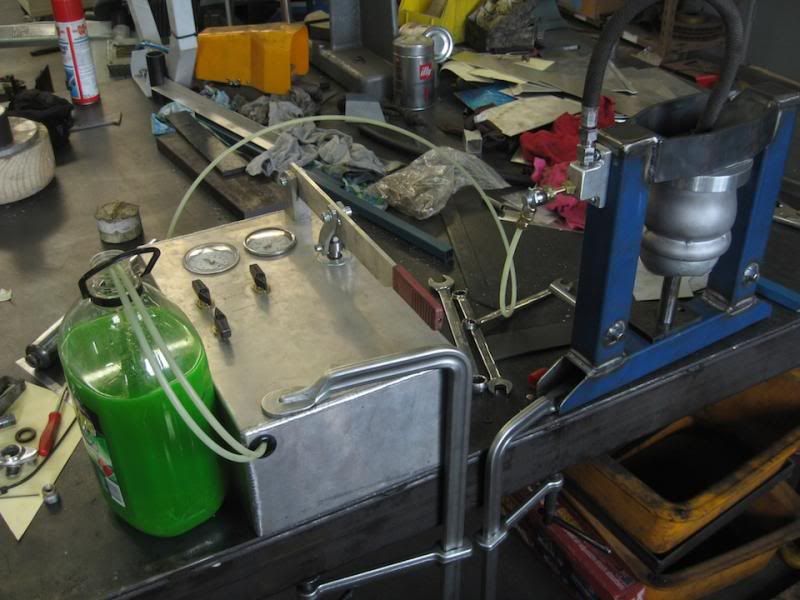
Pressure testing bag setup. I'm using a weak dilute of coolant to water. Pulling fluid from this bottle and draining it back in.
Image

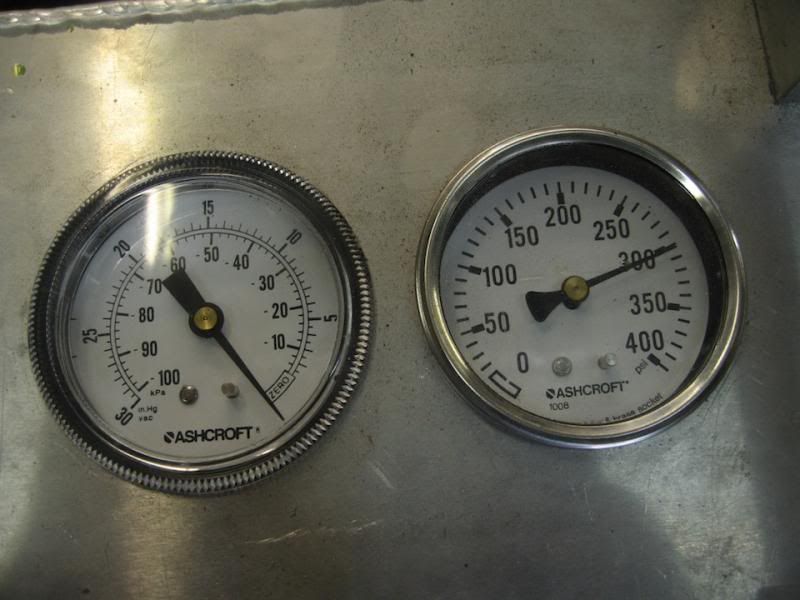
Gauge pressure, 300psi holding for a couple hours… probably should have taken it to 400psi for shits and giggles, and safety. I'll do that when its in the car under "normal" factory conditions. I probably won't go to 450 as the factory suggests as this is not a new bag.
Image

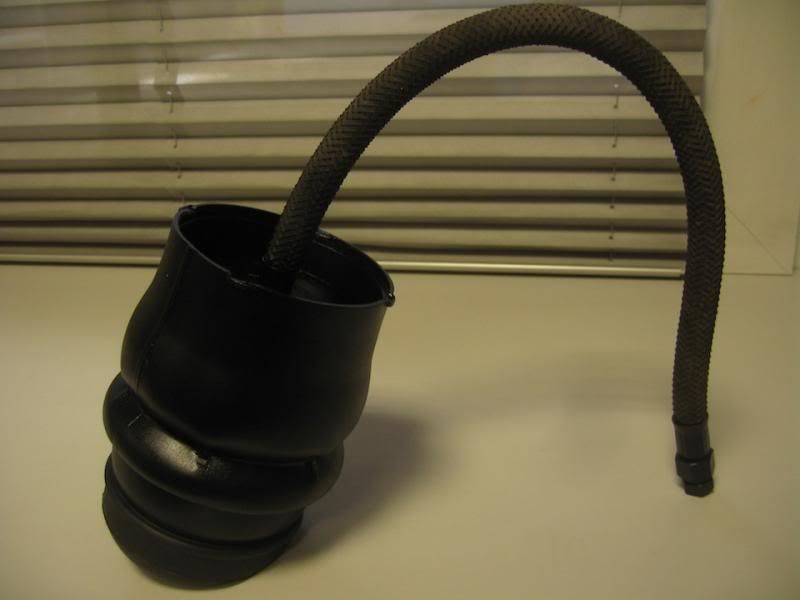
Finished bag. I taped up the rubber flex shaft and tried to cover most of the rubber as the solvents in paint degrades rubber much faster (like the window rubbers and seals that crack quickly after a quick/cheap tap and paint body job)
Image

In the car tonight! Holding at 300psi on its own (too dark to take a pic, was doing it all by torch). Thanks again for the hustle Matt, happy to have our car on her own four shoes!

Cheers, d


Top
 Profile  
 
 Post subject: Re: Hydrolastosity
PostPosted: Tue Dec 03, 2013 10:45 am 
Offline
Yay For Hay!
User avatar

Joined: Wed Sep 08, 2004 9:27 pm
Posts: 15912
Location: Wodonga - Vic/NSW border
loving this thread..... I have a pile of bags (~15?) in various states that I really should clean out as you suggest....

_________________
did I tell you that I won a trophy?


Top
 Profile  
 
 Post subject: Re: Hydrolastosity
PostPosted: Tue Dec 17, 2013 8:07 pm 
Offline
Causing or creating vexation

Joined: Wed Jul 21, 2004 10:32 pm
Posts: 19124
Hi Don,
It might be a good idea to take a look at this Moulton Moke Hydrolastic testing prototype and see if you can work out what Alex Moulton was up to...
http://www.bonhams.com/auctions/21274/lot/349/


Top
 Profile  
 
 Post subject: Re: Hydrolastosity
PostPosted: Wed Dec 18, 2013 7:36 am 
Offline
Bimmer Twinky
User avatar

Joined: Mon Sep 06, 2004 4:36 pm
Posts: 8606
Location: Brisbane
great work Don, glad that bag was "somewhere" near use-able

& on that note , & simple because you`re a great guy & obviously dedicated to the cause--> i`m happy to donate another bag to the cause, so i`ll send you another,,, will need your address again tho

& my offer still stands with regards to having the bags remade... we make quite a lot of stuff in China & as much as i don`t like sending this work overseas, it`s simply an economic/financial decision to do so... but we can do it.

cheers & again well done, great work, good effort.
Just like all the good girls say-> Keep it up :-)

_________________
No offence intended here but--> anyone writing a book about minis 30 years ago may not have experienced such worn or stuffed-with components as we are finding these days.

You should put your heart & soul into everything you do.


Top
 Profile  
 
 Post subject: Re: Hydrolastosity
PostPosted: Wed Dec 18, 2013 8:03 am 
Offline
848cc
848cc
User avatar

Joined: Sat Sep 08, 2007 7:08 am
Posts: 95
Great work very interesting for us hydro lovers

_________________
998 SC12 61atw


Top
 Profile  
 
Display posts from previous:  Sort by  
Post new topic Reply to topic  [ 46 posts ]  Go to page Previous  1, 2, 3, 4  Next

All times are UTC + 10 hours


Who is online

Users browsing this forum: No registered users and 78 guests


You cannot post new topics in this forum
You cannot reply to topics in this forum
You cannot edit your posts in this forum
You cannot delete your posts in this forum
You cannot post attachments in this forum

Jump to:  

© 2016 Ausmini. All garage work involves equal measures of enthusiasm, ingenuity and a fair degree of irresponsibility.