Ausmini
It is currently Wed Jul 23, 2025 1:41 am

All times are UTC + 10 hours


Post new topic Reply to topic  [ 25 posts ]  Go to page 1, 2  Next
Author Message
 Post subject: Assembling a mini
PostPosted: Fri Jun 27, 2014 8:43 am 
Offline
848cc
848cc
User avatar

Joined: Mon May 12, 2014 11:13 am
Posts: 208
Location: Brisbane
I promise this will be my last new thread for a while. . . promise!

but more to the point though. . .

where the heck do I start? so the car I have is 100% in bits and I was not the one to take it all apart, now Ive taken the engine out and back in more times than i can remember in my other mini and ive changed brake pads on the front and rear cylinders on the back, changed the tires and re wired the dash. . . . but that's it with the mini. . . so where on earth do I start to assemble this mini?

its a 66/67 mini deluxe, I am pretty confident i have all the parts (minus a few things that i am tracking down) and Im edging to get going but i don't want to be the guy who puts half the car together to realize he did it in the wrong order and instead has created the worlds first functioning death ray. . (although that would be kinda cool)

so is there a definitive 'how to re-assemble your mini from scratch' guide?

Thanks
Leroy.

_________________
1967 Mini Deluxe bucket of rust and mismatched parts powered by a 1360cc and a destroyed gearbox missing second gear :D Image


Top
 Profile  
 
 Post subject: Re: Assembling a mini
PostPosted: Fri Jun 27, 2014 9:36 am 
Offline
1098cc
1098cc

Joined: Fri Dec 27, 2013 12:24 pm
Posts: 1395
Location: Hobart, Tasmania
Find a thread on someone else doing the same! Rodney aka Boomini is rebuild his and is documenting it well with photos. He is in the process of painting at the moment but has fitted bottom end stuff! He's also a very knowledgable guy, friendly and won't mind questions regards help.

http://www.ausmini.com/forums/viewtopic.php?f=3&t=83268


Top
 Profile  
 
 Post subject: Re: Assembling a mini
PostPosted: Fri Jun 27, 2014 9:39 am 
Offline
848cc
848cc
User avatar

Joined: Mon May 12, 2014 11:13 am
Posts: 208
Location: Brisbane
Minimadmarty wrote:
Find a thread on someone else doing the same! Rodney aka Boomini is rebuild his and is documenting it well with photos. He is in the process of painting at the moment but has fitted bottom end stuff! He's also a very knowledgable guy, friendly and won't mind questions regards help.

http://www.ausmini.com/forums/viewtopic.php?f=3&t=83268


awesome thanks.

:)

_________________
1967 Mini Deluxe bucket of rust and mismatched parts powered by a 1360cc and a destroyed gearbox missing second gear :D Image


Top
 Profile  
 
 Post subject: Re: Assembling a mini
PostPosted: Fri Jun 27, 2014 10:24 am 
Offline
848cc
848cc
User avatar

Joined: Sat Sep 21, 2013 9:47 pm
Posts: 324
Location: Melbourne West
Mick should write a 'how to' thread for this type of task.
you are not alone my friend, I have one which I only have half ripped apart myself.
cant be that hard.

_________________
It's easy once you know how.


Top
 Profile  
 
 Post subject: Re: Assembling a mini
PostPosted: Fri Jun 27, 2014 11:12 am 
Offline
1098cc
1098cc

Joined: Wed Jun 26, 2013 10:05 pm
Posts: 1500
Location: perth WA
Hey guys, its not that hard. Lay everything out, label all the components, clean or refurb everything and plan your rebuild. Set small jobs and before you know it mini is rebuilt.

_________________
The best part of fixing your mini is the test drive

Minis..

1976 van daily drive
1975 van
1968 deluxe in the shed
1967 deluxe high strung 1310
1959 austin healey sprite


Top
 Profile  
 
 Post subject: Re: Assembling a mini
PostPosted: Fri Jun 27, 2014 11:16 am 
Offline
848cc
848cc
User avatar

Joined: Mon May 12, 2014 11:13 am
Posts: 208
Location: Brisbane
boomini wrote:
Hey guys its jot that hard. Lay everything out label all the componants clean or tefurb everything and plan you rebuild. Set small jobs and before you know it mini is rebuilt


I do not anticipate it being hard, I have build other cars from scratch a few times, but not a mini. its the assembly order that im not sure about(and the extreemly long list of bolts I know I do not have) :) done my fair share of LR's and suzuki's.

Leroy.

_________________
1967 Mini Deluxe bucket of rust and mismatched parts powered by a 1360cc and a destroyed gearbox missing second gear :D Image


Top
 Profile  
 
 Post subject: Re: Assembling a mini
PostPosted: Fri Jun 27, 2014 11:34 am 
Offline
1098cc
1098cc

Joined: Wed Jun 26, 2013 10:05 pm
Posts: 1500
Location: perth WA
Ah cool. If your missing heaps of bolts a series spares in the uk sell mini in a bucket its all the bolts etc you need to put your mini back together

_________________
The best part of fixing your mini is the test drive

Minis..

1976 van daily drive
1975 van
1968 deluxe in the shed
1967 deluxe high strung 1310
1959 austin healey sprite


Top
 Profile  
 
 Post subject: Re: Assembling a mini
PostPosted: Fri Jun 27, 2014 11:43 am 
Offline
SooperDooperMiniCooper ExpertEngineering
User avatar

Joined: Fri Apr 29, 2005 9:46 am
Posts: 18887
Location: Under the bonnet son!
I like to start by thinking as the factory liked to assemble the cars. Watch the videos on youtube from the BMC Factories assembling the mini and you will see the least difficult method of assembly. They based their decisions for assembly for the least interference from other assemblies, and its methodical.

Stay away from fitting components, you want to fit assemblies. By components I mean individual parts, by assemblies I mean a whole subframe assembly with sub assemblies like hubs and brake lines. The subframe assembly complete with shocks, hubs, brakes and anything else which is needed to make it work. This goes for the other items like instrument clusters, wiring looms. Work on the assembly before mounting it to the body means all the work is done over a work bench, and not under the car. It also minimises scratches, forgotten parts and rework.

The order I like is to add the wiring loom to the bare body, then the lines underneath the car, then the interior including upholstery and instruments, fit the engine bay out with all equipment ready to accept subframes, then subframes (front complete with engine).

There's plenty of detail stuff, and tweaking, but a simple methodical approach by assemblies and sub assemblies brings great results.

_________________
SooperDooperMiniCooperExpertEngineering

All garage work involves equal measures of enthusiasm, ingenuity and a fair degree of irresponsibility.


Top
 Profile  
 
 Post subject: Re: Assembling a mini
PostPosted: Fri Jun 27, 2014 12:00 pm 
Offline
1360cc
1360cc
User avatar

Joined: Wed Oct 03, 2007 9:04 pm
Posts: 6750
Location: Melbourne, VIC
It's a good question being asked. Some of the answers are obvious but there's a few traps for young players, such as fitting the steering rack, and brake/hydro pipes before fitting the front and rear subframes, fitting the headlining before the window rubbers, etc.

_________________
ex-NSW Police 1970 MK II Cooper S
VMCI #43


Top
 Profile  
 
 Post subject: Re: Assembling a mini
PostPosted: Fri Jun 27, 2014 2:42 pm 
Offline
998cc
998cc
User avatar

Joined: Sun Jan 08, 2006 12:04 am
Posts: 648
Location: Ballarat, Victoria
winabbey wrote:
fitting the headlining before the window rubbers

When I put in my headlining, I actually used the side window and door rubbers as clamps to hold it in place.
but yeah... make sure the roof lining is in before you do the front and rear screens

Also I found leaving the side windows and doors off until the very end was helpful in improving access for other jobs.

_________________
1975 Hairy Lime/White Clubby
Build Thread: http://www.ausmini.com/forums/viewtopic.php?f=3&t=80657


Top
 Profile  
 
 Post subject: Re: Assembling a mini
PostPosted: Fri Jun 27, 2014 3:44 pm 
Offline
SooperDooperMiniCooper ExpertEngineering
User avatar

Joined: Fri Apr 29, 2005 9:46 am
Posts: 18887
Location: Under the bonnet son!
This guy will show you how :)

Warning: Some Assembly Required.


_________________
SooperDooperMiniCooperExpertEngineering

All garage work involves equal measures of enthusiasm, ingenuity and a fair degree of irresponsibility.


Top
 Profile  
 
 Post subject: Re: Assembling a mini
PostPosted: Fri Jun 27, 2014 6:04 pm 
Offline
1275cc
1275cc
User avatar

Joined: Thu May 24, 2007 7:19 pm
Posts: 5370
Location: Yandina,Sunshine Coast,QLD
(1) If it's a bare shell start with the brake, fuel, battery, hydro lines that run under the floor. Then fit the assembled subframes (steering rack first for the front and don't forget the hand brake lines with the rear frame).
(2) Then once it's a rolling frame make it steer and stop. Pedal box, brake and clutch MC's, hand brake, steering column.
(3) Then your wiring loom, dash, lights, wiper motor, fuel tank, pump & filter. If you want you can finish the boot off now, mount the boot lid fit the battery (don't hook it up yet) and you have one section finished.
(4) Fit the interior, hood lining first, carpet, door cards, seatbelts & seats. Mount the doors and fit all the glass. Now the second section is finished.
(5) lastly is the engine, drop it in, install engine accessories, connect exhaust, carby and hook up fuel lines, radiator and hoses, connect battery cable and all engine wiring. Get it running before you fit the bonnet and grill. Be careful when first starting the engine, this is when you can have fuel, oil & coolant leaks, also keep an eye on electrics you don't want it to short out or catch fire, keep a fire extinguisher handy (or two, one big and one small) and have the battery easy to disconnect (no spark=no fire).
Easy peasy.

_________________
Respect mine and I'll respect yours.


Top
 Profile  
 
 Post subject: Re: Assembling a mini
PostPosted: Fri Jun 27, 2014 7:40 pm 
Offline
998cc
998cc

Joined: Sat Jun 21, 2008 12:43 pm
Posts: 850
Location: Narellan NSW
put the tail lights and rear shocks on before you put fuel tanks in


Top
 Profile  
 
 Post subject: Re: Assembling a mini
PostPosted: Sat Jun 28, 2014 9:47 am 
Offline
848cc
848cc

Joined: Sat Aug 27, 2011 9:34 pm
Posts: 307
Location: East Melbourne
Just dont think too much about the big picture, or it can get pretty daunting. Concentrate on the small steps, each assembly at a time. Some good advice in here.


Top
 Profile  
 
 Post subject: Re: Assembling a mini
PostPosted: Mon Jun 30, 2014 8:36 am 
Offline
848cc
848cc
User avatar

Joined: Mon May 12, 2014 11:13 am
Posts: 208
Location: Brisbane
thanks guys,

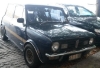
after all this my mate decided we would go ahead and throw the subframes in so we can roll the body in and out of the garage. . probably not the best thing to do first but they come back out easy anyway.

during this process i discovered i have two front subframe bolts for the hydro towers. . . that's it. . 0_0 the rest is held in with random things currently to keep it rolling. I think i need to buy that 'mini in a box' bolt kit mentioned above.

the 1098 is bolted to the subframe on brand new engine mounts also.

i think my next step is going to be pulling the hand brake from the 'parts wreck' that never seems to have the parts i need :( (no subframes in it so no subframe bolts/parts i needed) and fitting that all up, and ill have to go buy a length of power wire for the positive run from the Battery to the engine bay as I do not have that.

other question though, my steering rack is just chilling out not bolted in. . how do these bolt in? im either stupid or blind (or both!) and could not see any obvious mounting bolt holes on it? u bolts or something is it?

other thing ive found I need is full CV's to go from the deluxe front drums into the splines on the 1098 diff/gearbox as I have none. . . best place to source these? serviceable second hand will do me fine as long as they fit in the car.

Leroy.

_________________
1967 Mini Deluxe bucket of rust and mismatched parts powered by a 1360cc and a destroyed gearbox missing second gear :D Image


Top
 Profile  
 
Display posts from previous:  Sort by  
Post new topic Reply to topic  [ 25 posts ]  Go to page 1, 2  Next

All times are UTC + 10 hours


Who is online

Users browsing this forum: Bing [Bot] and 89 guests


You cannot post new topics in this forum
You cannot reply to topics in this forum
You cannot edit your posts in this forum
You cannot delete your posts in this forum
You cannot post attachments in this forum

Jump to:  

cron

© 2016 Ausmini. All garage work involves equal measures of enthusiasm, ingenuity and a fair degree of irresponsibility.