Ausmini
It is currently Tue Jul 22, 2025 9:27 am

All times are UTC + 10 hours


Post new topic Reply to topic  [ 32 posts ]  Go to page 1, 2, 3  Next
Author Message
PostPosted: Wed Jul 01, 2015 10:35 am 
Offline
1275cc
1275cc
User avatar

Joined: Thu Dec 21, 2006 11:50 am
Posts: 2639
Location: Bentleigh Melbourne Victoria Australia
Just to re-open this thread

viewtopic.php?f=2&t=75687&p=854526&hilit=remove+subframes#p854526

When I am draining the fluid from the valves will it spray out or dribble out?

I managed to strip the whole car down to the shell except for engine and subframes which I took to get done but for various reasons I now have the car back with engine out but subframes still on. I want to get the subframes off for a full resto of them and the car but I must admit I am a bit nervous and was wondering if I will need too many specialized tools to do it? Should I have a go and learn how it is done or is it best left to a mechanic? The manuals aren't making all that much sense to me. Just not sure where to start or even if I should. Cheers.

Image

_________________
Flute - 68 MK I Cooper S
Member: VMCI #2474
Member: International Mini Model Collectors Club


Top
 Profile  
 
PostPosted: Wed Jul 01, 2015 10:47 am 
Offline
1275cc
1275cc
User avatar

Joined: Sun Jan 21, 2007 9:16 pm
Posts: 3166
Location: North of the Harbour planning my next mini project
Hi,

Its is easy to drain the hydro without a pump.
I have done it in the past you just need to be aware that the lines have about 300psi pressure in them so the fluid does spurt out.
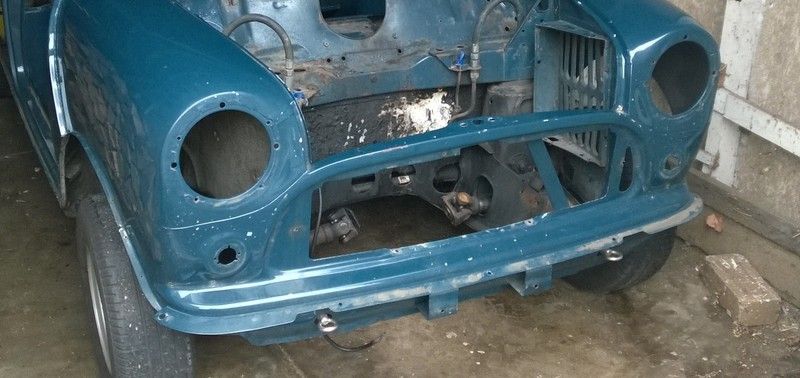
If in your garage then I cover the floor under the rear subframe with newspapers to catch the spray and place a bucket or container under the subframe valves.
If you have goggles and gloves then it is a very good idea to put them on at this point.
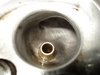
Mine had a dust cap on the valves which is unscrewed and then very carefully press the centre of the valve with a small Phillips screw driver or similar.
When you do this make sure your head is behind the valve direction and not in front, for obvious reasons.
The fluid will in initially come out quite fast and as the pressure dies down then it should be possible to place your container under the valve and catch the fluid.
Once the fluid is down to a dribble then repeat the other side.
The main caution is to keep your eyes protected as the fluid stings. :shock:
Good luck!

_________________
1969 Cooper "S"
1967 Mini Deluxe
1973 Clubman Van (the fleet spare)
1978 ex 1275 LS ("Wizard" Eaton Supercharged) :)
2015 HSV GenF GTS(occasional drive & tow car)
2019 MINI F55 Cooper S


Top
 Profile  
 
PostPosted: Wed Jul 01, 2015 12:48 pm 
Offline
998cc
998cc
User avatar

Joined: Tue Apr 11, 2006 8:15 am
Posts: 722
Location: Brisbane
You could avoid all this B.S. and mess with the use of a Valve Chuck, A short length of suitable hose joined to the valve Chuck and an empty Drink Bottle.
Push the valve chuck onto the valve as you would when pumping up a tyre and drain the fluid into the bottle..................

_________________
Image


Top
 Profile  
 
PostPosted: Wed Jul 01, 2015 1:37 pm 
Offline
998cc
998cc

Joined: Fri Apr 01, 2011 8:33 pm
Posts: 1195
Getting it out is simple. Poke the valve with a small screwdriver as already suggested....and that's it.

As suggested (strongly:) wear goggles - it is under pressure and will squirt out (initially) ....... IMHO gloves are optional.

The fluid is basically engine coolant (mostly water) but you don't want the antifreeze etc in your eyes....

Don't do it on the lawn as it will kill the grass... As described, catch as much as you can and wash the rest away with the hose.

You can do it outside and then wheel the car back into the garage for the subframe removal. Just place some layers of plywood between the body and bump stops in case the wheels jam on the body when fully deflated. I drove mine about 10 kays like that to the shop to get it re-inflated. Back then, there were still BMC/Leyland dealers ..and its how the drivers handbook recommended you do it :)

I've done the re-inflation at home as well using a converted grease gun and home made fluid. You don't need any terribly exotic tools....

Cheers, Ian


Top
 Profile  
 
PostPosted: Wed Jul 01, 2015 3:50 pm 
Offline
Yay For Hay!
User avatar

Joined: Wed Sep 08, 2004 9:27 pm
Posts: 15912
Location: Wodonga - Vic/NSW border
squirt it into a cordial bottle and put it in the kitchen cupboard ;)

_________________
did I tell you that I won a trophy?


Top
 Profile  
 
PostPosted: Wed Jul 01, 2015 4:41 pm 
Offline
1275cc
1275cc
User avatar

Joined: Thu Dec 21, 2006 11:50 am
Posts: 2639
Location: Bentleigh Melbourne Victoria Australia
Haha, I laughed at your comments in the old thread too!

Thanks for replies, I will have a go at releasing hydro fluid with this tyre inflator.
I guess then I just disconnect hydro lines and brake hoses, remove handbrake cables and start undoing bolts. Does it matter if you start with the front or the back sub frame first?

Image

_________________
Flute - 68 MK I Cooper S
Member: VMCI #2474
Member: International Mini Model Collectors Club


Top
 Profile  
 
PostPosted: Wed Jul 01, 2015 5:18 pm 
Offline
1098cc
1098cc
User avatar

Joined: Tue Aug 05, 2008 8:03 pm
Posts: 1479
Location: Qld, Brisbane
Once the pressure it out of the system it doesn't matter what end you work on first


Top
 Profile  
 
PostPosted: Wed Jul 01, 2015 5:21 pm 
Offline
Causing or creating vexation

Joined: Wed Jul 21, 2004 10:32 pm
Posts: 19124
You will get more fluid out if the car is sitting on its wheels.
You won't get the jack under it if it is sitting on its wheels.


Top
 Profile  
 
PostPosted: Wed Jul 01, 2015 6:22 pm 
Offline
SooperDooperMiniCooper ExpertEngineering
User avatar

Joined: Fri Apr 29, 2005 9:46 am
Posts: 18887
Location: Under the bonnet son!
I dunno, I've come to like the tang of the green stuff.

_________________
SooperDooperMiniCooperExpertEngineering

All garage work involves equal measures of enthusiasm, ingenuity and a fair degree of irresponsibility.


Top
 Profile  
 
PostPosted: Thu Jul 02, 2015 5:20 pm 
Offline
1098cc
1098cc
User avatar

Joined: Sat Feb 22, 2014 10:13 am
Posts: 1362
Off topic question - what colour blue is that?

_________________
Build thread for Supercharged 1275 1967 Deluxe Resto
Build thread for Mini ute conversion 998cc Turbo


Top
 Profile  
 
PostPosted: Thu Jul 02, 2015 6:04 pm 
Offline
1275cc
1275cc
User avatar

Joined: Fri May 02, 2008 3:07 pm
Posts: 5123
Location: The Internet
Indigo Blue


Top
 Profile  
 
PostPosted: Thu Jul 02, 2015 8:16 pm 
Offline
1098cc
1098cc
User avatar

Joined: Sat Feb 22, 2014 10:13 am
Posts: 1362
gtogreen1969 wrote:
Indigo Blue
cheers

_________________
Build thread for Supercharged 1275 1967 Deluxe Resto
Build thread for Mini ute conversion 998cc Turbo


Top
 Profile  
 
PostPosted: Thu Jul 02, 2015 8:37 pm 
Offline
848cc
848cc
User avatar

Joined: Mon Dec 19, 2005 1:09 am
Posts: 43
Location: mango hill brisbane
I got tired of the hydo system and these kind of issues

good rubber bags were hard to get locally was my main problem
only ones offer was used back ones ...got too expensive
never worked out why it was always the drivers right to fail first

so changed to rubber cone
never looked back

_________________
I am an Over Thinker


Top
 Profile  
 
PostPosted: Fri Jul 03, 2015 1:06 pm 
Offline
1275cc
1275cc
User avatar

Joined: Thu Dec 21, 2006 11:50 am
Posts: 2639
Location: Bentleigh Melbourne Victoria Australia
Yes, colour is Indigo blue / snow white roof which I will be doing again. Here it is in different light.

Image

_________________
Flute - 68 MK I Cooper S
Member: VMCI #2474
Member: International Mini Model Collectors Club


Top
 Profile  
 
PostPosted: Fri Jul 03, 2015 3:23 pm 
Offline
SooperDooperMiniCooper ExpertEngineering
User avatar

Joined: Fri Apr 29, 2005 9:46 am
Posts: 18887
Location: Under the bonnet son!
Sweet image. A foggy Essendon morning?

_________________
SooperDooperMiniCooperExpertEngineering

All garage work involves equal measures of enthusiasm, ingenuity and a fair degree of irresponsibility.


Top
 Profile  
 
Display posts from previous:  Sort by  
Post new topic Reply to topic  [ 32 posts ]  Go to page 1, 2, 3  Next

All times are UTC + 10 hours


Who is online

Users browsing this forum: ken@miniauto and 89 guests


You cannot post new topics in this forum
You cannot reply to topics in this forum
You cannot edit your posts in this forum
You cannot delete your posts in this forum
You cannot post attachments in this forum

Jump to:  

© 2016 Ausmini. All garage work involves equal measures of enthusiasm, ingenuity and a fair degree of irresponsibility.