Ausmini
It is currently Sat Jun 21, 2025 7:45 pm

All times are UTC + 10 hours


Post new topic Reply to topic  [ 1864 posts ]  Go to page Previous  1 ... 99, 100, 101, 102, 103, 104, 105 ... 125  Next
Author Message
 Post subject:
PostPosted: Mon Dec 31, 2012 10:39 pm 
Offline
1275cc
1275cc
User avatar

Joined: Fri Jun 17, 2005 10:31 am
Posts: 3183
Location: Burpengary, Queensland - Home of Tricky Performance Engineering
Big fat arse....You'll get yours Alice and it wont be in Wonderland either!! LOL!!

Anyway, after 3 days, 4069km, a couple hours sleep and lots of fast food, El Gato finally arrived home....
Image

Image

And here he is safe and sound in the shed, ready to undergo his rebuild in earnest - no mucking around now!!
Image

Image

I would just like to say a big, big, huge, massive thanks to Ashie and Hallsey, not only for putting Mitch and I up for a night, but for all the hard work they have done to get The Cat to where he is now - I owe you guys!! Also, thanks to all for the very kind words from you guys, it is very heartening to know your peers think that what you do is good work!!

Simon - I hope thats 99% hot and 1% sh!t!!

Did a bit of work today - had to machine down the centre locating rings on the drive flanges - I had already done this once (metro drive flanges) to suit the Superheavies (Superlites) but had to machine more off them off to fit the Oz Racing wheels - why arent things standard size I will never know!! So, I chucked them on the lathe and removed the rings altogether - the wheelnuts are self-centering so the locating rings are redundent.So now all the wheels are on (and that also explains why they werent on for the trip home - I didnt see that one coming!!
Image

Image

Then I fitted the hood scoop and the rubber apron that will feed the oil cooler. After that I fitted the motorcycle filler caps - mmm, flush!!!
Image

That was it for today - had some honey-do's that had to get done. Should have the engine in soon.

Cheers and thanks,
Tricky

_________________
"Not Speeding Officer..........Qualifying"


Top
 Profile  
 
 Post subject:
PostPosted: Mon Dec 31, 2012 10:56 pm 
Offline
1275cc
1275cc
User avatar

Joined: Fri Jun 17, 2005 10:31 am
Posts: 3183
Location: Burpengary, Queensland - Home of Tricky Performance Engineering
Oh, and HAPPY NEW YEAR EVERYBODY!!

_________________
"Not Speeding Officer..........Qualifying"


Top
 Profile  
 
 Post subject:
PostPosted: Tue Jan 01, 2013 1:38 pm 
Offline
998cc
998cc
User avatar

Joined: Sun May 24, 2009 1:25 am
Posts: 750
Location: St George, Parramatta
that looks amazing guys! well done to all involved!

happy New Year

_________________
1963 850 - laid up
1970 Morris mini K van - eating up the kms!


Top
 Profile  
 
 Post subject:
PostPosted: Tue Jan 01, 2013 3:27 pm 
Offline
1098cc
1098cc
User avatar

Joined: Thu Sep 30, 2004 3:12 pm
Posts: 1461
Location: Brisbane
Great work bud!
I really need to pull my finger out...

_________________
If you want more inches, stroke it
Life's a garden.... Dig It!
http://www.ausmini.com/forums/viewtopic.php?t=20746


Top
 Profile  
 
 Post subject:
PostPosted: Tue Jan 01, 2013 3:41 pm 
Offline
Milatsmadmini
User avatar

Joined: Mon Nov 12, 2007 6:57 pm
Posts: 6287
Location: the inner west of sydeney!
Divine... all I can say

_________________
Here am I sitting in my tin can far above the Moon
Planet Earth is blue and there's nothing I can do...


“A turbo: exhaust gasses go into the turbocharger and spin it, witchcraft happens and you go faster.” - Jeremy Clarkson


Top
 Profile  
 
 Post subject:
PostPosted: Wed Jan 02, 2013 3:43 pm 
Offline
848cc
848cc
User avatar

Joined: Wed Mar 14, 2007 3:50 pm
Posts: 404
Location: MORNINGTON PENINSULA
A big kudos to Ashie

he's the master i'm just the grasshopper

The poor guy had to battle on solo for 3 months while i had a
bout of cancer and even though i was there most weekends
i was flat out picking up a roll of masking tape. The guys a legend

The cat looks the goods though

Cheers Hallsey


Top
 Profile  
 
 Post subject:
PostPosted: Thu Jan 03, 2013 7:45 am 
Offline
1275cc
1275cc
User avatar

Joined: Fri Jun 17, 2005 10:31 am
Posts: 3183
Location: Burpengary, Queensland - Home of Tricky Performance Engineering
Yep, Ashie is the man alright - forever grateful!!

Just a quick update from yesterday - stinking hot here, so didnt get a great deal done due to being in and out of the pool all day with the kids, and also having to install a new salt water chlorinator for the pool - so I played plumber as well.

Anyway, I was dying to see how the Ford rubber door cable-ways would fit in the door gap, and whether they would interfere with the door closing - happy to report that they fit exceptionally well, and no interference with the door closing or opening. Now I can get all my speaker, central locking, courtesy light and fast glass cables into the door hidden and protected!!
Image

Front brakes now on for good, and centre-caps on:
Image

Replaced the black socket-head bolts with stainless ones, as the black ones were showing signs of corrosion and not looking perfect - deliberated over this for a while - black or stainless - your choice!!!:
Image

Subfame and front link bar in for the last time - replaced the under-floor wing bolts with stainless items to resist corrosion. Finished with the hood scoop (needed some 6mm plastic plugs, so went to Masters. Masters is the bomb, they have everything!!) so the bonnet was removed ready for the engine install:
Image

And finally, installed the pedal box and master cylinders, but will have to replace the bolts with new ones as they are rusted and look shite!!
Image

Engine goes back in today, so the engine bay will look a little more filled!!

Cheers,
Tricky

_________________
"Not Speeding Officer..........Qualifying"


Top
 Profile  
 
 Post subject:
PostPosted: Thu Jan 03, 2013 9:01 am 
Offline
1275cc
1275cc
User avatar

Joined: Fri Jun 17, 2005 10:31 am
Posts: 3183
Location: Burpengary, Queensland - Home of Tricky Performance Engineering
Oh, and one more, minor, but aesthetically pleasing addition, the side indicators.

Installed them yesterday, and they give El Gato a nice modern look, which is of course what we are trying to achieve. I like the shape of them too!!
Image

Image

Thats it for now - sons birthday today - Happy Birthday Mitchell!! - so off shopping for his present (iPad)....

_________________
"Not Speeding Officer..........Qualifying"


Top
 Profile  
 
 Post subject:
PostPosted: Thu Jan 03, 2013 11:34 am 
Offline
998cc
998cc
User avatar

Joined: Fri Jan 28, 2011 1:19 pm
Posts: 533
Location: Adelaide
Great car!

How did you do the black wndow surrounds? Did you need to rough up the stainless so the paint adhered well? Or did you just paint over the top?

_________________
Zulu...

1967 mini Cooper S


Top
 Profile  
 
 Post subject:
PostPosted: Thu Jan 03, 2013 8:38 pm 
Offline
1275cc
1275cc
User avatar

Joined: Fri Jun 17, 2005 10:31 am
Posts: 3183
Location: Burpengary, Queensland - Home of Tricky Performance Engineering
Hey ZW,

I think they scuffed them prior to painting to get good adhesion.

Anyway, quick update for today. Went shopping today for my lads iPad, very popular they are for 11 year olds!!

Back to the car - replaced some rusted nuts as per our previous post, and then it was on to the engine install. Proud to say, mission complete - engine installed!!
Image

Image

Its dusty, but its in!! I'll tackle the other engine bay goodies tomorrow.

Cheers,
Tricky

_________________
"Not Speeding Officer..........Qualifying"


Top
 Profile  
 
 Post subject:
PostPosted: Thu Jan 03, 2013 10:57 pm 
Offline
998cc
998cc
User avatar

Joined: Mon Jan 16, 2006 1:15 pm
Posts: 685
Location: Melbourne
Nice work Tricky.
Looking bloody fantastic!

Madmorrie


Top
 Profile  
 
 Post subject: Mini
PostPosted: Fri Jan 04, 2013 4:32 pm 
Offline
848cc
848cc

Joined: Wed Apr 20, 2005 9:49 pm
Posts: 363
Location: brisbane
Even though I've been lurking around and posting on ausmini for the better part of 8 years, I've never bothered to look in the mini engine conversion section as it wasn't my bag.....

How silly have I been???

Tricky this car is sensational, I've just read this thread start to finish over the last 3 days while I'm on holidays, havent got an early nights sleep as I can't put it down it's been an amazing journey!

Thanks for sharing it so far and I look forward to further installments, it's been a great read better than any book!

Hmmm......makes a guy wanna install this in every mini!


Top
 Profile  
 
 Post subject:
PostPosted: Fri Jan 04, 2013 8:25 pm 
Offline
1275cc
1275cc
User avatar

Joined: Fri Jun 17, 2005 10:31 am
Posts: 3183
Location: Burpengary, Queensland - Home of Tricky Performance Engineering
Evening Viewers,

Ross - thanks very much mate. Glad you approve.

Howdy Pete - Well now you know where all the action is. I am just one of many doing a conversion, and a lot of them are top-shelf endeavours as well. But, sincerely, thanks very much for your kind and thoughtful words, its been a long journey aye, but the end is in sight now.

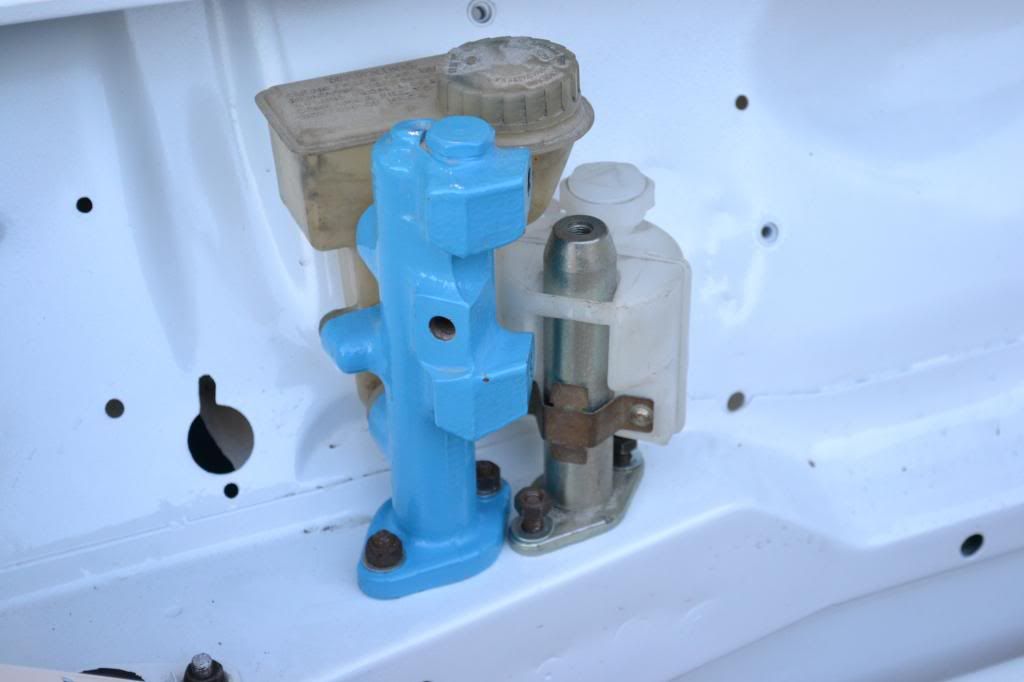
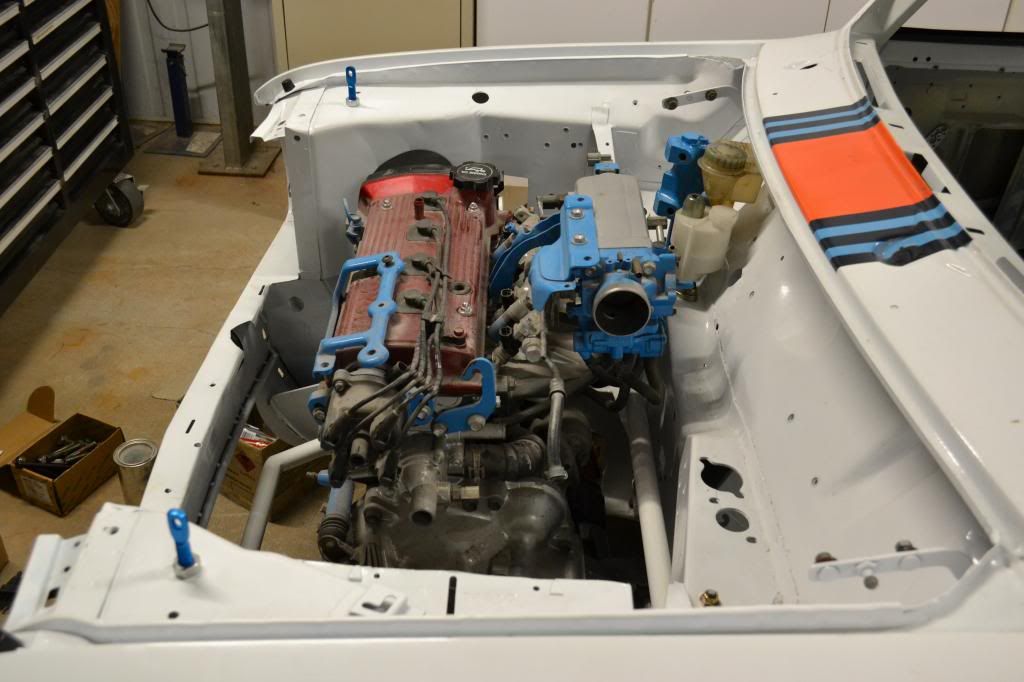
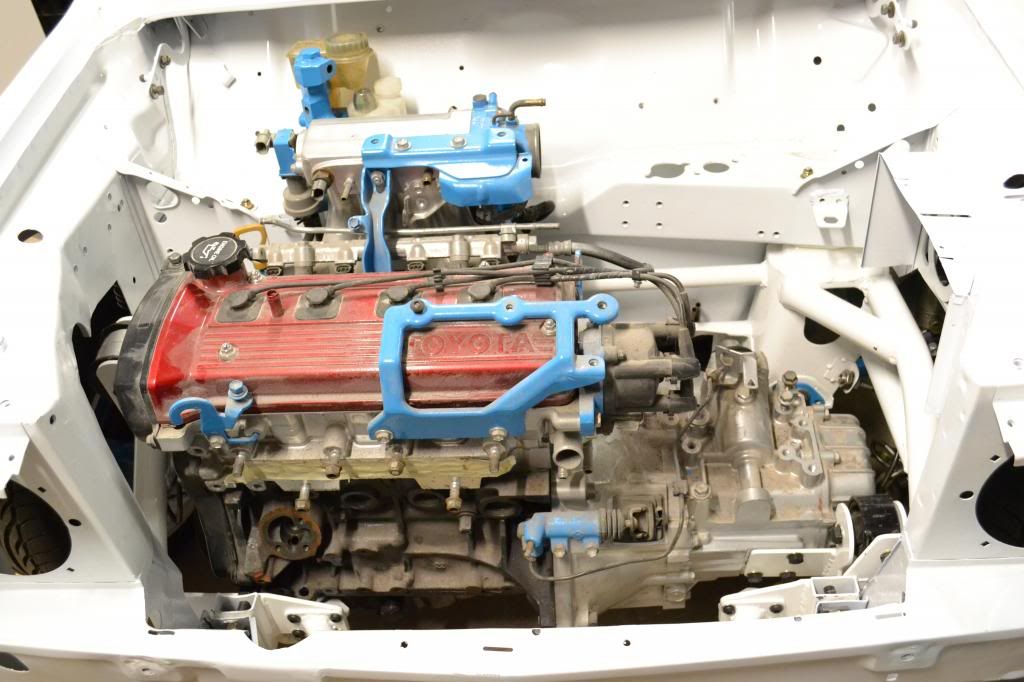
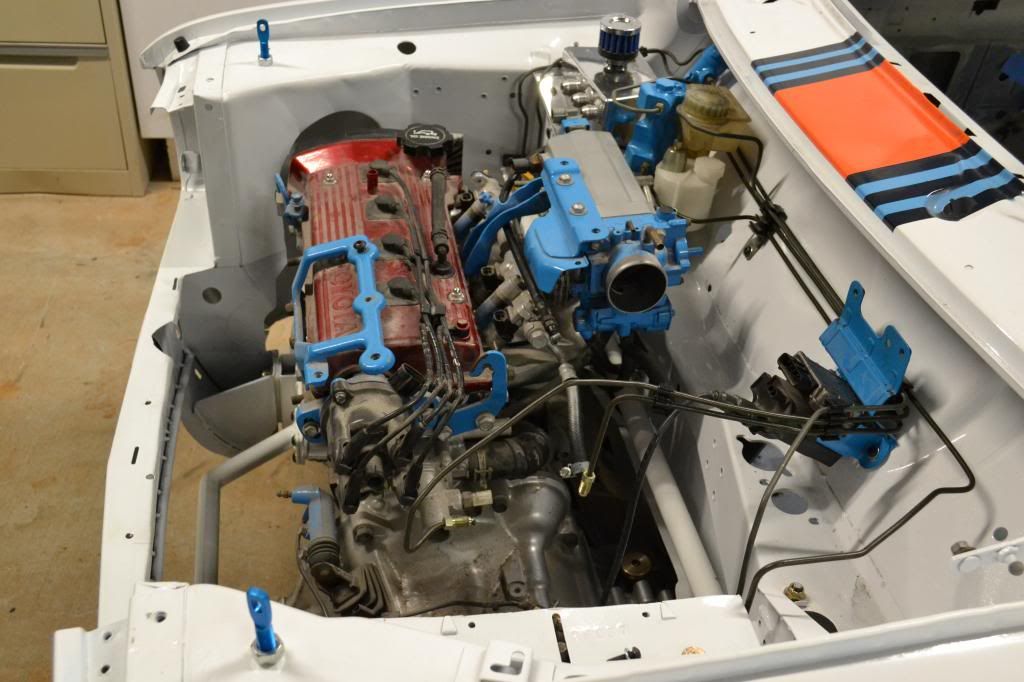
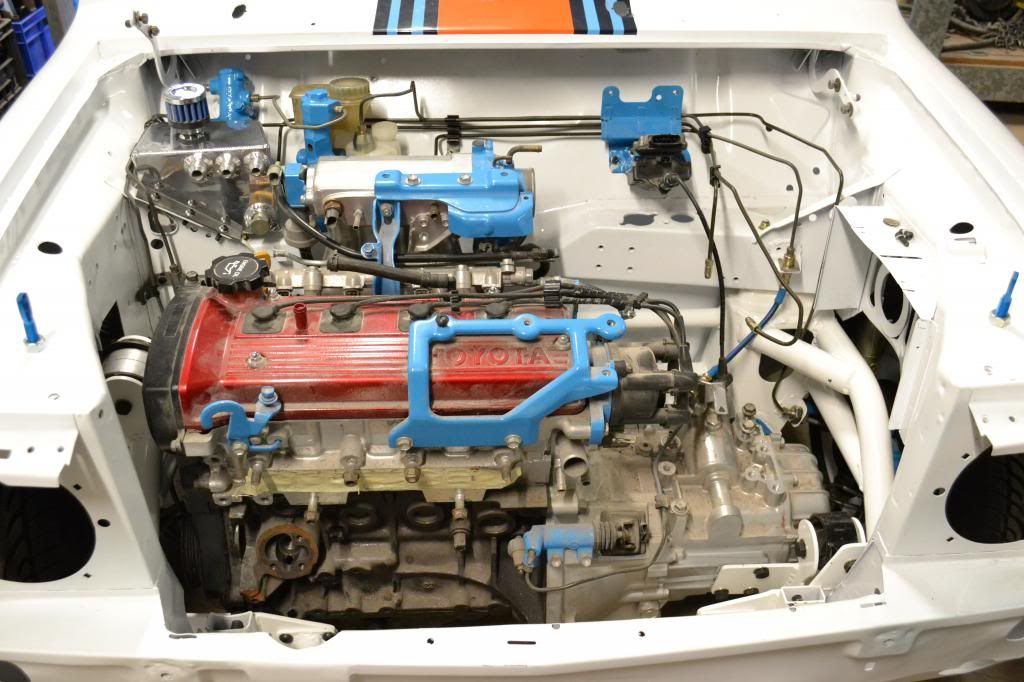
A bit of an update. Spend the day in the engine compartment picking up where we left off. Installed the brake lines, which werent that hard because they were all pre-bent. The hard part was doing the final connections to the different fittings - especially the front brake lines. Also installed the accelerator cable, brake proportioning valve, as it was behind the oil catch-can, and then the oil catch-can itself.

Had to do some serious polishing on the catch-can, as it had many years of fingerprints, grime, dust etc. It can up just fine. Also polished the radiator overflow, but will install that tomorrow as the bracket holding it on needs polishing too. This bracket sits off the mount that holds the coilpack and ignitor, which we installed as well.
Image

Image

Then I decided to have some fun!! Because I am running a Digidash from ETB Instruments, which has a digital speedo, it uses a Hall effect sensor to pick up magnetic impulses that tell it how fast the vehicle is moving. Now these magnets could be mounted anywhere on anything rotating at the same proportional speed as the car - like a tailshaft or driveshaft.

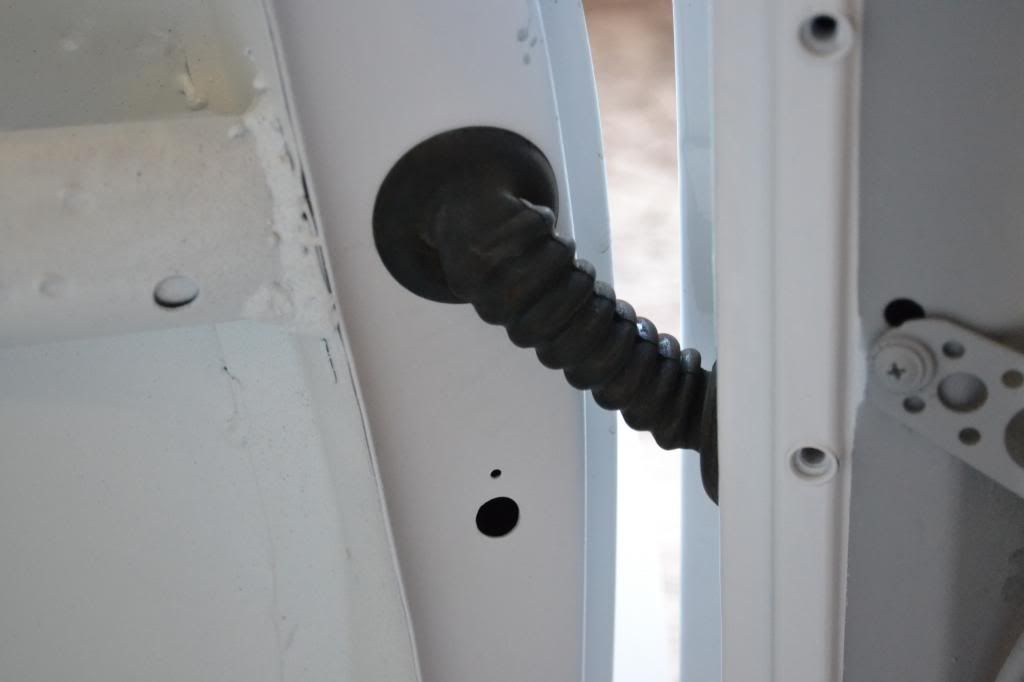
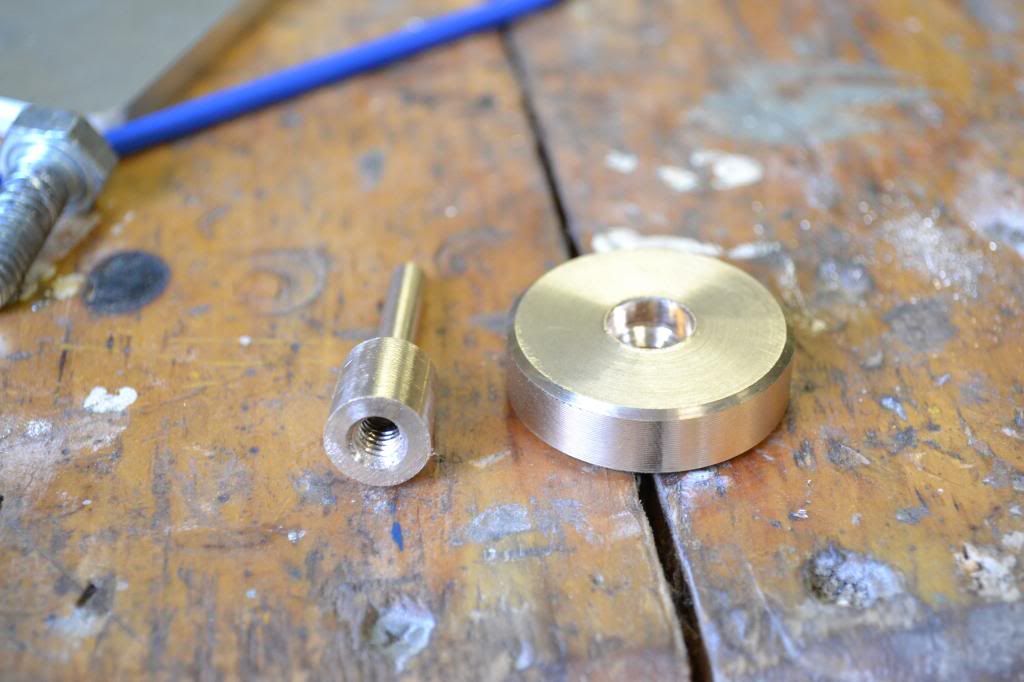
But, I wanted to do something a bit more engineered and I wanted to use the original speedo cable drive out of the gearbox. So, this would require some thinking and some machining (I love machining!!). This is a job I have put off until the car was going back together, so here it comes.

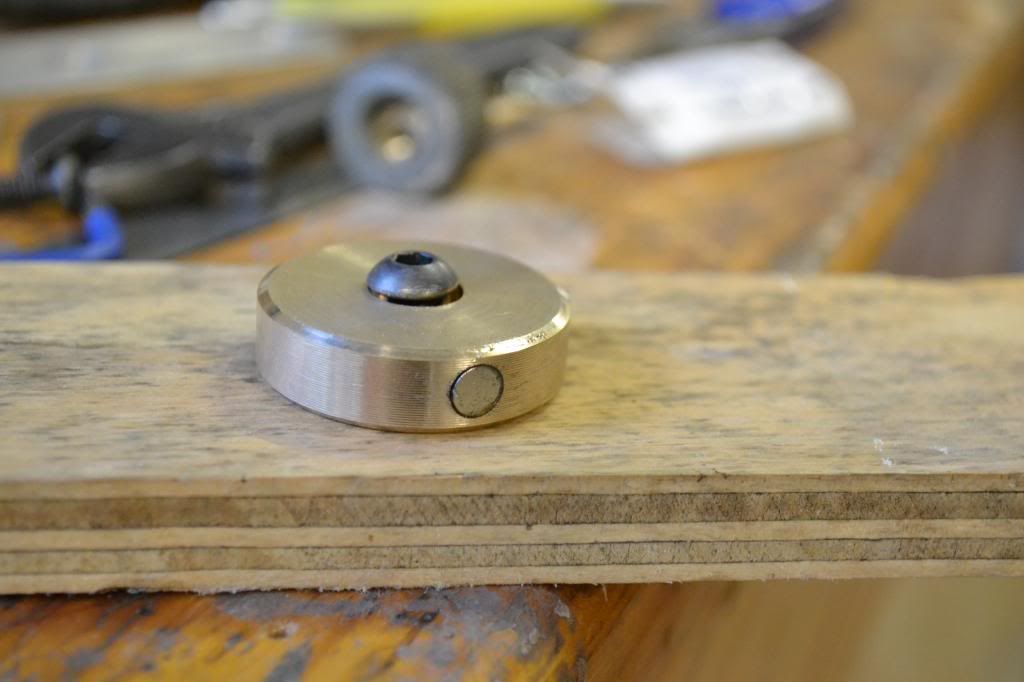
I started off by buying a 16mm x 5mm bearing from BSC - this would form the basis of our speedo drive, as it fitted inside the speedo cable take-off housing. Next was to turn down some metal to make an arbor - luckily I had some brass stock leftover from turning some lamps necks for the wife (why brass, does not rust and non-magnetically conductive). So, I turned down in the lathe some brass to act as an arbor - the dimensions had to be spot on as we wanted an interference fit into the bearing ID, which was 5.0mm, so we turned the brass down the shaft to 5.10mm. The oustide diameter of the body was 12mm, which fits through the screw collar that would normally hold the speedo cable in place. Then we drilled andf tapped a 6mm thread into the body.

Next, we machined a flywheel, which would house the two magnets which give the impulses to the Hall effect sensor - 35mm diameter and with a 6.5mm hole through the center, and countersunk:
Image

Then we drillled into the outer face of the flywheel 6mm holes for the magnets, and epoxied them in - they must be perfectly 180 degrees apart:
Image

Then we assembled the whole lot together, not forgetting to include to collar into the mix. Press fit the bearing into place, and then Loctited the 6mm socket head bolt through the flywheel and into the arbor:
Image

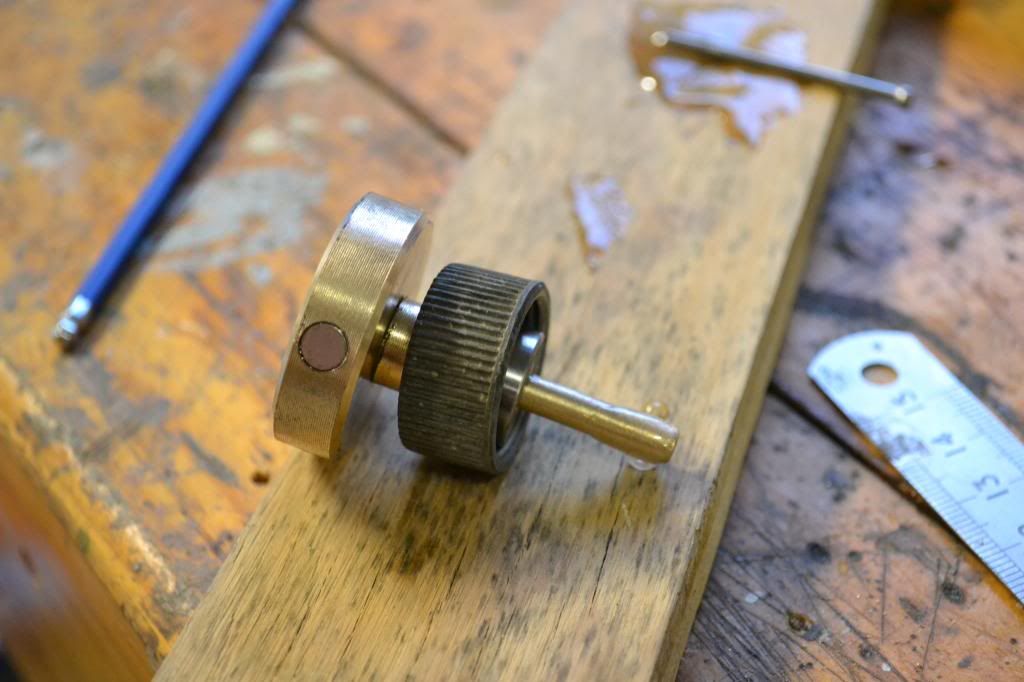
Then because it was too hard to machine a keyway into the arbor shaft (the original speedo cable has its keyway 'pinched' into it by a special machine), I decided that some epoxy on the end should secure it enough to hold it in place. Remember, it does have to do anything but spin inside the bearing, only having to overcome its own rotational inertia - so hopefully the epoxy will be enough. And then we install it, by simply screwing down the original collar:
Image

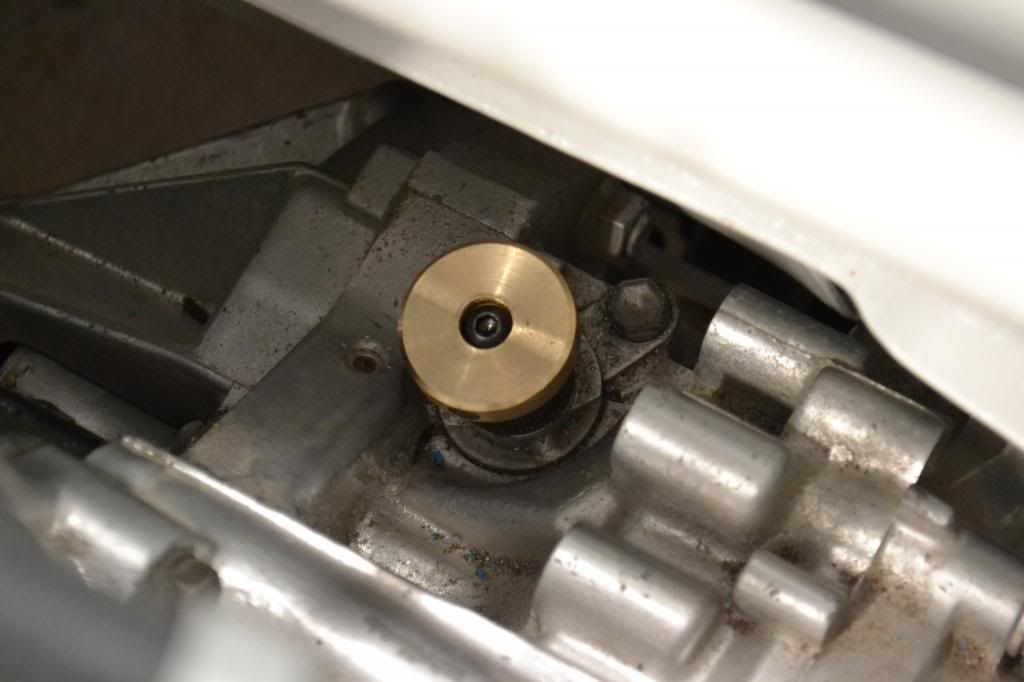
Tomorrow we shall make up a bracket for the Hall effect sensor - it must have an airgap not exceding 1.0mm. Luckily the runout on the assembly was only 0.2mm which was acceptable.

Also tomorrow, more polishing and more installing - stay tuned.

Cheers,
Tricky

_________________
"Not Speeding Officer..........Qualifying"


Top
 Profile  
 
 Post subject:
PostPosted: Fri Jan 04, 2013 9:11 pm 
Offline
1098cc
1098cc
User avatar

Joined: Thu Sep 30, 2004 3:12 pm
Posts: 1461
Location: Brisbane
I've got to say it... But now there is too much progress :wink:
Great stuff though! You back at work this coming week or the week after?

_________________
If you want more inches, stroke it
Life's a garden.... Dig It!
http://www.ausmini.com/forums/viewtopic.php?t=20746


Top
 Profile  
 
 Post subject:
PostPosted: Sat Jan 05, 2013 6:44 am 
Offline
848cc
848cc
User avatar

Joined: Wed Mar 14, 2007 3:50 pm
Posts: 404
Location: MORNINGTON PENINSULA
Mate ,its looking awesome :D

I love this part of the build when everything goes on for the last time

Very satisfying , even................erotic :shock:

Keep plugging away bro, he'll be on the road in no time

Cheers Hallsey


Top
 Profile  
 
Display posts from previous:  Sort by  
Post new topic Reply to topic  [ 1864 posts ]  Go to page Previous  1 ... 99, 100, 101, 102, 103, 104, 105 ... 125  Next

All times are UTC + 10 hours


Who is online

Users browsing this forum: No registered users and 2 guests


You cannot post new topics in this forum
You cannot reply to topics in this forum
You cannot edit your posts in this forum
You cannot delete your posts in this forum
You cannot post attachments in this forum

Jump to:  

© 2016 Ausmini. All garage work involves equal measures of enthusiasm, ingenuity and a fair degree of irresponsibility.