Update 24 September
As promised I will update everyone with pics! (I know how much you guys love pics

)
Final preparations
How exciting!!! this is it! I've been waiting for this for week!
I started by scrubbing the insides of the block including oilways. I used Graham's long handled brush and got all the dirt out of the oilways, bearing feed oilways, main galleries and the block, crank and rods and making sure it was entirely spotless. I then ran them through 15 mins on the hot washer. They all came out spotless.
All clean and ready for assembly
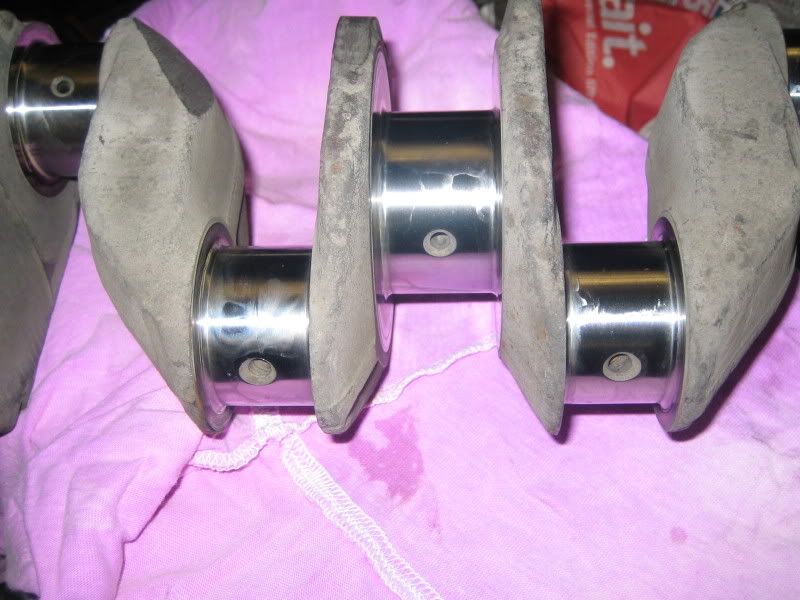
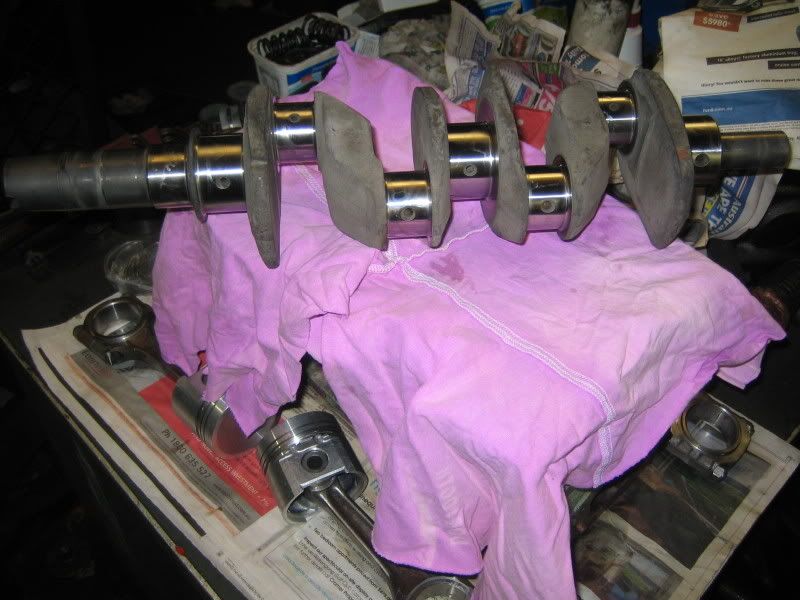
The new uncracked, ground and balanced crank. Note that the dull finish is due to acid dipping and hot washing.

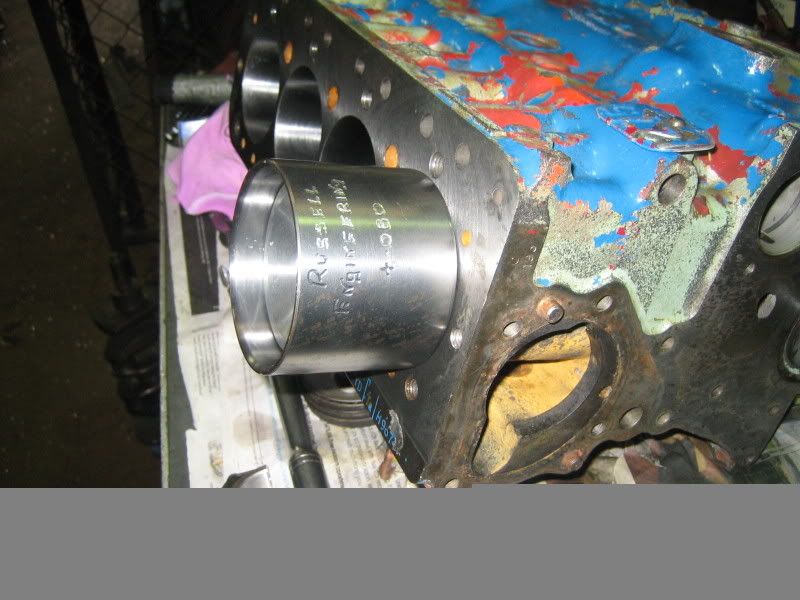
The cleaned block

Note that I have an older 1100S block, you can tell because it has a gaping hole in between 2 and 3. This was removed in later 1100S or so called GT blocks. Graham ground around the hole so that there are no sharp edges or burrs.
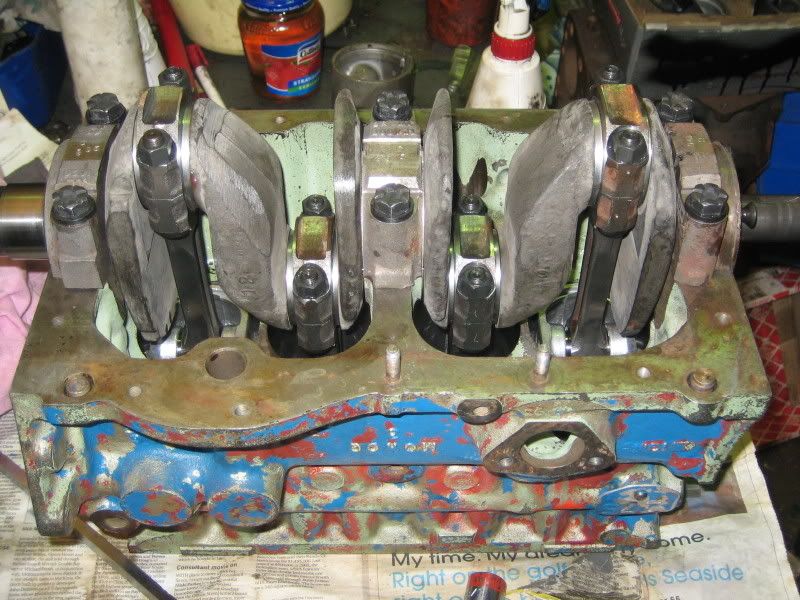
Final Block Assembly
I then began to assemble the crank and rods with the new Duraglide bearings. I used bearing saver assembly lube on both the bearing surface and the journal surfaces. Graham reminded me to use LMM grease on the threads and under the heads so that they would torque down properly.
Graham then warned me that the bolts may bottom out at full torque, in particular the centre main bolts. He must be a psychic because sure enough the bolts were bottoming out! the hole is deep enough but the thread bottomed out. There are really 3 options, tap it deeper, cut the bolts shorter or use hardenned washers to space the bolt enough so that it doesn't bottom out. Graham just happened to have a stash of ARP hardenned washers (as you would

) and all was sweet.
Crank End Float
Using my old thrust washers we inserted them to check the crank end float was 003 thou. Ideally it would be good to be about 5-7 thou clearance. We started by checking the flatness and some of the trust washers where varying in thickness by 1thou along the length! Using wet dry and a pane of glass I took to thinning the thrusts down a further 1 thou each. The total float is now 005 thou. Perfect
 Pistons and rods assembly
I then installed the rings onto each piston by following the very clear instructions contained in the hastings box. I used a special piston ring expander tool to put the top 2 compression rings in. Now instead of using a ring compression tool Graham has a special ring compression pipe thingy! It is a bit of steel machined up with a shamfered top and is perfectly the size of +060. Basically using WD40, the piston is pushed into the tool which compresses the rings. The whole assebly is then slid into the cylinder and the piston is pushed into the cylinder. It works so well I managed to install all 4 pistons in no time at all. I got to get myself one of these!
Graham's Special piston compression tool
The finished product!
All that is left to do with the block is to paint it!! Now you must all be wondering what colour I have chosen to paint this hot engine of mine

I have decided that since Lillee is relatively stock looking (no flares) and is a red car she would look hot with a stock looking S engine

I know some of you don't agree (like how boring) but I think the metallic green will look good against a silver gearbox and silver clutch cover.
I will attempt to do this during the week at home before installing the cam and assembling the rest of the engine. Until then, may all your dirty hands smell like WD40